Last updated: Mon Apr 22 05:00:31 2024
Tylida Eraldi squints and looks at you with a slight grin on her face. 'Hello. I don't suppose you're a baker by profession, or perhaps you're [interested] in learning? I have several jobs that I need done, but I just don't have time to do them myself. Are you interested in helping out?'
You say, 'I am interested.'
Tylida Eraldi says 'This crew needs a lot of food. My specialty is long-lasting food items that can be taken on long journeys. Obviously a lot of Wayfarers are taking a lot of long trips these days. I was wondering if you would mind [helping me] out? I really want to spend more time working with the newly discovered strain of local wheat. There's a wild variety of wheat that only grows in the mountainous areas, which is a very odd place for any wheat to grow, But this stuff grows there, if sparsely. The thing is, there are some very odd properties to this wheat, and with the proper technique it can be made into a very [unique flour]. So if you have a chance, I would be pleased if you could [help out]. Unfortunately, the recipes I'm working on require the use of Taelosian Wheat Flour. If you can find some Taelosian Wheat, Ordin can make flour from it. Bring that to me, and I'll have plenty of tasks for you to do.'
You say, 'What unique flour?'
Tylida Eraldi says 'I'm still a bit shocked that wheat is growing on the side of mountains. They even say that some of the creatures up there eat it by the handful like a snack. Obviously we'd prefer to make baked items from it. If you can get me some of that Taelosian Mountain Wheat, I'll make flour out of it. I'll only keep a little of it for myself.'
You say, 'I will help out.'
Tylida Eraldi says 'I can definitely use your help. I need some Taelosian Wheat Flour for the tasks I want you to do. Ordin can make flour from the raw wheat if you have any. If you bring me some flour, we can get started. You'll have to sweat a bit before we're done, but if you're up to the task I can reward you with the secret of milling the local wheat. Because I'll be asking you to find your own supplies, I can reward you a bit sooner than Ordin will.'
Taelosian Wheat may be foraged in Natimbi and drops in various other GoD zones. Ordin Wheasly stands near Tylida. Give him one Taelosian Wheat to receive two Taelosian Wheat Flour. Give Tylida one Taelosian Wheat Flour:
Tylida Eraldi says 'Thanks for helping me. The first thing I need you to do is bake some Wayfarer Wheat Crackers. These are one of the staples of our scouts, and I don't like letting them leave without as many as they can carry. So take a Small Sack of Taelosian Wheat Flour and Wayfarer Spice and put them in the oven. Don't be tempted by their wonderful smell. Eating them isn't really part of the task.' Tylida smiles. 'Bring them right back to me when you're done.'
You receive 10 x Small Sack of Taelosian Wheat Flour and 10 x Wayfarer Spice. Combine 1 of each in an oven or spit.
You have learned the recipe Wayfarer Wheat Crackers!
Wayfarer Wheat Crackers trivials at 31. After doing 10 combines, hand them back to Tylida unstacked, up to four at a time. After handing them all in, give her another Taelosian Wheat Flour to get more ingredients. After handing in around 30 Wayfarer Wheat Crackers total, the next time you hand in a Taelosian Wheat Flour you see this:
Tylida Eraldi says 'Hello! Great, thanks for helping. We need to stock up on Wayfarer loaves. They keep a good long time, so I hope to get ahead today and stay that way. Take a Small Sack of Taelosian Wheat Flour, a Wayfarer Spice, and Crushed Nuts and bake them in the oven. A Wayfarer Loaf won't rise much, so don't worry about that. Just bring them back here to me and I'll store them.'
You get 10 x Small Sack of Taelosian Wheat Flour, 10 x Wayfarer Spice, and 10 x Crushed Nuts. Combine 1 of each in an oven or spit.
You have learned the recipe Wayfarer Loaf!
Wayfarer Loaf trivials at 38. After doing 10 combines, hand them back to Tylida unstacked, up to four at a time. After handing them all in, give her another Taelosian Wheat Flour to get more ingredients. After handing in around 30 Wayfarer Loaves total, the next time you hand in a Taelosian Wheat Flour you see this:
Tylida Eraldi says 'You've been a big help, thank you. This time I need some Wayfarer cookies. These are sort of tough, but very flavorful and tasty. They travel real well, so they're a big hit with Wayfarers, hence their name. Just take a Small Sack of Taelosian Wheat Flour, Wayfarer Spice, and two Pinches of Sugar and bake them up. Please don't try to eat them hot. They really hold onto heat and you'll probably burn yourself. Just bring them to me and I'll get them to those that need them.'
You receive 10 x Small Sack of Taelosian Wheat Flour, 10 x Wayfarer Spice, and 10 x Pinch of Sugar. Combine 1 each of the flour, spice, and sugar in an oven or spit.
You have learned the recipe Wayfarer Cookie!
Wayfarer Cookie trivials at 46. After doing 10 combines, hand them back to Tylida unstacked, up to four at a time. After handing them all in, give her another Taelosian Wheat Flour to get more ingredients. After handing in around 30 Wayfarer Cookies total, the next time you hand in a Taelosian Wheat Flour you see this:
Tylida Eraldi says 'May Brell bless you! I could really use some Wayfarer Fruitcake right now. I know, you've heard that fruitcake is more like wood than food. Well, ours are a little better than wood, but just as durable. I'm not going to make you eat them, that's for the others to accomplish. All I need you to do is put a Small Sack of Taelosian Wheat Flour, Wayfarer Spice, and Heavy Fruit into the oven and bake up some fruitcakes. Bring them back here, use a cart if you must, and I'll see that they find homes.'
You receive 10 x Small Sack of Taelosian Wheat Flour, 10 x Wayfarer Spice, and 10 x Heavy Fruit. Combine 1 of each in an oven or spit.
You have learned the recipe Wayfarer Fruitcake!
Wayfarer Fruitcake trivials at 54. After doing 10 combines, hand them back to Tylida unstacked, up to four at a time. After handing them all in, give her another Taelosian Wheat Flour to get more ingredients. After handing in around 30 Wayfarer Fruitcakes total, the next time you hand in a Taelosian Wheat Flour, you see:
Tylida Eraldi says 'You've been of great assistance. I owe you my thanks. I'll find others to do these tasks now. Go over and talk to Ordin and he'll give you your reward. Make sure to tell him that you were of great [assistance].
You say, 'Hail, Ordin Wheasly'
Ordin Wheasly says 'Hello! Boy, I'm glad to see you! I really need your help. Can you help me with some simply [baking tasks]? A ship floats on its belly, you know.'
You say, 'I was of great assistance.'
Ordin Wheasly says 'You have been a big help around the kitchen! I wouldn't feel right continuing to abuse your kindness.' Ordin glances around. 'Take a quick peek into my recipe book. This is the way you grind the Taelosian Wheat into flour.' He quickly shows you the last page of his coveted recipe book. It only takes you a moment to see what the trick is. From now on, all you have to do is put the Taelosian Wheat or Taelosian Mountain Wheat into your mixing bowl and combine it to get the flour. In fact, you are certain that if you work at it long enough, you can produce more usable wheat with practice.'
You can now refine Taelosian Wheat into Taelosian Wheat Flour and Taelosian Mountain Wheat into Taelosian Mountain Wheat Flour.
Baking Freebie: Ordin's Tasks (Normal): You say, 'Hail, Ordin Wheasly'
Ordin Wheasly says 'Hello! Boy, I'm glad to see you! I really need your help. Can you help me with some simply [baking tasks]? A ship floats on its belly, you know.'
You say, 'What baking tasks?'
Ordin Wheasly says 'Wayfarers eat far more than their fair share. It's just about impossible to keep up with them! I'd really like some help baking some of the basic foods so that I can spend my time thinking up new uses for this wonderful wild grain that has been descovered on Taelosia. I've named it Taelosian [Wheat], but I suppose that the natives might have some other name for it. Can you be of any [assistance] to me?'
You say, 'What Wheat?'
Ordin Wheasly says 'It's wonderful! I haven't had as much time to try it in some of my favorite recipes, but I have done a little taste-testing and it's very good. It even has some magical properties that I'm still trying to figure out. It does require some special treatment when making the flour, but I've figured that out. If you bring me some Taelosian Wheat, I'd gladly grind it for you. I'd just keep a bit of it for my efforts.'
You say, 'I can be of assistance.'
If your skill is already too high, Ordin can still learn you the recipes, see below.
Ordin Wheasley says 'Great! Right now what I need is some oatmeal prepared for meals that we need to serve right away. This is a simple task and may be too easy for you, but those folks are hungry. Just take this Oatmeal and Hot Water and mix it in your mixing bowl. Bring the finished Oatmeal to me right away. If you help me with the many tasks that I have to get done, I might be willing to share with you the secret of grinding the Taelosian Wheat into flour.'
You receive 20 x Hot Water and 20 x Oatmeal. Combine 1 of each in a Mixing Bowl.
You have learned the recipe Ordin's Oatmeal!
Ordin's Oatmeal trivials at 31. After doing each set of 20 combines, hand them back to Ordin unstacked, up to four at a time. After handing them all in, say "I can be of assistance" again and he will give you more Ordin's Oatmeal components until he feels you've made enough (approximately 100).
You say, 'I can be of assistance.'
Ordin Wheasly says 'Yes! Wayfarer's Muffins are probably our most popular traveling food. And folks passing through here are always traveling. If you could take a hunk of dough and a single dose of Wayfarer Surpize and put them in the oven, I would be grateful. Hmmm? Oh, no, I can't really tell you what's in the Wayfarer's surprize. Please bring the muffins back to me as fast as you can, we're always running out.'
You receive 20 x Hunk of Dough and 20 x Wayfarer Surprise. Combine 1 of each in an oven or spit.
You have learned the recipe Wayfarer Muffin!
Wayfarer Muffin trivials at 38. After doing each set of 20 combines, hand them back to Ordin unstacked, up to four at a time. After handing them all in, say "I can be of assistance" again and he will give you more Wayfarer Muffin components until he feels you've made enough (approximately 100).
You say, 'I can be of assistance.'
Ordin Wheasly says 'Good! We're trying to stock up for dinner. We usually serve a lot of Wayfarer Pie. It's sort of a pie surprize! If you could run over to the oven and bake up a Hunk of Dough, Wayfarer Pie Tin and Wayfarer Surprise into a nice, tasty pie, that would be great! Bring the pies to me when you're done. No, I'm still not going to tell you what the surprize is.'
You receive 20 x Hunk of Dough, 20 x Wayfarer Pie Tin, and 20 x Wayfarer Surprise. Combine 1 of each in an oven or spit.
You have learned the recipe Wayfarer Pie!
Wayfarer Pie trivials at 46. After doing each set of 20 combines, hand them back to Ordin unstacked, up to four at a time. After handing them all in, say "I can be of assistance" again and he will give you more Wayfarer Pie components until he feels you've made enough (approximately 100).
You say, 'I can be of assistance.'
Ordin Wheasly says 'You have been a big help! I think I can trust you to make some dessert for these ruffians. I need a lot of pastries, or who knows what they might do! Just take this Hunk of Dough and a Dab of Frosting and pop them in the oven! Bring them back piping hot, please!'
You receive 20 x Hunk of Dough and 20 x Dab of Frosting. Combine 1 of each in an oven or spit.
You have learned the recipe Wayfarer Pastry!
Wayfarer Pastry trivials at 54. After doing each set of 20 combines, hand them back to Ordin unstacked, up to four at a time. After handing them all in, say "I can be of assistance" again and he will give you more Wayfarer Pastry components until he feels you've made enough (approximately 100).
You say, 'I can be of assistance.'
Ordin Wheasly says 'You've been a big help around the kitchen! I wouldn't feel right about continuing to abuse your kindness.' Ordin glances around. 'Take a quick peek at my recipe book. This is the way you grind Taelosian Wheat into flour.' He quickly shows you the last pages of his coveted recipe book. It only takes you a moment to see what the trick is. From now on, all you have to do is put the Taelosian Wheat or Taelosian Mountain Wheat into your mixing bowl and combine it to get the flour. In fact, you are certain that if you work at it long enough, you can produce more usable wheat with practice.
If your skill is high enough, Ordin can still learn you the recipes.
You say, 'I can be of assistance.'
Ordin Wheasly says, 'You have been a big help around the kitchen! I wouldn't feel right continuing to abuse your kindness. If you have forgotten or want them for posterity, I can give you the [recipes] you used while helping us.' Ordin glances around. 'Take a quick peek into my recipe book. This is the way you grind the Taelosian Wheat into flour.' He quickly shows you the last page of his coveted recipe book. It only takes you a moment to see what the trick is. From now on, all you have to do is put the Taelosian Wheat or Taelosian Mountain Wheat into your mixing bowl and combine it to get the flour. In fact, you are certain that if you work at it long enough, you can produce more usable wheat with practice.'
You say, 'please give me the recipes.'
You have learned the recipe Ordin's Oatmeal!
You have learned the recipe Wayfarer Muffin!
You have learned the recipe Wayfarer Pie!
You have learned the recipe Wayfarer Pastry!
You have learned the recipe Wayfarer Wheat Crackers!
You have learned the recipe Wayfarer Loaf!
You have learned the recipe Wayfarer Cookie!
You have learned the recipe Wayfarer Fruitcake!
Ordin Wheasly says, 'Here you go.'
Bard Abysmal Armor (Normal): You say, 'Hail, Luvwen Arrya'
Luvwen Arrya says 'Hail, adventurer. Welcome aboard! Should you be a bard like myself, I am sure you have collected quite a few stories thus far in your travels. Would you be a [bard]?'
You say, 'I am a bard.'
Luvwen Arraya says 'Well, then, perhaps I can be of even greater assistance to you. If you are in need of new equipment such as [helm], [legplates], [chestplate], [bracer], [vambraces], [gloves], or pair of [boots] let me know.'
You say, 'What boots?'
Luvwen Arrya says 'A pair of boots you want, hmm? Yes, I can see the pair you are wearing seem a bit worn. Bring me back Muramite Boot Armor and I bevlive I can rework them into something quite fine for you. Place them into a forge with one sheet of Infused Muramite metal to yield your boots. If you need help in the infusing process, just talk to Nalasrine.'
You say, 'What bracer?'
Luvwen Arrya says 'A bracer is rather simple to reshape. If you speak to Nalasrine about her findings, she may be able to help you infuse some Muramite metal to strengthen it. One sheet of infused Muramite metal along with a reworked bracer from me in a forge should yield a fine bracer.'
You say, 'What chestplate?'
Luvwen Arrya says 'Ahh, a chestplate. Such a thing of beauty! I can craft one for you farily easily if you do the legwork. Travel into the hostile areas and bring back two sheets of Muramite metal and Muramite Chest Armor. Make sure to speak to Nalasrine about infusing the sheets of metal. Bring me the chest piece for reworking, then simply weld together the new chest and sheets in a forge.'
You say, 'What gloves?'
Luvwen Arrya says 'I can make you a wonderful pair of gloves. Take the time to dig up some Muramite metal and have Nalasrine assist you with infusing it. Bring me Muramite Glove Armor and I can reshape it into something that you can use. Strengthen the gloves in a forge with the newly infused metal, and a fine pair shall be yours.'
You say, 'What helm?'
Luvwen Arrya says 'I can easily reform a Muramite helm into something suitable for you. Nalasrine has managed to form a powerful compound that reinforces some native materials. Bring me Muramite Helm Armor and I wil rework it for you. Once I have finished with that you need only to fuse your infused Muramite metal and the helm I give you in a forge.'
You say, 'What legplates?'
Luvwen Arrya says 'Reforming some Muramite legplates into a pair that would serve you well should be no great feat. Bring me a pair of Muramite Greaves and I will rework them for you. For these you will need to infuse two sheets of Muramite metal with Nalasrine's special solvent. Combine both sheets with the new greaves in a forge and voila!'
You say, 'What vambraces?'
Luvwen Arrya says 'A new set of vambraces is what you seek? Hardly a challenge, at least for me. You, however, have some work to do. Venture into these strange lands and bring me Muramite Sleeve Armor. I will rework the sleeves for you, but you will need to talk to Nalasrine about infusing a sheet of Muramite metal as well. Place the bracer from me along with one sheet of infused Muramite metal in a forge for your sleeves.'
Nalasrine Twinklecoil is located in the next room.
You say, 'Hail, Nalasrine Twinklecoil'
Nalasrine Twinklecoil says 'Salutations! It is great to see so many eager travelers out and about. How are you enjoying our little city here? I have been quite busy myself. There are so many interesting things to learn about these strange beings that inhabit Taelosia. Their armor in particular is most interesting. I have developed some intriguing compounds. Let me know if you are interested in such things before I just prattle on!'
You say, 'I am interested.'
Nalasrine Twinklecoil says 'Oh, good. Well let me see. Basically, I have been studying the armor that our explorers have been bringing back from their adventures. While it is a bit strangely shaped, as these creatures that seem to reside here are, I have found that by strengthening some native materials it can be reworked into rather fine armor for the likes of you and me.'
You say, 'What armor?'
Nalasrine Twinklecoil says 'If you are looking into having some armor made, you definitely will need to use my infusions. They are a bit pricey, however they are difficult to make and well frankly, I am the only one who can! Use the plate solvent on plate armor, chain solvent on chain, tanning solution on leather, and silk strengthener on silk. All rather intuitive isn't it? Simply take a look at the different types I have for sale.'
Muramite armor begins dropping in Qvic and above. Bring back the appropriate piece of "Muramite XXX Armor" and turn it in to Luvwen Arrya to get a class-specific, no-stat "Reworked Muramite XXX."
Craft a Muramite Metal Sheet by combining a Meldstone, Water Flask, and Smithy Hammer in a forge. This has a high trivial (282) and a high minimum smithing requirement (in the 240s).
Buy Nalasrine's Superior Plate Solvent from Nalasrine Twinklecoil for around 10,500 pp. Combine the solvent with the Muramite Metal Sheet in a forge (no-fail combine). This results in a NO DROP piece of Infused Muramite Metal.
Combine the Infused Muramite Metal with your piece of Reworked Muramite XXX armor in a forge to receive your quest reward (no-fail combine). Reward: Luvwen's Helm of Melody
Reward: Luvwen's Boots of Melody
Reward: Luvwen's Gauntlets of Melody
Reward: Luvwen's Bracer of Melody
Reward: Luvwen's Vambraces of Melody
Reward: Luvwen's Chestplate of Melody
Reward: Luvwen's Legplates of Melody
Beastlord Abysmal Armor (Normal): You say, 'Hail, Kizash Proudpaw.'
Kizash Proudpaw says 'Greetings ______, I am looking for those who are one with the beast. Are you a [beastlord]?'
You say, 'Yes, I am a Beastlord.'
Kizash Proudpaw says 'Wonderful, it brings me joy to see so many following the path of harmony. For one such as yourself, I may be able to assist. If you are in need of new equipment such as [cap], [leggings], [tunic], [bracer], [sleeves], [gloves], or [sandals] - let me know.'
You say, 'What bracer?'
Kizash Proudpaw says 'A bracer is rather simple to reshape, if you know what you're doing. Bring me back a Muramite Bracer Armor piece and I will get to work on it. You will also need a section of infused Muramite leather to finish the bracer in a loom. Talk to Nalasrine if you still some help infusing the leather.'
You say, 'What cap?'
Kizash Proudpaw says 'I should be able to reform Muramite Helm Armor into something quite useful to you. Explore these lands until you find some Muramite leather padding. Talk to Nalasrine about infusing it, then piece it together with your new helm from me in a loom.'
You say, 'What gloves?'
Kizash Proudpaw says 'I can make you a wonderful pair of gloves. Take the time to dig up some Muramite leather and have Nalasrine assist you with infusing it. Bring me Muramite Glove Armor and I can reshape it into something that you can use. Strengthen the gloves by reinforcing them with the infused leather in a loom, and a fine pair shall be yours.'
You say, 'What leggings?'
Kizash Proudpaw says 'Reforming some Muramite greaves into a pair of leggings that would serve you well should be no great feat. Bring me a pair of Muramite Greaves and I will get to work on that. To finish your leggings you will also need to obtain two pieces of Muramite leather padding. Speak to Nalasrine about infusing it, then place the leather pieces and leggings in a loom to work them together.'
You say, 'What sandals?'
Kizash Proudpaw says 'Soft, supple boots are my specialty. Bring me back Muramite Boot Armor and I believe I can rework them into something quite fine for you. Once I've reworked them, you will need to take a section of infused Muramite leather along with the new boots and reinforce them in a loom. If you need help in the infusing process, just talk to Nalasrine.'
You say, 'What sleeves?'
Kizash Proudpaw says 'Some new sleeves? Indeed, arm protection is important. Venture into these strange lands and find some Muramite Sleeve Armor. Bring the armor piece to me and I will get to work on refitting it for you. Once you have a piece of Muramite leather padding, talk to Nalasrine about infusing the it. The new sleeve from me can be easily stitched up in a loom with the infused Muramite leather.'
You say, 'What tunic?'
Kizash Proudpaw says 'A tunic! Of course. Such a thing of beauty! I can craft one for you fairly easily if you do the legwork. Travel into the hostile areas and bring back two sections of Muramite leather and Muramite Chest Armor. Make sure to speak to Nalasrine about infusing the sections of leather. Bring me the chest piece for reworking, then simply weld together the new chest and leather in a loom.'
Nalasrine Twinklecoil is located in the next room.
You say, 'Hail, Nalasrine Twinklecoil'
Nalasrine Twinklecoil says 'Salutations! It is great to see so many eager travelers out and about. How are you enjoying our little city here? I have been quite busy myself. There are so many interesting things to learn about these strange beings that inhabit Taelosia. Their armor in particular is most interesting. I have developed some intriguing compounds. Let me know if you are interested in such things before I just prattle on!'
You say, 'I am interested.'
Nalasrine Twinklecoil says 'Oh, good. Well let me see. Basically, I have been studying the armor that our explorers have been bringing back from their adventures. While it is a bit strangely shaped, as these creatures that seem to reside here are, I have found that by strengthening some native materials it can be reworked into rather fine armor for the likes of you and me.'
You say, 'What armor?'
Nalasrine Twinklecoil says 'If you are looking into having some armor made, you definitely will need to use my infusions. They are a bit pricey, however they are difficult to make and well frankly, I am the only one who can! Use the plate solvent on plate armor, chain solvent on chain, tanning solution on leather, and silk strengthener on silk. All rather intuitive isn't it? Simply take a look at the different types I have for sale.'
Muramite armor begins dropping in Qvic and above. Bring back the appropriate piece of "Muramite XXX Armor" and turn it in to Kizash Proudpaw to get a class-specific, no-stat "Reworked Muramite XXX."
Craft a Muramite Leather Padding by combining by combining a Meldstone and some Snake Scales in a loom. This has a high trivial (282) and a high minimum smithing requirement (in the 240s).
Buy Nalasrine's Enforcing Tanning Solution from Nalasrine Twinklecoil for around 10,500 pp. Combine the solution with the Muramite Leather Padding in a loom (no-fail combine). This results in a NO DROP piece of Infused Muramite Leather.
Combine the Infused Muramite Leather with your piece of Reworked Muramite XXX armor in a loom to receive your quest reward (no-fail combine). Reward: Kizash's Savage Heart Bracer
Reward: Kizash's Savage Heart Sandals
Reward: Kizash's Savage Heart Cap
Reward: Kizash's Savage Heart Gloves
Reward: Kizash's Tunic of Savage Heart
Reward: Kizash's Savage Heart Sleeves
Reward: Kizash's Leggings of Savage Heart
Berserker Abysmal Armor (Normal): Harlad Ragesoul may be found in the room with Nalasrine Twinklecoil at -200, -10.
You say, 'Hail, Harlad Ragesoul'
Harlad Ragesoul says 'Hail Barbarian, I am seeking a [berserker]. One of those few brave souls that show no fear regardless of the enemy. Is such bravery within you?'
You say 'I am a berserker.'
Harlad Ragesoul says 'In that case, I am in your service. If you would perform a few simple tasks I will assist you in creating a new set of powerful armor to guard you in battle. I can make you a [helm], [greaves], [chainmail], [bracer], [vambraces], [gloves], and [boots].'
Need additional dialogues.
Now talk to Nalasrine Twinklecoil, who stands nearby.
You say, 'Hail, Nalasrine Twinklecoil'
Nalasrine Twinklecoil says 'Salutations! It is great to see so many eager travelers out and about. How are you enjoying our little city here? I have been quite busy myself. There are so many interesting things to learn about these strange beings that inhabit Taelosia. Their armor in particular is most interesting. I have developed some intriguing compounds. Let me know if you are interested in such things before I just prattle on!'
You say, 'I am interested.'
Nalasrine Twinklecoil says 'Oh, good. Well let me see. Basically, I have been studying the armor that our explorers have been bringing back from their adventures. While it is a bit strangely shaped, as these creatures that seem to reside here are, I have found that by strengthening some native materials it can be reworked into rather fine armor for the likes of you and me.'
You say, 'What armor?'
Nalasrine Twinklecoil says 'If you are looking into having some armor made, you definitely will need to use my infusions. They are a bit pricey, however they are difficult to make and well frankly, I am the only one who can! Use the plate solvent on plate armor, chain solvent on chain, tanning solution on leather, and silk strengthener on silk. All rather intuitive isn't it? Simply take a look at the different types I have for sale.'
Muramite armor begins dropping in Qvic and above. Bring back the appropriate piece of "Muramite XXX Armor" and turn it in to Harlad Ragesoul to get a class-specific, no-stat "Reworked Muramite XXX."
Craft a Muramite Chain Link by combining a Meldstone, Water Flask, and File in a forge. This has a high trivial (282) and a high minimum smithing requirement (in the 240s).
Buy Nalasrine's Thick Chain Solvent from Nalasrine Twinklecoil for around 10,500 pp. Combine the solvent with the Muramite Chain Link in a forge (no-fail combine). This results in a NO DROP piece of Infused Muramite Chain.
Combine the Infused Muramite Chain with your piece of Reworked Muramite XXX armor in a forge to receive your quest reward (no-fail combine). Reward: Harlad's Boots of Fury
Reward: Harlad's Bracer of Fury
Reward: Harlad's Gauntlets of Fury
Reward: Harlad's Helm of Fury
Reward: Harlad's Vambraces of Fury
Reward: Harlad's Chainmail of Fury
Reward: Harlad's Greaves of Fury
Breakdown in Communication #0: Pre-Flag (Normal): Beginning
Talk to Fezbin Fizzles
Fezbin Fizzles may be found near Morden Rasp at -35, +60, 156.69. He will only speak to you if you are level 65+.
You say, 'Hail, Fezbin Fizzles.'
Fezbin Fizzles says 'Greetings adventurer, have you come to explore this new [continent] we recently discovered?'
You say, 'What continent?'
Fezbin Fizzles focuses his attention on ______.
Fezbin Fizzles says 'Due to some rather odd events with Calliav, we, the Wayfarers Brotherhood, were guided here to the continent we have come to call Taelosia. It is a continent which has suffered through a great magical explosion and now the native inhabitants are in dire straits. Our goal was to investigate this continent and find out more about the strange pieces of matter that we recently found in various places. All signs led us here and so we decided to build this magnificent floating city you are standing in. Unfortunately, we have found out some rather disturbing [news] recently that has all of us rather concerned.'
You say, 'What news?'
Fezbin Fizzles says 'Well, when we finished the city, we began to send out scouts to various locales all over the new continent. Right away information started to flow in. They gave us details on the layout of the land and its current inhabitants. We began to piece together this picture of the current state of things on land. Many of the reports gave details on various things like wildlife and climate as well as the local inhabitants and level of advancement. All of this seemed promising to us as we thought we might be able to talk to the natives and find out more about the strange matter that seemed to originate from this place, but then we begin to receive some very [upsetting reports].'
You say, 'What upsetting reports?'
Fezbin Fizzles says 'Apparently, the event that spread these strange pieces of matter all over Norrath brought with it a group of beings more horrifying than a shaved dwarf. These creatures seemed to be an organized army of some sort. They have apparently taken over the continent and enslaved the natives. Curious about this, we ordered our scouts to find out more about these beings. Specifically, if they could be reasoned with and if they knew anymore about the odd chunks of rock we found recently. Shortly after we made this demand, everything [stopped].'
You say, 'Stopped?'
Fezbin Fizzles says 'The scout reports stopped coming in. We figured that maybe they had just not found anything yet, but as time went by we began to worry. That's when Morden suggested that we send someone to find one of them and learn what was going on. Young Falcin did not know what he was getting into when he volunteered to check things out for us. Falcin left here under the light of a full moon and returned soon after barely able to breathe. He had been caught spying on the beings that currently control the continent. They had tortured him for hours trying to get information. Being the resourceful human he is, he managed to escape only to be mauled by what the natives call ukun, a humanoid creature that is twisted and lethal. Left for dead, Falcin dragged himself back to us and explained what he had [discovered] during his ordeal.'
You say, 'Discovered?'
Fezbin Fizzles says 'Falcin told us that all of the scouts had been captured and were either dead or were enduring extreme torture sessions. These invading beings are a vicious lot who show absolutely no mercy. Falcin's wounds were proof enough of that. Falcin explained that the scouts who were still alive are being held near where they had been discovered. Those who he could not find he assumed were dead but he still tried to get some proof before he wrote them off. Unfortunately Falcin would not live to see his desire through, he passed on shortly after revealing this information to us and now we are at a loss as to how we can help our scouts who are still living return to us and provide a proper burial for those who were lost. We cannot afford to send anyone else out there as it seems it will require a significant force in order to have any chance of accomplishing the [task] we need completed.'
You say, 'What task?'
Fezbin Fizzles says 'With half of our numbers back home dealing with the investigation of the recently unearthed dungeons and the rest here on the ship handling what information we have and trying to decide the best plan of action, Morden figured it might be a good idea to ask some courageous individuals to assist us. Morden has authorized some form of valuable reward for those who can bring us any information regarding our missing scouts or the scouts themselves. Seeing as how you have been so interested in all I have said so far, do you think you would be interested in helping the Wayfarers Brotherhood?'
You say, 'yes'
You have received the 'Breakdown in Communication' quest. Now you must find those mentioned by Fezbin and help them the best you can. If at any point you find you have made a mistake in your scouting, please return to Fezbin and say, "I need to rescout (zone name)" and he will reset your status in that zone. If you lose your reward at any point, return to Fezbin and hail him and he should give you the appropriate reward based on your level of progress.
Fezbin Fizzles says 'Most excellent. Please take these as a token of our gratitude. It is not much to look at now, but by helping us you will find ways to make this stone more [powerful] when combining it with certain items in that sealer. Please take the time to find Taminoa Bialu, Vaifan Cogswin, and L`diava Rexxen. They are all located on this ship. Each of them is responsible for information from certain areas of the continent. Taminoa has all the information on the city area, Vaifan keeps the information on the mountain passes, and L`diava collects information on the temple areas. If you truly wish to help us, talk to some or all of them and they will help guide you to the right path. When you have finished helping them all, return to me and I shall give you the reward that has been approved by Morden.'
You are now pre-flagged for subsequent steps in the quest.
You say, 'How do I make it more powerful?'
Fezbin Fizzles says 'The stone I have given you is very special indeed. It is a rare stone with a power that has not yet been revealed. After studying it we have come to the conclusion that its power is based off of resonance. You will see that there are fourteen sockets in the stone. Each socket requires a gem fragment of a certain resonance. As the fragments are set in the stone it will gradually increase in power. These fragments must be placed in the stone in a certain order using a set of clockwork gemcutter's tools, the stone, and the correct shard in the device I handed to you along with the stone. As you help find our scouts, you may come across the gem fragments that will fit into the stone. If you do, please try combining them in the special sealer. If at any time you lose the sealer or misplace the stone return to me and I will what I can do about a replacement.'
You receive A Socketed White Crystal and Vaifan's Experimental Sealer, a 4-slot container. Reward: Vaifan's Experimental Sealer
Reward: Socketed White Crystal
Breakdown in Communication #10: Free Stuff (Normal): After you have completed all of the previous steps, head back to Fezbin Fizzles. The previous quest told you:
You have succeeded in retrieving all the information the Wayfarers Brotherhood was seeking. Return to Fezbin and tell him you have completed your task so that he can give you your final reward.
You say, 'I have completed my task.'
Fezbin Fizzles says 'So I have been told, ______. Your help will long be remembered by the brotherhood. Since you first came to me, the stone should have grown in power and now I will give you the item that will unlock the stone's full potential. Please combine this with your stone after you have combined all of the other items given to you by the lead scouts and you will possess an item of immense power and a symbol of your fighting spirit. Once again, the brotherhood thanks you. I must bid you good day as I recently received some [interesting information].'
Flag: You have done quite well and your exploits will forever be talked about by the members of the Wayfarers Brotherhood, but don't you dare relax as there's still many more adventures and hidden treasures out there waiting for a hero like you.
You receive A Jagged Blood Shard.
You say, 'What interesting information?'
Fezbin Fizzles says 'Where are my manners? I should have known someone as adventurous as you would be interested in this. One of our researching experts by the name of Beanalle has recently discovered some very intriguing information about the temples beyond Yxtta and Kod'Taz.'
Combine A Jagged Blood Shard with A Smokey Green Gemstone and Vaifan's Clockwork Gemcutter Tools in Vaifan's Experimental Sealer to craft an archetype-specific Adventurer's Stone.
The gem resonates with power as the shards placed within glow unlocking some of the stone's power. You were successful in assembling most of the stone but there are four slots left to fill, where could those four pieces be? Reward: Adventurer's Stone of Might
Reward: Adventurer's Stone of Power
Reward: Adventurer's Stone Of Magic
Reward: Adventurer's Stone of Blessing
Breakdown in Communication #11: Qvic (Normal): Beanalle Banoam may be found at -440, +220, +90. You must have already completed steps 0-10 to accomplish this step of the quest.
You say, 'Hail, Beanalle Banoam'
Beanalle Banoam says 'Hello, ______. It is truly an honor to meet you. I have heard some great things about you and hope that what I have [discovered] will interest you.'
You say, 'What have you discovered?'
Beanalle Banoam says 'After going through some of the reports submitted by the scout leaders, I was able to figure something out about the temples that lie beyond Yxtta and Kod'Taz. Apparently, the temple called Qvic is where the Muramite army first broke through. The temple was ravaged by the force of the explosion when the portal to the Muramites' realm closed. Of course, as you know, they are not the only thing that came through the portal. The strange magic stones we discovered were also a result of that explosion and up until now we thought we had found the most powerful ones. After going through the reports, I found out that concentrated pieces of the magic-imbued [matter] lie in the Qvic temple area and beyond.'
You say, 'What matter?'
Beanalle Banoam says 'These pieces of matter possess vast power like none we have ever seen, but there is a drawback. You see these special augmentations? I have come to call them shards of power because of the odd shapes they take. They must have their power removed and condensed before they can be applied to an item. I have figured out a way to do this, but another [drawback] has prevented me from testing my theory further.'
You say, 'What drawback?'
Beanalle Banoam says 'Well, these special shards can only be combined with an item they are attuned to. In other words, the materials that make up an item determine if these shards are compatible with it. Now, I have found many formulas that will allow for a particular shard to merge with a particular item. Recently I discovered one [item] that was perfectly in tune with them all.'
You say, 'What item?'
Beanalle Banoam says 'Why, your stone of course. The different items you have added to it have altered its makeup so much that it is hardly what it was when you first received it. It is a powerful item that can be made even more powerful with my help and yours, but this will require the help of many and I am afraid we do not have the force to take on such a task. Do you think you would be willing to collect the four shards of power from the temples and bring them to me as you get them?'
You say, 'Yes.'
Beanalle Banoam says 'Excellent! I knew Fezbin was right about you. Okay, here is what I can tell you. Qvic, Inktu'ta, Txevu, and Tacvi are the names of the temples beyond Yxtta and Kod'Taz. Within each of these you should find a shard of power. The hard part will be finding one as the Muramites are aware of the power within them and are hoarding every piece they find. If my theory is correct, you will have to combine the shards in a particular order before the stone will become attuned with another. You should retrieve the shards from the temples in the order I said before -- Qvic, Inktu'ta, Txevu, and Tacvi. Give each shard to me one at a time so that I can remove and condense the magic for you and then you can combine them in the special sealer. Now, hurry! I am worried that the leader of the Muramites may realize he needs to get rid of these shards, before we can get our hands on them.'
A "Shard of Dark Matter" is a common (but not guaranteed) drop from Cynosure Kvanjji, the boss of Qvic. For details about this encounter, see this quest entry. He can drop as many as three at a time, or none at all. Bring it back to Beanalle.
Beanalle Banoam says 'Ah, perfect. I am glad you were successful in finding it. Now, if you will give me one second I will condense the shard into concentrated energy which you can add to your stone. There we are. Please take the time to attach this, but make sure you do it in the order I mentioned when we first spoke.'
You receive a Condensed Matter Shard, which you may then combine with your Adventurer's Stone of XXX (where "XXX" depends on your class archetype) and Vaifan's Clockwork Gemcutter Tools in Vaifan's Experimental Sealer to craft an archetype-specific Black Matter Gemstone. Reward: Black Matter Gemstone
Reward: Black Matter Gemstone
Reward: Black Matter Gemstone
Reward: Black Matter Gemstone
Breakdown in Communication #12: Inktu'ta (Normal): Beanalle Banoam may be found at -440, +220, +90. You must have already completed steps 0-11 to accomplish this step of the quest.
A Shard of Dark Matter is an uncommon drop from Noqufiel, the boss of Inktu'ta (see this quest entry for details about the raid expedition). Bring it back to Beanalle Banoam:
Beanalle Banoam says 'Ah, perfect. I am glad you were successful in finding it. Now, if you will give me one second I will condense the shard into concentrated energy which you can add to your stone. There we are. Please take the time to attach this, but make sure you do it in the order I mentioned when we first spoke.'
You receive a "Condensed Matter Shard" (looks the same as the one for completing steps 11, 13, and 14, but identifies as "Pure Matter Extracted From A Faintly Glowing Shard").
Combine this item with your class archetype-specific "Black Matter Gemstone" with "Vaifan's Clockwork Gemcutter Tools" inside a "Vaifan's Experimental Sealer" to craft a class archetype-specific "Jagged Black Matter Gemstone". Reward: Jagged Black Matter Gemstone
Reward: Jagged Black Matter Gemstone
Reward: Jagged Black Matter Gemstone
Reward: Jagged Black Matter Gemstone
Breakdown in Communication #13: Txevu (Normal): Beanalle Banoam may be found at -440, +220, +90. You must have already completed steps 0-12 to accomplish this step of the quest.
A Shard of Dark Matter is an uncommon drop from Zun`Muram Tkarish Zyk, the boss of Txevu. Bring it back to Beanalle Banoam.
Beanalle Banoam says 'Ah, perfect. I am glad you were successful in finding it. Now, if you will give me one second I will condense the shard into concentrated energy which you can add to your stone. There we are. Please take the time to attach this, but make sure you do it in the order I mentioned when we first spoke.'
You receive a Condensed Matter Shard (looks the same as the one for completing steps 11, 12, and 14, but identifies as "Pure Matter Extracted From A Brightly Glowing Shard"), which is then combined with your class archetype-specific Jagged Black Matter Gemstone with Vaifan's Clockwork Gemcutter Tools in Vaifan's Experimental Sealer to craft a class archetype-specific reward. Reward: Smooth Black Matter Gemstone
Reward: Smooth Black Matter Gemstone
Reward: Smooth Black Matter Gemstone
Reward: Smooth Black Matter Gemstone
Breakdown in Communication #14: Tacvi (Incomplete): Beanalle Banoam may be found at -440, +220, +90. You must have already completed steps 0-13 to accomplish this step of the quest.
1-3 x Cracked Shard of Power drops every time from Tunat`Muram Cuu Vauax, the boss of Tacvi. Bring it back to Beanalle Banoam to receive Condensed Shard of Power.
Beanalle Banoam says 'Ah, perfect. I am glad you were successful in finding it. Now, if you wil give me one second I will condense the shard into concentrated energy which you can add to your stone. There we are. Please take the time to attach this, but make sure you do it in the order I mentioned when we first spoke.'
You then combine the Condensed Shard of Power with your class archetype-specific Smooth Black Matter Gemstone with Vaifan's Clockwork Gemcutter Tools in Vaifan's Experimental Sealer to craft a class archetype-specific reward. Upon the final combine, you see in yellow text:
The gem resonates with power as the shards placed within glow unlocking all the stone's power. You were successful in assembling the stone and now if it is ever lost Fezbin will return it to you whenever you hail him.
Reward(s):
Caster - Black Gemstone of Death - (Recipe)
Melee - Black Gemstone of Pain - (Recipe)
Hybrid - Black Gemstone of Suffering - (Recipe)
Priest - Black Gemstone of Torture - (Recipe)
Reward: Black Gemstone of Death
Reward: Black Gemstone of Pain
Reward: Black Gemstone of Suffering
Reward: Black Gemstone of Torture
Breakdown in Communication #1: Qinimi (Normal): Talk to Taminoa Bialu
Taminoa Bialu may be found downstairs at /waypoint -87, -29, 140
You say, 'Hail, Taminoa Bialu'
Taminoa Bialu says 'Greetings. You must be one of the adventurers that Fezbin told me about. It is a pleasure to meet such a brave individual. Where are my manners? My name is Taminoa Bialu and I compile all the information from our scouts in the [city] area of Taelosia.'
You say, 'What city?'
Taminoa Bialu says 'Well, it appears the native inhabitants of Taelosia lived in a grand city once. This city is made up of four different areas named in their language. They are [Qinimi], [Riwwi], [Barindu], and [Ferubi]. Based off of early information, we believe each area had a specific purpose. I am still trying to decipher the native language to figure out what the names mean, but going off of visual information I can assume that Qinimi served as their court, Riwwi is where they held games, Barindu was a lush garden, and Ferubi was a central place of worship once. That is about the extent of my information as far as the intended purpose of each area. What they are now used for I can explain in further detail. Which area would you like to hear more about?'
You say, 'What is Qinimi?'
Taminoa Bialu says 'It appears the Muramites have made this some sort of stronghold. Destroying many of the native symbols, the invaders have converted the building that once served as the court into fortified headquarters. It is here you will find a structure called the Chamber of Souls, various pens to hold ukun, and a moat of sickly black sludge. The structures that the nihil once called home are all but destroyed now. Very sad indeed. That's where the legion keeps the bulk of the [slaves]. I believe that the scout for this area was caught sneaking around the housing district, but I have no proof. If you were to search this area, maybe you would find some sort of sign or marker he may have left. That would be helpful.'
You say, 'What slaves?'
Taminoa Bialu says 'I see Fezbin saved some of the more dismal news for me. The legion has enslaved the natives of the continent. In the city area, these slaves are used mainly for menial tasks. Due to their fragile bodies, they cannot do any heavy lifting, but their knowledge of shaping stone makes them perfect for building new structures for the legion to use as well as altering current ones. They command the stone workers. I am not sure how the slaves are used in the temple areas. That information is held by L`diava.'
The scout he mentions is Kreshin Silentcog. You need to confirm that he was caught by the muramites and find out what he was doing at the time.
Finding the Report
In Qinimi, follow the right wall from the zone-in from Natimbi. You will find Kreshin's Journal Page as a ground spawn on a rock near the wall between the two lines of buildings, location +310, -1060. Bring it back to Taminoa Bialu.
Taminoa Bialu says 'Yes. This is exactly what I needed. Excellent job. Okay, now give me one moment to decipher this . . . hm. It seems that just before he was captured he was trying to communicate with the slaves in the area. The text is very hard to make out, but it looks like he may have been trying to get into the main headquarters. He was interacting with a particular slave named Sislono Nislan. This slave promised him a way into the headquarters only if he promised to rid the area of a tyrant, named Tixxrt. The rest of the parchment is undecipherable. I would suggest finding this slave and showing him this to see if he knows what happened.'
You receive a different version of the page back.
Sislono's Key
Councilman Sislono Nislan may be found elsewhere in Qinimi at +255, -645. You will need at least dubious faction with Nihil or else he will not accept your turn in items.
You say, 'Hail, Councilman Sislono Nislan'
Councilman Sislono Nislan says 'While I place my own life at risk by helping you, I feel a strong sense of honor amongst you and those who have come with you. It is because of this that I will try to help in anyway I can.'
Give Councilman Sislono Nislan the page you got back from Taminoa.
Councilman Sislono Nislan says 'Yes, I have seen this and others like it before. While we do not understand where it comes from, we have come to the conclusion that these strange glyphs express somthing important to your people. These particular glyphs were made by the small one they hold captive in the courtroom. If you wish to help him, you will have to retrieve the [stone of entry]. Only with this stone can you enter the courtroom and help the one who calls himself Kreshin.'
You say, 'What stone of entry?'
Councilman Sislono Nislan says 'Gaining access to such a private place has always been reserved for the elders of my people. While the legion may have destroyed our home, they have yet to figure out a way around many of our wards that bar access to our sacred areas. Unfortunately, their frustration at gaining entry resulted in the painful torture of many of my people until they were given the keys to enter. The courtroom requires one of these keys and while the invaders hold all of the existing keys, I can create one if you can retrieve the proper [items].'
You say, 'What items?'
Councilman Sislono Nislan says 'The key consists of mud, some stonedust particles, and a piece of chalk. The mud can be found in the sewers beneth the city. The stonedust is plentiful near the coliseum, and the chalk can be found all over this area. Bring these to me and I will make you a temporary key which will grant you access to the courtroom. I implore you to hurry. I fear the one you seek may not be alive much longer.'
The three items he refers to are Stonedust Particles (random drop in Riwwi), Glob of Mud (random drop in the Sewers), and a Piece of Chalk (random drop in Qinimi). Give them to Sislono.
Sislono covers the three pieces in his hands, closes his eyes, and begins to chant. A glow begins to emanate from his hands and he begins to chant louder. Then, just as quickly as it began, the glow in his hands dims and the chanting stops. 'There you are -- the key which grants you and your party access to the courtroom. Just stand on the pedestal in the center of the large building in this part of the city with the key in your hand and say you wish to enter. There is one more [thing] I must tell you before you go.'
You receive a Stone of Entry.
You say, 'What thing?'
Councilman Sislono Nislan says 'The geomantic device which raises you into the courtroom is an ancient one and takes time to reset after it has been used. If you are having trouble entering, be patient. You will know it is ready to receive a key when you hear a grinding sound from the base of the device as it settles into place. Please be sure you are fully prepared before entering. While it once was a place of peaceful discussion, the courtroom is now a place where terrible torture is conducted by those the legion wants information from. When they see uninvited guests, they will not be very happy. The leader of this area's force is known as Tixxrt and stopping him is the only way you can save the small one, called Kreshin.'
Save the Scout
With the Stone of Entry, a single group may attempt to save the scout from execution. This event is similar to the Plane of Justice trials, but more difficult, with a time limit of six minutes total for the entire event. Make your way to the temple on the south side of the zone. All members of the group must be visible and standing on the pedestal inside the temple. The keyholder must have the Stone of Entry in his/her inventory and say, "I wish to enter."
The trial area has many mobs around but inactive. As soon as you teleport in, three come alive and attack immediately.
Pixtt Xictic Krvne shouts 'What is this? How dare you fools enter this sacred place and interrupt my ritual. Minions of the legion! Show these infidels what they have gotten themselves into!'
As soon as you defeat the initial three and loot their corpses, another three become active and attack. If you don't loot the corpses, the other mobs stay inactive. After you defeat the first six, a second wave of six will come.
Pixtt Xictic Krvne says 'Looks like I may have underestimated you. Let's see how you handle more of my minions.'
After you defeat the second wave of six, another wave of six comes. After three waves of this, the boss, Pixtt Tixxrt Kvrok, and 2 mobs called "Tixxrt's Guardsman" become targetable.
After the boss goes down, the execution Xocik spawns and has to be killed (the guards may still be alive).
Pixtt Tixxrt Kvrok says, 'What is this? Seems I have understimated your friends, Kreshin. No matter what this means, I will have to hasten your death and handle these intruders myself. Prepare yourselves for my wrath! Xocik, kill Kreshin -- no matter what happens to me.'
Executioner Hexxt Xocik says, 'As you wish Tixxrt. I shall slay the spy no matter what the cost.'
If you exceed the six-minute time limit, you are teleported out (provided you aren't dead) and a zone-wide emote announces the execution of Kreshin. If you are dead, Besana the Gravedigger is in the zone and can summon your corpses for you if you say, "I wish to live again" (be careful getting to her though).
If you succeed in killing Xocik, you see this:
Xocik writhes in pain as his body falls to the floor. Your valiant efforts have resulted in the rescue of Kreshin.
Kreshin Silentcog says 'Thank you for rescuing me. I sense that one of you holds a stone key which allowed you entrance into the courts. Please show it to me.'
Give him the Stone of Entry.
Kreshin Silentcog says 'You have done well to get this far. Please, take this to Taminoa and tell him it is vital that he decipher it. I must stay here to investigate more. Let him know I am safe and thank you again.'
You get the Stone back and a Writ of the Magi. Multiple people can hail Kreshin and do the turn-in.
Head back to Taminoa and give him the writ.
Another Enemy
Taminoa Bialu says 'Finally, you have returned and with some information I see. Kreshin contacted me in advance to let me know of your daring rescue. We are indebted to you. Now, back to business. While I cannot make out most of it, Kreshin has translated some of it and it appears to be a description of a ritual one of the head ikaav performs regularly. Apparently she has been trying to absorb the geomantic powers of the natives of Taelosia. The details are kind of sketchy as Kreshin was only able to translate so much, but some information is better than none, I always say. Anyway, it says here that the ritual is conducted in the Chamber of Souls. It used to be a large tower which the natives used to watch the shores. The tower was destroyed when the invaders took over the area and converted it to a ritual chamber. They used it in experiments centered on the extraction of magic. The head ikaav, known as Xictic, has been trying to use the powers of the native Taelosians to build an army of stone workers that he can directly control instead of relying on the ability of slaves. During the ritual, Xictic stands atop a platform which is suspended over a circle of platforms. The center platform holds an inanimate stone worker while eight ikaav stand on smaller platforms around the center. What happens next is not really known, but the end result is three lifeless slave corpses. According to this, she has not yet been successful, which I would say is good news. But if we do not stop her, she could easily reinforce the numbers with stone workers tainted by the touch of this legion. I know you have accomplished your goal, but I must ask that you find a way into this ritual and silence Xictic for good. Show this to Nislan. He should be able to decipher the images. I believe this is the key to getting into the ritual chamber. Now, hurry please and return to me with proof of Xictic's death so that I can make a final report on the Qinimi area to Fezbin.'
You get back a slightly altered version of the Writ of the Magi. Head back to Qinimi and give it to Councilman Sislono Nislan.
Councilman Sislono Nislan says 'These glyphs look quite familiar. They are definitely in my language, but it seems as if the one who etched them did so against his will. Where did you get this? Wait, don't tell me. I know. Kreshin must have been successful in finding out what was going on in the Chamber of Souls. These glyphs detail how to animate stone using our geomancy abilities. There are some strange symbols toward the bottom, but for the most part, this is our language. Could he be trying to conduct the [ritual] of my people?'
You say, 'What ritual?'
Councilman Sislono Nislan says 'While animating stone comes easy for us, sometimes we need an extremely powerful stone worker to help with the city. These stone servants were made through a ritual which combined the power of eight geomancers into a ninth. This geomancer would then imbue a stone worker with this power, resulting in a more powerful construct. We stopped doing the ritual when we discovered that it could take away our ability over time. If [she] has somehow figured out a way to absorb this power, then my people could be in more danger than I thought possible.'
You say, 'Who is she?'
Councilman Sislono Nislan says 'We refer to her as the silent one, but the legion calls her Xictic. She is one of their kind who can use magic and she seems to be quite feared by everyone in this area. She comes here sometimes and takes three of us into the building with the glowing dome around it. Along with her are eight magic-using invaders and some of the slavers. When they are finished, only members of the legion leave. None of my people who enter are ever seen again. If what this says is true, you must stop her. If she succeeds, she will be able to control our stone servants at will and cause even more destruction. I beg you to stop her. I will help you in any way if you [promise] to stop her.'
You say, 'I promise to stop her.'
Councilman Sislono Nislan says 'I cannot tell you how relieved this makes me. Now to the issue at hand. While Xictic and those she chooses can roam freely in and out of the magical dome surrounding the chamber, if anyone else tries to enter they are held back. As a councilman, I was granted a device that allows access into the dome and I've managed to keep it away from the prying eyes of the Mata Muram. Using it is not without its consequences, though. As soon as an outsider shows up within the dome, they will know what has occurred and will come searching for the culprit so be certain you are ready to face the challenges ahead before you embark upon this venture. Only eighteen of you will be allowed into the chamber at one time so gather your forces and tell me you are [ready] to face Xictic.'
Gather a raid of 3 full groups (update: 3 people in raid suffices, just 1 needs to be in zone), then say:
You say, 'I am ready to face Xictic.'
If you are not in a raid, you see in red:
You must be in a raid before attempting this event.
If you are in a raid, you see:
Councilman Sislono Nislan pulls out a small stone and closes it in his hand. 'Please be careful. What you are about to see may shock you at first, but don't let yourself be distracted for too long. These beings are merciless and once they have discovered your presence, they will stop at nothing to add your corpse to the others in the area.'
Your raid will be teleported into the enclosed dome in the center of Qinimi to fight another ring event, this one with a 27-minute time limit. You must kill the three ra'tuks within the first 10 minutes or the first sacrifice goes through and you will get slaughtered by the stone golem they created.
There are several waves of mobs:
After the 3 ra'tuks are dead:
a ra`tuk decimator's corpse drills a mighty hand into its wounds to hasten the coming of death.
You slash a ra`tuk decimator for 1261 points of damage.
You have slain a ra`tuk decimator!
Your faction standing with Hexxt got worse.
Your faction standing with Nihil got better.
As the last sacrificer falls to the floor, his lifeless eyes lock onto you in a soul-entrancing stare. Even dead, these strange beings look ready to leap forward and try to separate your bones from your skin or your eyes from their sockets.
Xictic shouts, 'What? How can this be? You fools have ruined my ritual and I am so close to finally fulfilling my goal. You shall suffer for this dearly. Meet my elite guardian, Kabeka. He will keep you busy while I finish absorbing the power from my eight magi. I warn you, stopping me this time will not be so easy.'
The chamber begins to glow with magic as the magi continue to funnel their power into Xictic. Unfortunately, that is a concern that will have to be dealt with at a later time as the creature called Kabeka prepares to strike.
Kabeka Kret says 'Xictic wishes you to be destroyed. It will be done.'
Kabeka Kret's corpse says 'Your numbers proved stronger today, but I am one of many who will lay down my life for the legion.'
You have slain Kabeka Kret!
4 Pixt Xictic Krvne spawn permarooted. 3 are fakes, one is real.
If you kill a fake Xictic they all respawn.
Pixtt Xictic Krvne says, 'You fools, did you think it would be that easy? The time you have wasted attacking my illusions has helped me gain even more strength. Now, see if you can find the real one this time.'
If you kill the real one, they all despawn. The real one is not perma-rooted.
Casting Beacon says 'Your foolish decisions have weakened your resolve and given me more power. I shall destroy you once and for all.'
Upon killing him:
The snakelike body of Xictic slowly slumps to the floor, eyes locked in disbelief. As the convulsions of death take control of the lifeless corpse, the area is filled with a familiar laugh. 'You fools! Did you really think I would be dumb enough to fight so many of you at once. I admit your power is indeed formidable, but our army will still crush you and this realm you call home.' Silence follows. Something evil has taken hold of this continent and the threat to Norrath may be much greater than anyone could ever imagine.'
Other items from the raid:
The Finale
Give Xictic's Bloody Robes to Taminoa Bialu.
Taminoa Bialu says 'You have returned bruised, but not broken I see. I am disappointed to hear that he got away, but you are not at fault. We could not foresee how crafty these beings would be. The information you have given us will be invaluable. Fezbin will be pleased. Kreshin told me to give this to you. He believes it may be one of the fragments that will fit into the stone Fezbin gave you. Who knows, if you help me find the rest of our scouts we may yet find more fragments.'
You have successfully completed a section of the Taelosian City.
You receive A Dull Gem Shard, which you may combine with A Socketed White Crystal and Vaifan's Clockwork Gemcutter Tools in Vaifan's Experimental Sealer to craft A Dull Socketed Crystal.
Reward: Gloves of the Great Earthquake
Reward: Shoulder Plates of Discord
Reward: Wand of Stone Mastery
Reward: Dull Socketed Crystal
Reward: Granite Buckler
Reward: Xictic's Twisted Stud
Reward: Band of Bloody Spikes
Reward: Fervid Hunter's Mask
Reward: Mask of Cracked Stone
Reward: Pauldrons of Judgment
Reward: Veil of the Aneuk
Reward: Muddy Ring
Reward: Pendant of Corrupted Souls
Reward: Broken Blade of Brooding
Reward: Gavel of the Adjudicator
Breakdown in Communication #2: Barindu (Normal): Talk to Taminoa Bialu
Taminoa Bialu may be found near Fezbin Fizzles at -35, +60, with whom you must have already completed the preflagging to accomplish this step of the quest.
You say, 'Hail, Taminoa Bialu'
Taminoa Bialu says 'Greetings. You must be one of the adventurers that Fezbin told me about. It is a pleasure to meet such a brave individual. Where are my manners? My name is Taminoa Bialu and I compile all the information from our scouts in the [city] area of Taelosia.'
You say, 'What city?'
Taminoa Bialu says 'Well, it appears the native inhabitants of Taelosia lived in a grand city once. This city is made up of four different areas named in their language. They are [Qinimi], [Riwwi], [Barindu], and [Ferubi]. Based off of early information, we believe each area had a specific purpose. I am still trying to decipher the native language to figure out what the names mean, but going off of visual information I can assume that Qinimi served as their court, Riwwi is where they held games, Barindu was a lush garden, and Ferubi was a central place of worship once. That is about the extent of my information as far as the intended purpose of each area. What they are now used for I can explain in further detail. Which area would you like to hear more about?'
You say, 'What is Barindu?'
Taminoa Bialu says 'This area holds the remains of what was once a place to build stone workers. We can only guess what purpose this part of the city served and all we know now is that it is home to some of the cruelest acts of violence against the nihil. I assigned this area to Talwin, a young wood elf new to the brotherhood. He was a proven scout eager to assist. Initially things were going well, but the information he was sending was not helping much. I think this worried him and resulted in him pushing his luck a little far. Ever since I told him his reports were lacking the vital evidence we needed I have not heard from him. Before Falcin passed on, I asked him if he had found anything out about Talwin and he shook his head. I know Talwin is still alive . . . he has to be . . . and I know that there must be some clues in the area of Barindu somewhere. He was diligent about recording what he found so I would assume that if he has been captured that his writings must be lying around the area somewhere. See if you can find two of his journal entries and bring them back to me. When you return please give what you find to my assistant Opury Foop. She is trying to help me organize my reports a little better.'
You need to find out what happened to Talwin.
Find the Report
Talwin's Journal Pages 1 and 2 drop from random mobs in Barindu. Give these pages to Opury Foop, located near Taminoa Bialu on the ship..
Your Location is -112.19, -43.76, 144.51
You say, 'Hail, Opury Foop'
Opury Foop says 'My brother is an adventurer like you. He left to explore the new continent a couple of days ago. I hope he is okay.'
Upon hand-in:
Opury Foop says 'What's this . . . Oh, you must be one of the adventurers helping us with our scout issue. Taminoa will be excited to see this. Talwin and Tam were really close before Talwin joined the brotherhood, but it is really not my place to give you any more details. I will leave that to him. Now, let me see. According to what Talwin has written here, the head slaver is a being known as Ixvet Pox who spends much of his time in the Stone Worker Yard. Apparently he forces the slaves to use their control over the stone workers to protect him. Sounds like that may be the best place to start looking for more Talwin clues. Wait a second. There are some more notes here on the second page. Seems Talwin was able to build a rapport with the head slave in the area. His name is Proterri and it says here that he was planning to poison the head slaver and try to start a slave revolt. While it seems you could easily go find the head slaver, I would suggest talking to Proterri first and asking him about Talwin. Either way, whatever information you find out regarding Talwin, please return it to Taminoa. I should have finished helping him get things in order by the time you return.'
You gain experience!!
Proteri Amari
You must have warmly faction with the Nihil to have this conversation:
You say, 'Hail, Proteri Amari'
Proteri Amari glances around nervously. 'Leave me be. I can't be seen talking to outsiders.'
You say, 'Who is Talwin?'
In yellow text:
'Yes ... Talwin. He and I were becoming fast friends until Ixvet took him. I am not sure what has happend to him, but if you would be [interested] in helping me I may be able to assist you in return.'
You say, 'I am interested.'
Proteri Amari says 'Good, good. As you may have noticed, the majority of these creatures are brutish types best suited for destruction. They are kept under control solely by strong [leadership].'
You say, 'What leadership?'
Proteri Amari says 'The one who controls this area of the city goes by the name Ixvet Pox. She's as cruel as the rest, but considerably more intelligent which makes her even more dangerous. Fortunately, she's grown complacent and that gives us an [opportunity]. If we can destroy Ixvet, it will throw this area into chaos and we should be able to escape before order is restored.'
You say, 'What opportunity?'
Proteri Amari says 'I've managed to get someone loyal to our cause placed within Ixvet Pox's entourage of personal servants and a skilled herbalist tends to her favorite fruits in the gardens. We will use this connection to poison the tyrant. Go talk with Kunimi Falade. You can find her working on the Hanging Gardens. Give her this ring as proof that you are there with my blessing and she will tell you what she needs.'
You receive a Simple Stone Band.
The Exotic Poison
Kunimi Falade is on the east side of the hanging gardens. You need warmly (possibly high warmly) faction with the Nihil to turn in the ring.
You say, 'Hail, Kunimi Falade'
Kunimi Falade glances around to make sure no one is within earshot then whispers, 'Who are you and what do you want?'
You say, 'Proteri sent me.'
Kunimi Falade looks nervous at the mention of that name and says, 'I'm sorry. I don't know anyone by that name.'
Give Kunimi Falade the Simple Stone Band.
Kunimi Falade takes the ring and studies it for a moment. 'So the time has finally come. Unfortunately, I have had little success. Our traditional poisons have absolutely no effect on these invaders. They don't even seem to notice the poison. But, there is some hope. I believe I can distill a poison that will affect them if I had the right [ingredients].'
You say 'What ingredients?'
Kunimi Falade says 'Creating poisons is distasteful business and I'm afraid the items that go into it are just as distasteful. I need the black bile of a hynid and the yellow bile of a tide feaster from the shores of Natimbi and both a vial of corrosive slime and a mass of insect larva from the sewers beneath us. Once I have these items, I should be able to create an effective poison. Now, you should leave before we're seen.'
You need Black Hynid Bile (from Natimbi), Yellow Tide Feaster Bile (also from Natimbi), Writhing Mass of Insect Larva (from flies and gnats in any of the four the Sewers), and a Vial of Corrosive Slime (from lurker mobs in any of the four Sewers). Give them to Kunimi.
Note: To open Sewers of Nihilia expeditions, visit Gamesh in Barindu.
Kunimi Falade takes the ingredients and gets to work. Within a few minutes, she produces a viscous green liquid. Plucking a bunch of fruit from the nearby plant, she coats the fruit in the poison.
Kunimi Falade says 'That should do it. I can't be positive that this will do more than give Ixvet an upset stomach, but we can hope. Please take this to Proteri Amari.'
Your faction standing with Nihil has been adjusted by 10.
You gain experience!
You receive a Poisoned Fruit. Head back to Proteri Amari.
Poison Ikaav Ixvet Pox
Proteri Amari says 'I knew Kunimi would come through! Our day of escape is almost here. Take this to Abena Taifa. She is the servant who brings Ixvet his meals and is loyal to our cause.'
Your faction standing with Nihil has been adjusted by 10.
You gain experience!
You get a different Poisoned Fruit back (if you turn in the wrong one, you'll need to restart from the beginning). This one goes to Abena Taifa in theory. Alas, she has run into a snag, and you'll have to find help somewhere else.
Abena Taifa says 'Proteri sent word that you would be coming. I have bad news. It seems Ixvet has gotten wind of a plot on his life and has grown paranoid. He has started changing his personal servants on a regular basis and I was replaced by Chiaka Lerato yesterday. I'm afraid that I'm not going to be able to help you anymore. Please, keep the fruit for now'.
Abena hands you back yet another version of Poisoned Fruit. You now need to determine whether Chiaka Lerato will help.
You say, 'Hail, Chiaka Lerato'
Chiaka Lerato ignores your attempts to talk to her.
Hand her the poisoned fruit.
Chiaka Lerato says 'I know of your plot and I have no interest in being a part of it. It's too dangerous and more likely to get us all killed than set us free. I don't want anyone else getting hurt, so I won't tell the guards, but I will have no part in your plans.'
You get another different form of the Poisoned Fruit. Now you have to figure out how to either get Chiaka to help or replace her as Ixvet's servant. Go back to the Abysmal Sea and talk to Hamisi Lerato, a family member of Chiaka's found near the Soulbinder (location -200, 220, 129: same room as the soulbinder - above the bar, by way of the stairs in the bar).
You say, 'Hail, Hamisi Lerato'
Hamisi Lerato looks despondent. 'I recently managed to escape from the city with my mother, but my sister is still stuck in there. She was too frightened to escape with us and now I fear she may be dead.'
You say, 'Chiaka is alive.'
A look of astonishment flashes across Hamisi's face. 'You've seen my sister? Is she ok? Where is she? Wait, there will be time to talk later. For now, you must return to her immediately. Our mother has been worrying herself to death and has grown very sick. I fear she won't last much longer. Please, take this shawl to my sister. It's our mother's. My sister will recognize it and know what it means. May the ocean speed your journey!'
You get a Tattered Shawl. Head back to Chiaka and give it to her.
Chiaka Lerato says 'How did you. . . Never mind. I'd know this shawl anywhere and it can only mean one thing. Mother needs me. I haven't heard from my brother or mother since they escaped and I thought they might be dead. I should have left with them when I had the chance. Fortunately, Hamisi told me of his plans. I should be able to use the same route he did to escape. Here, take this. I won't need it any more.'
You gain experience!!
You get her Serving Tray. Chiaka then starts walking toward the Ferubi zoneline and eventually despawns.
Wait until Ixvet is back up and go to Abena Taifa. Give her the Serving Tray and Poisoned Fruit (from Chiaka).
Abena Taifa says 'Just in time! Ixvet is due for his next meal in a few minutes. With Chiaka out of the way, I'll be able to serve him. I hope this poison isn't noticeable. Here, I've managed to secret this away from the guards up until now and I hate to think about those beasts getting their hands on it. Please hold onto it for me. If this goes well, I won't need it anymore.'
Your faction standing with Nihil has been adjusted by 50.
You gain experience!
You get Abena's Collar of Liberation.
Abena will be killed, because one of the aneuk guards will taste the fruit before it gets to Ixvet.
Abena Taifa says 'Ikaav Ixvet Pox, I humbly present you with your meal.'
Ikaav Ixvet Pox says 'Be gone. I've no interest in your fruits today.'
Aneuk Controller says 'Bring that tray here, girl! I'm famished.'
Aneuk Controller says 'Don't keep that all to yourself. Bring some of that fruit over here too!'
The Aneuk Controllers quickly gorge themselves on the fruit. After a few moments, they both double over and cry out in pain.
Ikaav Ixvet Pox says 'What have you done, slave! Try to poison me? You will pay for your insolence!'
Kill the ikaav and Talwin's Remains, a fallen skeleton in one of the buildings becomes targetable (similar to a chest in the Lost Dungeons of Norrath). The controllers will also join in the fight:
Aneuk Controller raises its scepter and calls out, 'Finally, a chance to practice our tactics. Constructs, destroy their support troops!'
However, being poisoned, they cannot command the constructs:
Aneuk Controller doubles over in pain, losing its concentration as the poison burns through its body.
Break the remains open (attack it) to get Talwin's Final Report.
The Finale
Give the report to Taminoa Bialu.
Taminoa Bialu looks at the final report before bowing his head for a second. 'While I had accepted Talwin's passing as reality, I still hoped you would save him in time. Either way, I thank you for your effort and for delivering this vital piece of information contained in this report. Please take this. I found it wrapped up in the report. Talwin would have wanted you to have it as it appears to be a gem fragment that could fit into the stone Fezbin gave you. Now that you have finished all that was needed for Barindu, there is still more of the city left to explore and I won't be able to complete my report until it is done.'
You have successfully completed a section of the Taelosian City.
You receive A Shiny Gem Shard, which you may combine with A Dull Socketed Crystal and Vaifan's Clockwork Gemcutter Tools in Vaifan's Experimental Sealer to craft a A Shiny Socketed Crystal. Reward: Shiny Socketed Crystal
Reward: Abena's Collar of Liberation
Breakdown in Communication #3: Riwwi (Normal): Talk to Taminoa Bialu
Taminoa Bialu may be found near Fezbin Fizzles at -35, +60, with whom you must have already completed the preflagging to accomplish this step of the quest.
You say, 'Hail, Taminoa Bialu'
Taminoa Bialu says 'Greetings. You must be one of the adventurers that Fezbin told me about. It is a pleasure to meet such a brave individual. Where are my manners? My name is Taminoa Bialu and I compile all the information from our scouts in the [city] area of Taelosia.'
You say, 'What city?'
Taminoa Bialu says 'Well, it appears the native inhabitants of Taelosia lived in a grand city once. This city is made up of four different areas named in their language. They are [Qinimi], [Riwwi], [Barindu], and [Ferubi]. Based off of early information, we believe each area had a specific purpose. I am still trying to decipher the native language to figure out what the names mean, but going off of visual information I can assume that Qinimi served as their court, Riwwi is where they held games, Barindu was a lush garden, and Ferubi was a central place of worship once. That is about the extent of my information as far as the intended purpose of each area. What they are now used for I can explain in further detail. Which area would you like to hear more about?'
You say, 'What is Riwwi?'
Taminoa Bialu says 'Riwwi has to be the most interesting of all of the city areas. You see, this is where the coliseum is located. Now, we are not completely aware of how it was used before this invading army took up residence in the area, but now it is used for the merciless slaughter of the nihil. Early reports from our scout, Reyna, indicate that the slaves in the area would not interact with her until she proved herself. How she was able to do this I am not sure, but I would suggest trying to find something of Reyna's while I go over my Riwwi information. Come back to me when you find something.'
Reyna's Demise
It seems Reyna did get in a bad situation. You will find Reyna's Bloody Earring as a random drop in Riwwi. Hand it to Taminoa:
Taminoa Bialu says 'This does not bode well for Reyna's fate. If I had to guess, I would say they took her to the coliseum. Knowing what we know about these strange beings, they would have taken her to the coliseum just so they could entertain themselves by torturing her. You must find a way into the coliseum and save Reyna. I think your best plan of action would be to locate and speak to Turlini and Namosa. They are two slaves Reyna mentioned in her reports. They may not talk to you if you have not proven yourself, but once you do that they should be pretty helpful. They may even know an easy way into the coliseum. Find these two and ask them about Reyna. Return to me when you find out more information about her.'
So, you are directed to two slaves, Turlini and Namosa, who will not trust you at first. This is an entire side quest, which results in its own rewards. It also takes a while.
Gain faction with the Yunjo Resistance
You can gain faction by relentlessly killing some of the mobs that give off the required faction increase (not all do, and the faction is +1 per kill).
You can also help some of the slaves. This is how Reyna did it. There are some slaves that are hungry and thirsty, located in the first building to the left of the Qinimi zone line. They require some player-made foods and drinks from native Taelosian products.
Drinks give +5 faction, and food gives either +2 or +5 faction.
Each slave will tell you what it wants. Turn in these for faction gain to the appropriate slave. Slaves accept exactly 8 turn-ins of food or drink, no more than that. On the 8th turn-in the slave despawns and a new one immediately takes its place. The respawn time is 15-20 minutes, and the type of Yunjo that pops is random, either An Enslaved Yunjo, or one of the 5 types listed above.
You need to attain high kindly faction standing with the Yunjo Resistance to talk to the two slaves. The Taelosian Morphemic Staff (grants positive faction to Nihil and Yunjo Resistance) can go a long way toward helping you along here.
Namosa's Family
Namosa Bubundu may be found at -220, -190, +25 in Riwwi, in the "pavilion" straight out from Qinimi. You must have at least kindly faction (1100) to speak with Namosa successfully.
You say, 'Hail, Namosa Bubundu'
Namosa Bubundu coughs pitifully and looks through you with weak eyes, 'This gazebo was once a place of contemplation, meditation, and reflection, but now it is a place of torture. These slavers shackle us here within feet of the pool of water and refuse us food or drink for days at a time, accompanied by horrible beatings. And now, I have had enough. I am through with this world and can only hope for peace in my passing. Before I pass on I wonder if you could do a [favor] for me?'
You say, 'What favor?'
Namosa Bubundu slips you a scuffed signet ring, 'Yes, yes. Here is a family heirloom that I have been keeping secret from our captors. If you deliver this ring to my kin, I can die in peace knowing it never fell into their hands. There are rumors that some of my family members have escaped the clutches of these monsters and made their way into a city that floats on water. I hope you understand, friend. Go quickly.'
You receive a Scuffed Signet Ring. Go talk to Pandula Bubundu at +10, -145, +115 on the ship in the Abysmal Sea.
You say, 'Hail, Pandula Bubundu'
Pandula Bubundu says 'What can I do for you? I'm waiting to hear word from the Wayfarer scouts. My niece has been captured by the Muramites and I only wish to discover if she is still alive. I can't take this, not knowing. I would much rather endure a thousand of those beast's whips than be kept in the dark. Please find her for me.'
Give Pandula the Scuffed Signet Ring.
Pandula Bubundu sobs uncontrollably, tears welling up in her eyes, 'So my little one is still out there. This is wonderful news. I can now die in peace. The Wayfarers have transcribed my final wishes onto this parchment. Please deliver this to Namosa.'
Your faction standing with Yunjo Slave Resistance has been adjusted by +1
Your faction standing with Gladiators of Mata Muram has been adjusted by -1
You gain experience!!
You receive Pandula's Final Words. Take these back to Namosa.
Namosa Bubundu gasps, 'What?! Oh no, this isn't good at all. She isn't supposed to die. I am! Quick, go and see Councilman Tentric in Qinimi and let him know what's happening. He has always helped our family when we were in need. If you bring this token he will know I sent you!'
Your faction standing with Yunjo Slave Resistance has been adjusted by +1
Your faction standing with Gladiators of Mata Muram has been adjusted by -1
You gain experience!!
You receive a Token of Understanding. Go find Councilman Tentric in Qinimi at +285, -995, -15, in the southeast hut.
You say, 'Hail, Councilman Tentric'
Councilman Tentric says 'You haven't come to demand something of me, have you? I've been subjected to enough atrocities already. Please leave this old man in peace.'
Give him the Token of Understanding.
Councilman Tentric nods solemnly, 'Hmm . . . I see. So Pandula is contemplating leaving this world. There is no doubt that these are hard times. Our people are strong however, and nothing will truly break our spirit. Please let Pandula know that the gods have not forgotten us. Bring her this holy symbol.'
Your faction standing with Yunjo Slave Resistance has been adjusted by +1
Your faction standing with Gladiators of Mata Muram has been adjusted by -1
You gain experience!!
You receive a Symbol of Faith. Take it to Pandula.
Pandula Bubundu looks quizzically at the symbol and rubs it in her hands. She smiles as if realizing something, 'Ah, Tentric, you are always right. I can't give up on this world or my family. I'm not sure why I was behaving so selfishly. Take this flower to my niece, she will know what it means.'
Your faction standing with Yunjo Slave Resistance has been adjusted by +1
Your faction standing with Gladiators of Mata Muram has been adjusted by -1
You receive a Drakelily. Take it to Namosa.
Your faction standing with Yunjo Slave Resistance has been adjusted by 50.
Your faction standing with Gladiators of Mata Muram has been adjusted by -25.
You have received a character flag!
Namosa Bubundu says 'A drakelily? My aunt grew these in her garden. In fact, I helped her plant some of them myself. She always told me they were a sign of hope. Thank you, ______. I'll inform our people of your kindness.'
Your faction standing with Yunjo Slave Resistance has been adjusted by +1
Your faction standing with Gladiators of Mata Muram has been adjusted by -1
You gain experience!!
Namosa touches your shoulder and gazes at you with pleading eyes. 'I hope this isn't presumptuous of me. You've already done so much. Before you go, I need to ask you for another favor. Turlini is under heavy guard in one of the nearby towers. The Muramites think he's up to something and I'm concerned they may torture or kill him. Please have a talk with Turlini when you can.'
You receive a Crescent Stone Amulet, whose use is not yet known.
Turlini's Revolt
This part can be completed on its own as a side quest for its own rewards, provided you have completed the Namosa's Family portion.
You say, 'Hail, Turlini'
Turlini beams with excitement, 'I recognize you! One of the adventurers we've heard tales about! There are rumors of you destroying the Legion of Mata Muram. Have you come to set us free?'
You say, 'I have come to set you free.'
Turlini says 'Bless you, we're saved! Listen up, friend. I've already formulated a plan to stage a quick and decisive escape, but first we need to get our hands on a complete set of shackle keys. Just a few won't suffice; it must be entire set. If we were to rescue only some of my brethren, those that remain behind would be brutally tortured beyond imagination. Now, I've watched the guards carefully and counted the silvery keys they carry. There are ten in total. Combine the set in this sack and return it to me. I knew you would help!'
You receive Turlini's Key Bag. You now need to collect the 10 keys, which may be obtained as follows:
Combine the 10 keys in the bag to craft a Sack of Silvery Keys. Give this to Turlini.
You have received a character flag!
Turlini fishes a jagged key from the sack and tries it on his manacles. They unlock with a loud snap and slide off his wrists. His expression melts into simultaneous shock and elation. 'YES! We will be freed. Very soon now, these chains will bind my people no longer! And as for you, ______, you will become a legend among my people.'
Turlini can barely contain his excitement. 'This is wonderful news, friend. Freedom is within our grasp! The only problem remaining is the ever-present guards. They are always watching over us. We would need a monumental distraction to buy enough time for me to release everyone. Which is where you come in. One of your kind who goes by the name of Reyna has been taken to the arena and has been tortured daily in front of the Muramite masses. If you were to create enough of a ruckus in the arena trying to free her I think we could make our escape.'
Your faction standing with Yunjo Slave Resistance has been adjusted by +50
Your faction standing with Gladiators of Mata Muram has been adjusted by -25
You gain experience!!
The Great Diversion: Freeing Reyna
Once you have the flag from Turlini, you can start a series of increasingly difficult fights in the coliseum in Riwwi. Talk to "an enslaved yunjo" in the coliseum.
You say, 'Hail, an enslaved yunjo'
an enslaved yunjo says 'It's you! The champion everyone has spoken of! Have you come to defy the Muramites?'
You say, 'I have come to defy the Muramites.'
an enslaved yunjo shouts '______ defies you! Do you hear me? ______ defies you and will destroy your kind!'
An officiator shouts, 'We'll see how defiant ______ is after they have been crushed for our amusement. Send in one of our trained hynids!'
an enslaved yunjo says 'Stand fast and prepare for a fight! They're sending a bloodthirsty beast into the arena to kill you as we speak. If you defeat it, place the head in this sack as proof and return it to Turlini. He is the leader of the resistance and may be able to assist you for helping us.'
At the beginning of each encounter, you get a bag, typically called the Satchel of the XX Battle, where "XX" is numbered from "First" through "Tenth." This will trigger one or more mobs entering the arena. Kill the mob(s), loot the head(s), and combine them into the appropriate satchel. Each battle is a single-group encounter. Anyone outside the group who interferes will cause the Officiators to call the interference unfair, and the interferer will be teleported to the zoneline. After each battle, head back to Turlini and turn in the satchel to receive an upgraded necklace. You may then give the necklace to the slaves in the coliseum to begin the next battle in the series.
If you fail an encounter, you must start over from wave 1. If a mob gates, it is considered a failure.
The ten encounters:
1. Difficulty: easy
--You have looted a Frothing Hynid's Head.--
Turlini gives you an appraising nod, 'Your valiant demonstration in the arena has given us all hope that someone can stand against the Muramites. Please accept this trinket as a token of appreciation from our people.'
You receive Yunjo's Braided Cord.
2. Difficulty: easy
You say, 'Hail, an enslaved yunjo'
an enslaved yunjo smiles, 'You are very strong. If you wish to challenge the Muramites, hand me the item Turlini gave you and I will gain their attention again.'
Hand in Yunjo's Braided Cord.
an enslaved yunjo shouts '______ defies you! Do you hear me? ______ defies you and they will destroy your kind!'
An officiator sneers, 'Then let's have a demonstration, shall we, ______? How to be slaughtered by a rabid animal in front of a captivated audience.'
--You have looted a Gibbering Hynid's Head.--
Turlini gives you an appraising nod, 'Your valiant demonstration in the arena has given us all hope that someone can stand against the Muramites. Please accept this trinket as a token of appreciation from our people.'
You receive Yunjo's Sea Kelp Cord.
Turlini kicks the shackles from their legs. 'Quick, to the exits!'
3. Difficulty: easy
Hand in Yunjo's Sea Kelp Cord.
an enslaved yunjo shouts '______ defies you! Do you hear me? ______ defies you and they will destroy your kind!'
An officiator shouts, 'You've proven amusing so far, ______, but how long can you last? Handlers, send in the cragbeast!'
--You have looted a High Hill Cragbeast's Head.--
--You have looted a Handler Bvekh's Head.--
Turlini gives you an appraising nod, 'Your valiant demonstration in the arena has given us all hope that someone can stand against the Muramites. Please accept this trinket as a token of appreciation from our people.'
You receive Yunjo's Woven Twine Cord.
4. Difficulty: easy
Hand in Yunjo's Woven Twine Cord.
an enslaved yunjo shouts '______ defies you! Do you hear me? ______ defies you and they will destroy your kind!'
An officiator gloats, 'Your little stand is at an end, ______. Prepare to be slaughtered. I will enjoy this thoroughly.'
--You have looted a Pfaaxle's Head.--
Turlini gives you an appraising nod, 'Your valiant demonstration in the arena has given us all hope that someone can stand against the Muramites. Please accept this trinket as a token of appreciation from our people.'
You receive Yunjo's Plaited Hynid-Fur Cord.
Turlini kicks the shackles from their legs. 'Quick, to the exits!'
5. Difficulty: easy
Hand in Yunjo's Plaited Hynid-Fur Cord.
an enslaved yunjo shouts '______ defies you! Do you hear me? ______ defies you and they will destroy your kind!'
An officiator shouts, 'Enough of this, let ______ deal with one of the stoneservants.'
--You have looted a Manipulated Stoneworker's Head.--
Create a Heavy Satchel (identifies as "One heavy head inside") and hand it in.
Turlini gives you an appraising nod, 'Your valiant demonstration in the arena has given us all hope that someone can stand against the Muramites. Please accept this trinket as a token of appreciation from our people.'
Turlini says 'Yes! We have been released! Head to the marshlands.'
You receive Yunjo's Hynid Fang Cord.
6. Difficulty: easy
Hand in Yunjo's Hynid Fang Cord.
an enslaved yunjo says 'It's you! The champion everyone has spoken of! Have you come to defy the Muramites?'
You say, 'I have come to defy the Muramites.'
an enslaved yunjo shouts '______ defies you! Do you hear me? ______ defies you and they will destroy your kind!'
An officiator shouts, 'Graargh! Bring in two stoneservants.'
--You have looted a Misguided Stoneworker's Head.--
--You have looted a Controlled Earthmover's Head.--
Create a Heavy Satchel (identifies as "Two heavy heads inside") and hand it in.
Turlini gives you an appraising nod, 'Your valiant demonstration in the arena has given us all hope that someone can stand against the Muramites. Please accept this trinket as a token of appreciation from our people.'
You receive Pressed Leather Yunjo Sash.
Turlini says 'Yes! We have been released! Head to the marshlands.'
7. Difficulty: medium
Hand in Pressed Leather Yunjo Sash.
an enslaved yunjo shouts '______ defies you! Do you hear me? ______ defies you and they will destroy your kind!'
An officiator shouts, 'This should prove to be very entertaining. How will you manage against controlled stoneservants? I don't think you will manage at all. Farewell, ______.'
--You have looted a Pixtt Master Hviqu's Head.--
--You have looted a Directed Destroyer's Head.--
--You have looted a Dominated Bonecrusher's Head.--
Turlini gives you an appraising nod, 'Your valiant demonstration in the arena has given us all hope that someone can stand against the Muramites. Please accept this trinket as a token of appreciation from our people.'
You receive Spiked Leather Yunjo Sash.
Turlini kicks the shackles from their legs. 'Quick, to the exits!'
8. Difficulty: somewhat hard
Hand in Spiked Leather Yunjo Sash.
an enslaved yunjo shouts '______ defies you! Do you hear me? ______ defies you and they will destroy your kind!'
An officiator laughs, 'Here come the Kyv. It's over now ______'
--You have looted a Qiz's Head.--
--You have looted a Xnoz's Head.--
--You have looted a Dvax's Head.--
Turlini gives you an appraising nod, 'Your valiant demonstration in the arena has given us all hope that someone can stand against the Muramites. Please accept this trinket as a token of appreciation from our people.'
Turlini kicks the shackles from their legs. 'Quick, to the exits!'
You receive Woven Bone Yunjo Sash.
9. Difficulty: even harder
Hand in Woven Bone Yunjo Sash.
an enslaved yunjo shouts '______ defies you! Do you hear me? ______ defies you and they will destroy your kind!'
An officiator roars, 'GAH! Why won't you die?! ______, your time has come to an end. Send in the SLAYER!'
--You have looted a Kizki the Slayer's Head.--
Turlini gives you an appraising nod, 'Your valiant demonstration in the arena has given us all hope that someone can stand against the Muramites. Please accept this trinket as a token of appreciation from our people.'
You receive Silvery Mesh Yunjo Sash.
10. Difficulty: very hard (3 unmezzable ukuns, 3 mezzable aneuks)
Hand in Silvery Mesh Yunjo Sash.
an enslaved yunjo shouts '______ defies you! Do you hear me? ______ defies you and will destroy your kind!'
An officiator shouts, 'I tire of toying with you, ______. Men, kill them. Now.'
--You have looted a Hexxt Skazm's Head.--
--You have looted a Hexxt Lixx's Head.--
--You have looted a Hexxt Nheki's Head.--
--You have looted a Pixtt Kirq's Head.--
--You have looted a Pixtt Mik's Head.--
--You have looted a Pixtt Khark's Head.--
You have received a character flag!
Turlini shouts with joy. 'Aha, you've done it! Thanks to your distractions in the coliseum, the Muramite legion is engulfed in utter chaos. We will take this opportunity to escape. You have saved us all. Oh, I almost forgot! Before I go, take this as a final gift from the Yunjo. It holds much strength, just as you do. Unfortunately I have bad news. Something I could not tell you until now. Reyna passed on a few days ago. Her last request was that I give this to someone who had proven his or her worth. You have more than done that. I wish there were more I could do, but we are masters of shaping stone not life.'
You receive Sash of the Yunjo's Champion.
Turlini says 'I can't wait to be reunited with my family! Let's get out of this place.'
After only a few seconds, Turlini runs out of the tower and despawns, along with the other slaves in the zone. Respawn time for Turlini is several hours (for me it was 6.5 hours)
You get Reyna's Scout Report. Give this to Taminoa Bialu.
Taminoa Bialu says 'Reyna was a skilled scout who had spent many years honing her abilities. Learning that she died so horribly upsets the stomach, but she died trying to help others. Yes . . . that's what we should focus on. This report you have returned will be a great help to us and this reward should help you as well. It was wrapped in the report and appears to be a gem fragment that may fit into the stone Fezbin gave you. Now to the rest of the city. Hopefully we can prevent our other scouts from suffering the same fate as Reyna.'
You have successfully completed a section of the Taelosian City.
You receive A Glowing Gem Shard, which you may combine with A Shiny Socketed Crystal and Vaifan's Clockwork Gemcutter Tools in Vaifan's Experimental Sealer to craft A Glowing Socketed Crystal.
Need all missing dialogues, mob /locs, and faction hits. Reward: Glowing Socketed Crystal
Reward: Sash of the Yunjo's Champion
Breakdown in Communication #4: Ferubi (Normal): Talk to Taminoa Bialu
Taminoa Bialu may be found near Fezbin Fizzles at -35, +60, with whom you must have already completed the preflagging to accomplish this step of the quest.
You say, 'Hail, Taminoa Bialu'
Taminoa Bialu says 'Greetings. You must be one of the adventurers that Fezbin told me about. It is a pleasure to meet such a brave individual. Where are my manners? My name is Taminoa Bialu and I compile all the information from our scouts in the [city] area of Taelosia.'
You say, 'What city?'
Taminoa Bialu says 'Well, it appears the native inhabitants of Taelosia lived in a grand city once. This city is made up of four different areas named in their language. They are [Qinimi], [Riwwi], [Barindu], and [Ferubi]. Based off of early information, we believe each area had a specific purpose. I am still trying to decipher the native language to figure out what the names mean, but going off of visual information I can assume that Qinimi served as their court, Riwwi is where they held games, Barindu was a lush garden, and Ferubi was a central place of worship once. That is about the extent of my information as far as the intended purpose of each area. What they are now used for I can explain in further detail. Which area would you like to hear more about?'
You say, 'What is Ferubi?'
Taminoa Bialu says 'The area called Ferubi was once a Taelosian temple. Now it is a place that reeks of pain and suffering. The invading army has desecrated the temple and the slaves within endure unimaginable torture. Based on the information our scout Smith Rondo sent to me before his disappearance, the invaders use this area to craft weaponry and conduct strange experiments. Smith's ability to sneak in and out of places quickly made him the ideal choice for this job, but like most of our other scouts he eventually got caught trying to reveal a vital piece of information. We have confirmed that he is still alive and I need you to go find him and give him this. It is a special farstone attuned to his aura so only he can use it. Please make haste in your mission, but be careful. You are entering the lion's den and if you are caught, I cringe to think what will happen.'
You receive a Tuned Farstone. You are to attempt to give the stone to Smith Rondo as a means to get him home.
The Corruption of Smith Rondo
Smith Rondo may be found in Ferubi. Give him the farstone.
Smith Rondo says 'While I applaud your effort, I must decline. You see, since I was captured I have been altered by the beings known as ikaav. As a result, my aura has changed, making this farstone useless. I do not know what it is I am becoming, but I will not place the lives of the brotherhood in danger. I have decided to give in to the inevitable and serve these beings. Please tell Taminoa I am sorry, but this is for the best. And please give him this. As I slip deeper and deeper into insanity, I have lost my ability to articulate my thoughts on paper. This is one of my last written reports and I think Taminoa will find it quite interesting.'
You receive a Sealed Report. Head back to Taminoa and give him the report.
Taminoa Bialu says 'Ah. Glad to see you return and report that you found Smith. Let me see, what does it say here . . . oh my, I can't believe this. These beings are truly insane. This is a detailed account of the experiments the Muramites have been conducting on the natives and on Smith. If what is listed here is true, we must find out more about this. It says that this is one of two reports he wrote, so we must assume he still has the other one on him. It also says here that the weapon master has access to the mountain area that leads to a secret way into the temples where they conduct these experiments. Oh, poor Smith. As soon as he figured out what was going on he documented it, hoping that he could somehow get it back to us without them finding out. Hm . . . here at the bottom he gives details about the weapon master. Seems he only enters the Ferubi area to fix the weapons that his four elite guards use. Knowing this, I am sure we can trick him into appearing. You must return to Ferubi and find his elite guards and collect a different weapon from each of them, but remember the weapon has to be damaged. Sounds like this is pretty durable stuff they use, so it may take some time to accomplish this. Either way, once it is done I would suggest giving the pieces to Smith and asking him to help.'
Free Smith Rondo
You have to get four NO DROP weapons parts: Broken Sword Blade from Pxet Elite Blademaster, Jagged Spear Tip from Pxet Elite Spearmaster, Tarnished Knuckles from Pxet Elite Brawler, and Chipped Hammer Head from Pxet Elite Hammermaster.
Gather a raid force and give the four parts to Smith Rondo. This will attract the attention of Weapon Master Vtiink Vzaan himself. Kill him and his apprentices.
The Weapon Master can drop the following loot:
After defeating him, his ghost spawns and is up for a very short period, make sure to hail right after Weapon Master's death. Hail the ghost to receive a flag to bypass the first four trials in the Sewers for zone progression. If you have completed the quest up to this point (including previous subquests), you will receive Rondo's Report. Any number of reports may be received, provided the ghost is still up and the people hailing are fully flagged thus far. You can also trigger the raid if no one is currently doing the quest. If you were not in the raid when the Weapon Master was triggered, the ghost will ignore you.
You say, 'Hail, Smith`s Spectral Memory'
You feel a chill surround your body as a voice enters your mind. 'Thank you for releasing me from an eternity of suffering. Now you must help the others on this continent whose fate I fear is much worse than mine. You must seek out Apprentice Udranda in Barindu. She can help you gain access to the temples beyond the mountain passes.'
The Finale
Turn in Rondo's Report to Taminoa Bialu. You have now finished the city scouting. You receive A Green Colored Gem Shard, which may be combined with A Glowing Socketed Crystal and Vaifan's Clockwork Gemcutter Tools in Vaifan's Experimental Sealer to craft one of four versions of A Green Hued Gemstone (melee, hybrid, caster, priest). Reward: Dark Hide Belt
Reward: Veil of Forgotten Heroes
Reward: Bone Linked Collar
Reward: Blade of Ornate Symbols
Reward: Gleaming Metal Cuffs
Reward: Soft Scale Cap
Reward: Aegis of Discordant Matter
Reward: Muramite Plated Bracer
Reward: Green Hued Gemstone
Reward: Green Hued Gemstone
Reward: Green Hued Gemstone
Reward: Green Hued Gemstone
Breakdown in Communication #5: Sewers (Normal): Talk to Vaifan Cogswin
Vaifan Cogswin may be found near Fezbin Fizzles at -35, +60, with whom you must have already completed the preflagging to accomplish this step of the quest.
You say, 'Hail, Vaifan Cogswin'
Vaifan Cogswin says 'Well, hello traveler. You here to help with the scout problem we've been having?'
You say, 'Yes.'
Vaifan Cogswin says 'Good to hear. I have been going out of my skull trying to tinker another one to find the first. Now that you are here, I can stop that and focus on compiling the information I already have. Let me tell you, being in charge of something like this is very taxing on the nerves. I remember being a young gnome and whenever I tinkered something it worked the first time. Ah, how good it felt to put the Cogswin family emblem on my wonderful creations. Nowadays it seems like everything I make has some intermittent flaw or defect. I might have to accept that I am getting old and a little slow, but I still have the wits to invent. I should stop rambling and get to the point. I am in charge of scouting the mountain areas known as [Tipt], [Vxed], and the [sewers] under the city. Which would you like to know about?'
You say, 'What sewers?'
Vaifan Cogswin says 'According to my records here, the sewers are a pretty vile area. Filled with some strange creatures, I hear. So, being the genius that I am, I came up with a plan to use a prototype clockwork scout I built when we were having problems exploring the catacombs in Mistmoore. He appeared to be working fine. I received constant detailed reports on the sewers and mountain areas until one day it stopped. For some time I tried to make contact with the clockwork, but nothing. I started working on a second one to retrieve the first when Falcin stumbled onto the boat. In his struggle to get back to us he had to make his escape through the sewers. While going through there, he found this. This is the reporting module used by the clockwork scout. It does not look like much now, but you should have seen it when Falcin gave it to me. I have repaired most of the damage in an attempt to access the information stored within, but there are four vital components missing. I need you to go to the four sewer areas and find a timing gear, a rusty spring, an oiled cog, and a processing gizmo. When you have them all, place them inside the gearbox and combine them. Once this has been done, the gearbox should give you a report. Return the report to me.'
You receive a Broken Clockwork Output Gearbox, a 4-slot container.
Repair the Gearbox
You now need to go through each of the four sewer zones and collect the parts mentioned. The Timing Gear drops in the Emanating Crematory off Cryxtetl, Diseased Larva, and Slime Devourer. The Oiled Cog drops in the Lair of Trapped Ones off Blistering Larva, Sludge-Eating Fly, and Rigara the Lost. The Rusty Spring drops in the Pool of Sludge off Distraught Slimesnipper, Festering Sewer Gnat, and Xthid the Undying. The Processing Gizmo drops in the Purifying Plant off Grimy Turepta, Kril V`Lak and Ukun Packleader. You will need to kill many mobs in the zone before the named mobs spawn.
Once you have all four parts, combine them in the Broken Clockwork Output Gearbox.
As you fit each piece into place the small device comes to life. Whirring and clicking, it begins to shake in your hand as a mangled piece of paper slides out of an opening on the front. Then, just as quickly as it started the device goes dead.
You have crafted a Repaired Clockwork Output Gearbox, as well as the Mangled Report you were looking for. Give the report to Vaifan for your reward. Hang on to the Gearbox, as it will be used in a later subquest.
Vaifan Cogswin says 'Grrr, I was afraid of this. Seems without the extra modules working together this one won't function completely. Nonetheless at least it is fixed now and with your assistance we should be able to reassemble the scout and place this module back inside. Take this. I found it in the gearbox when I first received it. Seems like it may have some affinity with the stone Fezbin gave to you. Let me know when you are ready to help out some more.'
Flag: You were successful in helping Vaifan complete her report of the sewer areas.
You receive A Muddy Gem Shard, which you may combine with the appropriate version of A Green Hued Gemstone (melee, hybrid, caster, priest) with Vaifan's Clockwork Gemcutter Tools in Vaifan's Experimental Sealer to craft A Muddy Green Gemstone. Reward: Repaired Clockwork Output Gearbox
Reward: Muddy Green Gemstone
Breakdown in Communication #6: Vxed (Normal): Talk to Vaifan Cogswin
Vaifan Cogswin may be found near Fezbin Fizzles at -35, +60, with whom you must have already completed the preflagging to accomplish this step of the quest.
You say, 'Hail, Vaifan Cogswin'
Vaifan Cogswin says 'Well, hello traveller. You here to help with the problems we've been having with the mechanical scout?'
You say, 'Yes.'
Vaifan Cogswin says 'Good to hear. I have been going out of my skull trying to tinker another one to find the first. Now that you are here, I can stop that and focus on compiling the information I already have. Let me tell you, being in charge of something like this is very taxing on the nerves. I remember being a young gnome and whenever I tinkered something it worked the first time. Ah, how good it felt to put the Cogswin family emblem on my wonderful creations. Nowadays it seems like everything I make has some intermittent flaw or defect. I might have to accept that I am getting old and a little slow, but I still have the wits to invent. I should stop rambling and get to the point. I am in charge of scouting the mountain areas known as [Tipt], [Vxed], and the [sewers] under the city. Which would you like to know about?'
You say, 'What is Vxed?'
Vaifan Cogswin says 'We have discovered that this continent holds many dangerous creatures, including the strange beings of the invading army. Many of these beasts can be found in the mountain area called Vxed. After being severely damaged in Tipt, the clockwork scout made its way back to Vxed to perform self maintenance, but I believe this is where it met its final demise. While the chance is slim, I believe you may be able to salvage enough of the parts from the creatures within Vxed to reassemble the frame. What you will need to find is a flickering finkenheimer, a tarnished sprocket, some uncoiled springs, a greased bolt, and some connection rods. When you have them all place, the sprocket, springs, bolt, and rods in the finkenheimer and bring me the result. I must warn you to be careful though. If these things could stop my clockwork, they must be pretty powerful creatures.'
Collect the Parts
The parts are random drops in Vxed. You need a Flickering Finkenheimer (the container), a Tarnished Sprocket, some Uncoiled Springs, a Greased Belt (Vaifan got confused), and some Connection Rods. Once you have the parts, put them all in the Finkenheimer and hit combine. Note that you must have had the quest assigned to you by Vaifan or the combination will result in nothing:
You have trouble fitting the pieces into the frame correctly. Each attempt ruins the frame a bit more until it crumbles into multiple unsalvageable pieces.
If you had the quest assigned to you, you see this instead:
Linking the pieces together the you create an empty clockwork shell. [sic]
You craft a Clockwork Scout Shell.
The Finale
Give the shell to Vaifan.
Vaifan Cogswin says 'I can't believe you did it. Not a bad job if I do say so myself. You may have a future in tinkering my young friend. Now, if you will give me one second to change a few things and rip this part out, adjust this here, add a couple of these, and there you go, a nice new clockwork frame. Now we just need to collect the rest of the pieces to rebuild him. Oh, and before I forget, here is a reward for helping me out. Let me know if you wish to explore any of the other areas by asking me about them.'
Flag: You were successful in helping Vaifan complete her report of the Vxed mountain area.
You receive A Dusty Gem Shard, which you may combine with A Muddy Green Gemstone and Vaifan's Clockwork Gemcutter Tools in Vaifan's Experimental Sealer to craft A Dusty Green Gemstone. You also receive an Inactive Clockwork Scout Module, "for the rest of the pieces to rebuild him." Reward: Inactive Clockwork Scout Module
Reward: Dusty Green Gemstone
Breakdown in Communication #7: Tipt (Normal): Talk to Vaifan Cogswin
Vaifan Cogswin may be found near Fezbin Fizzles at -35, +60, with whom you must have already completed the preflagging to accomplish this step of the quest.
You say, 'Hail, Vaifan Cogswin'
Vaifan Cogswin says 'Well, hello traveler. You here to help with the scout problem we've been having?'
You say, 'Yes.'
Vaifan Cogswin says 'Good to hear. I have been going out of my skull trying to tinker another one to find the first. Now that you are here, I can stop that and focus on compiling the information I already have. Let me tell you, being in charge of something like this is very taxing on the nerves. I remember being a young gnome and whenever I tinkered something it worked the first time. Ah, how good it felt to put the Cogswin family emblem on my wonderful creations. Nowadays it seems like everything I make has some intermittent flaw or defect. I might have to accept that I am getting old and a little slow, but I still have the wits to invent. I should stop rambling and get to the point. I am in charge of scouting the mountain areas known as [Tipt], [Vxed], and the [sewers] under the city. Which would you like to know about?'
You say, 'What is Tipt?'
Vaifan Cogswin says 'The mountainous areas of this continent hold many dangers within them. Tipt in particular is thick with members of the invading army, dangerous creatures, and the angry spirits of nihil refugees. Looking at the information I have, the clockwork scout tried to take a direct path to the other side of Tipt and had some serious problems. Apparently, it had a run in with some cragbeasts, a pack of ghosts, numerous Muramites, and a native riddlemaster. While he made it pretty far, he took significant damage each step of the way. My last report received for this area stated that it was returning to the Vxed area to recover, but had lost multiple power cells in the process. I need you to retrieve these power cells. They are vital to rebuilding the scout and getting that report. There are five different types of cells, each one is called Vaifan's Power Cell -- named after the most ingenious gnome there is, of course. The cells are named from A to E. When you have collected all of them, place them in this power pack, activate it, and return it to me.'
You receive a Depleted Clockwork Power Pack, a 6-slot SMALL container.
Retrieve the Power Cells
The five cells, named Vaifan's Temporary Power Cell A-E, are rare drops from the mobs mentioned in Tipt: A drops from an enraged maternal cragbeast, B drops from undead nihils, C drops from key-dropping mobs, D is handed to you by Rikabi the Riddler if you solve his riddle, E drops from Kyv Heartstriker Jhiru.
NOTE: See this quest entry for all details about the expedition into Tipt, Treacherous Crags.
Once you have all five cells, combine them in the power pack:
Each battery slides neatly into place as the power pack emits a low whine indicating it is powered up and fully operational.
This produces a "Fully Charged Power Pack". Give this to Vaifan.
Vaifan Cogswin says 'Wonderful. While the power cells were slightly damaged I was still able to increase the strength of the power pack for a short amount of time. This should give the scout just enough power to produce a legible copy the report. Thank you for the assistance, take this I scraped it off the side of the power cells. Looks like it might be able to add some power to the stone you recieived from Fezbin. There are still some areas left to explore, so when you are ready ask me about the next area you want to look into.'
You were successful in helping Vaifan complete her report of the Tipt Mountain pass.
You receive A Dirt Covered Gem Shard, which you may combine with A Dusty Green Gemstone and Vaifan's Clockwork Gemcutter Tools in Vaifan's Experimental Sealer to craft one of four versions of A Dirty Green Gemstone (melee, hybrid, caster, priest). You also receive an Extended Life Power Pack, a Power Pack Adapter, and Clockwork Scout Assembly Instructions.
The above is what you see if you have completed some but not all of steps 5-7. If you have completed all three steps, you see the following:
Vaifan Cogswin says 'Now that we have all the functioning pieces, we can reassemble the scout. Take these instructions and this power pack adapter and return to either mountain area to assemble the scout. I would have you do it here, but I fear he may be unstable and . . . well, let's just say I don't want to put the ship in danger. Please return to me with the report once you have it. I am going to prepare my final report so when you return I can take it straight to Fezbin. Good luck to you.'
Now you must reassemble the Extended Life Power Pack, the Power Pack Adapter, and the Repaired Clockwork Output Gearbox in the Inactive Clockwork Scout Module. This combine only works in Vxed or Tipt, as indicated in the Clockwork Scout Assembly Instructions.
With the final piece in place, the clockwork scout's eyes light up as it comes to life.
Clockwork Scout Model XIII /cons indifferent. As instructed:
You say, 'Access code 040703'
Clockwork Scout Model XIII says 'Verifying password and user identity . . .'
Clockwork Scout Model XIII says 'Identity verified as ______. Processing scout report. Please return report to Vaifan.'
You receive an Outer Regions Scouting Report. Only the person who spawned the scout can get the report. The scout despawns after one minute.
Clockwork Scout Model XIII says 'Power cells low. Shutting down to reserve power.'
Give the report to Vaifan.
Vaifan Cogswin says 'Excellent. It is always wonderful when something you invent works out. This was all I needed to finish up my report to Fezbin. Thank you once again. You have been very helpful. Once again I must reward you with this. When you brought the clockwork frame to me this fell out of it. I think it will go with your stone quite well. Try combining the two together and see what happens. I must say goodbye now.'
Yellow text: Your assistance has helped Vaifan and Taminoa greatly, but L'diava is still in need of assistance.
You get as a reward whatever reward you were supposed to get at the final step of parts 5-7 that you completed. Reward: Dirty Green Gemstone
Reward: Dirty Green Gemstone
Reward: Dirty Green Gemstone
Reward: Dirty Green Gemstone
Breakdown in Communication #8: Yxtta (Normal): Talk to L`diava Rexxen
L`diava Rexxen may be found near Fezbin Fizzles at -35, +60, with whom you must have already completed the preflagging to accomplish this step of the quest.
You say, 'Hail, L`diava Rexxen'
L`diava Rexxen says 'Yes, yes. What is it I can do for you? I am a very busy woman and do not have a moment to waste on just anyone. Are you one of the adventurers sent here by Fezbin?'
You say, 'Yes.'
L`diava Rexxen says 'Very good. You are just in time. I am in need of immediate assistance in the temple areas known as [Yxtta] and the [frightful temple], Kod'Taz. While our scouts have been missing for quite some time, I recently received some information that leads me to believe they may still be alive. Which one we help first is up to you. Which area do you wish to investigate?'
You say, 'What is Yxtta?'
L`diava Rexxen says 'Yxtta is one of three smaller temple areas where a group of natives known as the trusik used to worship a god called Trushar. We do not know who this god is, but we believe he is a false god centered around a belief in natural destruction. Xounii Resnen was the scout assigned to this area. She was given this task because of her expertise in shapeshifting. I told her to take the shape of a trusik native and interact with them to find out more information. She managed to fit in quite well. Perhaps too well. Gradually, reports came less frequently until they eventually stopped. While everyone feared she had suffered the same fate as the other scouts, I think she started to believe she was really a trusik and has abandoned her assignment. What I need you to do is go there and find her. Now, be careful, the trusik are not a friendly race of beings and they are even more irritated by the invasion of the Muramite army. When you find Xounii I fear she may attack you. If this happens, I will not fault you for defending yourself, but if it comes to this I want some form of proof as to what happened.'
Xounii's Journal
Xounii's Journal Page 1 drops randomly from the Primal creatures. It seems that one of these is in fact Xounii, so deeply shapeshifted she forgot she wasn't such a beast. Bring it back to L`diava.
Note: For information about getting past the locked door to the Primal Caves, see this quest entry.
L`diava Rexxen says 'Thank you for returning this to me. I wish the circumstances could have been different, but in honor of her memory, we will use this information to prevent the needless death of any other scouts. Now let me see what is written here. Hm. Seems she stumbled onto a secret ritual of some sort in an underground temple, called Uqua. Looks like the Muramites may be trying to reproduce another tear in space. This does not bode well for anyone. We must find out more about this. I must ask that you return to Yxtta and see if you can find any more of Xounii's entries. I cannot tell you where to start looking, but it seems that the best place to look would be in the caves where you found her. Xounii was very diligent about her reports so she would have written much about this. Try to find four more pieces of her journal entries and return them to me.'
The four pages mentioned are Xounii's Journal Page 2 Left Half (dropped by Primal Arachnid and random spiders), Xounii's Journal Page 2 Right Half (dropped by Pixtt Suir Mindrider and random mobs outside primal caves), Xounii's Journal Page 3 Left Half (dropped by Primal Insect and random insects), and Xounii's Journal Page 3 Right Half (dropped by Primal Reptile and random cragbeasts). Return the four pages to L`diava:
L`diava Rexxen tells you, 'You are truly a blessing from the gods. I thank you for risking your life to help the brotherhood and want to offer you this token of our appreciation. It is an item of dormant power locked within. The only way to unlock this power is to combine it with the stone Fezbin gave to you. Now that we have solved the mystery of Yxtta, I need assistance in Kod'Taz. If you are willing to help please ask me about this area.'
You were successful in helping L'Diava complete her report of Yxtta. Fezbin will be pleased, but there are others who need your help.
You receive A Translucent Gem Shard, which you may combine with one of the four versions of A Dirty Green Gemstone and Vaifan's Clockwork Gemcutter Tools in Vaifan's Experimental Sealer to craft A Translucent Green Gemstone. Reward: Translucent Green Gemstone
Breakdown in Communication #9: Kod'Taz (Normal): Talk to L`diava Rexxen
L`diava Rexxen may be found near Fezbin Fizzles at -35, +60, with whom you must have already completed the preflagging to accomplish this step of the quest.
You say, 'Hail, L`diava Rexxen'
L`diava Rexxen says 'Yes, yes. What is it I can do for you? I am a very busy woman and do not have a moment to waste on just anyone. Are you one of the adventurers sent here by Fezbin?'
You say, 'Yes.'
L`diava Rexxen says 'Very good. You are just in time. I am in need of immediate assistance in the temple areas known as [Yxtta] and the [frightful temple], Kod'Taz. While our scouts have been missing for quite some time, I recently received some information that leads me to believe they may still be alive. Which one we help first is up to you. Which area do you wish to investigate?'
You say, 'What frightful temple?'
L`diava Rexxen says 'Kod'Taz is made up of multiple temples that were once used for worship by the trusik natives. Many of them have since been destroyed or made into strongholds for the Muramite army. Due to the sheer size of this area, we sent a scouting force there to investigate. All of them are still alive, save one, named Kitren Lanom. None of the scouts left in the area know what happened to her or her belongings. Last time they remember seeing her was when she entered the Temple of Tri-Fates in an attempt to pass the temple trial. Please go to Kod'Taz and speak to Kevren Nalavat. He should be able to help you access the three trials. You will have to enter each trial and bring me back anything you find of Kitren's from each temple. Even though the scouts there have searched many times for something, I think a fresh set of eyes may help some. Kevren is the only one who knows you are helping me. Please do not let the others know you were sent by me. I have not yet ruled out the possibility of foul play and if they are aware of your affiliation, it may place you in more danger.'
Kitren's Tattered Cloak may be found in A Pile of Bones, the reward chest at the end of the third Ikkinz trial. Give it to L`diava.
L`diava Rexxen says 'Oh, thank you brave adventurer. We are now one step closer to finding out what happened to Kitren. Now, give me one second to look through the cloak here and . . . here it is, Kitren's notebook. There must be some information here that can help us more. While I read through this, I need you to return to Kevren Nalavat. He believes he may have found more clues to Kitren's whereabouts and since you did such a good job with the trials he believes you may be able to help him. Even though you have proven yourself by defeating the trials, he will not give you what I need unless you help him. When you return to him, show him this letter and it will confirm my trust in you. Hurry now. There no time to waste!'
You receive a Sealed Note. Find Kevren Nalavat at 1020, -1040 and give him the note from L`diava.
Kevren Nalavat says 'Seems you have made quite an impression if you are trusted by L`diava. But don't think that this means you do not have to gain my trust. While you survived the three trials I am still in need of assistance, I some [other tasks] completed, when you have finished them please return to me and tell me you have done all I asked and I will give you what you came here for. If you do not wish to start these tasks right now we do have some time to talk a little [more].'
Asking about the "other tasks" leads you to the standard Kod'Taz flag progression. You do need to complete some of that progression to get the Kod'taz reward:
You say, 'I have done all you asked.'
Kevren Nalavat says 'Indeed you have and your help is greatly appreciated. Take this back to L`diava I believe it has the answers she seeks.'
You receive a Sealed Confession. Take it back to L`diava.
L`diava Rexxen says 'Once again, a job well done. I hear you accomplished the tasks with flying colors. Now let's see what this says. Hm . . . this changes everything. I never suspected something like this, but now that I know, it all makes sense to me. Oh poor Kitren, why didn't you warn me first? Please leave me be. I must take sometime to think. Take this as proof of your accomplishments in Kod'Taz. It possesses a power that you can unlock when you combine it with the stone from Fezbin. Return to me later if you wish to investigate Yxtta.'
Flag: You were successful in helping L`diava complete her report of Kod'Taz. Fezbin will be pleased, but there are others who need your help.
You have succeeded in retrieving all the information the Wayfarers Brotherhood was seeking. Return to Fezbin and tell him you have completed your task so that he can give you your final reward.
You receive A Smoky Gem Shard, which may be combined with A Translucent Green Gemstone and Vaifan's Clockwork Gemcutter Tools in Vaifan's Experimental Sealer to craft one of four versions of a Smokey Green Gemstone (melee, hybrid, caster, priest). Reward: Smokey Green Gemstone
Reward: Smokey Green Gemstone
Reward: Smokey Green Gemstone
Reward: Smokey Green Gemstone
Brewing Collect: Galidnus' Busywork (Normal): Galidnus Corkpopper may be found at -175, +180, +115.
You say, 'Hail, Galidnus Corkpopper'
Galidnus Corkpopper says 'Welcome! Welcome! Hey, I don't suppose you'd like to learn how to brew? Or maybe you already know the trade and you just want to help me out? I've got some busywork to do, and I'd like to get someone else to do it for me. I'd rather spend my time making tea from those wonderful local tea leaves. There's a wild variety that somehow grows in the mountains that I really would like to spend some time working with. Can you help me with my [busywork]?'
You say, 'What busywork?'
Galidnus Corkpopper says 'The local tea can be used for some helpful brews. Of course this means that I have to spend all my time and energy brewing stuff up for the Wayfarers and no time trying new ideas. I really want to investigate this [mountain tea]! It's supposedly growing in harsh terrain, and the properties it displays are definitely magical. So if you are willing to do [some work] for me, I'll reward you with the secret that Yitimis and I have learned about preparing both types of local tea. I would need you to bring me some of the Taelosian Tea that Yitimis can make for you if you bring her Taelosian Tea Leaves.'
You say, 'What mountain tea?'
Galidnus Corkpopper says 'It's amazing that this tea can grow in those mountains. I hear the locals like it a lot and often have it with them. I'd love to have some, and I'll prepare the Taelosian Mountain Tea leaves for you. I'll give you most of the Taelosian Mountain Tea and keep just a bit for myself.'
You say, 'I am willing to do some work for you.'
Galidnus Corkpopper says 'I can definitely use your help. I need some Taelosian Tea for the tasks I want you to do. Give Yitimis some Taelosian Tea Leaves and she can prepare Taelosian Tea for you. If you bring that to me, I can get you doing the busywork. Of course, since I'm asking you to supply the materials, I can reward you sooner than Yitimis will.'
Taelosian Tea Leaves may be foraged or dropped in various Gates of Discord zones. Yitimis Groglenog may be found near Galidnus at -135, +180, +115. Hand in 1 x Taelosian Tea Leaves to receive 2 x Taelosian Tea. Give Galidnus 1 x Taelosian Tea:
Galidnus Corkpopper says 'Let's get you started. Brew us up some Traveler's Tea. Just drop a Small Bundle of Taelosian Tea and a Pinch of Sugar into a brew barrel and combine. The tea it makes is very tasty and very popular with the Wayfarers. Bring the Traveler's Tea to me as soon as you have it.'
You receive 10 x Small Bundle of Taelosian Tea and 10 x Pinch of Sugar. Combine 1 of each in a Brew Barrel.
You have learned the recipe Traveler's Tea!
Traveler's Tea trivials at 31. After doing 10 combines, hand them back to Galidnus unstacked, up to four at a time. After handing them all in, give him another Taelosian Tea to get more ingredients. After handing in around 40 x Traveler's Tea total, the next time you hand in a Traveler's Tea you will see this:
Galidnus Corkpopper says 'Much work to do. Dive right in and brew up some Wayfarer Spiced Tea. Just take a Small Bundle of Taelosian Tea and Wayfarer Spice and combine them in a brew barrel. The result is pretty good! Just bring the tea back to me when you have it ready. Thank you.'
You receive 10 x Small Bundle of Taelosian Tea and 10 x Wayfarer Spice. Combine 1 of each in a Brew Barrel.
You have learned the recipe Wayfarer Spiced Tea!
Wayfarer Spiced Tea trivials at 38. After doing 10 combines, hand them back to Galidnus unstacked, up to four at a time. After handing them all in, give him another Taelosian Tea to get more ingredients. After handing in around 30 x Wayfarer Spiced Tea total, the next time you hand in a Wayfarer Spiced Tea you will see this:
Galidnus Corkpopper says 'You'll have plenty of experience brewing tea before I'm done with you,' Galidnas smiles. 'I need more Bitter Berry Tea. Personally, I can't stand the stuff, but it goes over well with some folks. Just take a Small Bundle of Taelosian Tea and a Bitter Berry and combine them in a brew barrel. Don't worry, you only need one of those berries, they are really bitter! Bring the tea back to me when you're done.'
You receive 10 x Small Bundle of Taelosian Tea and 10 x Bitter Berry. Combine 1 of each in a Brew Barrel.
You have learned the recipe Berry Tea!
Berry Tea (not Bitter Berry Tea as per the dialogue) trivials at 46. After doing 10 combines, hand them back to Galidnus unstacked, up to four at a time. After handing them all in, give him another Taelosian Tea to get more ingredients. After handing in around 40 x Berry Tea total, the next time you hand in a Berry Tea you will see this:
Galidnus Corkpopper says 'Busy work is never done, is it? Well, I need some Rum Tea brewed up. Simple, but wonderful stuff, especially with that new tea. Combine Small Bundle of Taelosian Tea, Wayfarer Spice and an Ounce of Rum in a brew barrel to make this. It's my favorite drink. Bring it right back here to me as soon as you can, please.'
You receive 10 x Small Bundle of Taelosian Tea, 10 x Wayfarer Spice, and 10 x Ounce of Rum. Combine 1 of each in a Brew Barrel.
You have learned the recipe Rum Tea!
Rum Tea trivials at 54. After doing 10 combines, hand them back to Galidnus unstacked, up to four at a time. After handing them all in, give him another Taelosian Tea to get more ingredients. After handing in around 30 x Rum Tea total, the next time you hand in a Rum Tea you will see this:
Galidnus Corkpopper says 'I don't want to work you to death. There are others that can help me. Besides, you've earned your reward. Go talk to lovely Yitimis and she'll give you the secret. Make certain to tell her that you were able to [lend a hand] over here.'
To Yitimis:
You say, 'I was able to lend a hand.'
Yitimis Groglenog says 'You've been just a peach helping out! I don't think I need your help any more, you've already done so much. Let me give you the secret I promised and you go out and enjoy the rest of the day.' Yitimis pulls out several ragged-looking pieces of parchment, most with wine stains that make them almost unreadable. She holds one up for you to look at. It only takes you a minute to grasp what needs to be done to prepare the Taelosian Tea Leaves and the Taelosian Mountain Tea Leaves. In fact, you are certain that if you work at it long enough, you can produce more usable tea with practice.'
This gives you the ability to process Taelosian Tea Leaves and Taelosian Mountain Tea Leaves into Taelosian Tea and Taelosian Mountain Tea respectively. These two types of tea are used in many GoD brewing recipes.
Brewing Freebie: Work for Yitimis (Normal): Yitimis Groglenog is located on the Queen of Thorns in the Abysmal Sea at -135, +180, +115.
You say, 'Hail, Yitimis Groglenog'
Yitimis Groglenog says 'Hail. Brell's blessing on you. Are you, perchance, a brewer or interested in learning the craft? I have a lot of [work] to do here, and I could use some help.'
You say, 'What work?'
Yitimis Groglenog says 'We're very busy just trying to keep up with demand. With all of the new discoveries on Taelosia, we have a lot of visitors, but I'd really like to have some time to look at the native plants. I've been given some samples of the [tea] that grows locally and it has some very unusual properties. I just have not had enough time to investigate. Perhaps you could [lend a hand] with my daily tasks so that I can free up some time to look into this?'
You say, 'What tea?'
Yitimis Groglenog says 'It's aromatic and that's the least of its properties. I have a few dozen interesting ideas I want to try. Unfortunately, the tea requires special preparation before it can be used. I've worked out how to do that and I'd be very pleased if you could bring me some of those Taelosian Tea Leaves. I'll prepare them for you and only keep a small amount for myself. That way we can both try it!'
You say, 'I will lend a hand.'
Yitimis Groglenog says 'Excellent. The mornings are probably the busiest around here. And a Wayfarer's favorite pick-me-up in the morning is called Spicy Sunrise. Just take the Orange Juice and the Wayfarer Spice and combine it in a brew barrel. It will make a tasty drink! Please bring them to me as soon as you can. If you help me out enough, I may be willing to share the secret of preparing Taelosian Teas with you!'
You receive 20 x Orange Juice and 20 x Wayfarer Spice. You also receive a book entitled "Making Sauces." Head to the Brew Barrel (south of Yitimis in the same room, -220, +175, +115) and do the combines. Combine 1 of each ingredient in the brew barrel.
You have learned the recipe Spicy Sunrise!
Spicy Sunrise trivials at 31. After doing each set of 20 combines, hand them back to Yitimis. After handing them all in, say "I will lend a hand" again and she will give you more Spicy Sunrise components until she feels you've made enough (approximately 100).
You say, 'I will lend a hand.'
Yitimis Groglenog says 'Well hello! I can certainly use your help. We need to brew up some coffee. I think we'll make Vanilla Coffee today. Just take the Coffee Beans, the Vanilla Beans and the Flask of Purified Sea Water and combine them in a brew barrel. Please rush back and give me the coffee, we'd like to serve it hot.'
You receive 20 x Coffee Beans, 20 x Vanilla Beans and 20 x Flask of Purified Sea Water. As before, combine 1 of each in a brew barrel.
You have learned the recipe Vanilla Coffee!
Vanilla Coffee trivials at 38. After doing each set of 20 combines, hand them back to Yitimis unstacked, up to four at a time. After handing them all in, say "I will lend a hand" again and she will give you more Vanilla Coffee components until she feels you've made enough (approximately 100).
You say, 'I will lend a hand.'
Yitimis Groglenog says 'Hi! I'm glad you can help. One of the things we have trouble with around here is folks that stay on duty for hour after hour and getting bored. They tend to fall asleep. Well, Galidnus designed a tasty beverage that helps folks stay awake. Though he didn't come up with a very good name for it. He calls it Galidnus' Glad Juice. To make it, just put Orange Juice, Coffee Beans, and Redberry into a brew barrel and combine. Bring them back to me when you've got them ready. Thank you!'
You receive 20 x Orange Juice, 20 x Coffee Beans, and 20 x Redberry. Back to the barrel.
You have learned the recipe Galidnus' Glad Juice!
Galidnus' Glad Juice trivials at 46. After doing each set of 20 combines, hand them back to Yitimis unstacked, up to four at a time. After handing them all in, say "I will lend a hand" again and she will give you more Galidnus' Glad Juice components until she feels you've made enough (approximately 100).
You say, 'I will lend a hand.'
Yitimis Groglenog says 'You sure are helpful! This one is pretty simple, though the ingredients can be expensive enough, I suppose. We need a good stock of Wayfarer Spiced Wine. Just put the Simple Wine and the Wayfarer Spice in a brew barrel and combine them. Bring me the wine and I'll get them into the store room. Thank you for helping me out.'
You receive 20 x Simple Wine and 20 x Wayfarer Spice. You know what to do.
You have learned the recipe Wayfarer Spiced Wine!
Wayfarer Spiced Wine trivials at 54. After doing each set of 20 combines, hand them back to Yitimis unstacked, up to four at a time. After handing them all in, say "I will lend a hand" again and she will give you more Wayfarer Spiced Wine components until she feels you've made enough (approx. 100). When you've turned in enough of those, finally...
You say, 'I will lend a hand.'
Yitimis Groglenog says 'You've been just a peach helping out! I don't think I need your help any more, you've already done so much. Let me give you the secret I promised and you go out and enjoy the rest of the day.' Yitimis pulls out several ragged-looking pieces of parchment, most with wine stains that make them almost unreadable. She holds one up for you to look at. It only takes you a minute to grasp what needs to be done to prepare the Taelosian Tea Leaves and the Taelosian Mountain Tea Leaves. In fact, you are certain that if you work at it long enough, you can produce more usable tea with practice.'
This gives you the ability to process Taelosian Tea Leaves and Taelosian Mountain Tea Leaves into Taelosian Tea and Taelosian Mountain Tea respectively. These two types of tea are used in many GoD brewing recipes.
If your skill is already high enough :
Yitimis Groglenog says 'You've been just a peach helping out! I don't think I need your help any more, you've already done so much. If you have forgotten or want them for posterity, I can give you the [recipes] you used while helping us. Let me give you the secret ...
You say, 'Please give me the recipes.'
Yitimis Groglenog says 'Here you go.'
You have learned the recipe Spicy Sunrise!
You have learned the recipe Vanilla Coffee!
You have learned the recipe Galidnus' Glad Juice!
You have learned the recipe Wayfarer Spiced Wine!
You have learned the recipe Traveler's Tea!
You have learned the recipe Wayfarer Spiced Tea!
You have learned the recipe Berry Tea!
You have learned the recipe Rum Tea!
Chaos Runes (Ancient GoD Spells) (Normal): Reyfin Malakwa may be found on the ship at /waypoint +225, +290, +100.
You say, 'Hail, Reyfin Malakwa'
Reyfin Malakwa stares silently out over the ocean towards the magical wards protecting the ship from the unyielding onslaught of the pounding waves. He jumps back terrorized when he realizes your presence. His visage calms a bit when he senses you mean him no immediate harm. He ponders you timidly for a moment and then leans down and begins drawing something in the sea grime that covers one of the boxes. You study his sketch for a moment and begin to understand that it is a rune of sorts. Three arching lines join in the center to form a sort of Y-shape.
All classes can turn in Chaos Runes to Reyfin Malakwa for a spell or discipline depending upon class. Each class gets one reward. The Chaos Runes is LORE and NO DROP, and has been reported as dropping in Qvic and higher.
Bard - Ancient: Chaos Chant
Beastlord - Ancient: Frozen Chaos
Berserker - Ancient: Cry of Chaos
Cleric - Ancient: Chaos Censure
Druid - Ancient: Chaos Frost
Enchanter - Ancient: Chaos Madness
Magician - Ancient: Chaos Vortex
Monk - Ancient: Phantom Chaos
Necromancer - Ancient: Seduction of Chaos
Paladin - Ancient: Force of Chaos
Ranger - Ancient: Burning Chaos
Rogue - Ancient: Chaos Strike
Shadowknight - Ancient: Bite of Chaos
Shaman - Ancient: Chaotic Pain
Warrior - Ancient: Chaos Cry
Wizard - Ancient: Strike of Chaos
Reyfin Malakwa 's eyes grow wide as you hand him the glowing black rune. He holds the chaos rune in his left hand and begins to speak. Your skin begins to crawl as you recognize the words as the language of the legion. The runes melt into a sticky mass of darkness which seeps out over Reyfin's hands. He tips his head toward your hands and you bring them out in front of you. Without any visible motion from Reyfin, the black mass quivers and slides through the air toward you and settles in your out stretched hands. The goo begins to solidify and your eyes quiver with amazement as the letters begin to form into familiar words on the black stone. Reward: Spell: Ancient: Bite of Chaos
Reward: Spell: Ancient: Burning Chaos
Reward: Spell: Ancient: Chaos Censure
Reward: Spell: Ancient: Chaos Chant
Reward: Spell: Ancient: Chaos Frost
Reward: Spell: Ancient: Chaos Madness
Reward: Spell: Ancient: Chaos Vortex
Reward: Spell: Ancient: Chaotic Pain
Reward: Spell: Ancient: Force of Chaos
Reward: Spell: Ancient: Frozen Chaos
Reward: Spell: Ancient: Seduction of Chaos
Reward: Spell: Ancient: Strike of Chaos
Reward: Tome of Ancient: Chaos Cry
Reward: Tome of Ancient: Chaos Strike
Reward: Tome of Ancient: Phantom Chaos
Reward: Tome of Ancient: Cry of Chaos
Chef Chowderly's Award-Winning Recipes (Normal): Is there a minimum faction/skill level/level required to get this text?
Find Chef Chowderly at location -100, +175, +115, next to Tylida Eraldi, who shows up on /find.
You say, 'Hail, Chef Chowderly'
Chef Chowderly says 'Sorry, friend. I do not mean to be rude, but I am very busy right now cooking a [meal].'
You say, 'What meal?'
Chef Chowderly says 'I must cook for a large portion of the people living here on the ship. Seems they just cannot get enough of my cooking. I am a master at making [tasty tuna dishes] after all.'
You say, 'What tasty tuna dishes?'
Chef Chowderly says 'Are you interested in the culinary arts? If you are, then you must have heard of some of my most famous dishes such as my Seafarer's Tuna-Corn Chowder. You haven't heard of that you say? Hrmph. If you are interested in perhaps learning my award winning recipes, I could use a good assistant. Throgar over there is not much help!' Chef Chowderly gives a cold glance to his assistant Throgar who is standing in a small pile of broken dishes. 'I swear he drops more dishes than he cleans! Anyway, I might have time to teach you some recipes if you [can help] me with something and you have some knowledge of cooking.'
You say, 'I can help you.'
Chef Chowderly says 'First of all I need some more dishes.' Chef Chowderly glances over at Throgar again, who drops a glass on the ground, shattering it into tiny pieces. 'Sigh. I think I will need a lot of dishes. If you can, take this note to my friend Rellix in Rivervale. He owes me a favor and should be able to give you some dishes. Return them to me when you get them.'
You receive a Note to Rellix. Rellix may be found in Rivervale near the /findable Byl Babbinsbort (location -135, -110, -8). Give him the note.
Rellix says 'A note from Chef Chowderly, eh? I haven't heard from him in some time. Hope he is doing well.' Rellix reads the note. 'I do happen to have some spare dishes. Here, take them.'
You gain experience!!
You receive a Case of Dishes. Head back to Chef Chowderly and give him the case.
Chef Chowderly says 'Thanks much. These should last at least a day or so. Take this recipe for my world famous Spicy Tuna Salad Sandwich and see what you can do with it. Once you make one, hand it to me along with the recipe I just gave to you. Now, I don't let just anyone borrow recipes, so please pay attention and do your best.'
You gain experience!!
You receive a Recipe for Spicy Tuna Salad Sandwich, which reads:
Spicy Tuna Salad Sandwich
Combine in an Oven:
One 1 lb. Saltwater Tuna
One Loaf of Bread
Algae Spices
Kelp Garnish
Lettuce
Butter
-Chef Chowderly
Make one (trivial 202) and give it and its recipe scroll to Chef Chowderly.
Chef Chowderly scarfs down the dish you created. 'Nicely done! I can tell it was prepared with great care! Take this recipe for Pan-Seared Orange Tuna. It is a personal favorite of mine. Once you make this dish, hand it to me along with the recipe I just gave to you.' Chef Chowderly returns to his busy pace of cooking.
You gain experience!!
You receive a Recipe for Pan-Seared Orange Tuna, which reads:
Pan-Seared Orange Tuna
Combine in an Oven:
One 2 lb. Saltwater Tuna
Loaf of Bread
Spices
Seaweed Vinegar
Flask of Orange Juice
Cup of Sugar
Non-Stick Frying Pan
-Chef Chowderly
Make one (trivial 215) and give it and its recipe scroll to Chef Chowderly.
Chef Chowderly scarfs down the dish you created. 'This is great. Your dish was flavorful, cooked just right, and I can tell you know your tuna. Take this recipe for Taelosian Tuna Kabobs. Once you make this dish, hand it to me along with the recipe I just gave to you.' Chef Chowderly returns to his busy pace of cooking.
You gain experience!!
You receive a Recipe for Taelosian Tuna Kabobs, which reads:
Talosian [sic] Tuna Kabobs
Combine in an Oven:
One 3 lb. Saltwater Tuna
Skewers
One Spotted Mushroom
One Habanero Pepper
Ground Garlic
-Chef Chowderly
The mushroom you need is "A Spotted Mushroom," dropped in Dawnshroud Peaks. Make one set of kabobs per the recipe (trivial 228) and give it and its recipe scroll to Chef Chowderly.
Chef Chowderly scarfs down the kabobs. 'Quality work! The tuna was cooked just right, the mushrooms were tender, and you added just enough peppers. I am impressed. Keep up the good work. Take this recipe for my Delightful Tuna Cakes. Once you make this dish, hand it to me along with the recipe I just gave to you.' Chef Chowderly returns to his busy pace of cooking.
You gain experience!!
You receive a Recipe for Chowderly's Delightful Tuna Cakes, which reads:
Chowderly's Delightful Tuna Cakes
Combine in an Oven:
Two 1 lb. Saltwater Tuna
Ground Garlic
Three Shissar Eggs
Bread Crumbs
One Water Flask
One Cup of Flour
-Chef Chowderly
Shissar Eggs drop from various shissar in Ssraezsha Temple. Make one batch of cakes (trivial 242) and hand it and its recipe scroll to Chef Chowderly.
Chef Chowderly joyfully eats the cakes. 'This is great! You certainly know how to make this dish. Shissar Eggs are not easy to prepare properly, but you did an excellent job. We might have a master chef in the making here! I think these dishes have been too easy for you. From here on out, the recipes are going to be harder to make. I think you can handle it though. Take this recipe for Taelosian Tuna a la King. Once you make this dish, hand it to me along with the recipe I just gave to you.' Chef Chowderly returns to his busy pace of cooking.
You gain experience!!
You receive a Recipe for Taelosian Tuna A La King, which reads:
Talosian [sic] Tuna A La King
Combine in an Oven
One 4 lb. Saltwater Tuna
One Bottle of Milk
One Cup of Flour
One Phoenix Egg
One Mushroom
Spices
Vegetables
-Chef Chowderly
Phoenix Eggs drop in Doomfire, the Burning Lands and Eryslai, the Kingdom of Wind. The mushroom is A Mushroom, which drops in Dawnshroud Peaks off the shrooms. Make one batch of Taelosian Tuna A La King (trivial 268) and give it and its recipe scroll to Chef Chowderly.
Chef Chowderly joyfully eats the dish you prepared. 'This dish truly was fit for a king. Very nice work. Your training is almost complete. Take this recipe for Tuna Rice Surprise. Once you make this dish, hand it to me along with the recipe I just gave to you,' Chef Chowderly returns to his busy pace of cooking.
You gain experience!!
You receive a Recipe for Tuna Rice Surprise, which reads:
Tuna Rice Suprise [sic]
Combine in an Oven:
One 4 lb. Saltwater Tuna
Rice
Mature Cheese
Butter
Bread Crumbs
Jug of Sauces
Fish Oil
Wok
`-Chef Chowderly
Make one batch (trivial 282) and give it and its recipe scroll to Chef Chowderly.
Chef Chowderly joyfully eats your meal. 'Excellent work, my friend. I guess you want to know what the surprise part of the dish is? Well, there isn't one really. It is always nice to include the word surprise in at least one of your dishes! That is a tip you should never forget! Take this recipe for Spicy Tuna Sunrise Steak. Once you make this dish, hand it to me along with the recipe I just gave to you.' Chef Chowderly returns to his busy pace of cooking.
You gain experience!!
You receive a Recipe for Spicy Tuna Sunrise Steak, which reads:
Spicy Tuna Sunrise Steak
combine in an Oven:
One 4 lb. Saltwater Tuna
Vegetables
One Small Bottle of Soy Sauce
Ground Garlic
One Celestial Essence
Spices
One Webbed Tail Fin
Non-Stick Frying Pan
`-Chef Chowderly
Webbed Tail Fins drop in the Plane of Nightmare off of slarghilugs. Make one batch (trivial 295) and give it and its recipe scroll to Chef Chowderly.
Chef Chowderly quickly engulfs your steak. 'Your dish was fiercely spicy and cooked just right. Very nice work. Your training is now complete. I present to you your rewards -- Chowderly's Grand Bowl and most importantly, a book containing all my great recipes! It has been a pleasure teaching you! I now send you forth into the world, hoping you feel confident with your tuna related cooking skills!'
You gain experience!!
You receive Chowderly's Grand Bowl and Chef Chowderly's Tuna Recipe Compilation, containing all the recipes used in the quest. Reward: Chowderly's Grand Bowl
Reward: Chef Chowderly's Tuna Recipe Compilation
Cleric Abysmal Armor (Normal): Dakkamor Ironspirit may be found at -175, +75, +95.
You say, 'Hail, Dakkamor Ironspirit'
Dakkamor Ironspirit says 'Hail there! Welcome aboard! There is never enough time to care for all the ill in such a place. You wouldn't happen to be a cleric as well would you?'
You say, 'I am a cleric'
Dakkamor Ironspirit says 'Mayhaps we can help each other out. You keep going about being a good helpful cleric, so I have fewer sick folk to tend to, and I will help you out in the equipment department. If you are in need of new equipment such as helm, legplates, chestplate, bracer, vambraces, gloves, or pair of boots let me know.'
You say, 'What pair of boots?'
Dakkamor Ironspirit says 'Bring me back a sheet of infused Muramite metal along with a Muramite Boot Armor and I believe I can rework them into something quite fine for you. If you need help in the infusing process, just talk to Nalasrine.'
You say, 'What bracer?'
Dakkamor Ironspirit says 'A bracer is rather simple to reshape. If you speak to Nalasrine about her findings, she may be able to help you infuse some Muramite metal to strengthen it. One sheet of infused Muramite metal along with a Muramite Bracer Armor should be sufficient for me to rework it for you.'
You say, 'What chestplate?'
Dakkamor Ironspirit says 'Ahh, a chestplate. Who doesn't want a new chestplate? I can craft one for you fairly easily if you do the legwork. Travel into the hostile areas and bring back two sheets of Muramite Metal. Make sure to speak to Nalasrine about infusing it. Bring me those sheets along with a Muramite Chest Armor and a chestplate you shall have.'
You say, 'What gloves?'
Dakkamor Ironspirit says 'In order for me to craft you some gloves, you need to find some more Muramite metal. I am sure Nalasrine can assist you with infusing the metal, which needs to be done before you bring it back to me. Bring me an infused Muramite metal sheet, and a Muramite Glove Armor.'
You say, 'What helm?'
Dakkamor Ironspirit says 'I can craft a Muramite helm into something suitable for you. Nalasrine has managed to form a powerful compound that reinforces some native materials. Bring me a Muramite Helm Armor piece and some Muramite metal that has been infused with Nalarsine's mixture.'
You say, 'What legplates?'
Dakkamor Ironspirit says 'Reshaping a pair of Muramite legplates into a pair that would serve you well should be easy. Bring back a pair of Muramite Greaves and two sheets of Muramite metal. Give only the greaves to me for shaping, once I am done with that you will need to take the metal and greaves to a forge. Don't forget to infuse the metal with the mixture from Nalasrine before you take it to the forge.'
You say, 'What vambraces?'
Dakkamor Ironspirit says 'Vambraces? Hmm, find some Muramite metal and some Muramite Sleeve Armor. Once you have these things talk to Nalasrine about infusing the metal. When it is strong I should be able to craft you some nice vambraces.'
Nalasrine Twinklecoil is located in the next room at -240, -5, +100.
'Hail, Nalasrine Twinklecoil'
Nalasrine Twinklecoil says 'Salutations! It is great to see so many eager travelers out and about. How are you enjoying our little city here? I have been quite busy myself. There are so many interesting things to learn about these strange beings that inhabit Taelosia. Their armor in particular is most interesting. I have developed some intriguing compounds. Let me know if you are interested in such things before I just prattle on!'
You say, 'I am interested.'
Nalasrine Twinklecoil says 'Oh, good. Well let me see. Basically, I have been studying the armor that our explorers have been bringing back from their adventures. While it is a bit strangely shaped, as these creatures that seem to reside here are, I have found that by strengthening some native materials it can be reworked into rather fine armor for the likes of you and me.'
You say, 'What armor?'
Nalasrine Twinklecoil says 'If you are looking into having some armor made, you definitely will need to use my infusions. They are a bit pricey, however they are difficult to make and well frankly, I am the only one who can! Use the plate solvent on plate armor, chain solvent on chain, tanning solution on leather, and silk strengthener on silk. All rather intuitive isn't it? Simply take a look at the different types I have for sale.'
Muramite armor begins dropping in Qvic and above. Bring back the appropriate piece of "Muramite XXX Armor" and turn it in to Dakkamor Ironspirit to get a class-specific, no-stat "Reworked Muramite XXX."
Craft a Muramite Metal Sheet by combining a Meldstone, Water Flask, and Smithy Hammer in a forge. This has a high trivial (282) and a high minimum smithing requirement (in the 240s).
Buy Nalasrine's Superior Plate Solvent from Nalasrine Twinklecoil for around 10,500 pp. Combine the solvent with the Muramite Metal Sheet in a forge (no-fail combine). This results in a NO DROP piece of Infused Muramite Metal.
Combine the Infused Muramite Metal with your piece of Reworked Muramite XXX armor in a forge to receive your quest reward (no-fail combine). Reward: Dakkamor's Bracer of the Divine
Reward: Dakkamor's Gauntlets of the Divine
Reward: Dakkamor's Boots of the Divine
Reward: Dakkamor's Helm of the Divine
Reward: Dakkamor's Vambraces of the Divine
Reward: Dakkamor's Chestplate of the Divine
Reward: Dakkamor's Legplates of the Divine
Cristov's Wine (Normal): Take the Cristov's Red Wine that you get from the Freeport Stout quest and give it to Cristov to get a recipe. Reward: Cristov's Schematics
Discord Skin Samples (Normal): Alexsa Whyte may be found at -125, -40, 145.
You say, 'Hail, Alexsa Whyte.'
Alexsa Whyte says 'Greetings traveler, my name is Alexsa and I am currently looking in to collecting samples from the strange beings that make up the Legion of Mata Muram ranks. Our initial encounters with them revealed that each one is innately resistant to certain types of weapons and weak against others. So, by order of Morden, we must gather skin samples from each race and examine it. Thanks to our tinkering sister, Vaifan, I now have a device which can readily examine samples. However, with news of our scouts missing and our resources being spread so thin, retrieving these samples are impossible for us. Since you have taken the time to listen, I am wondering if you would be willing to help?'
You say, 'Yes.'
Alexsa Whyte says 'Oh wonderful! You don't know how helpful this will be. Take this device. It is what we use to examine samples. When you defeat the Muramite, remove his tongue, place it inside of here and combine it with some distilling salts. Distilling slats can be found along the shores of Natimbi. Once you have combined the ingredients, it will give you a final sample which I will need you to return to me when you get the chance. Each time you hand a sample, I will be able to reveal to you the innate strengths and weeknesses for that race. If you are successful at recovering a sample from every different race that has come through the portal, then I will talk to Morden about giving you a reward.'
You receive Vaifan's Pocket Sampling Device. At this point, anything else said is replied to with:
Alexsa Whyte says 'There is nothing more I can tell you, please take the item you received and get some samples for me.'
The item you're looking for is actually called Distilled Salts, and is a ground spawn on the beaches of Natimbi. Some known locations are:
-660, -545
+1300, -625
+1475, -900
+957, +918 (Northern shore)
-1017, -1519 (Western shore)
+625, -1305 (Eastern Shore)
-909, -1474 (Northern shore)
+533, +665 (Eastern shore)
Map File locations:
You have to gather tongues from several different types of monsters from the Gates of Discord and combine them in the device with the salts to craft "A XXXX Sample," where "XXXX" is replaced by the type of creature the tongue came from. Handing these samples in to Alexsa gives you information about the strengths and weaknesses of that type of creature.
A Kyv Sample
Alexsa Whyte says 'Ah yes, the kyv. These stealthy beings are quite elusive. The fact that you were able to recover a sample from one of them is quite an accomplishment. Now, let's see . . . it appears that the kyv have no noticeable weapon weaknesses or resistances, but we do know they have the ability to deflect incoming arrows and thrown objects. It would seem that they are also resistant to poison based incantations, and quite weak to magic based spells. You're doing great, but there are more samples left to be found. Please get them to me as soon as you can.'
A Mastruq Sample
Alexsa Whyte says 'Great sample! It looks like this was taken from a being with a thickened hide. This particular being is called a mastruq and seems to be quite resistant to blunt objects, but an arrow or slashing weapon would get through that hide quite easily. Because of their thick hides cold based elemental magic would be quite ineffective while the opposite would hold true for fire magic. You're doing great, but there are more samples left to be found. Please get them to me as soon as you can.'
A Noc Sample
Alexsa Whyte says 'Looks like this came from the body of the race of beings called the noc. While their bony frames make them quite weak against crushing damage, their plated chests protect any major organs, reducing the effectiveness of arrows or slashing weapons. It would appear that their flesh is diseased which makes them resistant to disease based spells but their thin skin means that cold might be quite affective against them. You're doing great, but there are more samples left to be found. Please get them to me as soon as you can.'
A Ratuk Sample
Alexsa Whyte says 'This looks like a sample from the brutish ra'tuk. These large beasts wield their axes adeptly and seem to have no major weaknesses save magical based spells. Because of their strange body makeup magic tends to affect them more then other spell types. You're doing great, but there are more samples left to be found. Please get them to me as soon as you can.'
An Aneuk Sample
Alexsa Whyte says 'These odd-looking floating beings interest me the most. They seem to be quite adept with magic making them strong against magical incantations. You're doing great, but there are more samples left to be found. Please get them to me as soon as you can.'
An Ikaav Sample
Alexsa Whyte says 'These snakelike beings are very deadly. The scales on their lower body are all but impervious to slashing weapons, but a well-placed arrow could do some serious damage. They are masters of magical energy making their defenses against such spells very good. However they do seem to be weak against elemental magic like cold. You're doing great, but there are more samples left to be found. Please get them to me as soon as you can.'
An Ixt Sample
Alexsa Whyte says 'These centaur-like beings are quite bloodthirsty. They appear to be bred for fighting. Their fur covered lower half makes them very resistant to the element of cold but while that fur can protect them from one element it also makes them very vulnerable to fire. You're doing great, but there are more samples left to be found. Please get them to me as soon as you can.'
An Ukun Sample
Alexsa Whyte says 'An excellent find here! It appears that this was retrieved from one of the beings called an ukun. They have frail bodies but their blood is a deadly poison. This would imply that they are probably very resistant to poison. You're doing great, but there are more samples left to be found. Please get them to me as soon as you can.'
Once you've collected the eight samples:
Alexsa Whyte says 'Now that I have all of the basic samples I can add all of my research into this tome and give it to you.'
Alexsa Whyte says 'While we still need samples from both the force commander and his lieutenant, what you have given me so far warrants a reward of some kind. When you have recovered samples from both of the additional races I mentioned I will be able to reward you with something much better.'
At this point you receive Alexsa's Research Notes, a book containing the information given to you thus far.
Zun'muram Sample
Alexsa asks for the Tongue of the Zun'muram, which drops off various Zun`Murams in Ferubi, Txevu, and Tacvi.
Alexsa Whyte says 'A two-headed beast built for destruction. This creature is quite powerful, as I am sure you found out when you met it. While it does not appear to have any resistances or weaknesses, this sample should reveal some more information about its particular race. You're doing great, but there are more samples left to be found. Please get them to me as soon as you can.'
Tunat'Muram Sample
You also need a Tongue of the Tunat'muram, which drops off the boss of Tacvi and all of Discord: Tunat`Muram Cuu Vauax.
Alexsa White says 'This is unbelievable, you retrieved a sample from the army's leader and you still live? You are truly a great adventurer. I must get this sample to our mages quickly. We must do some extended testing as we have not had any information on him till now. You're doing great, but there are more samples to be found. Please get them to me as soon as you can.'
After you have handed in all the samples:
Alexsa Whyte says 'This is unbelievable, you retrieved a sample from the army's leader and you still live? You are truly a great adventurer. I must get this sample to our mages quickly. We must do some extended testing as we have not had any information on him till now. You have collected all the samples we need and I thank you for the assistance. I am indebted to you and with approval given by Morden himself I want you to take this, hopefully it will help you in your future adventures. Good day and good luck.'
You receive an Assistant Researcher's Symbol.
Need missing drop information. Reward: Assistant Researcher's Symbol
Druid Abysmal Armor (Normal): You say, 'Hail, Gaelin Valekeeper'
Gaelin Valekeeper says 'Greetings ______, I am looking for those protectors of the woodland, the most noble of all classes, the [druid]. You wouldn�t happen to be one would you?'
You say, 'I am a druid'
Gaelin Valekeeper says 'Wonderful, it brings me joy to see fellow naturewalkers. For one such as yourself, I may be able to assist. If you are in need of new equipment such as [cap], [leggings], [tunic], [bracer], [sleeves], [gloves], or [sandals] - let me know.'
You say, 'What bracer?'
Gaelin Valekeeper says 'A bracer is rather simple to reshape, if you know what you�re doing. Bring me back Muramite Bracer Armor piece and I will get to work on it. You will also need a section of infused Muramite leather to finish the bracer in a loom. Talk to Nalasrine if you still some help infusing the leather.'
You say, 'What cap?'
Gaelin Valekeeper says 'I should be able to reform Muramite Helm Armor into something quite useful to you. Explore these lands until you find some Muramite leather padding. Talk to Nalasrine about infusing it, then bring piece it together with your new helm from me in a loom.'
You say, 'What gloves?'
Gaelin Valekeeper says 'I can make you a wonderful pair of gloves. Take the time to dig up some Muramite leather and have Nalasrine assist you with infusing it. Bring me Muramite Glove Armor and I can reshape it into something that you can use. Strengthen the gloves by reinforcing them with the infused leather in a loom, and a fine pair shall be yours.'
You say, 'What leggings?'
Gaelin Valekeeper says 'Reforming some Muramite greaves into a pair of leggings that would serve you well should be no great feat. Bring me a pair of Muramite Greaves and I will get to work on that. To finish your leggings you will also need to obtain two pieces of Muramite leather padding. Speak to Nalasrine about infusing it, then place the leather pieces and leggings in a loom to work them together.'
You say, 'What sandals?'
Gaelin Valekeeper says 'Soft, supple boots are my specialty. Bring me back Muramite Boot Armor and I believe I can rework them into something quite fine for you. Once I�ve reworked them, you will need to take a section of infused Muramite leather along with the new boots and reinforce them in a loom. If you need help in the infusing process, just talk to Nalasrine.'
You say, 'What sleeves?'
Gaelin Valekeeper says 'Some new sleeves? Indeed, arm protection is important. Venture into these strange lands and find some Muramite Sleeve Armor. Bring the armor piece to me and I will get to work on refitting it for you. Once you have a piece of Muramite leather padding, talk to Nalasrine about infusing the it. The new sleeve from me can be easily stitched up in a loom with the infused Muramite leather.'
You say, 'What tunic?'
Gaelin Valekeeper says 'A tunic! Of course. Such a thing of beauty! I can craft one for you fairly easily if you do the legwork. Travel into the hostile areas and bring back two sections of Muramite leather and Muramite Chest Armor. Make sure to speak to Nalasrine about infusing the sections of leather. Bring me the chest piece for reworking, then simply weld together the new chest and leather in a loom.'
Nalasrine Twinklecoil is located in the next room.
You say, 'Hail, Nalasrine Twinklecoil'
Nalasrine Twinklecoil says 'Salutations! It is great to see so many eager travelers out and about. How are you enjoying our little city here? I have been quite busy myself. There are so many interesting things to learn about these strange beings that inhabit Taelosia. Their armor in particular is most interesting. I have developed some intriguing compounds. Let me know if you are interested in such things before I just prattle on!'
You say, 'I am interested.'
Nalasrine Twinklecoil says 'Oh, good. Well let me see. Basically, I have been studying the armor that our explorers have been bringing back from their adventures. While it is a bit strangely shaped, as these creatures that seem to reside here are, I have found that by strengthening some native materials it can be reworked into rather fine armor for the likes of you and me.'
You say, 'What armor?'
Nalasrine Twinklecoil says 'If you are looking into having some armor made, you definitely will need to use my infusions. They are a bit pricey, however they are difficult to make and well frankly, I am the only one who can! Use the plate solvent on plate armor, chain solvent on chain, tanning solution on leather, and silk strengthener on silk. All rather intuitive isn't it? Simply take a look at the different types I have for sale.'
Muramite armor begins dropping in Qvic and above. Bring back the appropriate piece of "Muramite XXX Armor" and turn it in to Gaelin Valekeeper to get a class-specific, no-stat "Reworked Muramite XXX."
Craft a Muramite Leather Padding by combining by combining a Meldstone and some Snake Scales in a loom. This has a high trivial (282) and a high minimum smithing requirement (in the 240s).
Buy Nalasrine's Enforcing Tanning Solution from Nalasrine Twinklecoil for around 10,500 pp. Combine the solution with the Muramite Leather Padding in a loom (no-fail combine). This results in a NO DROP piece of Infused Muramite Leather.
Combine the Infused Muramite Leather with your piece of Reworked Muramite XXX armor in a loom to receive your quest reward (no-fail combine). Reward: Gaelin's Tunic of Woodlands
Reward: Gaelin's Woodland Gauntlets
Reward: Gaelin's Woodland Bracer
Reward: Gaelin's Woodland Cap
Reward: Gaelin's Woodland Sandals
Reward: Gaelin's Woodland Sleeves
Reward: Gaelin's Leggings of Woodlands
Druid Epic 2.0: Staff of Everliving Brambles (Normal): If you have the Staff of Living Brambles (druid epic 1.5):
Chapter 1 - The Strange Drawing and Yuisaha
Go to Abysmal Sea and find Reyfin Malakwa at +225, +285, +98.
You say, 'Hail, Reyfin Malakwa'
Reyfin Malakwa stares silently out over the ocean towards the magical wards protecting the ship from the unyielding onslaught of the pounding waves. He jumps back terrorized when he realizes your presence. His visage calms a bit when he senses you mean him no immediate harm. He ponders you timidly for a moment and then leans down and begins drawing something in the sea grime that covers one of the boxes. You study his sketch for a moment and begin to understand that it is a rune of sorts. Three arching lines join in the center to form a sort of Y-shape.
The bedraggled Taelosian refugee looks up at you after drawing the symbol and looks you directly in the eyes for the first time. He seems to draw strength from your presence and you sense that he feels the power of nature that you carry. He smiles weakly at you and then bends down and erases the symbol by smearing around the surrounding grime. He then draws a new symbol. This symbol is much more complicated, it is an arch with rods protruding from either side at the base. The rod to the right splits into four branches, the one on the left ends in a swirl. He looks up at you with a pleading look in his eyes as he hands you a small bag that appears to be made from his own clothing.
You receive a Ragged Cloth Bag. Forage 2 Rune Fragments from Barindu or Ferubi. They are LORE but there are two different versions, which identify as "A part of a runed stone" and "A part of a rune-carved stone."
Next, head to Qinimi. Find "a broken ritesdancer" in the houses to the right of Natimbi zone-in, at -355, -1065. The house should be the one furthest to the right of the first ones. You have to be careful because there's a Noc inside and a few wanderers, so you need to do this while getting hit, or cleverly pacify everything. NOTE: If the aforementioned mob does not respond, there may be "a melancholy architect" that will talk to you.
You say, 'What about the rune fragments?'
If your faction (with what?) is too low:
The worn Taelosian looks up at you discretely, as if looking at you directly would cause physical pain. She shyly hands you a small, worn bag and what appears to be an animal fang. She then holds up six fingers and points at the fang, then points at herself. She then turns quickly away and proceeds to act as if you are not there.
You receive a Threadbare Cloth Bag and an Undamaged Noc Fang. Collect 5 more Undamaged Noc Fang and combine all six in the bag to craft a Closed Cloth Bag. Give the bag to the ritesdancer.
If your faction is good enough or you did the above steps:
The worn Taelosian looks up at you defiantly. She studies you a moment and nods. Whatever judgment she was making about you, you seem to have passed. She reaches into her ragged clothing and pulls out a small hunk of rock and hands it to you. She then quickly returns to work.
You receive a THIRD rune fragment, which identifies as "A part of a rune-carved rock."
Return to Reyfin in the Abysmal Sea. Combine the three rune fragments in the Ragged Cloth Bag to craft a Wrapped Cloth Bag (can someone confirm that both this combine and the previous one result in a Wrapped Cloth Bag? if not, what does the first combine produce?), which you should give to him.
Reyfin Malakwa looks almost delighted, certainly happier than he has been in years. He smiles and raises his arms, both hands tightly clenching the rune fragments you have recovered. A small burst of magical energies pops off his hands. He lowers his arms and holds out to you the rune, reformed. He then speaks a single word to you, 'Yuisaha.'
You receive a Rune of Yuisaha.
Go to Nedaria's Landing and find Historian Finrazel at +1080, +1505.
You say, 'Hail, Historian Finrazel'
Historian Finrazel says 'Well hello there. I hope all is well with you, friend.'
You say, 'What of Yuisaha?'
Historian Finrazel says 'Where did you hear that name? How do you know it?'
Give him your Rune of Yuisaha.
Historian Finrazel says 'Well, this is an amazing find! I didn't think any of his runes survived the invasion.' The historian cleans the rune with a special solution, then hands it back to you. 'Let me tell you what I know of Yuisaha. He was a great rain spirit, perhaps the greatest patron of the Taelosians. He was manifested when the Muramites invaded Talosia so long ago. He was captured by the army and brought back to the Plane of Discord. What happened to Yuisaha then is hard to say, but there is a separate story of a powerful rain spirit that was frozen during a battle and shattered. The story claims that the frozen shards of the spirit were divided among the leaders of the winning army. Where they have gone since then, or if they still exist, nobody can tell. Do you really [plan to find] him?'
You say, 'I plan to find him.'
Historian Finrazel says 'Then you'll need this. I use it to store magical potions, but it might work for holding frozen pieces of a greater rain spirit.' He shrugs. 'I hope so, anyway. I don't exactly see a lot of frozen rain spirits.' He smiles. 'I wish you luck, friend. Rescuing such a being would be a boon for all of Norrath.'
You receive a Thick Leather Bag, a 4-slot MEDIUM container.
Chapter 2 - The Four Shards
The four shards can be done in any order.
1. Head to Nobles Causeway. Look for the Ukun Packleader camp. You can find it by tracking the only Aneuk in zone. Behind this Aneuk is a trench with a canyon. Don't go down, instead make a left north. You will see Bazu Scavenger wandering around. He is snareable and rootable and doesn't summon. Once he's dead loot a Frost Shard.
2. Head to Dranik's Scar. Go near -850, +1075. Tranlinor the Maimed will spawn. He is a noc that quads for 800, summons and has a single rampage. So you need a friend or two for him. Once he's dead loot a Wind Shard.
3. Head to Wall of Slaughter. You need a few groups for this guy and some mezzers. Tell your raid to go to loc +265, +460, on top of the castle. North of Pyrique Redwing. At this point some mobs will pop when you get near. Be sure to indicate to your raid/groups to clear the area first from trash mobs before you pop your named.
The mobs are 2 "a nervous guardian" and the main mob which is "a retired soldier". You will have to kill his two nervous guardians for the main mob to "awaken" and agro. Once they are dead, a retired soldier will become Lightning Lord. He hits for about 1200 max, summons of course, doesn't rampage and he can be shaman slowed. He spawns 4 to 6 unmezzable but slowable-by-shaman adds called "Lightning Loyalists." These adds will give a complete heal to the named and die/disappear after they do it, so either kill them before they sacrifice themselves or just burn the named while he CH's while mezzing/offtanking adds.
Take him down and loot a Rain Shard. A chest may spawn with additional loot.
4. Head to Qinimi. In the West part of the zone, you will find a shrine (-735, -890, 28 -- inside the first building in the southeast all the way to the back). Approach it and three mobs will spawn: Mastruq Commander Gorlakt, Spiritlord Mind and Spiritlord Body. This is a raid fight for sure. You need strong people, probably 3-4 groups of Time/Qvic people, and you need good healers and a good tank.
This fight goes similarly to the WoS one, but with a twist. Spiritlord Body procs Body Warp, Spiritlord Mind procs Mind Warp. Both the Spiritlords hit for 1500, can be shaman slowed and they are tethered/leeched. Once you kill one, Gorlakt will come alive and will inherit the AE of that which you killed first. Gorlakt also hits for about 2800-3000 and rampages.
Your best strategy is this: bring both guardians down to low health, then kill BODY first so Gorlakt takes his lifetap, kill the other fast. Then put your MT defensive on Gorlakt. Heal up, and since the lifetap can be interrupted, you will not have any AE issues. Just concentrate all healing on the tank and dps it. Once completed the event will yield Spirit Shard. A chest can spawn with additional loot.
Once you have all 4 Shards. Put them in your Thick Leather Bag and combine them. The result is Synched Leather Bag.
Take this to Historian Finrazel in Nedaria's Landing.
Historian Finrazel opens the bag and examines the shards with care and awe. He then seals them back into the bag and returns it to you. 'Well, isn't that a sight to behold. I'm grateful to you for letting me see them. It appears that the stories were correct. My guess would be that those shards were given to various Muramite leaders as rewards for some particularly horrible work they had done. I hope you can find a way to make those pieces whole again. I wish I could help you, but you've already exceeded the bounds of my knowledge. I wish you luck finding someone to help you restore the rain spirit shards.'
Chapter 3 - Restoring Yuisaha
Head to Abysmal Sea and give your bag to Reyfin Malakwa.
Reyfin Malakwa makes a motion with his hands, slowly clasping them together until they are locked tightly. He points at you, then at the shards, then makes the motion again.
Find Silanda Leafdew elsewhere on the ship at -315, +200, +114 (top deck) and give her the bag.
Silanda Leafdew says 'Well, this shouldn't be too hard. These pieces want to be rejoined. I suppose all you really need is a good source of reliable cold to help the pieces mend together and a cool place to put them while that happens. Once you have the pieces together you'll need a source constant heat to revive the spirit. The frozen spirit and the heat will need a warm place to sit for a while. You could probably use one good insulated container for both tasks. Here, let me show you what I mean.' Silanda sketches a drawing on a pieces of rough parchment and hands it to you. 'You'll want to have that made out of the clay the Taelosians used to make their stone workers. There is one problem, though. I can sense that all of the energy has been drained from the spirit that resides here. You will need to restore that energy once you have made the shards whole. It seems likely that the energy should be restored while the spirit is being revived.'
You receive an Insulated Container Sketch and your Synched Leather Bag back.
Make a Clump of Refined Ancient Taelosian Clay by handing a Chunk of Broken Ancient Stone Worker to Hiloan O'Yviania in Abysmal Sea (or if you're flagged for the recipe, just put the chunk in a pottery wheel and hit combine). The Chunk can be found from golems in GoD or in the bazaar. Make sure it's the ancient one.
Head to your nearest Kiln and combine the Clump with the Sketch. This combine will yield Insulated Container.
Head to Velketor's Laboratory. Find mobs called Velketor's Experiments and/or Failed Experiments. The Failed ones are near the end of the Icepaw tunnels, while the Velketor Experiment are found past Velketor's room in a dead end that has six total mobs. These two mobs are relatively easy, but hard to find. Once you kill them one will drop a Pulsing Frozen Heart. This is the cold source that Silanda talks about.
Combine your Bag and the Heart in your Insulated Container. This combine will yield Frozen Rain Spirit.
Head to Burning Woods and look for "a crippled wurm." The mob pops when you zone in at around +3000, 0, but will not spawn unless you've already made the Frozen Rain Spirit. The mob is inmune to run speed changes (meaning NOT snareable or rootable) and doesn't summon. Hits for about 450 damage. You can try soloing by outrunning it, or bring a friend. It drops an Everburning Jagged Tree Limb.
Complete the six raid trials in the Muramite Proving Grounds to gain access to the Asylum of Anguish, then defeat one of the bosses there: Warden Hanvar to spawn an Orb of Discordant Energy, the Keldovan the Harrier ring event to spawn Jelvan`s Keepsake, Arch Magus Vangl, or Overlord Mata Muram. Loot a Globe of Discordant Energy.
Finally, combine the Limb, Globe, and Frozen Rain Spirit in the Insulated Container. (This combine can only be made in the Asylum of Anguish and only if you're in the expedition "Anguish, the Fallen Palace.")
Yuisaha shouts 'I am Yuisaha, spirit of rain and storms.' A great thundering voice booms across the land like a thunderstorm breaking. 'You have endured much to free me. I thank you for rescuing and reviving me. Take this, a small portion of my essence. May it aid you, and may none forget the great deed you have done.
You receive Essence of Rainfall and the Insulated Container back. Combine the Essence of Rainfall with your Staff of Living Brambles (epic 1.5) in the Insulated Container to craft your Staff of Everliving Brambles. Reward: Staff of Everliving Brambles
Enchanter Abysmal Armor (Normal): You say, 'Hail, Lelyen Ieamria'
Lelyen Ieamria says 'Hello there High Elf, or are you? I am seeking those like myself that study the deceptive arts -- an [enchanter]. Is this your calling?'
You say, 'I am a enchanter.'
Lelyen Ieamria says 'Delightful. We are too few nowadays. To help a fellow illusionist I may be able to offer my services. If you are in need of new equipment such as [circlet], [pantaloons], [robe], [bracer], [sleeves], [gloves], and [sandals] please let me know.'
You say, 'What bracer?'
Lelyen Ieamria says 'A bracer? Of course! If you speak to Nalasrine about her findings, she may be able to help you infuse some Muramite silk thread to strengthen it. One length of infused Muramite silk thread along with a reworked bracer would suit you just fine. Find a Muramite Bracer Armor piece and return it to me for reworking.'
You say, 'What circlet?'
Lelyen Ieamria says 'I can shape you a beautiful circlet from Muramite Helm Armor. All you need to do is find some Muramite silk thread. A strengthened thread woven over the circlet in a loom shall yield a fine circlet indeed. Talk to Nalasrine about the strengthening process.'
You say, 'What gloves?'
Lelyen Ieamria says 'I can make you some fine delicate gloves. Find some Muramite silk thread. I am sure Nalasrine can assist you with strengthening it. Bring me Muramite Glove Armor and I will shape them for you, once I have finished you can add the final touches yourself in a loom.'
You say, 'What pantaloons?'
Lelyen Ieamria says 'Stitching some Muramite greaves into a pair of pantaloons that would serve you well should be no great feat. Bring me a pair of Muramite Greaves. Once I have done this, you will need to do the final touches yourself. Two lengths of Muramite silk thread infused with Nalasrine's strengthener should be sufficient to finish them up.'
You say, 'What robe?'
Lelyen Ieamria says 'A grand robe shall be yours if you bring me a Muramite Chest Armor piece. I can reshape it easily, and the finishing touches may be applied by your hand. Strengthen two lengths of Muramite silk thread with Nalasrine's special mixture and some quick work with a loom should do the trick.'
You say, 'What sandals?'
Lelyen Ieamria says 'Bring me back Muramite Boot Armor and I believe I can rework them into some nice sandals. To thread them together you will need some strengthened Muramite silk thread. If you need help in the strengthening process, just talk to Nalasrine.'
You say, 'What sleeves?'
Lelyen Ieamria says 'Sleeves do seem to wear so quickly, don't they? Bring me Muramite Sleeve Armor. I will do the alterations for you, then all you will need to do is find some Muramite silk thread. Nalasrine can help you strengthen it and you will have the makings of some nice sleeves.'
Nalasrine Twinklecoil is located in the next room.
You say, 'Hail, Nalasrine Twinklecoil'
Nalasrine Twinklecoil says 'Salutations! It is great to see so many eager travelers out and about. How are you enjoying our little city here? I have been quite busy myself. There are so many interesting things to learn about these strange beings that inhabit Taelosia. Their armor in particular is most interesting. I have developed some intriguing compounds. Let me know if you are interested in such things before I just prattle on!'
You say, 'I am interested.'
Nalasrine Twinklecoil says 'Oh, good. Well let me see. Basically, I have been studying the armor that our explorers have been bringing back from their adventures. While it is a bit strangely shaped, as these creatures that seem to reside here are, I have found that by strengthening some native materials it can be reworked into rather fine armor for the likes of you and me.'
You say, 'What armor?'
Nalasrine Twinklecoil says 'If you are looking into having some armor made, you definitely will need to use my infusions. They are a bit pricey, however they are difficult to make and well frankly, I am the only one who can! Use the plate solvent on plate armor, chain solvent on chain, tanning solution on leather, and silk strengthener on silk. All rather intuitive isn't it? Simply take a look at the different types I have for sale.'
Muramite armor begins dropping in Qvic and above. Bring back the appropriate piece of "Muramite XXX Armor" and turn it in to Lelyen Ieamria to get a class-specific, no-stat "Reworked Muramite XXX."
Craft a Muramite Silk Thread by combining a Meldstone and a Spider Silk in a loom. This has a high trivial (282) and a high minimum tailoring requirement (i268).
Buy Nalasrine's Perfected Silk Strengthener from Nalasrine Twinklecoil for around 10,500 pp. Combine the strengthener with the Muramite Silk Thread in a loom (no-fail combine). This results in a NO DROP piece of Infused Muramite Thread.
Combine the Infused Muramite Thread with your piece of Reworked Muramite XXX armor in a loom to receive your quest reward (no-fail combine). Reward: Lelyen's Gloves of Entrancement
Reward: Lelyen's Bracer of Entrancement
Reward: Lelyen's Circlet of Entrancement
Reward: Lelyen's Sandals of Entrancement
Reward: Lelyen's Sleeves of Entrancement
Reward: Lelyen's Pantaloons of Entrancement
Reward: Lelyen's Robe of Entrancement
Fletching Freebie: Imildu's Tasks (Normal): You say, 'Hail, Imildu Woodstreak'
Imildu Woodstreak says, 'Welcome ________, Tunare smiles upon us all. I don't want to impose, I know that we are all very busy, but if you have the time and inclination, I could use your help finishing some [tasks] that have been overwhelming me.'
You say, 'What tasks?'
Imildu Woodstreak says, 'As you may know, many of our scouts have been lost. That has not kept us from trying to explore, but to do so we need supplies. We also must keep those that stay behind stocked with weapons to use in our defense. This has kept me in here working on those supplies and has prevented me from getting our to see the new lands. A dwarf brought me back some strange stones from Taelosia and it's made me want to go out and explore with all my heart. The stone has a magical properties too. If treated properly, it can be used much like flint to make some of the sharpest arrowheads I've ever come across. If you could [aid] me with some of the simple tasks, I might be able to do more work with the [Taelosian Stone].'
You say, 'Taelosian stone?'
Imildu Woodstreak says, 'Truly unusual material. I suspect that there has been some long-term unnatural stress on it. If handled one way, it can be ground to power relitively easily, but with some clever manipulation it can be sheared to make very fine edges. It also seems to hold some magical potential, though. I just haven't had time to explore that possibility. If you come across a Chunk of Taelosian Rock, please bring to me. I'll treat it for you at the cost of keeping a small portion of the treated stone for myself.'
You say, 'I will aid you.'
Imildu Woodstreak nods to you. 'You are as welcome here as a shade tree in the Desert of Ro, friend. I and others have created the components needed to make arrows for the Wayfarers. I would be grateful if you could do the final assembly for me. Just take a Wayfarer Arrowhead, a Wayfarer Shaft, and a Wayfarer Fletching and combine them in your fletching kit. There are many chores that need to be completed. If you assist me with them I might be willing to share with you the secret for treating the Chunks of Taelosian Rock to create the useful Taelosian Stones. When you have those arrows finished, please bring them right back to me and I will make certain that they get to those that need them.'
If you fail some of the combines, all you have to do is hand in the ones you completed, then destroy the remaining supplies, hail him again and say aid to get the next batch.
You receive 20 x Wayfarer Arrowhead, 20 x Wayfarer Shaft, 20 x Wayfarer Fletching. Combine one of each in a fletching kit. You also receive the book The Beauty of a Simple Stone.
You have learned the recipe Wayfarer Arrow!
Wayfarer Arrow trivials at 31. After making them all, hand them to him unstacked, up to four at a time. Keep going back and saying "I will aid you" and he will give you more to craft until he is satisfied (need to hand in approximately 100), then he will move on to another recipe.
Imildu Woodstreak says 'Hail, Traveler. Thank you for taking the time to help me. I have several bow staves and stings that need to be assembled. A simple enough task, but time consuming. All you need to do is place the Wayfarer Bow Staff and the Wayfarer Bow String into your fletching kit and combine them. These bows will be needed soon, so please bring them directly to me when you have them assembled.'
You receive 20 x Wayfarer Bow Staff and 20 x Wayfarer Bow String. As before, combine one of each in a fletching kit.
You have learned the recipe Wayfarer Bow!
Wayfarer Bow trivials at 38. After making them all, hand them to him unstacked, up to four at a time. Keep going back and saying "I will aid you" and he will give you more to craft until he is satisfied (need to hand in approximately 100), then he will move on to another recipe.
Imildu Woodstreak says 'Like warm fire on a chill northern eve, you are welcome. We have run low on bow staves. New wood has been hard to find, but we have several staves that van be repaired with some careful work. Place a Scavenged Bow Staff and a Wayfarer Honing Stone into your fletching kit and combine them. The stones are not the best quality, and will be worthless by the time you fix a single staff, but stone is not difficult to find. When you have repaired the staves, bring them to me so I can get someone to assemble them into bows for use.'
You receive 20 x Scavenged Bow Staff and 20 x Wayfarer Honing Stone. As before, combine one of each in a fletching kit.
You have learned the recipe Wayfarer Bow Staff!
Wayfarer Bow Staff trivials at 46. After making them all, hand them to him unstacked, up to four at a time. Keep going back and saying "I will aid you" and he will give you more to craft until he is satisfied (need to hand in approximately 100), then he will move on to another recipe.
Imildu Woodstreak smiles at you. 'You are the stars on a clear night. I am grateful to you for your assistance. We have several ill-prepared or damaged arrowheads that we would like to repair and put into service. All resources must be watched carefully. Please take a Salvaged Arrowhead and a Wayfarer Honing Stone and combine them in your fletching kit. Some of these are badly damaged, but I think you have the skill to repair them. Bring them to me when you are done.'
You receive 20 x Salvaged Arrowhead and 20 x Wayfarer Honing Stone. As before, combine one of each in a fletching kit.
You have learned the recipe Wayfarer Arrowhead!
Wayfarer Arrowhead trivials at 54. After making them all, hand them to him unstacked, up to four at a time. Keep going back and saying "I will aid you" and he will give you more to craft until he is satisfied (need to hand in approximately 100, you can hand in stacks of 20 at a time).
Imildu Woodstreak beams a bright smile at you, one that softens his usually dour face dramatically. 'May Tunare bless you, friend. I can no longer keep you here. Certainly you too wish to get back out under the sun and see the new land. Your help has allowed me much freedom, and for that I thank you. If you have forgotten or want them for posterity, I can give you the [recipes] you used while helping us. Look at this compound. Using it when you work with the Chunks of Taelosian Rock and the Chunks of Discordian Rock will allow you to work them into the shapes you desire.' The smell of the liquid leads you to understand what he has given you. You will be able to incorporate that material into all of your fletching kits and work with this new stone easily. In fact, you believe that in time you can improve on the compound and get better results.
You may now place a Chunk of Taelosian Rock or Chunk of Discordian Rock in a fletching kit and "refine" it (and learn the resulting recipes).
Also, in addition to the refining ability, he teaches:
You have learned the recipe Wayfarer Arrow!
You have learned the recipe Wayfarer Bow!
You have learned the recipe Wayfarer Bow Staff!
You have learned the recipe Wayfarer Arrowhead!
You have learned the recipe Simple Taelosian Honing Stone!
You have learned the recipe Simple Taelosian Arrowhead!
You have learned the recipe Simple Jagged Taelosian Arrowhead!
You have learned the recipe Simple Veined Taelosian Arrowhead!
Freeport Stout for Tillgar (Normal): Tillgar may be found at -155, +80.
You say, 'Hail, Tillgar'
Tillgar grumbles. 'Sorry if'n I seem a bit cranky today. Bein' 'ere without me [favorite drink] is causin' me a bit o' trouble.'
You say, 'What favorite drink?'
Tillgar says 'Why Freeport Stout of course! I don't be knowin' why I like it so much. Just do. There be none in this city though. If you could bring me four Freeport Stouts, I think I could part with some coin for ye.'
Freeport Stout may be bought from Jaleel Hoglomp near the docks in East Freeport, at +165, -785. Hand in four.
Tillgar says 'Blessed be ye!' Tillgar immediately starts to swig down the stout. 'Take this for yer trouble. I don't much care fer wine.'
You gain experience!!
You receive 1 gold from Tillgar.
You receive Cristov's Red Wine. Reward: Cristov's Red Wine
Gates of Discord Progression #7: Access to Txevu (Normal): This part of Gates of Discord progression follows your having accessed Qvic.
Note: If you're Level 65+, you have access to Txevu by default. Presented here is the official access quest.
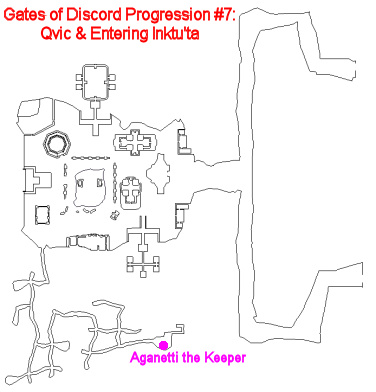
Splinter of the High Temple
By now, you should have a "Sliver of the High Temple" (Ikkinz Raid #4) and a "Fragment of the High Temple" (Uqua raid). Now, you're in need of a "Splinter of the High Temple".
This item is rewarded from the Inktu'ta, the Unmasked Chapel raid expedition (see the link for details). Just hail the Sentinel that spawns at the raid's end, and you'll receive the item.
This raid is given out by Aganetti the Keeper in the Trusik caves of Qvic.
Cipher of Txevu
Find Brevik Kalaner (click for map image), a High Elf found on the topside of the ship in the Abysmal Sea at /loc 700, -230. Hail him.
He requires the following items:
- Sliver of the High Temple (looted in Ikkinz Raid #4)
- Fragment of the High Temple (obtained from the Specter of Barxt after Uqua completion)
- Splinter of the High Temple (obtained from An Ancient Sentinel after Inktu'ta completion)
If you don't have any of these items when you hail him, you see:
Brevik Kalaner says 'Greetings. I'd love to chat but I must get back to my studies. I've been learning as much as I can about geomancy and its uses. Good day.'
If you have one or two of the three items when you hail him, you see:
Brevik Kalaner says 'Hello. I see you've been busy. I've heard of your exploits from the scouts in the mountains and it seems you're close to uncovering the mystery of Txevu. Return to me when you have more information.'
If you hand him only one of the items, you see:
Brevik Kalaner says 'You've found a sliver from the high temple deep within the mountains! I'm impressed. Do you have anything else or do you [need this back]?'
You say, 'I need this back!'
Brevik Kalaner says 'Here is your sliver from the high temple.'
Brevik Kalaner says 'Please keep it safe until you can recover whatever else goes along with it.'
If you have all three items in your inventory, you see:
Brevik Kalaner says 'I've been expecting you. You have all three pieces to complete the mystery of Txevu. Give them to me and I will use what geomantic knowledge I have to form them into a totem of stone that will carry the trusik essence.'
Give him the three pieces of the High Temple:
Brevik Kalaner takes the three stone pieces from you and wraps them in a soft hide covered with glyphs. He mutters some strange words and the stones begin to glow and undulate beneath the hide. You see a wind of souls swirl around you and become absorbed in the stone. 'The essence of the trusik has been imbued into this stone. With one touch of this totem, the guardian of Txevu will recognize the spirit of its masters and let you pass.'
You receive the "Cipher of Txevu", which is the key to Txevu, Lair of the Elite.
Moving On
You can now move onto the next part of Gates of Discord progression: Keying in Txevu & Requesting the Tacvi raid.
Reward: Cipher of Txevu
Germand's Problem (Normal): Germand Reton is located on one of the lower decks at 135, 112, 99.
You say, 'Hail, Germand Reton'
Germand Reton says 'Hello. Not much time to talk. We have a big [problem] on our hands.'
You say, 'What problem?'
Germand Reton says 'Before the magical Buoys that produce the protective dome over the city were in place, a large sea creature damaged the bottom of the ship. The problem is we need some wood to repair it. There appears to be no wood on this new continent however. If you could perhaps [find some wood] and bring it to me I could find some sort of reward for you.'
You say, 'I will find some wood.'
Germand Reton says 'Very good. Please travel to the Jaggedpine Forest and find Ervonis Leaflow. He supplied us with a lot of the wood during the construction of the Queen of Thorns. Once you find him give him this note.'
You receive a Note to Ervonis. You can find Ervonis Leaflow at -480, -630, -40 in Jaggedpine Forest. Hand in the note. He doesn't respond to hail.
Ervonis Leaflow says 'Germand needs some more lumber? Well I would be happy to chop some for you, but unfortunately I [lost] my axe. It was my favorite axe so I will not be chopping any more wood until I get it back.'
You gain experience!!
You say, 'Lost?'
Ervonis Leaflow says 'I was washing its fine blade down by the river when those darned potameids attacked me. I ran but left my axe behind out of pure fear. If you could [find] it, I would be grateful and won't even charge you for some wood.'
You say. 'I will find it.'
Ervonis Leaflow says 'Great. I would start by checking near the river. Be careful though, those potameids are dangerous!'
You'll find the axe at -60, -2620, -50, before the queen's room in the tunnels where the potameids live, just under a potameid spawn. The axe looks like a wind-worn axe laying on the ground. Take the Axe back to Ervonis Leaflow.
Ervonis Leaflow says 'I cannot tell you how thankful I am. Just a moment and I will get you some wood.' Ervonis chops some wood for you and ties it into a neat bundle. 'It is a bit heavy, but I think you can handle it. Thanks again!'
You gain experience!!
Receive a Bundle of Wood. Take this back to Germand.
Germand Reton says 'You found some wood! This will really help us with fixing the ship. Take this for your trouble. An enchanter friend of mine makes these little trinkets. Their magic doesn't last long, but it might help you out. You have my thanks and the thanks of the entire Wayfarers Brotherhood.'
You gain experience!! Reward: Wood Friend Bauble
GoD Freebie Pottery: Help Malkidiv (Normal): Malkidiv U`Ycionuz is located on the ship at -245, +210.
You say, 'Hail, Malkidiv U`Ycionuz'
Malkidiv U`Ycionuz says 'Hello. Thanks for stopping by. Are you, by chance, interested in helping me with some of the more [menial tasks] I have to get done around here?'
You say, 'What menial tasks?'
Malkidiv U`Ycionuz says 'Well, I am responsible for keeping the ship stocked with plates, pots and other simple supplies, but with all the research I'm working on and my experiments with the amazing local [clay], I just font have time to keep up. Wayfarers are notoriously hard on dinnerware. Can you [help] me out? And if you have any spare clumps of refined ancient clay, please speak with Hiloan, she needs help making some of the more complicated items used on the ship.'
You say, 'I will help.'
Malkidiv U`Ycionuz says 'Great! We've discovered that this new clay makes wonderfully durable plates. Of course, there's no point in making durable plates, that's just a challenge to these people to try and break them. With this clay we can make thinner plates that are just as strong and take up less room. Here, take these bits of broken plates and this bonding agent and re-fire the plates. Bring them back to me as soon as you can. I'm grateful for the help. If you can keep helping me out, I might be willing to share with you our secret method of refining the stone worker clay.'
You receive 20 x Broken Wayfarer Plate and 20 x Bonding Agent. Combine 1 of each item in a kiln.
You have learned the recipe Wayfarer Plate!
Wayfarer Plate trivials at 31. A kiln is located on the ship at -330 +233. After making them all, hand them to him unstacked, up to four at a time. Keep going back and saying "I will help." and he will give you more until he is satisfied (need to hand in approximately 100).
Malkidiv U`Ycionuz says 'Excellent, you're obviously too talented to be wasted fixing plates. We could use a lot of pots. Our cooks are just as clumsy as out patrons. Take these pot molds and blocks of clay and fire them in a kiln. I can use a lot of these things, we use them for storage, cooking, breaking over heads All the usual stuff. We don't need quality here, just quantity. Bring them back to me quickly or we'll run out soon.'
You receive 20 x Small Block of Scrap Clay and 20 x Wayfarer Pot Mold. Combine 1 of each item in the kiln.
You have learned the recipe Wayfarer Pot!
Wayfarer Pot trivials at 38. After making them all, hand them to him unstacked, up to four at a time. Keep going back and saying "I will help." and he will give you more until he is satisfied (need to hand in approximately 100).
Malkidiv U`Ycionuz says 'Wonderful! You are certainly good at working with a kiln, and you've been a great help to me. I have a somewhat more complicated task to be done, if you have the time. We go through mugs here faster than an ogre goes through chocolate. Take this clay and these flasks of water and turn them on a pottery wheel until you have something that resembles a mug. Handles would be helpful, but not necessary. Then take the unfired mug and these Wayfarers seals and carefully fire them in the kiln. Don't worry, those seals are stamped onto tough sea serpent skin, they won't burn. Bring me the mugs when you're done.'
You receive 20 x Small Block of Scrap Clay, 20 x Flask of Abysmal Sea Water, 20 x Wayfarer Mug Seal. Combine 1 Block of Scrap Clay and 1 Flask of Abysmal Sea Water in a pottery wheel.
You have learned the recipe Unfired Wayfarer Mug!
Combine 1 Unfired Wayfarer Mug and 1 Wayfarer Mug Seal in a kiln.
You have learned the recipe Wayfarer Mug!
Unfired Wayfarer Mug trivials at 46. Firing the Wayfarer Mug is trivial at 15. The pottery wheel is in the same room as Malkidiv at -258 +195. After making them all, hand them to him unstacked, up to four at a time. Destroy any remaining Wayfarer Mug Seals as you will not get another set of components with them. Keep going back and saying "I will help." and he will give you more until he is satisfied (need to hand in approximately 100).
Malkidiv U`Ycionuz says 'Fantastic! You have been of great service to the Wayfarers Brotherhood. If you can help me with my next task, I'd be willing to give out one of the Wayfarers trade secrets. This task will require more effort and skill than those I've been asking you to do. Some of our scouts use ceramic shafts for our arrows. These require some skill to make properly and have to be made well. I just can't trust anyone to make them. Take this clay, these flasks of water and this special dye and use the pottery wheel to form them into unfired shafts. Then, take these molds and fire the shafts. The dye is important, as each of the scouts likes to have their own colors on the shafts. Something about competing over who kills the most enemies or something like that.'
You receive 20 x Small Block of Scrap Clay, 20 x Flask of Abysmal Sea Water, 20 x Wayfarer Dye and 20 x Wayfarer Arrow Shaft Mold. Combine 1 Small Block of Scrap Clay, 1 Flask of Abysmal Sea Water and 1 Wayfarer Dye in the pottery wheel.
You have learned the recipe Unfired Wayfarer Arrow Shaft!
Combine 1 Unfired Wayfarer Arrow Shaft and 1 Wayfarer Arrow Shaft Mold in the kiln.
You have learned the recipe Wayfarer Arrow Shaft!
Unfired Wayfarer Arrow Shaft trivials at 54. Firing the Wayfarer Arrow Shaft is trivial at 15. After making them all, you can hand them to him in stacks of 20. Destroy any remaining Wayfarer Arrow Shaft Molds as you will not get another set of components with them. Keep going back and saying "I will help." and he will give you more until he is satisfied (need to hand in approximately 100).
Malkidiv U`Ycionuz says, 'You've been a great help already. I'd feel very guilty asking you to help out any further. There are others that can do that work for us. If you have forgotten or want them for posterity, I can give you the [recipes] you used while helping us. For all of your efforts, I'd be honored to teach you the secret of refining chunks of broken stone worker into refined Taelosian clay and chunks of broken ancient stone worker into refined ancient Taelosian clay.' Malkidiv pulls a small text from his coat and leans forward to show you a few of the pages. What he shows you seems amazingly simple once you've seen it. You think that with practice you might be able to get better results than Malkidiv gives to those that he refines clay for. Just place a single chunk of broken Taelosian stone worker onto a pottery wheel and you will receive clump of refined Taelosian clay.'
All the recipes learned:
You have learned the recipe Wayfarer Plate!
You have learned the recipe Wayfarer Pot!
You have learned the recipe Unfired Wayfarer Mug!
You have learned the recipe Wayfarer Mug!
You have learned the recipe Unfired Wayfarer Arrow Shaft!
You have learned the recipe Wayfarer Arrow Shaft!
You have learned the recipe Wayfarer Augment Receptacle!
You have learned the recipe Wayfarer Crucible!
You have learned the recipe Unfired Wayfarer Watering Can!
You have learned the recipe Wayfarer Watering Can!
You have learned the recipe Unfired Wayfarer Vial!
You have learned the recipe Wayfarer Vial!
GoD Freebie Tailoring: Tonlyei's Chores (Normal): Tonlyei Lyhin is a female Erudite at +45, +145, +115.
You say, 'Hail, Tonlyei Lyhin'
Tonlyei Lyhin says 'Greetings, ______. I hope this day finds you well. For us, as for many aboard, things are hectic. There are many people in need of new clothing or armor among the Wayfarers, and it is our pleasure to provide them. There are other tasks that we would like to attend to. I have received several samples of skin from the Muramites, and I believe that it can be used in many interesting applications. I would like to work with it if only I had [time].'
You say, 'Time?'
Tonlyei Lyhin says 'Time is precious for me. I wonder, would you be able to aid me by tackling some of my [chores] while I spend some time working with the [Muramite etched scales]?'
You say, 'I will tackle your chores.'
Tonlyei Lyhin says 'Very well then. I appreciate your assistance. I have long suspected that certain Wayfarers have been selling their clothing for drink and that is why they need replacements so frequently. Regardless of the reason, there are several simple items that I need to keep in abundant supply. If you can find the time to help us keep up with those supplies, I would be willing to teach you the method we have discovered for making useful leather out of the scales of those Muramites. There will be a lot of work for you as I won't be handing out this secret easily, but if you think the reward is worth the effort, then let's begin by having you make some simple belts for us. These are not complicated, nor are they meant to last, as there seems to be no point in making durable items for these scallywags. Just take a yard of this cloth and a pattern and place them into your sewing kit and combine them. Please return the belts to me as quickly as you can.'
You receive 20 x Yard of Rough Cloth and 20 x Simple Belt Pattern. Combine 1 of each in your Sewing Kit.
You have learned the recipe Simple Belt!
Simple Belt trivials at 31. After doing 20 combines, hand them back to Tonlyei unstacked, up to four at a time. After handing them all in, say "I will tackle your chores again" and she will give you more Simple Belt components. Repeat the process until she feels you've made enough (approximately 100).
You say, 'I will tackle your chores.'
Tonlyei Lyhin smiles and nods approvingly 'Welcome back. Again, I thank you for your efforts. I suppose it wouldn't shock you to know that my fellow Wayfarers use up a large number of socks every day. Many of them refuse to wear shoes as they traipse about the ship. Others just lose them. I suspect that some of the less reputable folks have been using them to filter tea! So, I have resorted to making a large volume of, well, lesser quality socks to give out to those that seem to require replacements more often than others. I would be grateful if you could create a good number of pairs for me to bolster my supplies. These are easy to make. Just take a yard of this cloth and a pattern and combine them in your sewing kit. Bring the socks to me when you are done. Thank you.'
You receive 20 x Yard of Rough Cloth and 20 x Simple Sock Pattern. Combine 1 of each in your Sewing Kit.
You have learned the recipe Simple Socks!
Simple Socks trivials at 38. After doing 20 combines, hand them back to Tonlyei unstacked, up to four at a time. After handing them all in, say "I will tackle your chores again" and she will give you more Simple Socks components. Repeat the process until she feels you've made enough (approximately 100).
You say, 'I will tackle your chores.'
Tonlyei Lyhin says 'Greetings to you, ______. It appears that our supply of pants has run low again. These are just simple cloth pants meant to be worn around the ship, not to protect anyone from harsh weather or sword cuts. This fabric starts off rough, but when washed it actually becomes rather soft. Sure, it's not silk, and you won't catch me wearing it, but for most that venture about this ship it is more than adequate for their needs. Just take a yard of cloth and a pattern and combine them in your sewing kit. Please bring the pants to me when you are done so that I can get a pair onto one of the halflings, as he is wont to run about without any.'
You receive 20 x Yard of Rough Cloth and 20 x Simple Pants Pattern. Combine 1 of each in your Sewing Kit.
You have learned the recipe Simple Pants!
Simple Pants trivials at 46. After doing 20 combines, hand them back to Tonlyei unstacked, up to four at a time. After handing them all in, say "I will tackle your chores again" and she will give you more Simple Pants components. Repeat the process until she feels you've made enough (approximately 100).
You say, 'I will tackle your chores.'
Tonlyei Lyhin says 'Wonderful! I must say your enthusiasm has brightened my day. I like to keep a good supply of shirts available for those that need replacements and for use by those that wear heavy armor as undershirts. These do not need to be of the best quality, but they need to be well made. I think you can produce a more than adequate shirt. Take a yard of cloth and a shirt pattern and combine them in your sewing kit. When you have the finished shirts, bring them to me.'
You receive 20 x Yard of Rough Cloth and 20 x Simple Shirt Pattern. Combine 1 of each in your Sewing Kit.
You have learned the recipe Simple Shirt!
Simple Shirt trivials at 54. After doing 20 combines, hand them back to Tonlyei unstacked, up to four at a time. After handing them all in, say "I will tackle your chores again" and she will give you more Simple Shirt components. Repeat the process until she feels you've made enough (approximately 100).
You say, 'I will tackle your chores.'
Tonlyei Lyhin smiles and clasps your hand for a moment. 'You have been of such great assistance to us that I can no longer ask you to spend your days working for us. I thank you. Please, allow me to show you the secret to preparing Muramite etched scales. This method will work on the younger and aged scales.' Tonlyei opens her sewing kit and shows you the contents. The kit is old, the tools you see there have been handed down by generations in her family. She points to a clearly marked bottle of liquid, a common substance that you might not have thought to use when working with this material. She explains that if you use it liberally when working with the Muramite scales it will reduce the brittleness that tends to develop over time, and makes it possible to work with them. You know that you can use this method, and you even suspect that you will be able to improve on it if you work with the scales for a while. Tonlyei bows slightly to you 'May Prexus guard the waters of your life, ______.'
GoD Freebie Tinkering: Help Skelontorim (Normal): You can get up to skill level 54 via this quest, provided you are a gnome and meet the level requirements.
You say, 'Hail, Skelontorim Orrthemech'
Skelontorim Orrthemech says 'Hail, ____! I can't believe that we've come this far! I've never been much of a traveler, but I'm glad I took these Wayfarers up on their offer to join, even though that means I have to travel on this leaky wooden contraption. I've been teaching these mechanically ignorant folks something about how things should be done. I have to say, they've taken to it well. When they find something useful they use it. So now we're swamped with requests. I could sure use a good [gnome] to lend a hand here.'
You say, 'I am a gnome.'
Skelontorim Orrthemech says ''Well, with all the items I need to make, I haven't any time to delve into the properties of this [new matter] that they've brought me. If I could just find someone to [lend a hand] around here . . .' Skelontorim peers at you, then around you, seemingly searching about for someone with hands to lend him.
You say, 'What new matter?'
Skelontorim Orrthemech says 'Ah! Fascinating stuff. Blacker than night, it is. Heavy, too. I've taken to calling it dark matter, though Tial is of a mind to call it Tialonium.' Skelontorim chuckles. 'In any case, it's surprisingly fragile and must be handled carefully. It seems as though it reacts to contact very poorly. It has to be tempered and refined before it is of any use. But with the proper tuning, as I call it, dark matter is an extremely powerful energy source. Unfortunately, it's also unstable. I'm very sure that I can put it to better use eventually. If you find any raw dark matter, bring it to me and I'll treat it for you. I'll keep a little for my research, but I'll give you most of it back.'
You say, 'I will lend a hand.'
Skelontorim Orrthemech says 'Great! I'm almost ashamed to ask you to do such a menial task, but we are in desperate need of springs. Nothing fancy, just small, tight springs of the sort that many gnomes learn to make before they are out of their cradle. Just take this wire and you should have new springs for me in no time. Bring them right to me.' Skelontorim pauses, then speaks again. 'I don't imagine you should go unrewarded for your efforts. If you help me enough, I can teach you the secret for treating dark matter. That's a pretty important secret, so you'll have to do a lot of work, but I think it's well worth it!'
You receive 20 x Thin Steel Wire. Combine 1 in a toolbox.
You have learned the recipe Simple Spring!
Simple Spring trivials at 31. After doing each set of 20 combines, hand them back to Skelontorim unstacked, up to four at a time. After handing them all in, say "I will lend a hand" again and he will give you more Simple Spring components until he feels you've made enough (approximately 100).
You say, 'I will lend a hand.'
Skelontorim Orrthemech says 'Aha! Just in time. I've got some work to do and I need, well, I need a lot of pulleys. You probably shouldn't ask what I need them for, it's a rather long story involving a cat and a wedding ring. Let's just say that I need some pulleys. These should be simple, you'll only need one of each of the items I've given you. Your toolbox, while in need of some repair, should be more than good enough to do the work.'
You receive 20 x Small Axle, 20 x Small Ball Bearings, and 20 x Small Roller. Combine 1 of each in a toolbox.
You have learned the recipe Simple Pulley!
Simple Pulley trivials at 38. After doing each set of 20 combines, hand them back to Skelontorim unstacked, up to four at a time. After handing them all in, say "I will lend a hand" again and he will give you more Simple Pulley components until he feels you've made enough (approximately 100).
You say, 'I will lend a hand.'
Skelontorim Orrthemech says 'Hello. I've got just the thing. As you may have noticed, we live mostly off of fish here. I noticed that our fishermen are using simple, boring lures. I'd like to get together a stock of my personal lures for them, but I just don't have time. If you could make some simple animated lures, I can at least upgrade their tools and improve their production. Not as well as using my special lures, but with all this work, what can we do? I apologize for the quality of the parts, I have to take what I can find here and even if that's used wine corks, then that's what I have to use. Bring the lures to me when you have them finished.'
You receive 20 x Ordinary Lure, 20 x Small Spring, and 20 x Used Cork. Combine 1 of each in a toolbox.
You have learned the recipe Simple Animated Lure!
Simple Animated Lure trivials at 46. After doing each set of 20 combines, hand them back to Skelontorim unstacked, up to four at a time. After handing them all in, say "I will lend a hand" again and he will give you more Simple Animated Lure components until he feels you've made enough (approximately 100).
You say, 'I will lend a hand.'
Skelontorim Orrthemech smiles widely, 'Fantastic! I am trying to provide some more useful tools for our scouts, namely bows. If you could crank out some simple bow cams for me, I'd be grateful. I like to send folks into battle with the best gear, and those plain wooden bows don't have the punch that they should. With a few simple additions and can give them some serious kick! So hurry back to me with those cams.'
You receive 20 x Bolts, 20 x Simple Gears, and 20 x Used Grease. Combine 1 of each in a toolbox.
You have learned the recipe Simple Bow Cam!
Simple Bow Cam trivials at 54. After doing each set of 20 combines, hand them back to Skelontorim. After handing them all in, say "I will lend a hand" again and he will give you more Simple Bow Cam components until he feels you've made enough (approximately 100). Finally:
Skelontorim Orrthemech smiles and claps you on the back. 'I think you've done enough. You look like one of those adventuring gnomes and I hate to keep you working for me. You should be out there defeating our enemies! Only you can bring the proper tools to the fight. If you have forgotten or just want them for posterity, I can give you the [recipes] you used while helping us. Before you go, let me explain to you what you need to know about the dark matter so you can treat it yourself.' Skelontorim whispers into your ear. This is distracting, but you are able to concentrate well enough to understand the process he is explaining. 'That should work well enough with the infused dark matter too. Now run off and save the world, but don't be a stranger!' As you step away from the master tinkerer, you are certain that you can treat both forms of the raw dark matter in your toolkit. In fact you're certain that if you work with the material long enough, you will be able to get better results and lose less of the material in the process.
If you say recipes to Skelontorim Orthemech, you will learn these 4 recipes and also Tialechaety's 4 recipes as well.
You may now place a piece of Raw Dark Matter or Raw Infused Dark Matter in a toolbox and "refine" it (and learn the resulting recipes).
GoD Jewelcraft Collect: Help Rilwind (Normal): This quest will require six Raw Crimson Nihilites, found uncommonly off pretty much any mob within the Gates of Discord. Your Jewelcraft skill will be raised to 54 by doing the 140 combines associated with this quest.
You say, 'Hail, Rilwind Sitnai'
Rilwind Sitnai says 'Greetings. We are busy here, and I have little time for pleasantries. I can sell you supplies, if you have need. I can even help you fix up that old Jeweler's [Kit] of yours. Or perhaps you are here to [assist] me with my work?'
You say, 'I am here to assist you.'
Rilwind Sitnai says 'I haven't the time to keep up with the needs of the Wayfarers, I have more urgent matters to attend to. We have discovered a rare form of a relatively worthless mineral. Some trauma seems to have affected the local ulexite, striating it, which has given it the unusual property of image transference, as well as imbuing it with some sort of magical properties. I can only imagine the sort of magical and geologic upheaval that would be required to make these changes in ulexite! I certainly would have been a dramatic experience. Study of this material is my primary concern. I also have a duty to the Wayfarers Brotherhood. If you could attend to some of my tasks, I would be grateful. If you can relieve me of enough of these [tasks], I can continue my study of the [Shimmering Nihilite].'
You say, 'recipes'
You have learned the recipe Simple Clasp!
You have learned the recipe Simple Copper Ring!
You have learned the recipe Simple Brass Armband!
You have learned the recipe Simple Silver Chain!
You have learned the recipe Simple Pale Nihilite Pendant!
You have learned the recipe Simple Pale Nihilite Ring!
You have learned the recipe Simple Pale Nihilite Earring!
You have learned the recipe Wayfarer Signet Ring!
Glirina Morningbloom says, 'Here you go.'
You say, 'What Shimmering Nihilite?'
Rilwind Sitnai says 'Nihilite appears to have two forms. The Pale Nihilite is relatively common. Shimmering Nihilite is infused with crystals that make the usual milky color of the stone glimmer with specks of light. It is truly beautiful, but hard to find. It seems to be concentrated in the interior of Taelosia. If you can find Raw Shimmering Nihilite, I can prepare it for you. In exchange, I will keep a small amount of it for my own work.'
Disregard the spew about shimmering nihilite. What you need to do is go to Glirina Morningbloom, another jewelcraft merchant found in the same room as Rilwind. Upon handing her a Raw Crimson Nihilite (formerly Raw Pale Nihilite), you'll receive two Crimson Nihilites.
Glirina Morningbloom says 'I am glad that I could assist you. If you discover more Raw Crimson Nihilite, please bring it to me.'
Give one Crimson Nihilite to Rilwind, and he'll give you some materials to combine (10 combines) as well as a book: "Weapon Adornments."
Rilwind Sitnai says 'Good. We are in need of some simple pendants made from Pale Nihilite, both for sale and for some of our research. Just take this Small Pale Nihilite and Thin Silver Chain and combine them in your Jeweler's Kit. Give me the pendants and I will be grateful.'
You'll receive 10 Thin Silver Chains and 10 Small Pale Nihilites. Combine these one at a time in any jeweler's kit to produce 10 Simple Pale Nihilite Pendants. Hand these pendants unstacked to Rilwind.
Rilwind Sitnai says 'Well done. I still have [tasks] for you.'
You say, 'What tasks?'
Rilwind Sitnai says 'There is much that needs to be done. I have several simple items that need to be made from the Pale Nihilite that Glirina can prepare for you. If you bring me some, I can set you to work on creating items from them. This will give you practice working with Nihilite and will give me more time to work on my research. Because I am asking you to provide the material for this work, I will be able to reward you more quickly than Glirina can. Just hand me the Pale Nihilite when you are ready to begin.'
Hand him another Pale Nihilite for 10 more combine materials. Keep repeating this process and combining the materials. After 140 combines (Simple Pale Nihilite Pendants, Rings, Earrings and Silver Rings), and after handing him another Pale Nihilite:
Rilwind Sitnai smiles at you. 'Thank you for your assistance. You have done enough to earn my gratitude. Speak with Glirina and she will show you the secret of preparing both Pale and Shimmering Nihilite. Be certain to mention to her all of the [work] you have done for us.'
To Glirina Morningbloom
You say, 'What work?'
Glirina Morningbloom smiles broadly at you. 'You have been of great assistance to me. It would be improper for me to ask more of you. I will find others to do these tasks. I have learned much doing research while you have been helping me. Let me show you the method I have discovered for preparing the Nihilite.' She works swiftly, but you understand what she is doing as she carefully prepared the soft stone. 'Here is some of the special polish that we have devised for use with the Nihilite. What I have shown you will work for both the Pale and Shimmering Nihilite and you should be able to get useful stones from Raw Crimson and Raw Shimmering Nihilite.' You know you can reproduce the polish she has given you. You are certain that you can improve on the method she has shown you, given enough practice with the Nihilite.
You can now combine Raw Crimson Nihilite and Raw Shimmering Nihilite to create the material needed for Gates Jewelcraft items.
GoD Refine Raw GoD Materials (Normal): For each of the seven general and three class- or race-specific tradeskills, there are NPCs on the ship in the Abysmal Sea who can convert raw GoD tradeskill components to refined materials. Note that players can do this themselves if they complete one of the tradeskill-specific quests to unlock the recipes, but the NPCs always yield 2, while player-made versions will yield 1-3 depending on the player's experience at making the recipe. Some of the refined materials have no known use other than in the "Collect" version of the tradeskill quests themselves, while some are also used extensively for GoD tradeskills.
The list of tradeskills, NPCs, raw materials and resultant materials, in that order, are as follows:
Reward: Pale Nihilite
Reward: Taelosian Stone
Reward: Taelosian Wheat Flour
Reward: Muramite Blood Distillate
Reward: Bar of Shimmering Steel
Reward: Discord Stone
Reward: Clump of Refined Ancient Taelosian Clay
Reward: Clump of Refined Taelosian Clay
Reward: Preserved Aged Muramite Etched Scales
Reward: Taelosian Tea
Reward: Taelosian Mountain Tea
Reward: Taelosian Mountain Wheat Flour
Reward: Preserved Muramite Etched Scales
Reward: Sample of Filtered Taelosian Sludge
Reward: Sample of Filtered Highland Sludge
Reward: Muramite Bile
Reward: Infused Dark Matter
Reward: Dark Matter
Reward: Crimson Nihilite
Reward: Shimmering Nihilite
GoD Smithing Collect: Esunta's Tasks (Normal): Esunta may be found on the top deck of the ship in the Abysmal Sea at +140, +260.
You say, 'Hail, Esunta'
Esunta says 'We is workin all day and night to make tings for da Wayfarers. Can you help us wit all dis [work]? We wants time to play wit da new ore.'
You say, 'What work?'
Esunta says 'We been getting da new ore an I wants to take it to da forge. Near da mountains dere is ore dat shines. It's da same aligned ore dat is found everywhere, but gots augment bits in it, and dat makes it shine. I wants time ta work wit it. Dere is too much work to do here, and you look like you can do some of it. If you can do dese [tasks] for me, den I can work wit da [shimmering ore].'
You say, 'What tasks?'
Esunta says 'Lot of work to do here. You help us out, work hard like real ogre, and I show you da secret of making steel from da ore. I needs to make stuff out of da aligned steel, so you needs to bring me some. Find da aligned ore and have Snokin make da steel. Den, bring to me and I will give you work. I reward you sooner dan Snokin if you help me. Jus bring da aligned steel to me when you ready to work.'
You say, 'What shimmering ore?'
Esunta says 'Da ore is pretty. Da bits of da augment stuff makes da stuff more magical. It only found in da mountains. Dey say dat's because some magic ting happen up dere long time ago. Dem magic types will do stuff wit da ore, for sure. I figured out how to smelt it, wit help from Snokin. If you bring da shimmering ore to me, I will give you da shimmering steel.'
Aligned Ore may be looted in various Gates of Discord zones. Snokin Breaksteel stands near Esunta. Give him one Aligned Ore to receive 2 x Bar of Aligned Steel. Give one of these to Esunta.
Esunta says 'Good, you is ready to work. We need skewers. Da more we make, da more we gets to eat! Da new steel makes skewers dat last long time an don't make food taste bad. So you take dis stuff and forge skewers. Bring dem to me when you done.'
You receive 10 x Scrap of Aligned Steel and 10 x Simple Skewer Mold. Combine 1 of each in a forge.
You have learned the recipe Simple Aligned Steel Skewer!
Simple Aligned Steel Skewer trivials at 31. After doing 10 combines, hand them back to Esunta unstacked, up to four at a time. After handing them all in, give her another Bar of Aligned Steel to get more ingredients. After handing in around 40 Simple Aligned Steel Skewers total, the next time you hand in a Bar of Aligned Steel you see this:
Esunta says 'Dere is much work for you. We use steel spikes for lots of tings here, and dey asks me to make some with da new steel. It easy job, so maybe you do it. Just take da metal and da mold to da forge and make da spikes. Bring dem to me when you is done.'
You receive 10 x Scrap of Aligned Steel and 10 x Simple Spike Mold. Combine 1 of each in a forge.
You have learned the recipe Simple Aligned Steel Spike!
Simple Aligned Steel Spike trivials at 38. After doing 10 combines, hand them back to Esunta unstacked, up to four at a time. After handing them all in, give her another Bar of Aligned Steel to get more ingredients. After handing in around 40 Simple Aligned Steel Spikes total, the next time you hand in a Bar of Aligned Steel you see this:
Esunta says 'Lots more work for you to do. Da iron files dat we use don't last long. For da special work dey asks me to make dem files from da new steel. So now you is going to make files from da new steel. Take dis stuff to da forge an make da files. Bring dem to me when you gets dem done.'
You receive 10 x Hardened Aligned Steel Bits, 10 x Scrap of Aligned Steel, and 10 x Simple File Mold. Combine 1 of each in a forge.
You have learned the recipe Simple Aligned Steel File!
Simple Aligned Steel File trivials at 46. After doing 10 combines, hand them back to Esunta unstacked, up to four at a time. After handing them all in, give her another Bar of Aligned Steel to get more ingredients. After handing in around 40 Simple Aligned Steel Files total, the next time you hand in a Bar of Aligned Steel you see this:
Esunta says 'You good helper. Dis time we need needles. Da peoples dat sews stuff likes da needles made wit da new metal, an my fingers is too big for making needles good. You take this stuff to da forge an make needles for us. Bring dem to me when you is done.'
You receive 10 x Scrap of Aligned Steel and 10 x Simple Needle Mold. Combine 1 of each in a forge.
You have learned the recipe Simple Aligned Steel Needle!
Simple Aligned Steel Needle trivials at 54. After doing 10 combines, hand them back to Esunta unstacked, up to four at a time. After handing them all in, give her another Bar of Aligned Steel to get more ingredients. After handing in around 40 Simple Aligned Steel Files total, the next time you hand in a Bar of Aligned Steel you see this:
Esunta says 'You do enough already. No do more. Go talk to Snokin, he will tell secret for making aligned ore into steel. Tell Snokin dat you do much [silly work] for me and he will show you secret.'
To Snokin Breaksteel:
You say, 'What silly work?'
Snokin Breaksteel says 'No more work now. Snokin happy wit what you do already. Snokin show you secret now. You not tell anyone!' Snokin looks around furtively, as if everyone on the ship doesn't hear everything he says. He hands you a piece of paper with some very precise writing on it. You can only guess that he did not write it. You look it over and you understand the methods for smelting the aligned ore and the shimmering aligned ore. It's not a complicated process, but you would have needed information that only that Wayfarers have to uncover it. Now all you need to do is place the ore into a forge and you will be able to make the steel. However, you are certain that you can improve the process if you work with the ore long enough. Snokin takes the paper back and pulls out a ledger. You see him carefully note your name on the ledger with clear and concise penmanship that matches that on the paper you just read.
You can now refine Aligned Ore into a Bar of Aligned Steel and Shimmering Aligned Ore into a Bar of Shimmering Steel.
Helmet Eclipsing Liquidation Machine (H.E.L.M.) (Normal): You say, 'Hail, Marius Alyonn'
Marius Alyonn looks at ______ and begins to speak.
Marius Alyonn says 'Come to exchange your [helm] or you just like looking at gnomes?'
You say, 'What helm?'
Marius Alyonn says 'Yes that's what I said. I have been working with the dwarves to create a device that can alter the view of your headgear. This advanced gnomish technology, that's right gnomish technology, will remove the shroud that makes your helm invisible to the naked eye. It can also replace the shroud if you decide you don't like it being shown. Amazing isn't it? And it was all my design! The only drawback to this device, appropriately named the Helmet Eclipsing Liquidation Machine or H.E.L.M. for short, is that it is only compatible with certain [headgear].'
You say, 'What headgear?'
Marius Alyonn says 'Well, so far I have only been successful with the latest class quest helms but I am hoping to expand soon. For now though if you have any of these and wish to try my machine out, then hand it over and let the show begin.'
Marius Alyonn pulls a small item out of his pocket places it on the floor and stands back as it starts to unfold, revealing what looks to be a modified forge. Placing the helm inside the forge, Marius pulls a small lever on the side, removes the helm from within, and hands it to you. 'There you go! Let me know what you think. If you don't like it, you can always come back, but it will cost you. This type of technology does not come cheap you know.'
You receive a different version of your helmet, one without visible graphics when you wear it. Often the new version loses an important stat as well, so be warned: you pay a price for your vanity. If you have the new version in your possession:
You say, 'Hail, Marius Alyonn'
Marius Alyonn looks at ______ and begins to speak.
Marius Alyonn says 'Ah, so I see you have returned. Do you wish to change your headgear back? Or are you here to alter another? Either way, I am going to have to charge you a small [fee] this time. I am planning to sell this invention in Norrath and beyond, but I need to save a little more money first.'
You say, 'What fee?'
Marius Alyonn says 'Hmm . . . let me see . . . the cost of materials, having to perform maintenance after the process is done, opening the item and closing it again, plus a small labor charge. I think a diamond sounds fair, what do you say [yes] or [no]?'
You say, 'Yes.'
Marius Alyonn says 'Good, then please hand the gem and I will give you my latest version of the H.E.L.M. device that you can use at your leisure. But before you give me the diamond remember that this device is only compatible with the latest class quest helms.'
You receive a Disposable H.E.L.M. Device. Put your GoD armor helmet without graphics into it, then combine.
You have fashioned the items together to create something new! Reward: Gaelin's Woodland Cap
Reward: Pressl's Cap of Balance
Reward: Trimdet's Helm of Chivalry
Reward: Jennu's Circlet of Creation
Reward: Kanleku's Helm of Spirits
Reward: Dakkamor's Helm of the Divine
Reward: Nunkin's Circlet of Pure Elements
Reward: Nolaen's Lifereaper Circlet
Reward: Luvwen's Helm of Melody
Reward: Nodnol's Helm of the Scoundrel
Reward: Nadien's Helm of the Archer
Reward: Rayin's Helm of Abhorrence
Reward: Lelyen's Circlet of Entrancement
Reward: Harlad's Helm of Fury
Reward: Vadd's Helm of Elite Combat
Reward: Kizash's Savage Heart Cap
Jewelcraft Freebie: Help Glirina (Normal): Glirina Morningbloom is located on the ship at -145, +230, +100.
ou say, 'Hail, Glirina Morningbloom'
Glirina Morningbloom says, 'Greetings. You are looking well.' Glirina gives you a critical glance, 'I wonder, are you skilled in jewel crafting? Or perhaps you are interested in learning our craft? I have an opportunity for one who fits either of these categories. I have need of help and by helping me you will learn something of what I know, if you are [interested] in such things.''
You say, 'interested'
Glirina Morningbloom says, 'There are always many simple but time-consuming jobs to do aboard the Queen of Thorns. I have more important research to attend to. I have been given samples of a new gem and I must turn my attention to discovering its properties. I have already discovered a method for cutting and preparing this [Crimson nihilite], as we've named it, so that it can be used in the creation of some beautiful work. Amber and Indigo Nihilite work equally well. We named it after a faction of the natives, though I'm not certain how these nihil differ from the others. I haven't time for the local politics. I have far too much work to do for that. Are you interested in learning something about crafting jewelry while helping me complete my [work]?'
You say, 'work'
Glirina Morningbloom gives you a slight smile 'I am pleased. I have work for you even now. As you may have noticed, members of the Wayfarers Brotherhood are often rough and careless. Despite my repeated insistence that they take more care with the things I make for them, they still return to me with many items in need of repair. The most common items they break are the simple clasps that hold various items together. I would be grateful if you could make many such clasps for me. Simply place this Thin Steel Wire into your Jeweler's Kit and combine it. It is a rather simple task, though the fine wire requires a delicate touch. Bring the clasps back to me when you are done. I have many such tasks that you can help me with. If you prove to be helpful enough, perhaps I will teach you how to prepare raw nihilite for use in your future jewelcrafting.'
You say, 'Crimson nihilite'
Glirina Morningbloom says, 'This nihilite is an unusual gemstone. In its natural state it is opaque and a milky color, generally not too attractive. When prepared properly, it retains its opacity but gains a unique property. When you place it upon another object, the nihilite transfers the image of that object to the front face of the stone! For example,' Glirina takes a small piece of cloudy-looking stone and shows you all sides. It appears the same milky color on all sides, though two sides are smooth while the others remain rough. She places a flat side onto the Wayfarers Brotherhood emblem on her cloak. The portion of the emblem covered by the nihilite is visible on the surface of the stone, as if the stone were suddenly transparent like glass, but only between those two surfaces. 'The stone is rather soft, so it is both easy and delicate to work with. We have discovered the method for preparing nihilite. If you can bring some nihilite, Neysia will prepare it for you, keeping a small amount of it for our use.''
You receive 20 x Thin Steel Wire. Combine 1 in a Jeweler's Kit.
You have learned the recipe Simple Clasp!
Simple Clasp trivials at 31. After making them all, hand them to her unstacked, up to four at a time. Keep going back and saying "What work?" and she will give you more until she is satisfied (need to hand in approximately 100).
Glirina Morningbloom says 'My thanks to you, ______. We have need of some simple items for trade, both here and in other lands. It's a way to keep ourselves involved in the markets all over Norrath. I would appreciate it if you would create some simple copper rings for me to help round out our inventory. Just place the Small Sheet of Copper and a Blob of Metal Polish in your Jeweler's Kit and combine them. Bring the rings to me when you are done.'
This time you receive 20 x Small Sheet of Copper and 20 x Blob of Metal Polish. Combine 1 of each in a Jeweler's Kit.
You have learned the recipe Simple Copper Ring!
Simple Copper Ring trivials at 38. After making them all, hand them to her unstacked, up to four at a time. Keep going back and saying "What work?" and she will give you more until she is satisfied (need to hand in approximately 100).
Glirina Morningbloom says 'I appreciate your assistance. I have a task for you that should be a little more challenging. We sell a fair amount of simple jewelry all around Norrath. Right now we are in need of simple brass armbands. They seem to have become popular, and we'd like to take advantage of this trend while it lasts. Just take the Small Sheet of Brass and a Blob of Metal Polish and combine them in your Jeweler's Kit. Please bring the armbands back to me as soon as you can.'
This time you receive 20 x Small Sheet of Brass and 20 x Blob of Metal Polish. Combine 1 of each in a Jeweler's Kit.
You have learned the recipe Simple Brass Armband!
Simple Brass Armband trivials at 46. After making them all, hand them to her unstacked, up to four at a time. Keep going back and saying "What work?" and she will give you more until she is satisfied (need to hand in approximately 100).
Glirina Morningbloom says 'I am appreciative of your assistance. This task is a bit more complicated. We use a lot of silver chain in our work here, and it is always better and cheaper to make our own. If you could take the Thin Silver Wire and a Blob of Metal Polish and combine them in your Jeweler's Kit, I am certain you can create beautiful silver chain. Please return the chains to me when you are done, we have need of them.'
This time you receive 20 x Thin Silver Wire and 20 x Blob of Metal Polish. Combine 1 of each in a Jeweler's Kit.
You have learned the recipe Simple Silver Chain!
Simple Silver Chain trivials at 54. After making them all, hand them to her unstacked, up to four at a time. Keep going back and saying "What work?" and she will give you more until she is satisfied (need to hand in approximately 100).
Glirina Morningbloom smiles broadly at you. 'You have been of great assistance to me. It would be improper for me to ask more of you. I will find others to do these tasks. I have learned much doing research while you have been helping me. Let me show you the method I have discovered for preparing the Nihilite.' She works swiftly, but you understand what she is doing as she carefully prepared the soft stone. 'Here is some of the special polish that we have devised for use with the Nihilite. What I have shown you will work for both the Pale and Shimmering Nihilite, and you should be able to get useful stones from Raw Pale and Raw Shimmering Nihilite.' You know you can reproduce the polish she has given you. You are certain that you can improve on the method she has shown you, given enough practice with the Nihilite.
Kutin's Key (Normal): Kutin's Key is a no-drop key acquired by fishing in The Abysmal Sea from the Queen of Thorns.
Take the key to Kutin Pyskar, located in the main hall behind and to the right of Morden Rasp. His location is -56.59, -46.197.
Upon handing in the key:
Kutin Pyskar says, 'You found my key! Where was it? Now how did it get there? No matter, you have returned it.'
Kutin opens the chest with the key you just found for him. 'Take this. I found it while adventurin' somewhere. It isn't much, but take it as a reward for findin' my key.'
You gain experience!
Reward was Potion of Transformation (Troll Illusion). Reward: Potion of Transformation
Magician Abysmal Armor (Normal): You say, 'Hail, Jennu Mennea'
Jennu Mennea says 'Hello there! Are you a friend of the elementalkin? Great master of the elements? Conjurer extraordinaire? [Magician]? If so you are just what I have been looking for!'
You say, 'I am a Magician.'
Jennu Mennea says 'Delightful! We are too few nowadays. The few I have met thus far seem intent on burning themselves out too quickly. We are delicate! In any case, to help a fellow magician I may be able to offer my services. If you are in need of new equipment such as [circlet], [pantaloons], [robe], [bracer], [sleeves], [gloves], and [sandals] please let me know.'
You say, 'What bracer?'
Jennu Mennea says 'If you speak to Nalasrine about her findings, she may be able to help you infuse some Muramite silk thread to strengthen it. One length of infused Muramite silk thread along with a reworked bracer would suit you just fine. Find Muramite Bracer Armor piece and return it to me for reworking.'
You say, 'What circlet?'
Jennu Mennea says 'I can shape you a beautiful circlet from Muramite Helm Armor. All you need to do is find some Muramite silk thread. A strengthened thread woven over the circlet in a loom shall yield a fine circlet indeed. Talk to Nalasrine about the strengthening process.'
You say, 'What gloves?'
Jennu Mennea says 'I can make you some gloves that won't burn through no matter how hard you try. Find some Muramite silk thread, I am sure Nalasrine can assist you with strengthening it. Bring me Muramite Glove Armor and I will shape them for you, once I have finished you can add the final touches yourself in a loom.'
You say, 'What pantaloons?'
Jennu Mennea says 'Stitching some Muramite greaves into a pair of pantaloons that would serve you well should be no great feat. Bring me a pair of Muramite Greaves. Once I have done this, you will need to do the final touches yourself. Two lengths of Muramite silk thread infused with Nalasrine's strengthener should be sufficient to finish them up.'
You say, 'What robe?'
Jennu Mennea says 'A grand robe shall be yours if you bring me a Muramite Chest Armor piece. I can reshape it easily, and the finishing touches may be applied by your hand. Strengthen two lengths of Muramite silk thread with Nalasrine's special mixture and some quick work with a loom should do the trick.'
You say, 'What sandals?'
Jennu Mennea says 'Bring me back Muramite Boot Armor and I believe I can rework them into some nice sandals. To thread them together you will need some strengthened Muramite silk thread. If you need help in the strengthening process, just talk to Nalasrine.'
You say, 'What sleeves?'
Jennu Mennea says 'I am always singing the cuffs of my sleeves, too. Bring me Muramite Sleeve Armor. I will do the alterations for you, then all you will need to do is find some Muramite silk thread. Nalasrine can help you strengthen it, and you will have the makings of some nice sleeves.'
Nalasrine Twinklecoil is located in the next room.
You say, 'Hail, Nalasrine Twinklecoil'
Nalasrine Twinklecoil says 'Salutations! It is great to see so many eager travelers out and about. How are you enjoying our little city here? I have been quite busy myself. There are so many interesting things to learn about these strange beings that inhabit Taelosia. Their armor in particular is most interesting. I have developed some intriguing compounds. Let me know if you are interested in such things before I just prattle on!'
You say, 'I am interested.'
Nalasrine Twinklecoil says 'Oh, good. Well let me see. Basically, I have been studying the armor that our explorers have been bringing back from their adventures. While it is a bit strangely shaped, as these creatures that seem to reside here are, I have found that by strengthening some native materials it can be reworked into rather fine armor for the likes of you and me.'
You say, 'What armor?'
Nalasrine Twinklecoil says 'If you are looking into having some armor made, you definitely will need to use my infusions. They are a bit pricey, however they are difficult to make and well frankly, I am the only one who can! Use the plate solvent on plate armor, chain solvent on chain, tanning solution on leather, and silk strengthener on silk. All rather intuitive isn't it? Simply take a look at the different types I have for sale.'
Muramite armor begins dropping in Qvic and above. Bring back the appropriate piece of "Muramite XXX Armor" and turn it in to Jennu Mennea to get a class-specific, no-stat "Reworked Muramite XXX."
Craft a Muramite Silk Thread by combining a Meldstone and a Spider Silk in a loom. This has a high trivial (282) and a high minimum tailoring requirement (in the 240s).
Buy Nalasrine's Perfected Silk Strengthener from Nalasrine Twinklecoil for around 10,500 pp. Combine the strengthener with the Muramite Silk Thread in a loom (no-fail combine). This results in a NO DROP piece of Infused Muramite Thread.
Combine the Infused Muramite Thread with your piece of Reworked Muramite XXX armor in a loom to receive your quest reward (no-fail combine). Reward: Jennu's Gloves of Creation
Reward: Jennu's Bracer of Creation
Reward: Jennu's Circlet of Creation
Reward: Jennu's Sandals of Creation
Reward: Jennu's Sleeves of Creation
Reward: Jennu's Robe of Creation
Reward: Jennu's Pantaloons of Creation
Meat for Allabar (Normal): You can find Allabar Yuti at -50, +80, +140.
You say, 'Hail, Allabar Yuti'
Allabar Yuti sighs. 'Oh, I am sorry. I do not mean to be rude. It is just that I miss the mainland. Being so far away from home is making me homesick. I hate to ask this, but think you could [help] me with something?'
You say, 'I can help you.'
Allabar Yuti says 'When I used to adventure, I acquired quit a habit of eating storm giant steaks. I dearly miss them. Think you could return four storm giant meats to me? I will happily give you some sort of reward if you can do so.'
Hand in 4 unstacked storm giant meats.
Allabar Yuti says 'Thank you very much. This will make me feel much better.'
Monk Abysmal Armor (Normal): You say, 'Hail, Sakar Pressl'
Sakar Pressl says 'Greetings ______, I am looking for those calm and worldly people known as [monks]. You wouldn't happen to be one would you?'
You say, 'I am a monk.'
Sakar Pressl says 'Very nice, it does always please me to see a fellow monk. For one such as yourself, I may be able to assist. If you are in need of new equipment such as [cap], [leggings], [tunic], [bracer], [sleeves], [gloves], or [sandals] - let me know.'
You say, 'What bracer?'
Sakar Pressl says 'Indeed, I can craft you a bracer. Bring me back Muramite Bracer Armor piece and I will get to work on it. You will also need a section of infused Muramite leather to finish the bracer in a loom. Talk to Nalasrine if you still some help infusing the leather.'
You say, 'What cap?'
Sakar Pressl says 'I should be able to reform Muramite Helm Armor into something quite useful to you. Explore these lands until you find some Muramite leather padding. Talk to Nalasrine about infusing it, then bring piece it together with your new helm from me in a loom.'
You say, 'What gloves?'
Sakar Pressl says 'I can make some fine gloves for you. Take the time to dig up some Muramite leather and have Nalasrine assist you with infusing it. Bring me Muramite Glove Armor and I can reshape it into something that you can use. Strengthen the gloves by reinforcing them with the infused leather in a loom, and a fine pair shall be yours.'
You say, 'What leggings?'
Sakar Pressl says 'I believe I can reform some Muramite greaves into a pair of leggings that would fit you. Bring me a pair of Muramite Greaves and I will get to work on that. To finish your leggings you will also have to obtain two pieces of Muramite leather padding. Speak to Nalasrine about infusing it, then place the leather pieces and leggings in a loom to work them together.'
You say, 'What sandals?'
Sakar Pressl says 'Bring me back Muramite Boot Armor and I believe I can rework them into something quite fine for you. Once I've reworked them, you will need to take a section of infused Muramite leather along with the new boots and reinforce them in a loom. If you need help in the infusing process, just talk to Nalasrine.'
You say, 'What sleeves?'
Sakar Pressl says 'Sleeves are quite simple. Venture into these strange lands and find some Muramite Sleeve Armor. Bring the armor piece to me and I will work on refitting it for you. Once you have a piece of Muramite leather padding, talk to Nalasrine about infusing the it. The new sleeve from me can be easily stitched up in a loom with the infused Muramite leather.'
You say, 'What tunic?'
Sakar Pressl says 'I can form you a nice light tunic that will not hinder you in battle. Travel into the hostile areas and bring back two sections of Muramite leather and Muramite Chest Armor. Make sure to speak to Nalasrine about infusing the sections of leather. Bring me the chest piece for reworking, then simply weld together the new chest and leather in a loom.'
Nalasrine Twinklecoil is located in the next room.
You say, 'Hail, Nalasrine Twinklecoil'
Nalasrine Twinklecoil says 'Salutations! It is great to see so many eager travelers out and about. How are you enjoying our little city here? I have been quite busy myself. There are so many interesting things to learn about these strange beings that inhabit Taelosia. Their armor in particular is most interesting. I have developed some intriguing compounds. Let me know if you are interested in such things before I just prattle on!'
You say, 'I am interested.'
Nalasrine Twinklecoil says 'Oh, good. Well let me see. Basically, I have been studying the armor that our explorers have been bringing back from their adventures. While it is a bit strangely shaped, as these creatures that seem to reside here are, I have found that by strengthening some native materials it can be reworked into rather fine armor for the likes of you and me.'
You say, 'What armor?'
Nalasrine Twinklecoil says 'If you are looking into having some armor made, you definitely will need to use my infusions. They are a bit pricey, however they are difficult to make and well frankly, I am the only one who can! Use the plate solvent on plate armor, chain solvent on chain, tanning solution on leather, and silk strengthener on silk. All rather intuitive isn't it? Simply take a look at the different types I have for sale.'
Muramite armor begins dropping in Qvic and above. Bring back the appropriate piece of "Muramite XXX Armor" and turn it in to Sakar Pressl to get a class-specific, no-stat "Reworked Muramite XXX."
Craft a Muramite Leather Padding by combining by combining a Meldstone and some Snake Scales in a loom. This has a high trivial (282) and a high minimum smithing requirement (in the 240s).
Buy Nalasrine's Enforcing Tanning Solution from Nalasrine Twinklecoil for around 10,500 pp. Combine the solution with the Muramite Leather Padding in a loom (no-fail combine). This results in a NO DROP piece of Infused Muramite Leather.
Combine the Infused Muramite Leather with your piece of Reworked Muramite XXX armor in a loom to receive your quest reward (no-fail combine). Reward: Pressl's Robe of Balance
Reward: Pressl's Sleeves of Balance
Reward: Pressl's Bracer of Balance
Reward: Pressl's Cap of Balance
Reward: Pressl's Gloves of Balance
Reward: Pressl's Sandals of Balance
Reward: Pressl's Leggings of Balance
Naea's Necklace (Normal): You say, 'Hail, Naea Fobbins'
Naea Fobbins says 'Why hello there. Just arrived? My name is Naea Fobbins. My husband and I recently joined the Wayfarers Brotherhood. When we heard that they were sailing for lands unknown we just had to go. Truth be told, I do miss home though. I had quite a lucrative business in Rivervale making [necklaces].'
You say, 'What necklaces?'
Naea Fobbins says 'I made all kinds! Some were magical in nature and some just beautiful to look at. That reminds me. My husband recently brought some shells from the shores of Natimbi. They were quite wonderful and I was able to make a nice necklace from them. If you could bring me some shells from Natimbi, I can try to make you one as well. I have nothing else to do at the moment. Are you [interested]?'
You say, 'I am interested.'
Naea Fobbins says 'Okay, great! I will need three Broken Shore shells, and one set of Reef Crustacean Glands to make a necklace for you. The glands are needed because they secrete a kind of sealant to protect the delicate shells. You should be able to find all the items in Natimbi. Hand them to me once you find them.'
Broken Shore Shells are foraged in Natimbi. Reef Crustacean Glands drop from A Reef Crustacean. Give the items to Naea.
Naea Fobbins says 'Oh, you have returned. And you brought all the items I asked for! As promised I will make you a necklace.' Naea begins to carefully thread the shells and adds the secretion from the gland. 'This should do nicely. Here you go! It was a pleasure making it for you. Take care!'
You gain experience!! Reward: Broken Shore Shell Necklace
Necromancer Abysmal Armor (Normal): Nolaen Tav`Inxya may be found at -160, +70, +98.
Nolaen Tav`Inxya says 'Do you command the dead? Do you practice the necromantic arts? Are you a [necromancer]? Speak up!'
You say, 'I am a necromancer'
Nolaen Tav`Inxya says 'Good. Sometimes it is difficult to contact each other, is it not? I too am a necromancer. If you are in need of new equipment such as [circlet], [pantaloons], [robe], [bracer], [sleeves], [gloves], and [sandals] please let me know.'
You say, 'What bracer?'
Nolaen Tav`Inxya says 'I will craft you a bracer if you bring me the materials. Speak to Nalasrine about her findings, she may be able to help you infuse some Muramite silk thread to strengthen it. One length of infused Muramite silk thread along with a reworked bracer would suit you just fine. Find Muramite Bracer Armor piece and return it to me for reworking.'
You say, 'What circlet?'
Nolaen Tav`Inxya says 'I can shape you a powerful circlet from from Muramite Helm Armor. All you need to do is find some Muramite silk thread. A strengthened thread woven over the circlet in a loom shall yield a fine circlet indeed. Talk to Nalasrine about the strengthening process.'
You say, 'What gloves?'
Nolaen Tav`Inxya says 'Find some Muramite silk thread, I am sure Nalasrine can assist you with stregnthening it. Bring me Muramite Glove Armor and I will shape them for you, once I have finished you can add the final touches yourself in a loom.'
You say, 'What pantaloons?'
Nolaen Tav`Inxya says 'Warping some Muramite greaves into a pair of pantaloons that would serve you well is menial. Bring me a pair of Muramite Greaves. Once I have done this, you will need to do the final touches yourself. Two lengths of Muramite silk thread infused with Nalasrine's strengthener should be sufficient to finish them up.'
You say, 'What robe?'
Nolaen Tav`Inxya says 'A useful robe shall be yours if you bring me Muramite Chest Armor piece. I can reshape it easily, and the finishing touches may be applied by your hand. Strengthen two lengths of Muramite silk thread with Nalasrine's special mixture and some quick work with a loom should do the trick.'
You say, 'What sandals?'
Nolaen Tav`Inxya says 'Bring me back Muramite Boot Armor and I believe I can rework them into some nice sandals. To thread them together you will need some strengthened Muramite silk thread. If you need help in the strengthening process, just talk to Nalasrine.'
You say, 'What sleeves?'
Nolaen Tav`Inxya says 'Bring me Muramite Sleeve Armor. I will do the alterations for you, then all you will need to do is find some Muramite silk thread. Nalasrine can help you strengthen it, and you will have the makings of some nice sleeves.'
Nalasrine Twinklecoil is located in the next room.
You say, 'Hail, Nalasrine Twinklecoil'
Nalasrine Twinklecoil says 'Salutations! It is great to see so many eager travelers out and about. How are you enjoying our little city here? I have been quite busy myself. There are so many interesting things to learn about these strange beings that inhabit Taelosia. Their armor in particular is most interesting. I have developed some intriguing compounds. Let me know if you are interested in such things before I just prattle on!'
You say, 'I am interested.'
Nalasrine Twinklecoil says 'Oh, good. Well let me see. Basically, I have been studying the armor that our explorers have been bringing back from their adventures. While it is a bit strangely shaped, as these creatures that seem to reside here are, I have found that by strengthening some native materials it can be reworked into rather fine armor for the likes of you and me.'
You say, 'What armor?'
Nalasrine Twinklecoil says 'If you are looking into having some armor made, you definitely will need to use my infusions. They are a bit pricey, however they are difficult to make and well frankly, I am the only one who can! Use the plate solvent on plate armor, chain solvent on chain, tanning solution on leather, and silk strengthener on silk. All rather intuitive isn't it? Simply take a look at the different types I have for sale.'
Muramite armor begins dropping in Qvic and above. Bring back the appropriate piece of "Muramite XXX Armor" and turn it in to Nolaen Tav`Inxya to get a class-specific, no-stat "Reworked Muramite XXX."
Craft a Muramite Silk Thread by combining a Meldstone and a Spider Silk in a loom. This has a high trivial (282) and a high minimum tailoring requirement (in the 240s).
Buy Nalasrine's Perfected Silk Strengthener from Nalasrine Twinklecoil for around 10,500 pp. Combine the strengthener with the Muramite Silk Thread in a loom (no-fail combine). This results in a NO DROP piece of Infused Muramite Thread.
Combine the Infused Muramite Thread with your piece of Reworked Muramite XXX armor in a loom to receive your quest reward (no-fail combine). Reward: Nolaen's Lifereaper Bracer
Reward: Nolaen's Lifereaper Circlet
Reward: Nolaen's Lifereaper Gloves
Reward: Nolaen's Lifereaper Sandals
Reward: Nolaen's Lifereaper Sleeves
Reward: Nolaen's Lifereaper Robe
Reward: Nolaen's Lifereaper Pantaloons
Nioti's Predicament (Normal): Nioti may be found at +95, +75, +100 in the Abysmal Sea.
You say, 'Hail, Nioti'
Nioti says 'Yes, what is it? I am a bit occupied right now with quite the [predicament]. I swear things keep getting worse and worse around here.'
You say, 'What predicament?'
Nioti says 'Well simply put, we are overwhelmed with repairs. While we made it safely to the shores of the new continent, we suffered some damage to the ship. To make matters worse, we are running out of supplies to complete the needed repairs and I don't have time to return to the mainland to find more. I sure could use some [assistance]. I knew we should have never come here.'
You say, 'What assistance?'
Nioti says 'Well I cannot really believe someone would want to help me, but if you really could help, that would be great. I would need you to find four Branches of Sylvan Oak and return them to me. If you do this for me, I will find some way to reward you for your efforts.'
You can forage the Branches of Sylvan Oak in the Eastern Wastes or the Wakening Land, or simply go to The Bazaar and buy them for a few platinum. Give four unstacked branches to Nioti.
Nioti says 'I don't think you would return. I appreciate your assistance. I hate to do this, but before I can convince my foreman to give you a reward, I am going to need to ask you to help me again. According to another adventurer that passed through here the other day, there is a golem graveyard of sorts in a temple somewhere on this continent. If you could find this place and gather one clay golem part that would help us greatly with repairs. Why do we need these golem parts you ask? I have no idea. Grumby, our foreman said we needed them for some sort of repairs. Oh yeah, take this badge. It identifies you as part of the ship's maintenance crew. Just hand the badge to me when you hand in the golem parts.'
You gain experience!!
You receive a Worker's Badge (identifies as Worker's Badge Number One). The Clay Golem Parts are a ground spawn in Barindu at +600, -585, in a room with Ikaav Ixvet Pox who sees through Shroud of Stealth. Hand in the parts and first Worker's Badge to Nioti:
Nioti says,'Thanks. I hope that wasn't too much trouble. Seems we need more help. Grumby just informed me that some parts on the bridge have already been damaged by rust. That doesnt sound good at all. We will need your help to get some sort of anti rust agent. What? Hey, dont get mad at me. I am sorry I keep asking for help, but I am just following Grumby's orders. There is a gnomish tinker in Ak'anon named Gilipus that might have something to help us. Go there and hand him this note along with your badge so he knows you are working for Grumby. I promise to reward you for your time when you are done helping us. Take your badge back and give it to me again when you hand in the anti-rusting agent.'
You receive a Note to Gilipus and another Worker's Badge (identifies as Worker's Badge Number Two).
Head to Ak'Anon and find Gilipus at +1385, -867 in the room next to the Ak'Anon Bank.
You say, 'Hail, Gilipus'
Gilipus says 'I had a wrench around here somewhere...'
Give him the Note to Gilipus and the Worker's Badge.
Gilipus says 'Yes, what is it? Just a moment, I cannot read without my glasses.'
Gilipus rummages through his numerous pockets looking for his reading glasses. 'Oh this is most embarrassing. Seems I have lost my reading glasses. Oh wait, I know where they are. They are on this bench here.' Just as Gilipus reaches for his glasses, a small mechanical rat snatches them and hurriedly scuttles away. 'Oh drat. This isn't good at all. That defective cleaner just took my reading glasses! Think you could go get them? What defective cleaner you ask? I don't know for certain. I couldn't make out the serial number. If you can find my glasses, I will read this note you brought me.'
You get the Worker's Badge back, but this time it identifies as Worker's Badge Number Three. Kill a defective cleaner in Ak'Anon until one drops Gilipus's Reading Glasses. Give the Glasses and Badge back to Gilipus.
Gilipus says 'Thank you. That is much better.' Gilipus begins to read the note. 'You need something to remove rust? Yes, I do believe I have just the thing for you. Just bring me some rubbing alcohol and I can make what you need. Now where are my tools?'
You get the Worker's Badge back, but now it identifies as Worker's Badge Number Four.
Rubbing Alcohol may be purchased in Thurgadin from Adia Coldbeard and Karey, or in West Cabilis from a mortician. Give the Badge and the Rubbing Alcohol to Gilipus.
Gilipus says 'Hello what can I do for you? Oh yes, you needed something to remove rust. This rubbing alcohol should help you. Good thing you thought to bring it.' Gilipus begins to mix some different chemicals together in a small vial. 'Here you go. This should work. I think. By the way, have you seen a small notebook? It was green with a picture of a lovely cog on it. . .'
You receive a Vial of Anti-Rusting Agent and your Worker's Badge, which now identifies as Worker's Badge Number Five. Head back to Nioti and give her both pieces.
Nioti says 'What took so long? Grumby has been breathing down my neck all day asking for this stuff. I am glad you were able to acquire it. It seems like everything around here is rusting away in this salty air. Your reward? Yes, yes. I will reward you. However it seems we need more help. Grumby has informed me that we need some ore. Think you could go and get some for us? Bring back three blocks of ore and your Worker's Badge.'
You get the Worker's Badge back again (Worker's Badge Number Six now). Blocks of Ore may be crafted by combining 3 x Large Brick of Ore with 1 x Water Flask in a forge, trivial 27. Turn in the Blocks of Ore with the Badge.
Nioti says 'Not the best quality but this ore should help a lot. Now don't get mad at me, but before we can reward you, Grumby has told me that you will need to go get him some food. He said he wants some Filleted Mammoth. Oh and he also wanted a Jumjum Cake. Bring me those food items along with your worker's badge.'
You get the badge again, Worker's Badge Number Seven.
Filleted Mammoth may be baked by combining Mammoth Meat with a Filleting Knife in an oven or spit, trivial 143.
Jumjum Cake may be baked by combining a Cake Round, Clump of Dough, Frosting, Winter Chocolate, and any of three varieties of Jumjum Stalk in an oven or spit, trivial 166.
Turn in the Filleted Mammoth and the Jumjum Cake with the Badge.
Nioti says 'Looks like your work here is done. Grumby said I can reward you. Here you go. Thanks again and sorry for all the trouble.'
Reward(s):
Worker's Earring of Efficiency Reward: Worker's Earring of Efficiency
Noita's Boots (Normal): Noita Ergarman may be found at +160, -235.
You say, 'Hail, Noita Ergarman'
Noita Ergarman says 'Hello. My name is Noita. I just arrived here a day ago. I have come to hopefully work on creating some [new armor designs].'
You say, 'What new armor designs?'
Noita Ergarman says 'Well I work mainly with cloth and animal hides. I have come here to see if there were any new creations I could make. So far I have found one [creature] whose hide has proved to be very durable.'
You say, 'What creature?'
Noita Ergarman says 'I was exploring the beach earlier today, and saw a creature that had a wolf-like appearance, but it was larger than any wolf I have ever seen. The creature proved to be quite vicious, but I was able to dispatch it. The hides I acquired made a very nice pair of boots, suitable for any adventurer. If you could perhaps bring me one boot pattern and three flawless hides from these creatures, I could attempt to make you a pair of these boots.'
Flawless Hynid Hides drop rarely from Hynid Fleshrippers in Natimbi. Hand in three and a Boot Pattern:
Noita Ergarman says 'Thank you, but I asked for other items as well.'
Noita Ergarman says 'Thank you, but I asked for other items as well.'
Noita Ergarman says 'Thank you, but I asked for other items as well.'
Noita Ergarman says 'Excellent. Hopefully I can make the same boots I did earlier.' Noita takes out her sewing kit and begins to skillfully sew the hides together. It doesn't take her long before you start to see the hides taking the familiar shape of a pair of boots. 'Here you go. These boots might be even better than the ones I made earlier. I hope they serve you well.'
You gain experience!! Reward: Hynid Boots
Orgmar's Haunt (Normal): You say, 'Hail, Yitandi'
Yitandi moans in a sad, wispy voice, 'Death. . . coming for all. . .'
You say, 'Hail, Orgmar'
Orgmar says 'You have got ta help me, lad! That ghost there in the corner won't [leave] me alone! Where ever I go he follows me!'
You say, 'Why won't she leave you alone?'
Orgmar say 'I think I took somethin' o' his and he wants it back. Ya got ta [help] me get rid of this ghost, lad! I taint slept in over a fortnight.'
Yitandi moans pitifully, 'Satchel...Sewers...'
You say, 'I will help.'
Orgmar says 'I went explorin' one day in some sewers in the new land. I came across a rottin' satchel on the ground. Inside were some strange gems. I couldn't resist. I took the satchel back here to me room. A day or two later, this ghost appeared. Scared me out o' me chainmail it did. It kept moanin' about wantin' its satchel back. I didn't know what ta do so I went back to the sewers and chucked it into the water. Thought it might appease it or somethin'. That didn't work though and the darn ghost still comes back. Please find the satchel and bring it back ere. Maybe if I can give the satchel to the ghost, it will make him go away for good!'
A Rotting Satchel is a random drop from mobs in the fourth trial (Pool of Sludge). Retrieve it and give it to Orgmar.
Orgmar says 'Ye done a good deed this day, me friend. Not that I am scared of ghosts or anything. Take this as your reward. I found it on one of me adventures in the new land. I know it be a bit gruesome lookin', but it has some magic power. Now to see if I can get rid o' this ghost. Farewell.'
You gain experience!! Reward: Gouged Out Ukun Eye
Paladin Abysmal Armor (Normal): Trimdet Trueheart may be found at -240, +170.
You say, 'Hail, Trimdet Trueheart'
Trimdet Trueheart says 'Greetings. I am only interested in speaking with those most uplifted of knights known as the [paladin], would you be one?'
You say, 'I am a paladin'
Trimdet Trueheart says 'I have served those such as you my entire life. If you are in need of new equipment such as a [helm], [legplates], [chestplate], [bracer], [vambraces], [gloves], or a pair of [boots] let me know.'
You say, 'What helm?'
Trimdet Trueheart says 'I can craft a Muramite helm into something suitable for you. Nalasrine has managed to form a powerful compound that reinforces some native materials. Bring me a Muramite Helm Armor piece and I can shape it to suit you, then you must take some Muramite metal that has been infused with Nalasrine's mixture and put it together in a forge to form a new helm.'
You say, 'What legplates?'
Trimdet Trueheart says 'Reshaping a pair of Muramite legplates into a pair for a noble one such as you is a pleasure. Bring back a pair of Muramite Greaves and two sheets of Muramite metal. Give only the greaves to me for shaping, once I am done with that you will need to take the metal and the greaves to a forge. Don't forget to infuse the metal with the misxture from Nalasrine before you take it to the forge.'
You say, 'What chestplate?'
Trimdet Trueheart says 'I can easily craft you a chestplate if you bring me back a Muramite Chest Armor. Give that to me and I can make some rough adjustments for you. In order for it to suit you properly however, you will also need to sheets of infused Muramite metal and a forge. Make sure to speak to Nalasrine about infusing the metal.'
You say, 'What bracer?'
Trimdet Trueheart says 'A bracer is rather simple to reshape. If you speak to Nalasrine about her findings, she may be able to help you infuse some Muramite metal to strengthen it. Bring me a Muramite Bracer Armor to work with. One sheet of infused Muramite metal along with the new bracer from me placed in a forge should come out perfectly.'
You say, 'What vambraces?'
Trimdet Trueheart says 'I shall make you some glorious vambraces. Bring to me Muramite Sleeve Armor and I will start shaping it to fit you. Once you have some Muramite metal talk to Nalasrine about infusing it. Then simply take the new vambraces from me and forge them with some of the infused metal.'
You say, 'What gloves?'
Trimdet Trueheart says 'In order for me to craft you some gloves, you will need to find some Muramite metal. I am sure Nalasrine can assist you with infusing the metal, which needs to be done before you forge it. Bring me the Muramite Glove Armor and I will shape some gauntlets for you. Then all you need to do is the final touch with the infused metal and the gauntlets in a forge.'
You say, 'What boots?'
Trimdet Trueheart says 'Bring me back some Muramite Boot Armor and I believe I can rework them into something quite fine for you. You will need a sheet of infused Muramite metal along with the new boots from me in a forge to get a good fit. If you need help with infusing process speak to Nalasrine.'
Nalasrine Twinklecoil is located in the next room.
You say, 'Hail, Nalasrine Twinklecoil'
Nalasrine Twinklecoil says 'Salutations! It is great to see so many eager travelers out and about. How are you enjoying our little city here? I have been quite busy myself. There are so many interesting things to learn about these strange beings that inhabit Taelosia. Their armor in particular is most interesting. I have developed some intriguing compounds. Let me know if you are interested in such things before I just prattle on!'
You say, 'I am interested.'
Nalasrine Twinklecoil says 'Oh, good. Well let me see. Basically, I have been studying the armor that our explorers have been bringing back from their adventures. While it is a bit strangely shaped, as these creatures that seem to reside here are, I have found that by strengthening some native materials it can be reworked into rather fine armor for the likes of you and me.'
You say, 'What armor?'
Nalasrine Twinklecoil says 'If you are looking into having some armor made, you definitely will need to use my infusions. They are a bit pricey, however they are difficult to make and well frankly, I am the only one who can! Use the plate solvent on plate armor, chain solvent on chain, tanning solution on leather, and silk strengthener on silk. All rather intuitive isn't it? Simply take a look at the different types I have for sale.'
Muramite armor begins dropping in Qvic and above. Bring back the appropriate piece of "Muramite XXX Armor" and turn it in to Trimdet Trueheart to get a class-specific, no-stat "Reworked Muramite XXX."
Craft a Muramite Metal Sheet by combining a Meldstone, Water Flask, and Smithy Hammer in a forge. This has a high trivial (282) and a high minimum smithing requirement (in the 240s).
Buy Nalasrine's Superior Plate Solvent from Nalasrine Twinklecoil for around 10,500 pp. Combine the solvent with the Muramite Metal Sheet in a forge (no-fail combine). This results in a NO DROP piece of Infused Muramite Metal.
Combine the Infused Muramite Metal with your piece of Reworked Muramite XXX armor in a forge to receive your quest reward (no-fail combine).
Hand-in dialogues needed. Reward: Trimdet's Boots of Chivalry
Reward: Trimdet's Chestplate of Chivalry
Reward: Trimdet's Bracer of Chivalry
Reward: Trimdet's Gauntlets of Chivalry
Reward: Trimdet's Helm of Chivalry
Reward: Trimdet's Vambraces of Chivalry
Reward: Trimdet's Legplates of Chivalry
Pepe's Got a Brand New Bag (Normal): Find Simmons Duronn at -155, -75, +139, outside the Morden Rasp building around the edge.
You say, 'Hail, Simmons Duronn'
Simmons Duronn says 'I am on the hunt for something, my friend. Think you can [assist] me?'
You say, 'I can assist you.'
Simmons Duronn says 'I have dealt with the natives, selling them some goods. In return they have told me of a way to make an interesting bag to carry goods in, from the Venemous Stonemites that inhabit Vxed, the Crumbling Caverns. If you could [travel there] and bring me back a venom sac from one of those Venemous Stonemites, I would be happy to see if I could make a bag for you.'
You say, 'I will travel there.'
Simmons Duronn says 'I await your return.'
Loot a Venomous Stonemite Poison Sac off A Venomous Stonemite in Vxed and return with it to the ship. Give the sac to Simmons.
Simmons Duronn says 'You found the sac! Now what was it they said to do next? Hmm. I believe they said something about not touching the poison. . . yes now I remember. We shouldn't touch the poison. I believe you should talk to a friend of mine named Rion. He can be found here in the city.' Simmons scribbles something down on a note. 'Take this note and the venom sac to him. He should be able to help you.'
You receive Note to Rion and Venomous Stonemite Poison Sac. Rion is located in the ship past the bank at +170, -90. Give him both items.
Rion says, 'Yes, yes. Hmm, a note from Simmons. Hmm, yes. I do believe I can do it, but my assistant Pepe has wandered off somewhere with all my tools. If you can track [Pepe] down and get my tools back, I think I can help you. Oh and here is your venom sac. Hold on to it for now and if you find my tools, hand them to me along with the venom sac.'
You gain experience!!
You also gain a few platinum.
You say, 'Where is Pepe?'
Rion says, 'I fear I do not know where Pepe is at the moment. He tends to get lost quite a bit. Poor lad is a bit addled. When his mother was on her death bed, I promised her I would look after him though. I don't think he would wander away from the city. At least I hope not. If you find him, ask him to give you my scraping tool. Take this doll too. It is his most prized possession. I am surprised he left it behind.'
You receive a doll named "Lamontt." Pepe often wanders past the bank. Give him his doll.
Pepe says, 'Here tools. Hope boss not get mad.' Pepe begins to hug Lamontt.
You gain experience!!
You receive Scraping Tool. Return to Rion and hand him the Scraping Tool and the Venomous Stonemite Poison Sac.
Rion says 'Very good. I will do my best . . . ' Rion begins to carefully remove the poison from the venom sac. 'Here you go. This should do.'
You gain experience!!
You receive a Prepared Stonemite Sac and Scraping Tool. Return to Simmons Duronn and give him the prepared sac.
Simmons Duronn says 'Okay, let's see. . .' Simmons begins to craft the sac into the shape of a small bag. He then dips it into some sort of liquid. 'This will preserve your new bag and keep its shape. Here you go, I hope it assists you on your adventures.'
You gain experience!! Reward: Treated Stonemite Bag
Poisonmaking Freebie: Help Uiyaniv (Normal): You say, 'Hail, Uiyaniv Tu`Vrozix'
Uiyaniv Tu`Vrozix says 'Hello,' Uiyaniv drawls as he appraises you. 'You may be of use to me. If you are wise enough to handle a few simple tasks, you will free me up to do more important things. Are you [willing] in making yourself useful?'
You say, 'I am willing.'
Uiyaniv Tu`Vrozix nods. 'Good start. Being useful is a good talent to cultivate. I am busy working on some interesting uses for the blood of the creatures they have dubbed Muramites. You can please me by doing some of the bothersome tasks that I have been given so that I can apply my talents to this research. Do you want to make yourself [useful] so that I can study the [Muramite blood]?'
You say, 'What muramite blood?'
Uiyaniv Tu`Vrozix says 'I've never seen one of these Muramites, but I've seen samples of their blood -- though calling it blood somewhat extends the usual meaning of that word. There is little resemblance to our blood and and it certainly interacts with it in a very negative way. It's almost like these creatures are antithetical to us. Maybe that's a little extreme, but their blood carries things in it that are first-class poisons to us. The stuff is a little difficult to work with and will certainly make you break out in a rash if you spill it on yourself. The issue is that the blood spoils easily and must be treated properly. I've figured out how to work with it. If you bring me a sample of Muramite blood, I'll distill it for you into something useful and keep a bit of it for my own use.'
You say, 'How can I be useful?'
Uiyaniv Tu`Vrozix says 'Tolerable. At least you are willing to try to prove yourself. Here is what I propose. I will have you complete many tedious and -- if I can manage it -- painful tasks. The result will mean that I have more free time to work on my own projects. In exchange, if you work hard enough, I will teach you the secret for distillation of the Muramite blood. Don't expect this to happen quickly. Your first task will be to create some simple universal suspension. Just take the simple thickener and a vial of Abysmal Sea water and combine them in you mortar and pestle. Return the suspension to me when you are done.'
You receive 20 x Simple Thickener and 20 x Vial of Abysmal Sea Water. Combine 1 of each in your mortar and pestle.
You have learned the recipe Simple Universal Suspension!
Simple Universal Suspension trivials at 31. After making them all, hand them to him unstacked, up to four at a time. Keep going back and saying "How can I be useful?" and he will give you more to craft until he is satisfied (need to hand in approximately 100), then he will move on to another recipe.
Uiyaniv Tu`Vrozix looks you over with a critical glance, 'I have plenty for you to do. We need some solvent. We use a lot of it around here. Just put one ounce of mild acid and a vial of Abysmal Sea water into you mortar and pestle and mix them. Go do that and leave me to my work. Only come back to give me the solvent.'
You receive 20 x Ounce of Mild Acid and 20 x Vial of Abysmal Sea Water. Combine 1 of each in your mortar and pestle.
You have learned the recipe Simple Solvent!
Simple Solvent trivials at 38. After making them all, hand them to him unstacked, up to four at a time. Keep going back and saying "How can I be useful?" and he will give you more to craft until he is satisfied (need to hand in approximately 100), then he will move on to another recipe.
Uiyaniv Tu`Vrozix says 'You are skilled enough to do something more challenging. We have some need of simple poison, though I cannot tell you exactly why. Just take a vial of simple suspension and one ounce of weak spider venom and combine them in your mortar and pestle. Bring me the resultant poison and you will earn a little more respect.'
You receive 20 x Vial of Simple Suspension and 20 x Ounce of Weak Spider Venom. Combine 1 of each in your mortar and pestle.
You have learned the recipe Simple Contact Poison!
Simple Contact Poison trivials at 46. After making them all, hand them to him unstacked, up to four at a time. Keep going back and saying "How can I be useful?" and he will give you more to craft until he is satisfied (need to hand in approximately 100), then he will move on to another recipe.
Uiyaniv Tu`Vrozix says 'Good. Now, get to work making some injected poison for me. It's not hard to do. Just take a vial of simple solvent and an ounce of weak snake venom and combine them in your mortar and pestle. Bring me the poison when you are done.'
You receive 20 x Vial of Simple Solvent and 20 x Ounce of Weak Snake Venom. Combine 1 of each in your mortar and pestle.
You have learned the recipe Simple Injected Poison!
Simple Injected Poison trivials at 54. After making them all, hand them to him unstacked, up to four at a time. Keep going back and saying "How can I be useful?" and he will give you more to craft until he is satisfied (need to hand in approximately 100), you finally see:
Uiyaniv Tu`Vrozix smiles and nods to you. 'You have proven your worth. You need do no more tasks for us. You have done enough and your skills will be more useful elsewhere. Here is the secret we promised you.' Uiyaniv retrieves a thin piece of paper from his pocket. He tells you that it is a bit of the filter that he uses for distilling Muramite blood. He waves it suddenly under your nose. You can't help but flinch at the stench, which causes him to chuckle. You recognize the smell and are able to figure out exactly what he uses to distill the poison from the blood. Figuring out the process is easy now. You also know that you can teach yourself a more effective process with enough practice. Uiyaniv then continues, 'The same method will work for the material we have been calling Muramite bile, though that probably has less in common with what we know as bile.'
Note that there is currently no use for Muramite Blood Distillate or Muramite Bile.
Ranger Abysmal Armor (Normal): You say, 'Hail, Nadien Goldbrow'
Nadien Goldbrow says 'Hail Wood Elf, I am seeing an archer. A forest stalker of the wilds, one who calls themselves [ranger]. Are you such a person?'
You say, 'I am a ranger.'
Nadien Goldbrow says 'In that case, I am at your service. If you would perform a few simple tasks I will assist you in creating a new set of powerful armor to guard you in battle. I can make you a [helm], [greaves], [chainmail], [bracer], [vambraces], [gloves], and [boots].'
You say, 'What bracer?'
Nadien Goldbrow says 'Bring me a Muramite Bracer Armor section and I can reshape it for you. If you speak to Nalasrine about her findings, she may be able to help you infuse some Muramite chain to strengthen it. One length of infused Muramite chain along with my reworked bracer in a forge should be sufficient.'
You say, 'What chainmail?'
Nadien Goldbrow says 'Merely bring me Muramite Chest Armor. Any final adjustments can be made with two lengths of infused Muramite chain and the new chainmail in a forge. Don't forget - Nalasrine can assist you with the infusion.'
You say, 'What gloves?'
Nadien Goldbrow says 'Bring me some Muramite Glove Armor and I shall craft you some gloves. Don't forget to also find a length of Muramite chain and to talk to Nalasrine about the infusion process. Place the infused chain and the gloves from me in a forge for final adjustments.'
You say, 'What greaves?'
Nadien Goldbrow says 'Simply bring me Muramite Greaves Armor. Two lengths of infused Muramite chain will be necessary to make some final adjustments to the greaves yourself in a forge. Don't forget - Nalasrine can assist you with the infusion.'
You say, 'What helm?'
Nadien Goldbrow says 'In order to craft a helm, I need you to bring me Muramite Helm Armor. I can take this helm and reshape it into something more suitable for you. Once I have done so, take an infused Muramite chain length and in a forge you can make any final adjustments to it yourself. Nalasrine can assist you with the infusing the chain.'
You say, 'What vambraces?'
Nadien Goldbrow says 'Bring me Muramite Sleeve Armor. I will fit them as close as I can, then you must take a length of infused Muramite chain and the sleeves to a forge. Nalasrine carries the infusions for the metal that you will need.'
You say, 'What boots?'
Dialogue needed.
Nalasrine Twinklecoil is located in the next room.
You say, 'Hail, Nalasrine Twinklecoil'
Nalasrine Twinklecoil says 'Salutations! It is great to see so many eager travelers out and about. How are you enjoying our little city here? I have been quite busy myself. There are so many interesting things to learn about these strange beings that inhabit Taelosia. Their armor in particular is most interesting. I have developed some intriguing compounds. Let me know if you are interested in such things before I just prattle on!'
You say, 'I am interested.'
Nalasrine Twinklecoil says 'Oh, good. Well let me see. Basically, I have been studying the armor that our explorers have been bringing back from their adventures. While it is a bit strangely shaped, as these creatures that seem to reside here are, I have found that by strengthening some native materials it can be reworked into rather fine armor for the likes of you and me.'
You say, 'What armor?'
Nalasrine Twinklecoil says 'If you are looking into having some armor made, you definitely will need to use my infusions. They are a bit pricey, however they are difficult to make and well frankly, I am the only one who can! Use the plate solvent on plate armor, chain solvent on chain, tanning solution on leather, and silk strengthener on silk. All rather intuitive isn't it? Simply take a look at the different types I have for sale.'
Muramite armor begins dropping in Qvic and above. Bring back the appropriate piece of "Muramite XXX Armor" and turn it in to Nadien Goldbrow to get a class-specific, no-stat "Reworked Muramite XXX."
Craft a Muramite Chain Link by combining a Meldstone, Water Flask, and File in a forge. This has a high trivial (282) and a high minimum smithing requirement (in the 240s).
Buy Nalasrine's Thick Chain Solvent from Nalasrine Twinklecoil for around 10,500 pp. Combine the solvent with the Muramite Chain Link in a forge (no-fail combine). This results in a NO DROP piece of Infused Muramite Chain.
Combine the Infused Muramite Chain with your piece of Reworked Muramite XXX armor in a forge to receive your quest reward (no-fail combine). Reward: Nadien's Bracer of the Archer
Reward: Nadien's Boots of the Archer
Reward: Nadien's Gauntlets of the Archer
Reward: Nadien's Helm of the Archer
Reward: Nadien's Vambraces of the Archer
Reward: Nadien's Chainmail of the Archer
Reward: Nadien's Greaves of the Archer
Reinforced Jeweler's Kit (Normal): You say, 'Hail, Rilwind Sitnai'
Rilwind Sitnai says 'Greetings. We are busy here, and I have little time for pleasantries. I can sell you supplies, if you have need. I can even help you fix up that old Jeweler's [Kit] of yours. Or perhaps you are here to [assist] me with my work?'
You say, 'What about the kit?'
Rilwind Sitnai says 'Ah, well, we've been working on improving our ability to work with liquid precious metals. To do that, we've had to improve our kits. We've made them a bit larger, and added some reinforcements to help them resist the heat. Neysia can make one for you, just find a turepta shell and two shimmering steel threads and hand them to me along with your Jeweler's Kit and she'll make you a new one.'
Neysia Morningbloom may be found at -140, +210, +98.
You say, 'Hail, Neysia Morningbloom'
Neysia Morningbloom says 'Greetings. I can sell you supplies, if you have need or, I can even help you fix up that old Jeweler's [Kit] of yours. Additionally if you like I can convert the various grades of raw Nihilite for you. I will keep a small amount for our use. I will convert raw amber nihilite, raw crimson nihilite, raw indigo nihilite and raw shimmering nihilite.'
You say, 'What Kit?'
Neysia Morningbloom says 'We've been working on improving our ability to work with liquid precious metals. To do that, we've had to improve our kits. We've made them a bit larger, and added some reinforcements to help them resist the heat. I can make one for you, just find a turepta shell and two shimmering steel threads and hand them to me along with your Jeweler's Kit and I'll make you a new one.'
Turepta Shells are uncommon drops from various tureptas in GoD zones. Shimmering Steel Thread may be purchased elsewhere on the ship from either Garald Samer or Tonlyei Lyhin. The Jeweler's Kit is purchasable from jewelcraft merchants in the same room. Give her the items.
Neysia Morningbloom says 'Good work! Here is your new kit.'
The reward is the Reinforced Jeweler's Kit, used in most GoD jewelcraft recipes. Reward: Reinforced Jeweler's Kit
Rogue Abysmal Armor (Normal): Your Location is -160.02, 170.33, 97.00
You say, 'Hail, Nodnol Oow'
Nodnol Oow says 'I am looking for a [rogue]. A cutthroat, a sneak, a thief! Are you some such nefarious person?'
You say, 'I am a rogue.'
Nodnol Oow grins. 'In that case, I am at your service. If you would perform a few simple tasks I will assist you in creating a new set of powerful armor to guard you in battle. I can make you a [helm], [greaves], [chainmail], [bracer], [vambraces], [gloves], and [boots].'
Other dialogues needed.
You say, 'I want to make a bracer.'
Nodnol Oow says 'Bring me Muramite Bracer Armor section and I can reshape it for you. If you speak to Nalasrine about her findings, she may be able to help you infuse some Muramite chain to strengthen it. One length of infused Muramite chain along with my reworked bracer in a forge should be sufficient.'
Nalasrine Twinklecoil is located in the next room.
You say, 'Hail, Nalasrine Twinklecoil'
Nalasrine Twinklecoil says 'Salutations! It is great to see so many eager travelers out and about. How are you enjoying our little city here? I have been quite busy myself. There are so many interesting things to learn about these strange beings that inhabit Taelosia. Their armor in particular is most interesting. I have developed some intriguing compounds. Let me know if you are interested in such things before I just prattle on!'
You say, 'I am interested.'
Nalasrine Twinklecoil says 'Oh, good. Well let me see. Basically, I have been studying the armor that our explorers have been bringing back from their adventures. While it is a bit strangely shaped, as these creatures that seem to reside here are, I have found that by strengthening some native materials it can be reworked into rather fine armor for the likes of you and me.'
You say, 'What armor?'
Nalasrine Twinklecoil says 'If you are looking into having some armor made, you definitely will need to use my infusions. They are a bit pricey, however they are difficult to make and well frankly, I am the only one who can! Use the plate solvent on plate armor, chain solvent on chain, tanning solution on leather, and silk strengthener on silk. All rather intuitive isn't it? Simply take a look at the different types I have for sale.'
Muramite armor begins dropping in Qvic and above. Bring back the appropriate piece of "Muramite XXX Armor" and turn it in to Nodnol Oow to get a class-specific, no-stat "Reworked Muramite XXX."
Craft a Muramite Chain Link by combining a Meldstone, Water Flask, and File in a forge. This has a high trivial (282) and a high minimum smithing requirement (in the 240s).
Buy Nalasrine's Thick Chain Solvent from Nalasrine Twinklecoil for around 10,500 pp. Combine the solvent with the Muramite Chain Link in a forge (no-fail combine). This results in a NO DROP piece of Infused Muramite Chain.
Combine the Infused Muramite Chain with your piece of Reworked Muramite XXX armor in a forge to receive your quest reward (no-fail combine). Reward: Nodnol's Bracer of the Scoundrel
Reward: Nodnol's Gauntlets of the Scoundrel
Reward: Nodnol's Vambraces of the Scoundrel
Reward: Nodnol's Helm of the Scoundrel
Reward: Nodnol's Boots of the Scoundrel
Reward: Nodnol's Chainmail of the Scoundrel
Reward: Nodnol's Greaves of the Scoundrel
Shadowknight Abysmal Armor (Normal): Rayin Yvain may be found at -175, +175, +100.
You say, 'Hail, Rayin Yvain'
Rayin Yvain says 'I need a dark knight, one who walks in the land of the shadow. Would you be thus, a [shadowknight]?'
You say, 'I am a shadowknight.'
Rayin Yvain says 'I too serve the shadow. If you are in need of new equipment such as [helm], [legplates], [chestplate], [bracer], [vambraces], [gloves], or pair of [boots] let me know.'
You say, 'What boots?'
Rayin Yvain says 'Bring me back Muramite Boot Armor and I believe I can rework them into something quite fine for you. You will need a sheet of infused Muramite metal along with new boots from me in a forge to get a good fit. If you need help in the infusing process, just talk to Nalasrine.'
You say, 'What bracer?'
Rayin Yvain says 'Bring me Muramite Bracer Armor to work with. One sheet of infused Muramite metal along with the new bracer from me placed in a forge should be sufficient for it to fit just right.'
You say, 'What chestplate?'
Dialogue needed.
You say, 'What gloves?'
Rayin Yvain says 'In order for me to craft you some gloves, you need to find some more Muramite metal. I am sure Nalasrine can assist you with infusing the metal, which needs to be done before you forge it. Bring me Muramite Glove Armor and I will shape some gauntlets for you. Then all you need to do is the final touch with the infused metal and gauntlets in a forge.'
You say, 'What helm?'
Rayin Yvain says 'I can craft a Muramite helm into something suitable for you. Nalasrine has managed to form a powerful compound that reinforces some native materials. Bring me Muramite Helm Armor piece and I can shape it to suit you, then you must take some Muramite metal that has been infused with Nalasrine's mixture and put it together in a forge with the new helm.'
You say, 'What legplates?'
Rayin Yvain says 'Bring back a pair of Muramite Greaves and two sheets of Muramite metal. Give only the greaves to me for shaping, once I am done with that you will need to take the metal and greaves to a forge. Don't forget to infuse the metal with the mixture from Nalasrine before you take it to the forge.'
You say, 'What vambraces?'
Rayin Yvain says 'I shall make you some glorious vambraces. Hmm, find some Muramite Sleeve Armor. Bring that to me and I will start shaping it to fit you. Once you have some Muramite metal talk to Nalasrine about infusing it. Then simply take the new vambraces from me and forge them with some of the infused metal.'
Nalasrine Twinklecoil is located in the next room.
You say, 'Hail, Nalasrine Twinklecoil'
Nalasrine Twinklecoil says 'Salutations! It is great to see so many eager travelers out and about. How are you enjoying our little city here? I have been quite busy myself. There are so many interesting things to learn about these strange beings that inhabit Taelosia. Their armor in particular is most interesting. I have developed some intriguing compounds. Let me know if you are interested in such things before I just prattle on!'
You say, 'I am interested.'
Nalasrine Twinklecoil says 'Oh, good. Well let me see. Basically, I have been studying the armor that our explorers have been bringing back from their adventures. While it is a bit strangely shaped, as these creatures that seem to reside here are, I have found that by strengthening some native materials it can be reworked into rather fine armor for the likes of you and me.'
You say, 'What armor?'
Nalasrine Twinklecoil says 'If you are looking into having some armor made, you definitely will need to use my infusions. They are a bit pricey, however they are difficult to make and well frankly, I am the only one who can! Use the plate solvent on plate armor, chain solvent on chain, tanning solution on leather, and silk strengthener on silk. All rather intuitive isn't it? Simply take a look at the different types I have for sale.'
Muramite armor begins dropping in Qvic and above. Bring back the appropriate piece of "Muramite XXX Armor" and turn it in to Rayin Yvain to get a class-specific, no-stat "Reworked Muramite XXX."
Craft a Muramite Metal Sheet by combining a Meldstone, Water Flask, and Smithy Hammer in a forge. This has a high trivial (282) and a high minimum smithing requirement (in the 240s).
Buy Nalasrine's Superior Plate Solvent from Nalasrine Twinklecoil for around 10,500 pp. Combine the solvent with the Muramite Metal Sheet in a forge (no-fail combine). This results in a NO DROP piece of Infused Muramite Metal.
Combine the Infused Muramite Metal with your piece of Reworked Muramite XXX armor in a forge to receive your quest reward (no-fail combine). Reward: Rayin's Bracer of Abhorrence
Reward: Rayin's Boots of Abhorrence
Reward: Rayin's Gauntlets of Abhorrence
Reward: Rayin's Helm of Abhorrence
Reward: Rayin's Vambraces of Abhorrence
Reward: Rayin's Chestplate of Abhorrence
Reward: Rayin's Legplates of Abhorrence
Shaman Abysmal Armor (Normal): Kanlekuu Grabboz may be found at -140, +135.
You say, 'Hail, Kanleku Grabboz'
Kanleku Grabboz says 'I seek those who study the spirit world and potions and tribal magic. I seek a shaman. Are you a [shaman]?'
You say, 'I am a shaman.'
Kanleku Grabboz says 'Wonderful. In that case, I am at your service. If you would perform a few simple tasks I will assist you in creating a new set of powerful armor to guard you in battle. I can make you a [helm], [greaves], [chainmail], [bracer], [vambraces], [gloves], and [boots].'
You say, 'What boots?'
Kanleku Grabboz says 'In order to make you some boots, I need you to bring me a Muramite Boot Armor piece. Then take a length of infused Muramite chain and shape the chain to the boots in a forge. Nalasrine can assist you with the infusion, by the way.'
You say, 'What bracer?'
Kanleku Grabboz says 'Bring me a Muramite Bracer Armor section and I can reshape it for you. If you speak to Nalasrine about her findings, she may be able to help you infuse some Muramite chain to strengthen it. One length of infused Muramite chain along with my reworked bracer in a forge should be sufficient.'
You say, 'What chainmail?'
Kanleku Grabboz says 'Merely bring me Muramite Chest Armor. Any final adjustments can be made with two lengths of infused Muramite chain and the new chainmail in a forge. Don't forget - Nalasrine can assist you with the infusion.'
You say, 'What gloves?'
Kanleku Grabboz says 'Bring me some Muramite Glove Armor and I shall craft you some gloves. Don't forget to also find a length of Muramite chain and to talk to Nalasrine about the infusion process. Place the infused chain and the gloves from me in a forge for final adjustments.'
You say, 'What greaves?'
Kanleku Grabboz says 'Simply bring me Muramite Greaves Armor. Two lengths of infused Muramite chain will be necessary to make some final adjustments to the greaves yourself in a forge. Don't forget - Nalasrine can assist you with the infusion.'
You say, 'What helm?'
Kanleku Grabboz says 'In order to craft a helm, I need you to bring me Muramite Helm Armor. I can take this helm and reshape it into something more suitable for you. Once I have done so, take an infused Muramite chain length and in a forge you can make any final adjustments to it yourself. Nalasrine can assist you with the infusing the chain.'
You say, 'What vambraces?'
Kanleku Grabboz says 'Bring me Muramite Sleeve Armor. I will fit them as close as I can, then you must take a length of infused Muramite chain and the sleeves to a forge. Nalasrine carries the infusions for the metal that you will need.'
Nalasrine Twinklecoil is located in the next room.
You say, 'Hail, Nalasrine Twinklecoil'
Nalasrine Twinklecoil says 'Salutations! It is great to see so many eager travelers out and about. How are you enjoying our little city here? I have been quite busy myself. There are so many interesting things to learn about these strange beings that inhabit Taelosia. Their armor in particular is most interesting. I have developed some intriguing compounds. Let me know if you are interested in such things before I just prattle on!'
You say, 'I am interested.'
Nalasrine Twinklecoil says 'Oh, good. Well let me see. Basically, I have been studying the armor that our explorers have been bringing back from their adventures. While it is a bit strangely shaped, as these creatures that seem to reside here are, I have found that by strengthening some native materials it can be reworked into rather fine armor for the likes of you and me.'
You say, 'What armor?'
Nalasrine Twinklecoil says 'If you are looking into having some armor made, you definitely will need to use my infusions. They are a bit pricey, however they are difficult to make and well frankly, I am the only one who can! Use the plate solvent on plate armor, chain solvent on chain, tanning solution on leather, and silk strengthener on silk. All rather intuitive isn't it? Simply take a look at the different types I have for sale.'
Muramite armor begins dropping in Qvic and above. Bring back the appropriate piece of "Muramite XXX Armor" and turn it in to Kanleku Grabboz to get a class-specific, no-stat "Reworked Muramite XXX."
Craft a Muramite Chain Link by combining a Meldstone, Water Flask, and File in a forge. This has a high trivial (282) and a high minimum smithing requirement (in the 240s).
Buy Nalasrine's Thick Chain Solvent from Nalasrine Twinklecoil for around 10,500 pp. Combine the solvent with the Muramite Chain Link in a forge (no-fail combine). This results in a NO DROP piece of Infused Muramite Chain.
Combine the Infused Muramite Chain with your piece of Reworked Muramite XXX armor in a forge to receive your quest reward (no-fail combine). Reward: Kanleku's Vambraces of Spirits
Reward: Kanleku's Boots of Spirits
Reward: Kanleku's Bracer of Spirits
Reward: Kanleku's Gauntlets of Spirits
Reward: Kanleku's Helm of Spirits
Reward: Kanleku's Chainmail of Spirits
Reward: Kanleku's Greaves of Spirits
Smithing Freebie: Help Snokin (Normal): Snokin Breaksteel is located on the ship at +95, +275.
You say, 'Hail, Snokin Breaksteel'
Snokin Breaksteel says 'Hello, Snokin can help you with da smith stuff. Can you [help] Snokin? Snokin too busy, need more time at forge with new ore, less time doing silly work for Wayfarers.'
You say, 'I can help.'
Snokin Breaksteel smiles broadly. 'You is nice person! Da Wayfarers wants Snokin to make lots of silly things for dem, but Snokin want to make stuff with [new ore], not old steel. Can you do some [silly work] for Snokin?'
You say, 'What new ore?'
Snokin Breaksteel says 'It is strange ore, Snokin never see anything like it. It very easy to work with, if you knows the way. It also make very strong steel. Dey say dat it get dat way when something big, like explosion or something magic, make all da metal line up. So dey call it aligned ore,' Snokin says the words, clearly unsure of what they mean. 'It make great steel! Very strong and make good, sharp edges if you hammer on it right way. Snokin know how to make steel from new ore. If you find any ore, bring to Snokin and Snokin give you new steel.'
You say, 'I can do some silly work.'
Snokin Breaksteel says 'Tank you! If you make stuff for Snokin, Snokin can work more on new ore. You work as hard as Snokin, den Snokin give you good reward. Snokin knows people work good for good reward. Take dis stuff and make studs so Snokin no have to. Just go to forge and put stuff in. One of each is good. When you have da studs, bring to Snokin. When you do enough work, Snokin will show you da secret for makin da new ore into da new steel.'
You receive 20 x Vial of Abysmal Sea Water, 20 x Metal Scraps, 20 x Simple Iron File. Combine 1 of each in the nearby forge. You also receive the book Makin Nice Stuff.
You have learned the recipe Simple Stud!
Simple Stud trivials at 31. After making them all, hand them to him unstacked, up to four at a time. Keep going back and saying "What silly work?" and he will give you more until he is satisfied (need to hand in approximately 100).
Snokin Breaksteel smiles at you, showing very crooked teeth. 'Good! Snokin needs some rings for da Wayfarers. If you could make dem. Snokin be happy. Take dis stuff and go over to da forge and make rings. Bring da rings to Snokin.'
This time he hands you 20 x Simple Iron File, 20 x Simple Ring Mold, and 20 x Metal Scraps. As before, combine 1 of each in a forge.
You have learned the recipe Simple Ring!
Simple Ring trivials at 38. After making them hand them to him unstacked, up to four at a time. Keep going back and saying "What silly work?" and he will give you more until he is satisfied (need to hand in approximately 100).
Snokin Breaksteel says 'Snokin not tink you as bad as dey say. Snokin need chisels and you can make dem. Take dis stuff to da forge, put one of each of dem in and make da chisel. Bring da chisel to Snokin fast, da Wayfarers needs dem.'
This time he hands you 20 x Simple Chisel Mold and 20 x Metal Scraps. Again, combine 1 of each in a forge.
You have learned the recipe Simple Chisel!
Simple Chisel trivials at 46. After making them hand them to him unstacked, up to four at a time. Keep going back and saying "What silly work?" and he will give you more until he is satisfied (need to hand in approximately 100).
Snokin Breaksteel says 'Good! More stuff for you to do for Snokin. Snokin like you. Make files and bring Snokin soon. Take dis stuff and put into forge to make files. Go now, work hard for reward, not stand and look at Snokin.'
This time he hands you 20 x Flask of Abysmal Sea Water, 20 x Simple File Mold, and 20 x Metal Scraps. Again, combine 1 of each in a forge.
You have learned the recipe Simple File!
Simple File trivials at 54. After making them hand them to him unstacked, up to four at a time. Keep going back and saying "What silly work?" and he will give you more until he is satisfied (need to hand in approximately 100).
Snokin Breaksteel says 'No more work now. Snokin happy wit what you do already. Snokin show you secret now. You not tell anyone!' Snokin looks around furtively, as if everyone on the ship doesn't hear everything he says. He hands you a piece of paper with some very precise writing on it. You can only guess that he did not write it. You look it over and you understand the methods for smelting the aligned ore and the shimmering aligned ore. It's not a complicated process, but you would have needed information that only that Wayfarers have to uncover it. Now all you need to do is place the ore into a forge and you will be able to make the steel. However, you are certain that you can improve the process if you work with the ore long enough. Snokin takes the paper back and pulls out a ledger. You see him carefully note your name on the ledger with clear and concise penmanship that matches that on the paper you just read.
You can now make (and learn) the Bar of Aligned Steel and Bar of Shimmering Steel recipes.
Taelosian Geomancy Stones (GoD spells) (Normal): Reyfin Malakwa may be found on the ship at +225, +290, +100.
You say, 'Hail, Reyfin Malakwa'
Reyfin Malakwa stares silently out over the ocean towards the magical wards protecting the ship from the unyielding onslaught of the pounding waves. He jumps back terrorized when he realizes your presence. His visage calms a bit when he senses you mean him no immediate harm. He ponders you timidly for a moment and then leans down and begins drawing something in the sea grime that covers one of the boxes. You study his sketch for a moment and begin to understand that it is a rune of sorts. Three arching lines join in the center to form a sort of Y-shape.
All classes can turn in Taelosian Geomancy Stones to Reyfin Malakwa for a spell or discipline depending upon the class. Taelosian Geomancy Stone Jelki may be turned in by all classes, while Taelosian Geomancy Stone Eril and Taelosian Geomancy Stone Yiktu may only be turned in by spellcasting classes.
Reyfin Malakwa shuffles back from you until familiarity dawns on him. You reach forward and hold the stone out in front of you. He tilts his head slightly and studies the stone for a moment before taking it from your hands.
Reyfin Malakwa holds the symbol up over his head and speaks out over the dark waters. He begins to recite some sort of ritual as the runes begin to drip a sticky-looking fluid down on to his hands and arms. The rune begins to glow, softly at first, but it becomes brighter as Reyfin's voice rises. Suddenly, the symbol sublimates into a hovering mass of glowing vapor. Reyfin turns to you and beckons. You hold out your hand and receive the glowing vapor. Almost immediately the vapor solidifies into a familiar shape. Reyfin bends down and begins drawing in the grime once again. You see a pair of jagged lines crossing in the center.
For Taelosian Geomancy Stone Jelki:
Bards receive the song Echo of the Trusik.
Beastlords receive the spell Trushar's Mending.
Berserkers receive the tome Battle Cry of the Mastruq (also vendor-sold, unlike any other quest rewards here).
Clerics receive the spell Holy Elixir.
Druids receive the spell Sylvan Fire.
Enchanters receive the spell Bliss of the Nihil.
Magicians receive the spell Elemental Siphon.
Monks receive the tome Phantom Shadow.
Necromancers receive the spell Night Stalker.
Paladins receive the spell Wave of Trushar.
Rangers receive the spell Sylvan Burn.
Rogues receive the tome Kyv Strike.
Shadowknights receive the spell Black Shroud.
Shaman receive the spell Breath of Trushar.
Warriors receive the tome Bellow of the Mastruq.
Wizards receive the spell White Fire.
For Taelosian Geomancy Stone Eril:
Bards receive the song Dark Echo.
Beastlords receive the spell Trushar's Frost.
Clerics receive the spell Order.
Druids receive the spell Sylvan Embers.
Enchanters receive the spell Madness of Ikkibi.
Magicians receive the spell Monster Summoning IV.
Necromancers receive the spell Night's Beckon.
Paladins receive the spell Holy Order.
Rangers receive the spell Sylvan Call.
Shadowknights receive the spell Miasmic Spear.
Shaman receive the spell Daluda's Mending.
Wizards receive the spell Telaka.
For Taelosian Geomancy Stone Yiktu:
Bards receive the song War March of the Mastruq.
Beastlords receive the spell Turepta Blood.
Clerics receive the spell Holy Light.
Druids receive the spell Sylvan Infusion.
Enchanters receive the spell Dreary Deeds.
Magicians receive the spell Rock of Taelosia.
Necromancers receive the spell Night Fire.
Paladins receive the spell Light of Order.
Rangers receive the spell Sylvan Light.
Shadowknights receive the spell Mental Horror.
Shaman receive the spell Balance of the Nihil.
Wizards receive the spell Black Ice. Reward: Spell: Trushar's Frost
Reward: Spell: Turepta Blood
Reward: Song: Dark Echo
Reward: Spell: Sylvan Light
Reward: Spell: Holy Light
Reward: Song: War March of the Mastruq
Reward: Song: Echo of the Trusik
Reward: Spell: Night Fire
Reward: Spell: Sylvan Call
Reward: Spell: Sylvan Infusion
Reward: Spell: Breath of Trushar
Reward: Spell: Holy Order
Reward: Spell: Mental Horror
Reward: Spell: Holy Elixir
Reward: Spell: Black Ice
Reward: Spell: White Fire
Reward: Spell: Dreary Deeds
Reward: Spell: Balance of the Nihil
Reward: Spell: Bliss of the Nihil
Reward: Spell: Trushar's Mending
Reward: Spell: Elemental Siphon
Reward: Tome of Bellow of the Mastruq
Reward: Spell: Wave of Trushar
Reward: Spell: Black Shroud
Reward: Spell: Sylvan Fire
Reward: Spell: Night Stalker
Reward: Tome of Phantom Shadow
Reward: Spell: Sylvan Burn
Reward: Spell: Light of Order
Reward: Spell: Daluda's Mending
Reward: Spell: Sylvan Embers
Reward: Tome of Kyv Strike
Reward: Spell: Telaka
Reward: Spell: Rock of Taelosia
Reward: Spell: Monster Summoning IV
Reward: Spell: Night's Beckon
Reward: Spell: Order
Reward: Spell: Madness of Ikkibi
Reward: Spell: Miasmic Spear
Reward: Tome of Battle Cry of the Mastruq
The Fourteen Great Adventurers (Normal): Your Location is -431.30, -226.01, 87.19.
You say, 'Hail, De`van Szostek'
De`van Szostek focuses his attention on ______.
De`van Szostek says 'Well, hello there. Have you come to listen to my tale of sorrow? Please say [yes].'
You say, 'Yes.'
De`van Szostek says 'Find a place to sit, for what I am about to tell you is a tale of fourteen great adventurers who met the full force of the Muramites head on . . . [continue].'
You say, 'Continue.'
De`van Szostek says 'When the brotherhood first arrived here, we sent out scouts to gather information about the area. Those scouts were some of our best and they were executing their task flawlessly until one day the information stopped. All of the brotherhood began to worry. We sent a young scout named Falcin to investigate. Soon after his departure, he returned in bad condition. Falcin died shortly afterward, but not before he detailed the gruesome practices of the Muramite army. This upset many, including a group of fourteen legendary adventurers who had arrived shortly after we hit land . . . [continue].'
You say, 'Continue.'
De`van Szostek says 'Feeling that things were getting out of hand, these fourteen came to me and asked that I help them by telling them everything we had found out about the continent thus far. Seeing the light of determination in their eyes, I decided to reveal confidential information to them. I figured they would just leave things to us once they knew how serious the situation was, but knowledge of how dire things could become just fueled the spirit of honor within all of them. I told them that it would be brought under control by the brotherhood, but they refused to listen. They decided that the only solution was to destroy the leader of this invading force . . . [continue].'
You say, 'Continue.'
De`van Szostek says 'That morning, those of them who chose to save us said goodbye to their friends and family, and the rest -- all good friends of mine -- asked me to honor them. They wanted me to say that I believed they would accomplish what it was they set out to do. I told them I would have a mug of ale waiting for all of them upon their triumphant return, but while I said this aloud, deep inside I knew that this would not turn out well . . . [continue].'
You say, 'Continue.'
De`van Szostek says 'The next morning I gathered all of them together and cast a spell on their leader that would allow me to communicate with him through his mind and see what he saw. So, off they went, leaving behind six of our residents -- Sophia, Verna, Irena, Jenna, Gizzmu, and Aprilia -- to wait for their return. Days passed and nights of unrest became worse and worse as visions of their battles popped into my mind. I saw them fighting through Qinimi and stalking through the sewers. I witnessed their arrival in Yxtta where they begin to have problems making it through. I saw one of them almost fall before the rest rushed to his aid and saved him. Even through all of this, they never once considered turning back . . . [continue].'
You say, 'Continue.'
De`van Szostek says 'A short time went by and my mind was oddly silent. I spent those moments trying to comfort the others as they began to ask me questions. Fearing I would reveal my worry, I reassured them that everything was fine and that our heroes would return shortly. There was more silence and my hopes began to wane. Then, I had another vision. They were still alive and were fighting in an area with a huge crater at its center. This, I surmised, was where some kind of explosion occurred that had caused all of the destruction I'd seen. Our friends fought on through this until they finally went as far as they could go . . . [continue].'
You say, 'Continue.'
De`van Szostek says 'They had finally made it to the entrance of Tacvi, the broken temple of the enslaved trusik. It was inside this temple that the trusik worshipped a false god named Trushar. It was here that the army's leader could be found, this ominous being we knew only as the Zun'Muram. It was here that I would receive my last vision and the link to my friends would disappear. The last thing I saw was all of them bruised and beaten, yet still determined to stop this threat to Norrath. Before entering the lair of the fearsome beast, they all embraced each other. That is where the visions stopped and the [mystery] began.'
You say, 'What mystery?'
De`van Szostek says 'Well, you see. this happened some time ago and as each day passes, me and the others sink deeper into depression. With our hope quickly dying, all we can do now is pray for some sort of closure. While I do not want to fully admit it, I believe our heroes all met their demise and now I just want them to be honored in death. I have taken enough of your time and I appreciate that you listened to me. Telling the story helps me feel better, but now I must go back to wondering what has happened [unless] . . .'
You say, 'Unless what?'
De`van Szostek sends this as a private message:
De`van Szostek says 'You seem quite interested in what I have said here and while I could be wrong, when I look at you I see a glimpse of the same honor-filled spirit I saw in them. I know it may be too much to ask, but we have all been suffering for a long time and . . . well, if you ever find yourself inside Tacvi, and you come across the remains of an adventurer, bring back what you find. For me, I would like to have the writings of Xenaida, Wijdan, Rytan, Kaikachi, Vahlara, Frizznik, Zajeer, and Valtron. As for the rest of them, I would ask that you return the memories to the six they left here on the boat. While this task is not an easy one, I shall handsomely reward anyone who returns all of these things to the proper people.'
Handing De`van Szostek any of the writings by the mentioned people nets you this:
De`van Szostek says 'This tome will serve as a remnant of a great warrior who died protecting our realm from the menace of the Muramites. I thank you, ______, and ask that you bring more if you find them.'
Sophia Florence is a dwarf located at -126.28, 236.84, 115.19, in the building with the baking and brewing merchants.
You say, 'Hail, Sophia Florence'
Sophia Florence focuses her attention on ______.
Sophia Florence wipes away a tear as she turns to face you. Hello ______, sorry if I seem somewhat antisocial but it has been many days since I last saw my father Lyndro and as each hour passes the possibility that he may never return becomes more apparent. While I have not given up hope it gets harder each day not to. If he is never to return to me I wish that I had something to remember him by, something that let me know he died just as brave a man as he has always been.
Give her Lyndro's Writings.
Sophia Florence takes the dusty tome from ______'s hands.
Sophia Florence's eyes open wide as she takes the journal and runs her hands over the front cover. Opening the book to the last page tears begin to roll down her cheeks and land on the parchment. Finishing the last line Sophia looks up to you and says, 'I don't know what to say but thank you. De'van mentioned that he had told someone of my worries and now here you are with the final writings of my father. You are truly a blessing sent by the Gods and I thank you once again, but I must ask that you do the same for the others who are worried about the loved ones that traveled with my father. If you have already helped everyone please tell De'van that your task is complete and he will reward you.'
Verna Abella is a barbarian located at -127.06, 227.74, 115.19, next to Sophia.
You say, 'Hail, Verna Abella'
Verna Abella focuses her attention on ______.
Verna Abella seems to be deep in thought. She ignores you at first but eventually turns towards you with a somber look on her face. 'Forgive me. I am not much of a talker these days since Silius left on his journey with Lyndro and the others. Sitting here everyday wishing that they would return has consumed me to the point that I can do nothing else. If only I had some proof of what has happened to Silius. Anything at all would help me in this time of wonder and worry.'
Give her Silius' Writings.
Verna Abella takes the dusty tome from ______'s hands.
Verna Abella takes the book from your hands instantly recognizing it. 'Does this mean he is . . .' She stops for a second choking back tears as the reality of Silius' passing hits her. 'I thank you for bringing this to me I shall cherish it always. Please help the others who have been suffering like me, bring them the closure you have given to me so that they can get on with their lives. Forgive me but I must be going there is much I must do. If you have already helped everyone please tell De'van that your task is complete and he will reward you.'
Aprilia Marrow is a human located at -115.71, 226.99, 131.19, upstairs in the same building from Sophia and Verna.
You say, 'Hail, Aprilia Marrow'
Aprilia Marrow focuses her attention on ______.
Aprilia Marrow groans softly as she turns to face you. 'Please leave me be. My darling Prathun has yet to return to me and each day weakens my resolve. I know in my heart he is out there somewhere, but with no word since the day he left, I fear that my heart may be wrong. If only I had something that would let me know what has happened to him.'
Give her Prathun's Writings.
Aprilia Marrow takes the dusty tome from ______'s hands.
Aprilia Marrow says 'I thought I would never have to face this reality, but here it is -- the proof I asked for. While these pages detail the adventures of my love, it is you who are the great one. While I shall forever be pained by this, I am in your debt for helping me. Please leave me now and find those others who suffer the continued disappearance of their loved ones. If you have already helped everyone, please tell De'van that your task is complete and he will reward you.'
Jenna Gurell is a gnome located at -170.21, 250.03, 115.19, in the same building and on the same level as Sophia and Verna.
You say, 'Hail, Jenna Gurell'
Jenna Gurell focuses her attention on ______.
Jenna Gurell says 'Please do not disturb me. I am mourning the loss of my dear Rashere. While I do not know if his fate has yet been sealed the empty feeling in my heart tells me so. If only I could see him once more, if only I could read his words again.'
Give her Rashere's Writings.
Jenna Gurell takes the dusty tome from ______'s hands.
Jenna Gurell opens the book and begins to read from the last page aloud. As she reaches the final sentence her voice begins to crack and tears stream down her face. Wiping the tears from her face Jenna looks up at you and says `Thank you but I really must be going. If you have done this wonderful thing for the others who have been suffering with me then return to De`van and tell him your task is complete and he will reward you.' Unable to continue she turns away from you motioning for you to leave.
Gizzmu the Wise is an erudite located at -250.35, 100.07, 117.49, one level down from the Grozmok Stone, to the right (with the magus behind you).
You say, 'Hail, Gizzmu the Wise'
Gizzmu the Wise focuses her attention on ______.
Gizzmu the Wise says 'Forgive me but sometimes I get so distracted when I stare out at the water here. I hate this feeling of worry that has overcome me. Here I am waiting for my son's return and yet something keeps telling me my wait is for naught. He is not coming back that is all I can think, but something keeps me hoping. I am sure you have heard our story, there are several others on this ship who have been awaiting the return of the 14 adventurers who set out to stop the Force Commander, one of them was my son Maddoc. While I am close to giving up, I would at least like to have something of his to remember him by. Something I can keep with me so I know somehow he is still looking out for me.'
Give her Maddoc's Writings.
Gizzmu the Wise takes the dusty tome from ______'s hands.
Gizzmu the Wise takes the bound volume from your hands and weeps. As she flips from page to page the crying becomes more intense until finally she closes the book unable to continue. 'Something told me you would bring an end to my worry. While this is not the happy return I had wished for it will help me move on. May your adventures be plentiful and your spirit forever blessed. If you have already helped everyone, please tell De'van that your task is complete and he will reward you.'
Irena Pereira is a vah shir located at -310.61, -179.49, 99.19, down the left stairs from the Grozmok Stone (with the magus behind you), then down the stairs to the left of Malandra.
You say, 'Hail, Irena Pereira'
Irena Pereira focuses her attention on ______.
Irena Pereira says 'You must be the one De'van spoke to. I'm not looking for any of your help. I know that the mighty Absor will return someday and until I am proven wrong I will continue to wait for him to arrive.'
Give her Absor's Writings.
Irena Pereira takes the dusty tome from ______'s hands.
Irena Pereira stops to look at the tome refusing to believe it is what it seems. As she leafs through each page she starts to get choked up. Slamming the book closed defying her want to shed tears she looks up at you and kneels. 'I thank thee mighty adventurer for helping place the spirit of Absor to rest. If you have already helped everyone please tell De'van that your task is complete and he will reward you.'
You say, 'Hail, De`van Szostek'
De`van Szostek says 'There is nothing more I can tell you. If you accomplish what I ask, then I will reward you. Until then, there is nothing left to say.'
You say, 'My task is complete.'
De`van Szostek says 'I thank you, ______, and as I promised, here is a reward for your efforts. Guard this with your life, for while it may not seem like much, I believe its potential will increase when we discover more about these beings and the realm they came from.'
You receive a Tome of New Beginnings (as of 13 Sep 2004, this is still not usable by berserkers). Reward: Tome of New Beginnings
Warrior Abysmal Armor (Normal): You say, 'Hail, Vadd Rabbok'
Vadd Rabbok says 'I seek a powerful warrior. One who does not shy from battle or duty. Are you such a [warrior]?'
You say, 'I am a warrior.'
Vadd Rabbok says 'The world does not turn without the service of those such as yourself. If you are in need of new equipment such as [helm], [legplates], [chestplate], [bracer], [vambraces], [gloves], or pair of [boots] let me know.'
You say, 'What boots?'
Vadd Rabbok says 'Bring me back Muramite Boot Armor and I believe I can rework them into something quite fine for you. You will need a sheet of infused Muramite metal along with new boots from me in a forge to get a good fit. If you need help in the infusing process, just talk to Nalasrine.'
You say, 'What chestplate?'
Vadd Rabbok says 'Bring back Muramite Chest Armor. Give that to me and I can make some rough adjustments for you. In order for it to suit you properly however, you will also need two sheets of infused Muramite metal and a forge. Make sure to speak to Nalasrine about infusing the metal.'
You say, 'What gloves?'
Vadd Rabbok says 'In order for me to craft you some gloves, you need to find some more Muramite metal. I am sure Nalasrine can assist you with infusing the metal, which needs to be done before you forge it. Bring me Muramite Glove Armor and I will shape some gauntlets for you. Then all you need to do is the final touch with the infused metal and gauntlets in a forge.'
You say, 'What helm?'
Vadd Rabbok says 'I can craft a Muramite helm into something suitable for you. Nalasrine has managed to form a powerful compound that reinforces some native materials. Bring me Muramite Helm Armor piece and I can shape it to suit you, then you must take some Muramite metal that has been infused with Nalasrine's mixture and put it together in a forge with the new helm.'
You say, 'What legplates?'
Vadd Rabbok says 'Bring back a pair of Muramite Greaves and two sheets of Muramite metal. Give only the greaves to me for shaping, once I am done with that you will need to take the metal and greaves to a forge. Don't forget to infuse the metal with the mixture from Nalasrine before you take it to the forge.'
You say, 'What vambraces?'
Vadd Rabbok says 'I shall make you some glorious vambraces. Hmm, find some Muramite Sleeve Armor. Bring that to me and I will start shaping it to fit you. Once you have some Muramite metal talk to Nalasrine about infusing it. Then simply take the new vambraces from me and forge them with some of the infused metal.'
Nalasrine Twinklecoil is located in the next room.
You say, 'Hail, Nalasrine Twinklecoil'
Nalasrine Twinklecoil says 'Salutations! It is great to see so many eager travelers out and about. How are you enjoying our little city here? I have been quite busy myself. There are so many interesting things to learn about these strange beings that inhabit Taelosia. Their armor in particular is most interesting. I have developed some intriguing compounds. Let me know if you are interested in such things before I just prattle on!'
You say, 'I am interested.'
Nalasrine Twinklecoil says 'Oh, good. Well let me see. Basically, I have been studying the armor that our explorers have been bringing back from their adventures. While it is a bit strangely shaped, as these creatures that seem to reside here are, I have found that by strengthening some native materials it can be reworked into rather fine armor for the likes of you and me.'
You say, 'What armor?'
Nalasrine Twinklecoil says 'If you are looking into having some armor made, you definitely will need to use my infusions. They are a bit pricey, however they are difficult to make and well frankly, I am the only one who can! Use the plate solvent on plate armor, chain solvent on chain, tanning solution on leather, and silk strengthener on silk. All rather intuitive isn't it? Simply take a look at the different types I have for sale.'
Muramite armor begins dropping in Qvic and above. Bring back the appropriate piece of "Muramite XXX Armor" and turn it in to Vadd Rabbok to get a class-specific, no-stat "Reworked Muramite XXX."
Craft a Muramite Metal Sheet by combining a Meldstone, Water Flask, and Smithy Hammer in a forge. This has a high trivial (282) and a high minimum smithing requirement (in the 240s).
Buy Nalasrine's Superior Plate Solvent from Nalasrine Twinklecoil for around 10,500 pp. Combine the solvent with the Muramite Metal Sheet in a forge (no-fail combine). This results in a NO DROP piece of Infused Muramite Metal.
Combine the Infused Muramite Metal with your piece of Reworked Muramite XXX armor in a forge to receive your quest reward (no-fail combine). Reward: Vadd's Chestplate of Elite Combat
Reward: Vadd's Bracer of Elite Combat
Reward: Vadd's Boots of Elite Combat
Reward: Vadd's Helm of Elite Combat
Reward: Vadd's Vambraces of Elite Combat
Reward: Vadd's Gauntlets of Elite Combat
Reward: Vadd's Legplates of Elite Combat
Wizard Abysmal Armor (Normal): You say, 'Hail, Nunkin Coggrinder'
Nunkin Coggrinder says 'Hello there! Are you a manipulator of fire, ice, and magic? Are you the most powerful of those that claim to be casters? Are you a [wizard]?'
You say, 'I am a wizard.'
Nunkin Coggrinder says 'This is good. I do love to converse with fellow wizards. In any case, to help a fellow wizard I may be able to offer my services. If you are in need of new equipment such as [circlet], [pantaloons], [robe], [bracer], [sleeves], [gloves], and [sandals] please let me know.'
You say, 'What bracer?'
Nunkin Coggrinder says 'A bracer? Of course! If you speak to Nalasrine about her findings, she may be able to help you infuse some Muramite silk thread to strengthen it. One length of infused Muramite silk thread along with a reworked bracer would suit you just fine. Find a Muramite Bracer Armor piece and return it to me for reworking.'
You say, 'What circlet?'
Nunkin Coggrinder says 'I can shape you a beautiful circlet from Muramite Helm Armor. All you need to do is find some Muramite silk thread. A strengthened thread woven over the circlet in a loom shall yield a fine circlet indeed. Talk to Nalasrine about the strengthening process.'
You say, 'What gloves?'
Nunkin Coggrinder says 'Find some Muramite silk thread, I am sure Nalasrine can assist you with stregnthening it. Bring me Muramite Glove Armor and I will shape them for you, once I have finished you can add the final touches yourself in a loom.'
You say, 'What pantaloons?'
Nunkin Coggrinder says 'Stitching some Muramite greaves into a pair of pantaloons that would serve you well should be no great feat. Bring me a pair of Muramite Greaves. Once I have done this, you will need to do the final touches yourself. Two lengths of Muramite silk thread infused with Nalasrine's strengthener should be sufficient to finish them up.'
You say, 'What robe?'
Nunkin Coggrinder says 'A grand robe shall be yours if you bring me a Muramite Chest Armor piece. I can reshape it easily, and the finishing touches may be applied by your hand. Strengthen two lengths of Muramite silk thread with Nalasrine's special mixture and some quick work with a loom should do the trick.'
You say, 'What sandals?'
Nunkin Coggrinder says 'Bring me back Muramite Boot Armor and I believe I can rework them into some nice sandals. To thread them together you will need some strengthened Muramite silk thread. If you need help in the strengthening process, just talk to Nalasrine.'
You say, 'What sleeves?'
Nunkin Coggrinder says 'Bring me Muramite Sleeve Armor. I will do the alterations for you, then all you will need to do is find some Muramite silk thread. Nalasrine can help you strengthen it, and you will have the makings of some nice sleeves.'
Nalasrine Twinklecoil is located in the next room.
You say, 'Hail, Nalasrine Twinklecoil'
Nalasrine Twinklecoil says 'Salutations! It is great to see so many eager travelers out and about. How are you enjoying our little city here? I have been quite busy myself. There are so many interesting things to learn about these strange beings that inhabit Taelosia. Their armor in particular is most interesting. I have developed some intriguing compounds. Let me know if you are interested in such things before I just prattle on!'
You say, 'I am interested.'
Nalasrine Twinklecoil says 'Oh, good. Well let me see. Basically, I have been studying the armor that our explorers have been bringing back from their adventures. While it is a bit strangely shaped, as these creatures that seem to reside here are, I have found that by strengthening some native materials it can be reworked into rather fine armor for the likes of you and me.'
You say, 'What armor?'
Nalasrine Twinklecoil says 'If you are looking into having some armor made, you definitely will need to use my infusions. They are a bit pricey, however they are difficult to make and well frankly, I am the only one who can! Use the plate solvent on plate armor, chain solvent on chain, tanning solution on leather, and silk strengthener on silk. All rather intuitive isn't it? Simply take a look at the different types I have for sale.'
Muramite armor begins dropping in Qvic and above. Bring back the appropriate piece of "Muramite XXX Armor" and turn it in to Nunkin Coggrinder to get a class-specific, no-stat "Reworked Muramite XXX."
Craft a Muramite Silk Thread by combining a Meldstone and a Spider Silk in a loom. This has a high trivial (282) and a high minimum smithing requirement (in the 240s).
Buy Nalasrine's Perfected Silk Strengthener from Nalasrine Twinklecoil for around 10,500 pp. Combine the strengthener with the Muramite Silk Thread in a loom (no-fail combine). This results in a NO DROP piece of Infused Muramite Thread.
Combine the Infused Muramite Thread with your piece of Reworked Muramite XXX armor in a loom to receive your quest reward (no-fail combine). Reward: Nunkin's Sleeves of Pure Elements
Reward: Nunkin's Bracer of Pure Elements
Reward: Nunkin's Circlet of Pure Elements
Reward: Nunkin's Gloves of Pure Elements
Reward: Nunkin's Sandals of Pure Elements
Reward: Nunkin's Robe of Pure Elements
Reward: Nunkin's Pantaloons of Pure Elements
Quests for Abysmal Sea
Baking Collect: Tylida's Jobs (Normal): You say, 'Hail, Tylida Eraldi'Tylida Eraldi squints and looks at you with a slight grin on her face. 'Hello. I don't suppose you're a baker by profession, or perhaps you're [interested] in learning? I have several jobs that I need done, but I just don't have time to do them myself. Are you interested in helping out?'
You say, 'I am interested.'
Tylida Eraldi says 'This crew needs a lot of food. My specialty is long-lasting food items that can be taken on long journeys. Obviously a lot of Wayfarers are taking a lot of long trips these days. I was wondering if you would mind [helping me] out? I really want to spend more time working with the newly discovered strain of local wheat. There's a wild variety of wheat that only grows in the mountainous areas, which is a very odd place for any wheat to grow, But this stuff grows there, if sparsely. The thing is, there are some very odd properties to this wheat, and with the proper technique it can be made into a very [unique flour]. So if you have a chance, I would be pleased if you could [help out]. Unfortunately, the recipes I'm working on require the use of Taelosian Wheat Flour. If you can find some Taelosian Wheat, Ordin can make flour from it. Bring that to me, and I'll have plenty of tasks for you to do.'
You say, 'What unique flour?'
Tylida Eraldi says 'I'm still a bit shocked that wheat is growing on the side of mountains. They even say that some of the creatures up there eat it by the handful like a snack. Obviously we'd prefer to make baked items from it. If you can get me some of that Taelosian Mountain Wheat, I'll make flour out of it. I'll only keep a little of it for myself.'
You say, 'I will help out.'
Tylida Eraldi says 'I can definitely use your help. I need some Taelosian Wheat Flour for the tasks I want you to do. Ordin can make flour from the raw wheat if you have any. If you bring me some flour, we can get started. You'll have to sweat a bit before we're done, but if you're up to the task I can reward you with the secret of milling the local wheat. Because I'll be asking you to find your own supplies, I can reward you a bit sooner than Ordin will.'
Taelosian Wheat may be foraged in Natimbi and drops in various other GoD zones. Ordin Wheasly stands near Tylida. Give him one Taelosian Wheat to receive two Taelosian Wheat Flour. Give Tylida one Taelosian Wheat Flour:
Tylida Eraldi says 'Thanks for helping me. The first thing I need you to do is bake some Wayfarer Wheat Crackers. These are one of the staples of our scouts, and I don't like letting them leave without as many as they can carry. So take a Small Sack of Taelosian Wheat Flour and Wayfarer Spice and put them in the oven. Don't be tempted by their wonderful smell. Eating them isn't really part of the task.' Tylida smiles. 'Bring them right back to me when you're done.'
You receive 10 x Small Sack of Taelosian Wheat Flour and 10 x Wayfarer Spice. Combine 1 of each in an oven or spit.
You have learned the recipe Wayfarer Wheat Crackers!
Wayfarer Wheat Crackers trivials at 31. After doing 10 combines, hand them back to Tylida unstacked, up to four at a time. After handing them all in, give her another Taelosian Wheat Flour to get more ingredients. After handing in around 30 Wayfarer Wheat Crackers total, the next time you hand in a Taelosian Wheat Flour you see this:
Tylida Eraldi says 'Hello! Great, thanks for helping. We need to stock up on Wayfarer loaves. They keep a good long time, so I hope to get ahead today and stay that way. Take a Small Sack of Taelosian Wheat Flour, a Wayfarer Spice, and Crushed Nuts and bake them in the oven. A Wayfarer Loaf won't rise much, so don't worry about that. Just bring them back here to me and I'll store them.'
You get 10 x Small Sack of Taelosian Wheat Flour, 10 x Wayfarer Spice, and 10 x Crushed Nuts. Combine 1 of each in an oven or spit.
You have learned the recipe Wayfarer Loaf!
Wayfarer Loaf trivials at 38. After doing 10 combines, hand them back to Tylida unstacked, up to four at a time. After handing them all in, give her another Taelosian Wheat Flour to get more ingredients. After handing in around 30 Wayfarer Loaves total, the next time you hand in a Taelosian Wheat Flour you see this:
Tylida Eraldi says 'You've been a big help, thank you. This time I need some Wayfarer cookies. These are sort of tough, but very flavorful and tasty. They travel real well, so they're a big hit with Wayfarers, hence their name. Just take a Small Sack of Taelosian Wheat Flour, Wayfarer Spice, and two Pinches of Sugar and bake them up. Please don't try to eat them hot. They really hold onto heat and you'll probably burn yourself. Just bring them to me and I'll get them to those that need them.'
You receive 10 x Small Sack of Taelosian Wheat Flour, 10 x Wayfarer Spice, and 10 x Pinch of Sugar. Combine 1 each of the flour, spice, and sugar in an oven or spit.
You have learned the recipe Wayfarer Cookie!
Wayfarer Cookie trivials at 46. After doing 10 combines, hand them back to Tylida unstacked, up to four at a time. After handing them all in, give her another Taelosian Wheat Flour to get more ingredients. After handing in around 30 Wayfarer Cookies total, the next time you hand in a Taelosian Wheat Flour you see this:
Tylida Eraldi says 'May Brell bless you! I could really use some Wayfarer Fruitcake right now. I know, you've heard that fruitcake is more like wood than food. Well, ours are a little better than wood, but just as durable. I'm not going to make you eat them, that's for the others to accomplish. All I need you to do is put a Small Sack of Taelosian Wheat Flour, Wayfarer Spice, and Heavy Fruit into the oven and bake up some fruitcakes. Bring them back here, use a cart if you must, and I'll see that they find homes.'
You receive 10 x Small Sack of Taelosian Wheat Flour, 10 x Wayfarer Spice, and 10 x Heavy Fruit. Combine 1 of each in an oven or spit.
You have learned the recipe Wayfarer Fruitcake!
Wayfarer Fruitcake trivials at 54. After doing 10 combines, hand them back to Tylida unstacked, up to four at a time. After handing them all in, give her another Taelosian Wheat Flour to get more ingredients. After handing in around 30 Wayfarer Fruitcakes total, the next time you hand in a Taelosian Wheat Flour, you see:
Tylida Eraldi says 'You've been of great assistance. I owe you my thanks. I'll find others to do these tasks now. Go over and talk to Ordin and he'll give you your reward. Make sure to tell him that you were of great [assistance].
You say, 'Hail, Ordin Wheasly'
Ordin Wheasly says 'Hello! Boy, I'm glad to see you! I really need your help. Can you help me with some simply [baking tasks]? A ship floats on its belly, you know.'
You say, 'I was of great assistance.'
Ordin Wheasly says 'You have been a big help around the kitchen! I wouldn't feel right continuing to abuse your kindness.' Ordin glances around. 'Take a quick peek into my recipe book. This is the way you grind the Taelosian Wheat into flour.' He quickly shows you the last page of his coveted recipe book. It only takes you a moment to see what the trick is. From now on, all you have to do is put the Taelosian Wheat or Taelosian Mountain Wheat into your mixing bowl and combine it to get the flour. In fact, you are certain that if you work at it long enough, you can produce more usable wheat with practice.'
You can now refine Taelosian Wheat into Taelosian Wheat Flour and Taelosian Mountain Wheat into Taelosian Mountain Wheat Flour.
Baking Freebie: Ordin's Tasks (Normal): You say, 'Hail, Ordin Wheasly'
Ordin Wheasly says 'Hello! Boy, I'm glad to see you! I really need your help. Can you help me with some simply [baking tasks]? A ship floats on its belly, you know.'
You say, 'What baking tasks?'
Ordin Wheasly says 'Wayfarers eat far more than their fair share. It's just about impossible to keep up with them! I'd really like some help baking some of the basic foods so that I can spend my time thinking up new uses for this wonderful wild grain that has been descovered on Taelosia. I've named it Taelosian [Wheat], but I suppose that the natives might have some other name for it. Can you be of any [assistance] to me?'
You say, 'What Wheat?'
Ordin Wheasly says 'It's wonderful! I haven't had as much time to try it in some of my favorite recipes, but I have done a little taste-testing and it's very good. It even has some magical properties that I'm still trying to figure out. It does require some special treatment when making the flour, but I've figured that out. If you bring me some Taelosian Wheat, I'd gladly grind it for you. I'd just keep a bit of it for my efforts.'
You say, 'I can be of assistance.'
If your skill is already too high, Ordin can still learn you the recipes, see below.
Ordin Wheasley says 'Great! Right now what I need is some oatmeal prepared for meals that we need to serve right away. This is a simple task and may be too easy for you, but those folks are hungry. Just take this Oatmeal and Hot Water and mix it in your mixing bowl. Bring the finished Oatmeal to me right away. If you help me with the many tasks that I have to get done, I might be willing to share with you the secret of grinding the Taelosian Wheat into flour.'
You receive 20 x Hot Water and 20 x Oatmeal. Combine 1 of each in a Mixing Bowl.
You have learned the recipe Ordin's Oatmeal!
Ordin's Oatmeal trivials at 31. After doing each set of 20 combines, hand them back to Ordin unstacked, up to four at a time. After handing them all in, say "I can be of assistance" again and he will give you more Ordin's Oatmeal components until he feels you've made enough (approximately 100).
You say, 'I can be of assistance.'
Ordin Wheasly says 'Yes! Wayfarer's Muffins are probably our most popular traveling food. And folks passing through here are always traveling. If you could take a hunk of dough and a single dose of Wayfarer Surpize and put them in the oven, I would be grateful. Hmmm? Oh, no, I can't really tell you what's in the Wayfarer's surprize. Please bring the muffins back to me as fast as you can, we're always running out.'
You receive 20 x Hunk of Dough and 20 x Wayfarer Surprise. Combine 1 of each in an oven or spit.
You have learned the recipe Wayfarer Muffin!
Wayfarer Muffin trivials at 38. After doing each set of 20 combines, hand them back to Ordin unstacked, up to four at a time. After handing them all in, say "I can be of assistance" again and he will give you more Wayfarer Muffin components until he feels you've made enough (approximately 100).
You say, 'I can be of assistance.'
Ordin Wheasly says 'Good! We're trying to stock up for dinner. We usually serve a lot of Wayfarer Pie. It's sort of a pie surprize! If you could run over to the oven and bake up a Hunk of Dough, Wayfarer Pie Tin and Wayfarer Surprise into a nice, tasty pie, that would be great! Bring the pies to me when you're done. No, I'm still not going to tell you what the surprize is.'
You receive 20 x Hunk of Dough, 20 x Wayfarer Pie Tin, and 20 x Wayfarer Surprise. Combine 1 of each in an oven or spit.
You have learned the recipe Wayfarer Pie!
Wayfarer Pie trivials at 46. After doing each set of 20 combines, hand them back to Ordin unstacked, up to four at a time. After handing them all in, say "I can be of assistance" again and he will give you more Wayfarer Pie components until he feels you've made enough (approximately 100).
You say, 'I can be of assistance.'
Ordin Wheasly says 'You have been a big help! I think I can trust you to make some dessert for these ruffians. I need a lot of pastries, or who knows what they might do! Just take this Hunk of Dough and a Dab of Frosting and pop them in the oven! Bring them back piping hot, please!'
You receive 20 x Hunk of Dough and 20 x Dab of Frosting. Combine 1 of each in an oven or spit.
You have learned the recipe Wayfarer Pastry!
Wayfarer Pastry trivials at 54. After doing each set of 20 combines, hand them back to Ordin unstacked, up to four at a time. After handing them all in, say "I can be of assistance" again and he will give you more Wayfarer Pastry components until he feels you've made enough (approximately 100).
You say, 'I can be of assistance.'
Ordin Wheasly says 'You've been a big help around the kitchen! I wouldn't feel right about continuing to abuse your kindness.' Ordin glances around. 'Take a quick peek at my recipe book. This is the way you grind Taelosian Wheat into flour.' He quickly shows you the last pages of his coveted recipe book. It only takes you a moment to see what the trick is. From now on, all you have to do is put the Taelosian Wheat or Taelosian Mountain Wheat into your mixing bowl and combine it to get the flour. In fact, you are certain that if you work at it long enough, you can produce more usable wheat with practice.
If your skill is high enough, Ordin can still learn you the recipes.
You say, 'I can be of assistance.'
Ordin Wheasly says, 'You have been a big help around the kitchen! I wouldn't feel right continuing to abuse your kindness. If you have forgotten or want them for posterity, I can give you the [recipes] you used while helping us.' Ordin glances around. 'Take a quick peek into my recipe book. This is the way you grind the Taelosian Wheat into flour.' He quickly shows you the last page of his coveted recipe book. It only takes you a moment to see what the trick is. From now on, all you have to do is put the Taelosian Wheat or Taelosian Mountain Wheat into your mixing bowl and combine it to get the flour. In fact, you are certain that if you work at it long enough, you can produce more usable wheat with practice.'
You say, 'please give me the recipes.'
You have learned the recipe Ordin's Oatmeal!
You have learned the recipe Wayfarer Muffin!
You have learned the recipe Wayfarer Pie!
You have learned the recipe Wayfarer Pastry!
You have learned the recipe Wayfarer Wheat Crackers!
You have learned the recipe Wayfarer Loaf!
You have learned the recipe Wayfarer Cookie!
You have learned the recipe Wayfarer Fruitcake!
Ordin Wheasly says, 'Here you go.'
Bard Abysmal Armor (Normal): You say, 'Hail, Luvwen Arrya'
Luvwen Arrya says 'Hail, adventurer. Welcome aboard! Should you be a bard like myself, I am sure you have collected quite a few stories thus far in your travels. Would you be a [bard]?'
You say, 'I am a bard.'
Luvwen Arraya says 'Well, then, perhaps I can be of even greater assistance to you. If you are in need of new equipment such as [helm], [legplates], [chestplate], [bracer], [vambraces], [gloves], or pair of [boots] let me know.'
You say, 'What boots?'
Luvwen Arrya says 'A pair of boots you want, hmm? Yes, I can see the pair you are wearing seem a bit worn. Bring me back Muramite Boot Armor and I bevlive I can rework them into something quite fine for you. Place them into a forge with one sheet of Infused Muramite metal to yield your boots. If you need help in the infusing process, just talk to Nalasrine.'
You say, 'What bracer?'
Luvwen Arrya says 'A bracer is rather simple to reshape. If you speak to Nalasrine about her findings, she may be able to help you infuse some Muramite metal to strengthen it. One sheet of infused Muramite metal along with a reworked bracer from me in a forge should yield a fine bracer.'
You say, 'What chestplate?'
Luvwen Arrya says 'Ahh, a chestplate. Such a thing of beauty! I can craft one for you farily easily if you do the legwork. Travel into the hostile areas and bring back two sheets of Muramite metal and Muramite Chest Armor. Make sure to speak to Nalasrine about infusing the sheets of metal. Bring me the chest piece for reworking, then simply weld together the new chest and sheets in a forge.'
You say, 'What gloves?'
Luvwen Arrya says 'I can make you a wonderful pair of gloves. Take the time to dig up some Muramite metal and have Nalasrine assist you with infusing it. Bring me Muramite Glove Armor and I can reshape it into something that you can use. Strengthen the gloves in a forge with the newly infused metal, and a fine pair shall be yours.'
You say, 'What helm?'
Luvwen Arrya says 'I can easily reform a Muramite helm into something suitable for you. Nalasrine has managed to form a powerful compound that reinforces some native materials. Bring me Muramite Helm Armor and I wil rework it for you. Once I have finished with that you need only to fuse your infused Muramite metal and the helm I give you in a forge.'
You say, 'What legplates?'
Luvwen Arrya says 'Reforming some Muramite legplates into a pair that would serve you well should be no great feat. Bring me a pair of Muramite Greaves and I will rework them for you. For these you will need to infuse two sheets of Muramite metal with Nalasrine's special solvent. Combine both sheets with the new greaves in a forge and voila!'
You say, 'What vambraces?'
Luvwen Arrya says 'A new set of vambraces is what you seek? Hardly a challenge, at least for me. You, however, have some work to do. Venture into these strange lands and bring me Muramite Sleeve Armor. I will rework the sleeves for you, but you will need to talk to Nalasrine about infusing a sheet of Muramite metal as well. Place the bracer from me along with one sheet of infused Muramite metal in a forge for your sleeves.'
Nalasrine Twinklecoil is located in the next room.
You say, 'Hail, Nalasrine Twinklecoil'
Nalasrine Twinklecoil says 'Salutations! It is great to see so many eager travelers out and about. How are you enjoying our little city here? I have been quite busy myself. There are so many interesting things to learn about these strange beings that inhabit Taelosia. Their armor in particular is most interesting. I have developed some intriguing compounds. Let me know if you are interested in such things before I just prattle on!'
You say, 'I am interested.'
Nalasrine Twinklecoil says 'Oh, good. Well let me see. Basically, I have been studying the armor that our explorers have been bringing back from their adventures. While it is a bit strangely shaped, as these creatures that seem to reside here are, I have found that by strengthening some native materials it can be reworked into rather fine armor for the likes of you and me.'
You say, 'What armor?'
Nalasrine Twinklecoil says 'If you are looking into having some armor made, you definitely will need to use my infusions. They are a bit pricey, however they are difficult to make and well frankly, I am the only one who can! Use the plate solvent on plate armor, chain solvent on chain, tanning solution on leather, and silk strengthener on silk. All rather intuitive isn't it? Simply take a look at the different types I have for sale.'
Muramite armor begins dropping in Qvic and above. Bring back the appropriate piece of "Muramite XXX Armor" and turn it in to Luvwen Arrya to get a class-specific, no-stat "Reworked Muramite XXX."
Craft a Muramite Metal Sheet by combining a Meldstone, Water Flask, and Smithy Hammer in a forge. This has a high trivial (282) and a high minimum smithing requirement (in the 240s).
Buy Nalasrine's Superior Plate Solvent from Nalasrine Twinklecoil for around 10,500 pp. Combine the solvent with the Muramite Metal Sheet in a forge (no-fail combine). This results in a NO DROP piece of Infused Muramite Metal.
Combine the Infused Muramite Metal with your piece of Reworked Muramite XXX armor in a forge to receive your quest reward (no-fail combine). Reward: Luvwen's Helm of Melody
Reward: Luvwen's Boots of Melody
Reward: Luvwen's Gauntlets of Melody
Reward: Luvwen's Bracer of Melody
Reward: Luvwen's Vambraces of Melody
Reward: Luvwen's Chestplate of Melody
Reward: Luvwen's Legplates of Melody
Beastlord Abysmal Armor (Normal): You say, 'Hail, Kizash Proudpaw.'
Kizash Proudpaw says 'Greetings ______, I am looking for those who are one with the beast. Are you a [beastlord]?'
You say, 'Yes, I am a Beastlord.'
Kizash Proudpaw says 'Wonderful, it brings me joy to see so many following the path of harmony. For one such as yourself, I may be able to assist. If you are in need of new equipment such as [cap], [leggings], [tunic], [bracer], [sleeves], [gloves], or [sandals] - let me know.'
You say, 'What bracer?'
Kizash Proudpaw says 'A bracer is rather simple to reshape, if you know what you're doing. Bring me back a Muramite Bracer Armor piece and I will get to work on it. You will also need a section of infused Muramite leather to finish the bracer in a loom. Talk to Nalasrine if you still some help infusing the leather.'
You say, 'What cap?'
Kizash Proudpaw says 'I should be able to reform Muramite Helm Armor into something quite useful to you. Explore these lands until you find some Muramite leather padding. Talk to Nalasrine about infusing it, then piece it together with your new helm from me in a loom.'
You say, 'What gloves?'
Kizash Proudpaw says 'I can make you a wonderful pair of gloves. Take the time to dig up some Muramite leather and have Nalasrine assist you with infusing it. Bring me Muramite Glove Armor and I can reshape it into something that you can use. Strengthen the gloves by reinforcing them with the infused leather in a loom, and a fine pair shall be yours.'
You say, 'What leggings?'
Kizash Proudpaw says 'Reforming some Muramite greaves into a pair of leggings that would serve you well should be no great feat. Bring me a pair of Muramite Greaves and I will get to work on that. To finish your leggings you will also need to obtain two pieces of Muramite leather padding. Speak to Nalasrine about infusing it, then place the leather pieces and leggings in a loom to work them together.'
You say, 'What sandals?'
Kizash Proudpaw says 'Soft, supple boots are my specialty. Bring me back Muramite Boot Armor and I believe I can rework them into something quite fine for you. Once I've reworked them, you will need to take a section of infused Muramite leather along with the new boots and reinforce them in a loom. If you need help in the infusing process, just talk to Nalasrine.'
You say, 'What sleeves?'
Kizash Proudpaw says 'Some new sleeves? Indeed, arm protection is important. Venture into these strange lands and find some Muramite Sleeve Armor. Bring the armor piece to me and I will get to work on refitting it for you. Once you have a piece of Muramite leather padding, talk to Nalasrine about infusing the it. The new sleeve from me can be easily stitched up in a loom with the infused Muramite leather.'
You say, 'What tunic?'
Kizash Proudpaw says 'A tunic! Of course. Such a thing of beauty! I can craft one for you fairly easily if you do the legwork. Travel into the hostile areas and bring back two sections of Muramite leather and Muramite Chest Armor. Make sure to speak to Nalasrine about infusing the sections of leather. Bring me the chest piece for reworking, then simply weld together the new chest and leather in a loom.'
Nalasrine Twinklecoil is located in the next room.
You say, 'Hail, Nalasrine Twinklecoil'
Nalasrine Twinklecoil says 'Salutations! It is great to see so many eager travelers out and about. How are you enjoying our little city here? I have been quite busy myself. There are so many interesting things to learn about these strange beings that inhabit Taelosia. Their armor in particular is most interesting. I have developed some intriguing compounds. Let me know if you are interested in such things before I just prattle on!'
You say, 'I am interested.'
Nalasrine Twinklecoil says 'Oh, good. Well let me see. Basically, I have been studying the armor that our explorers have been bringing back from their adventures. While it is a bit strangely shaped, as these creatures that seem to reside here are, I have found that by strengthening some native materials it can be reworked into rather fine armor for the likes of you and me.'
You say, 'What armor?'
Nalasrine Twinklecoil says 'If you are looking into having some armor made, you definitely will need to use my infusions. They are a bit pricey, however they are difficult to make and well frankly, I am the only one who can! Use the plate solvent on plate armor, chain solvent on chain, tanning solution on leather, and silk strengthener on silk. All rather intuitive isn't it? Simply take a look at the different types I have for sale.'
Muramite armor begins dropping in Qvic and above. Bring back the appropriate piece of "Muramite XXX Armor" and turn it in to Kizash Proudpaw to get a class-specific, no-stat "Reworked Muramite XXX."
Craft a Muramite Leather Padding by combining by combining a Meldstone and some Snake Scales in a loom. This has a high trivial (282) and a high minimum smithing requirement (in the 240s).
Buy Nalasrine's Enforcing Tanning Solution from Nalasrine Twinklecoil for around 10,500 pp. Combine the solution with the Muramite Leather Padding in a loom (no-fail combine). This results in a NO DROP piece of Infused Muramite Leather.
Combine the Infused Muramite Leather with your piece of Reworked Muramite XXX armor in a loom to receive your quest reward (no-fail combine). Reward: Kizash's Savage Heart Bracer
Reward: Kizash's Savage Heart Sandals
Reward: Kizash's Savage Heart Cap
Reward: Kizash's Savage Heart Gloves
Reward: Kizash's Tunic of Savage Heart
Reward: Kizash's Savage Heart Sleeves
Reward: Kizash's Leggings of Savage Heart
Berserker Abysmal Armor (Normal): Harlad Ragesoul may be found in the room with Nalasrine Twinklecoil at -200, -10.
You say, 'Hail, Harlad Ragesoul'
Harlad Ragesoul says 'Hail Barbarian, I am seeking a [berserker]. One of those few brave souls that show no fear regardless of the enemy. Is such bravery within you?'
You say 'I am a berserker.'
Harlad Ragesoul says 'In that case, I am in your service. If you would perform a few simple tasks I will assist you in creating a new set of powerful armor to guard you in battle. I can make you a [helm], [greaves], [chainmail], [bracer], [vambraces], [gloves], and [boots].'
Need additional dialogues.
Now talk to Nalasrine Twinklecoil, who stands nearby.
You say, 'Hail, Nalasrine Twinklecoil'
Nalasrine Twinklecoil says 'Salutations! It is great to see so many eager travelers out and about. How are you enjoying our little city here? I have been quite busy myself. There are so many interesting things to learn about these strange beings that inhabit Taelosia. Their armor in particular is most interesting. I have developed some intriguing compounds. Let me know if you are interested in such things before I just prattle on!'
You say, 'I am interested.'
Nalasrine Twinklecoil says 'Oh, good. Well let me see. Basically, I have been studying the armor that our explorers have been bringing back from their adventures. While it is a bit strangely shaped, as these creatures that seem to reside here are, I have found that by strengthening some native materials it can be reworked into rather fine armor for the likes of you and me.'
You say, 'What armor?'
Nalasrine Twinklecoil says 'If you are looking into having some armor made, you definitely will need to use my infusions. They are a bit pricey, however they are difficult to make and well frankly, I am the only one who can! Use the plate solvent on plate armor, chain solvent on chain, tanning solution on leather, and silk strengthener on silk. All rather intuitive isn't it? Simply take a look at the different types I have for sale.'
Muramite armor begins dropping in Qvic and above. Bring back the appropriate piece of "Muramite XXX Armor" and turn it in to Harlad Ragesoul to get a class-specific, no-stat "Reworked Muramite XXX."
Craft a Muramite Chain Link by combining a Meldstone, Water Flask, and File in a forge. This has a high trivial (282) and a high minimum smithing requirement (in the 240s).
Buy Nalasrine's Thick Chain Solvent from Nalasrine Twinklecoil for around 10,500 pp. Combine the solvent with the Muramite Chain Link in a forge (no-fail combine). This results in a NO DROP piece of Infused Muramite Chain.
Combine the Infused Muramite Chain with your piece of Reworked Muramite XXX armor in a forge to receive your quest reward (no-fail combine). Reward: Harlad's Boots of Fury
Reward: Harlad's Bracer of Fury
Reward: Harlad's Gauntlets of Fury
Reward: Harlad's Helm of Fury
Reward: Harlad's Vambraces of Fury
Reward: Harlad's Chainmail of Fury
Reward: Harlad's Greaves of Fury
Breakdown in Communication #0: Pre-Flag (Normal): Beginning
Talk to Fezbin Fizzles
Fezbin Fizzles may be found near Morden Rasp at -35, +60, 156.69. He will only speak to you if you are level 65+.
You say, 'Hail, Fezbin Fizzles.'
Fezbin Fizzles says 'Greetings adventurer, have you come to explore this new [continent] we recently discovered?'
You say, 'What continent?'
Fezbin Fizzles focuses his attention on ______.
Fezbin Fizzles says 'Due to some rather odd events with Calliav, we, the Wayfarers Brotherhood, were guided here to the continent we have come to call Taelosia. It is a continent which has suffered through a great magical explosion and now the native inhabitants are in dire straits. Our goal was to investigate this continent and find out more about the strange pieces of matter that we recently found in various places. All signs led us here and so we decided to build this magnificent floating city you are standing in. Unfortunately, we have found out some rather disturbing [news] recently that has all of us rather concerned.'
You say, 'What news?'
Fezbin Fizzles says 'Well, when we finished the city, we began to send out scouts to various locales all over the new continent. Right away information started to flow in. They gave us details on the layout of the land and its current inhabitants. We began to piece together this picture of the current state of things on land. Many of the reports gave details on various things like wildlife and climate as well as the local inhabitants and level of advancement. All of this seemed promising to us as we thought we might be able to talk to the natives and find out more about the strange matter that seemed to originate from this place, but then we begin to receive some very [upsetting reports].'
You say, 'What upsetting reports?'
Fezbin Fizzles says 'Apparently, the event that spread these strange pieces of matter all over Norrath brought with it a group of beings more horrifying than a shaved dwarf. These creatures seemed to be an organized army of some sort. They have apparently taken over the continent and enslaved the natives. Curious about this, we ordered our scouts to find out more about these beings. Specifically, if they could be reasoned with and if they knew anymore about the odd chunks of rock we found recently. Shortly after we made this demand, everything [stopped].'
You say, 'Stopped?'
Fezbin Fizzles says 'The scout reports stopped coming in. We figured that maybe they had just not found anything yet, but as time went by we began to worry. That's when Morden suggested that we send someone to find one of them and learn what was going on. Young Falcin did not know what he was getting into when he volunteered to check things out for us. Falcin left here under the light of a full moon and returned soon after barely able to breathe. He had been caught spying on the beings that currently control the continent. They had tortured him for hours trying to get information. Being the resourceful human he is, he managed to escape only to be mauled by what the natives call ukun, a humanoid creature that is twisted and lethal. Left for dead, Falcin dragged himself back to us and explained what he had [discovered] during his ordeal.'
You say, 'Discovered?'
Fezbin Fizzles says 'Falcin told us that all of the scouts had been captured and were either dead or were enduring extreme torture sessions. These invading beings are a vicious lot who show absolutely no mercy. Falcin's wounds were proof enough of that. Falcin explained that the scouts who were still alive are being held near where they had been discovered. Those who he could not find he assumed were dead but he still tried to get some proof before he wrote them off. Unfortunately Falcin would not live to see his desire through, he passed on shortly after revealing this information to us and now we are at a loss as to how we can help our scouts who are still living return to us and provide a proper burial for those who were lost. We cannot afford to send anyone else out there as it seems it will require a significant force in order to have any chance of accomplishing the [task] we need completed.'
You say, 'What task?'
Fezbin Fizzles says 'With half of our numbers back home dealing with the investigation of the recently unearthed dungeons and the rest here on the ship handling what information we have and trying to decide the best plan of action, Morden figured it might be a good idea to ask some courageous individuals to assist us. Morden has authorized some form of valuable reward for those who can bring us any information regarding our missing scouts or the scouts themselves. Seeing as how you have been so interested in all I have said so far, do you think you would be interested in helping the Wayfarers Brotherhood?'
You say, 'yes'
You have received the 'Breakdown in Communication' quest. Now you must find those mentioned by Fezbin and help them the best you can. If at any point you find you have made a mistake in your scouting, please return to Fezbin and say, "I need to rescout (zone name)" and he will reset your status in that zone. If you lose your reward at any point, return to Fezbin and hail him and he should give you the appropriate reward based on your level of progress.
Fezbin Fizzles says 'Most excellent. Please take these as a token of our gratitude. It is not much to look at now, but by helping us you will find ways to make this stone more [powerful] when combining it with certain items in that sealer. Please take the time to find Taminoa Bialu, Vaifan Cogswin, and L`diava Rexxen. They are all located on this ship. Each of them is responsible for information from certain areas of the continent. Taminoa has all the information on the city area, Vaifan keeps the information on the mountain passes, and L`diava collects information on the temple areas. If you truly wish to help us, talk to some or all of them and they will help guide you to the right path. When you have finished helping them all, return to me and I shall give you the reward that has been approved by Morden.'
You are now pre-flagged for subsequent steps in the quest.
You say, 'How do I make it more powerful?'
Fezbin Fizzles says 'The stone I have given you is very special indeed. It is a rare stone with a power that has not yet been revealed. After studying it we have come to the conclusion that its power is based off of resonance. You will see that there are fourteen sockets in the stone. Each socket requires a gem fragment of a certain resonance. As the fragments are set in the stone it will gradually increase in power. These fragments must be placed in the stone in a certain order using a set of clockwork gemcutter's tools, the stone, and the correct shard in the device I handed to you along with the stone. As you help find our scouts, you may come across the gem fragments that will fit into the stone. If you do, please try combining them in the special sealer. If at any time you lose the sealer or misplace the stone return to me and I will what I can do about a replacement.'
You receive A Socketed White Crystal and Vaifan's Experimental Sealer, a 4-slot container. Reward: Vaifan's Experimental Sealer
Reward: Socketed White Crystal
Breakdown in Communication #10: Free Stuff (Normal): After you have completed all of the previous steps, head back to Fezbin Fizzles. The previous quest told you:
You have succeeded in retrieving all the information the Wayfarers Brotherhood was seeking. Return to Fezbin and tell him you have completed your task so that he can give you your final reward.
You say, 'I have completed my task.'
Fezbin Fizzles says 'So I have been told, ______. Your help will long be remembered by the brotherhood. Since you first came to me, the stone should have grown in power and now I will give you the item that will unlock the stone's full potential. Please combine this with your stone after you have combined all of the other items given to you by the lead scouts and you will possess an item of immense power and a symbol of your fighting spirit. Once again, the brotherhood thanks you. I must bid you good day as I recently received some [interesting information].'
Flag: You have done quite well and your exploits will forever be talked about by the members of the Wayfarers Brotherhood, but don't you dare relax as there's still many more adventures and hidden treasures out there waiting for a hero like you.
You receive A Jagged Blood Shard.
You say, 'What interesting information?'
Fezbin Fizzles says 'Where are my manners? I should have known someone as adventurous as you would be interested in this. One of our researching experts by the name of Beanalle has recently discovered some very intriguing information about the temples beyond Yxtta and Kod'Taz.'
Combine A Jagged Blood Shard with A Smokey Green Gemstone and Vaifan's Clockwork Gemcutter Tools in Vaifan's Experimental Sealer to craft an archetype-specific Adventurer's Stone.
The gem resonates with power as the shards placed within glow unlocking some of the stone's power. You were successful in assembling most of the stone but there are four slots left to fill, where could those four pieces be? Reward: Adventurer's Stone of Might
Reward: Adventurer's Stone of Power
Reward: Adventurer's Stone Of Magic
Reward: Adventurer's Stone of Blessing
Breakdown in Communication #11: Qvic (Normal): Beanalle Banoam may be found at -440, +220, +90. You must have already completed steps 0-10 to accomplish this step of the quest.
You say, 'Hail, Beanalle Banoam'
Beanalle Banoam says 'Hello, ______. It is truly an honor to meet you. I have heard some great things about you and hope that what I have [discovered] will interest you.'
You say, 'What have you discovered?'
Beanalle Banoam says 'After going through some of the reports submitted by the scout leaders, I was able to figure something out about the temples that lie beyond Yxtta and Kod'Taz. Apparently, the temple called Qvic is where the Muramite army first broke through. The temple was ravaged by the force of the explosion when the portal to the Muramites' realm closed. Of course, as you know, they are not the only thing that came through the portal. The strange magic stones we discovered were also a result of that explosion and up until now we thought we had found the most powerful ones. After going through the reports, I found out that concentrated pieces of the magic-imbued [matter] lie in the Qvic temple area and beyond.'
You say, 'What matter?'
Beanalle Banoam says 'These pieces of matter possess vast power like none we have ever seen, but there is a drawback. You see these special augmentations? I have come to call them shards of power because of the odd shapes they take. They must have their power removed and condensed before they can be applied to an item. I have figured out a way to do this, but another [drawback] has prevented me from testing my theory further.'
You say, 'What drawback?'
Beanalle Banoam says 'Well, these special shards can only be combined with an item they are attuned to. In other words, the materials that make up an item determine if these shards are compatible with it. Now, I have found many formulas that will allow for a particular shard to merge with a particular item. Recently I discovered one [item] that was perfectly in tune with them all.'
You say, 'What item?'
Beanalle Banoam says 'Why, your stone of course. The different items you have added to it have altered its makeup so much that it is hardly what it was when you first received it. It is a powerful item that can be made even more powerful with my help and yours, but this will require the help of many and I am afraid we do not have the force to take on such a task. Do you think you would be willing to collect the four shards of power from the temples and bring them to me as you get them?'
You say, 'Yes.'
Beanalle Banoam says 'Excellent! I knew Fezbin was right about you. Okay, here is what I can tell you. Qvic, Inktu'ta, Txevu, and Tacvi are the names of the temples beyond Yxtta and Kod'Taz. Within each of these you should find a shard of power. The hard part will be finding one as the Muramites are aware of the power within them and are hoarding every piece they find. If my theory is correct, you will have to combine the shards in a particular order before the stone will become attuned with another. You should retrieve the shards from the temples in the order I said before -- Qvic, Inktu'ta, Txevu, and Tacvi. Give each shard to me one at a time so that I can remove and condense the magic for you and then you can combine them in the special sealer. Now, hurry! I am worried that the leader of the Muramites may realize he needs to get rid of these shards, before we can get our hands on them.'
A "Shard of Dark Matter" is a common (but not guaranteed) drop from Cynosure Kvanjji, the boss of Qvic. For details about this encounter, see this quest entry. He can drop as many as three at a time, or none at all. Bring it back to Beanalle.
Beanalle Banoam says 'Ah, perfect. I am glad you were successful in finding it. Now, if you will give me one second I will condense the shard into concentrated energy which you can add to your stone. There we are. Please take the time to attach this, but make sure you do it in the order I mentioned when we first spoke.'
You receive a Condensed Matter Shard, which you may then combine with your Adventurer's Stone of XXX (where "XXX" depends on your class archetype) and Vaifan's Clockwork Gemcutter Tools in Vaifan's Experimental Sealer to craft an archetype-specific Black Matter Gemstone. Reward: Black Matter Gemstone
Reward: Black Matter Gemstone
Reward: Black Matter Gemstone
Reward: Black Matter Gemstone
Breakdown in Communication #12: Inktu'ta (Normal): Beanalle Banoam may be found at -440, +220, +90. You must have already completed steps 0-11 to accomplish this step of the quest.
A Shard of Dark Matter is an uncommon drop from Noqufiel, the boss of Inktu'ta (see this quest entry for details about the raid expedition). Bring it back to Beanalle Banoam:
Beanalle Banoam says 'Ah, perfect. I am glad you were successful in finding it. Now, if you will give me one second I will condense the shard into concentrated energy which you can add to your stone. There we are. Please take the time to attach this, but make sure you do it in the order I mentioned when we first spoke.'
You receive a "Condensed Matter Shard" (looks the same as the one for completing steps 11, 13, and 14, but identifies as "Pure Matter Extracted From A Faintly Glowing Shard").
Combine this item with your class archetype-specific "Black Matter Gemstone" with "Vaifan's Clockwork Gemcutter Tools" inside a "Vaifan's Experimental Sealer" to craft a class archetype-specific "Jagged Black Matter Gemstone". Reward: Jagged Black Matter Gemstone
Reward: Jagged Black Matter Gemstone
Reward: Jagged Black Matter Gemstone
Reward: Jagged Black Matter Gemstone
Breakdown in Communication #13: Txevu (Normal): Beanalle Banoam may be found at -440, +220, +90. You must have already completed steps 0-12 to accomplish this step of the quest.
A Shard of Dark Matter is an uncommon drop from Zun`Muram Tkarish Zyk, the boss of Txevu. Bring it back to Beanalle Banoam.
Beanalle Banoam says 'Ah, perfect. I am glad you were successful in finding it. Now, if you will give me one second I will condense the shard into concentrated energy which you can add to your stone. There we are. Please take the time to attach this, but make sure you do it in the order I mentioned when we first spoke.'
You receive a Condensed Matter Shard (looks the same as the one for completing steps 11, 12, and 14, but identifies as "Pure Matter Extracted From A Brightly Glowing Shard"), which is then combined with your class archetype-specific Jagged Black Matter Gemstone with Vaifan's Clockwork Gemcutter Tools in Vaifan's Experimental Sealer to craft a class archetype-specific reward. Reward: Smooth Black Matter Gemstone
Reward: Smooth Black Matter Gemstone
Reward: Smooth Black Matter Gemstone
Reward: Smooth Black Matter Gemstone
Breakdown in Communication #14: Tacvi (Incomplete): Beanalle Banoam may be found at -440, +220, +90. You must have already completed steps 0-13 to accomplish this step of the quest.
1-3 x Cracked Shard of Power drops every time from Tunat`Muram Cuu Vauax, the boss of Tacvi. Bring it back to Beanalle Banoam to receive Condensed Shard of Power.
Beanalle Banoam says 'Ah, perfect. I am glad you were successful in finding it. Now, if you wil give me one second I will condense the shard into concentrated energy which you can add to your stone. There we are. Please take the time to attach this, but make sure you do it in the order I mentioned when we first spoke.'
You then combine the Condensed Shard of Power with your class archetype-specific Smooth Black Matter Gemstone with Vaifan's Clockwork Gemcutter Tools in Vaifan's Experimental Sealer to craft a class archetype-specific reward. Upon the final combine, you see in yellow text:
The gem resonates with power as the shards placed within glow unlocking all the stone's power. You were successful in assembling the stone and now if it is ever lost Fezbin will return it to you whenever you hail him.
Reward(s):
Caster - Black Gemstone of Death - (Recipe)
Melee - Black Gemstone of Pain - (Recipe)
Hybrid - Black Gemstone of Suffering - (Recipe)
Priest - Black Gemstone of Torture - (Recipe)
Reward: Black Gemstone of Death
Reward: Black Gemstone of Pain
Reward: Black Gemstone of Suffering
Reward: Black Gemstone of Torture
Breakdown in Communication #1: Qinimi (Normal): Talk to Taminoa Bialu
Taminoa Bialu may be found downstairs at /waypoint -87, -29, 140
You say, 'Hail, Taminoa Bialu'
Taminoa Bialu says 'Greetings. You must be one of the adventurers that Fezbin told me about. It is a pleasure to meet such a brave individual. Where are my manners? My name is Taminoa Bialu and I compile all the information from our scouts in the [city] area of Taelosia.'
You say, 'What city?'
Taminoa Bialu says 'Well, it appears the native inhabitants of Taelosia lived in a grand city once. This city is made up of four different areas named in their language. They are [Qinimi], [Riwwi], [Barindu], and [Ferubi]. Based off of early information, we believe each area had a specific purpose. I am still trying to decipher the native language to figure out what the names mean, but going off of visual information I can assume that Qinimi served as their court, Riwwi is where they held games, Barindu was a lush garden, and Ferubi was a central place of worship once. That is about the extent of my information as far as the intended purpose of each area. What they are now used for I can explain in further detail. Which area would you like to hear more about?'
You say, 'What is Qinimi?'
Taminoa Bialu says 'It appears the Muramites have made this some sort of stronghold. Destroying many of the native symbols, the invaders have converted the building that once served as the court into fortified headquarters. It is here you will find a structure called the Chamber of Souls, various pens to hold ukun, and a moat of sickly black sludge. The structures that the nihil once called home are all but destroyed now. Very sad indeed. That's where the legion keeps the bulk of the [slaves]. I believe that the scout for this area was caught sneaking around the housing district, but I have no proof. If you were to search this area, maybe you would find some sort of sign or marker he may have left. That would be helpful.'
You say, 'What slaves?'
Taminoa Bialu says 'I see Fezbin saved some of the more dismal news for me. The legion has enslaved the natives of the continent. In the city area, these slaves are used mainly for menial tasks. Due to their fragile bodies, they cannot do any heavy lifting, but their knowledge of shaping stone makes them perfect for building new structures for the legion to use as well as altering current ones. They command the stone workers. I am not sure how the slaves are used in the temple areas. That information is held by L`diava.'
The scout he mentions is Kreshin Silentcog. You need to confirm that he was caught by the muramites and find out what he was doing at the time.
Finding the Report
In Qinimi, follow the right wall from the zone-in from Natimbi. You will find Kreshin's Journal Page as a ground spawn on a rock near the wall between the two lines of buildings, location +310, -1060. Bring it back to Taminoa Bialu.
Taminoa Bialu says 'Yes. This is exactly what I needed. Excellent job. Okay, now give me one moment to decipher this . . . hm. It seems that just before he was captured he was trying to communicate with the slaves in the area. The text is very hard to make out, but it looks like he may have been trying to get into the main headquarters. He was interacting with a particular slave named Sislono Nislan. This slave promised him a way into the headquarters only if he promised to rid the area of a tyrant, named Tixxrt. The rest of the parchment is undecipherable. I would suggest finding this slave and showing him this to see if he knows what happened.'
You receive a different version of the page back.
Sislono's Key
Councilman Sislono Nislan may be found elsewhere in Qinimi at +255, -645. You will need at least dubious faction with Nihil or else he will not accept your turn in items.
You say, 'Hail, Councilman Sislono Nislan'
Councilman Sislono Nislan says 'While I place my own life at risk by helping you, I feel a strong sense of honor amongst you and those who have come with you. It is because of this that I will try to help in anyway I can.'
Give Councilman Sislono Nislan the page you got back from Taminoa.
Councilman Sislono Nislan says 'Yes, I have seen this and others like it before. While we do not understand where it comes from, we have come to the conclusion that these strange glyphs express somthing important to your people. These particular glyphs were made by the small one they hold captive in the courtroom. If you wish to help him, you will have to retrieve the [stone of entry]. Only with this stone can you enter the courtroom and help the one who calls himself Kreshin.'
You say, 'What stone of entry?'
Councilman Sislono Nislan says 'Gaining access to such a private place has always been reserved for the elders of my people. While the legion may have destroyed our home, they have yet to figure out a way around many of our wards that bar access to our sacred areas. Unfortunately, their frustration at gaining entry resulted in the painful torture of many of my people until they were given the keys to enter. The courtroom requires one of these keys and while the invaders hold all of the existing keys, I can create one if you can retrieve the proper [items].'
You say, 'What items?'
Councilman Sislono Nislan says 'The key consists of mud, some stonedust particles, and a piece of chalk. The mud can be found in the sewers beneth the city. The stonedust is plentiful near the coliseum, and the chalk can be found all over this area. Bring these to me and I will make you a temporary key which will grant you access to the courtroom. I implore you to hurry. I fear the one you seek may not be alive much longer.'
The three items he refers to are Stonedust Particles (random drop in Riwwi), Glob of Mud (random drop in the Sewers), and a Piece of Chalk (random drop in Qinimi). Give them to Sislono.
Sislono covers the three pieces in his hands, closes his eyes, and begins to chant. A glow begins to emanate from his hands and he begins to chant louder. Then, just as quickly as it began, the glow in his hands dims and the chanting stops. 'There you are -- the key which grants you and your party access to the courtroom. Just stand on the pedestal in the center of the large building in this part of the city with the key in your hand and say you wish to enter. There is one more [thing] I must tell you before you go.'
You receive a Stone of Entry.
You say, 'What thing?'
Councilman Sislono Nislan says 'The geomantic device which raises you into the courtroom is an ancient one and takes time to reset after it has been used. If you are having trouble entering, be patient. You will know it is ready to receive a key when you hear a grinding sound from the base of the device as it settles into place. Please be sure you are fully prepared before entering. While it once was a place of peaceful discussion, the courtroom is now a place where terrible torture is conducted by those the legion wants information from. When they see uninvited guests, they will not be very happy. The leader of this area's force is known as Tixxrt and stopping him is the only way you can save the small one, called Kreshin.'
Save the Scout
With the Stone of Entry, a single group may attempt to save the scout from execution. This event is similar to the Plane of Justice trials, but more difficult, with a time limit of six minutes total for the entire event. Make your way to the temple on the south side of the zone. All members of the group must be visible and standing on the pedestal inside the temple. The keyholder must have the Stone of Entry in his/her inventory and say, "I wish to enter."
The trial area has many mobs around but inactive. As soon as you teleport in, three come alive and attack immediately.
Pixtt Xictic Krvne shouts 'What is this? How dare you fools enter this sacred place and interrupt my ritual. Minions of the legion! Show these infidels what they have gotten themselves into!'
As soon as you defeat the initial three and loot their corpses, another three become active and attack. If you don't loot the corpses, the other mobs stay inactive. After you defeat the first six, a second wave of six will come.
Pixtt Xictic Krvne says 'Looks like I may have underestimated you. Let's see how you handle more of my minions.'
After you defeat the second wave of six, another wave of six comes. After three waves of this, the boss, Pixtt Tixxrt Kvrok, and 2 mobs called "Tixxrt's Guardsman" become targetable.
After the boss goes down, the execution Xocik spawns and has to be killed (the guards may still be alive).
Pixtt Tixxrt Kvrok says, 'What is this? Seems I have understimated your friends, Kreshin. No matter what this means, I will have to hasten your death and handle these intruders myself. Prepare yourselves for my wrath! Xocik, kill Kreshin -- no matter what happens to me.'
Executioner Hexxt Xocik says, 'As you wish Tixxrt. I shall slay the spy no matter what the cost.'
If you exceed the six-minute time limit, you are teleported out (provided you aren't dead) and a zone-wide emote announces the execution of Kreshin. If you are dead, Besana the Gravedigger is in the zone and can summon your corpses for you if you say, "I wish to live again" (be careful getting to her though).
If you succeed in killing Xocik, you see this:
Xocik writhes in pain as his body falls to the floor. Your valiant efforts have resulted in the rescue of Kreshin.
Kreshin Silentcog says 'Thank you for rescuing me. I sense that one of you holds a stone key which allowed you entrance into the courts. Please show it to me.'
Give him the Stone of Entry.
Kreshin Silentcog says 'You have done well to get this far. Please, take this to Taminoa and tell him it is vital that he decipher it. I must stay here to investigate more. Let him know I am safe and thank you again.'
You get the Stone back and a Writ of the Magi. Multiple people can hail Kreshin and do the turn-in.
Head back to Taminoa and give him the writ.
Another Enemy
Taminoa Bialu says 'Finally, you have returned and with some information I see. Kreshin contacted me in advance to let me know of your daring rescue. We are indebted to you. Now, back to business. While I cannot make out most of it, Kreshin has translated some of it and it appears to be a description of a ritual one of the head ikaav performs regularly. Apparently she has been trying to absorb the geomantic powers of the natives of Taelosia. The details are kind of sketchy as Kreshin was only able to translate so much, but some information is better than none, I always say. Anyway, it says here that the ritual is conducted in the Chamber of Souls. It used to be a large tower which the natives used to watch the shores. The tower was destroyed when the invaders took over the area and converted it to a ritual chamber. They used it in experiments centered on the extraction of magic. The head ikaav, known as Xictic, has been trying to use the powers of the native Taelosians to build an army of stone workers that he can directly control instead of relying on the ability of slaves. During the ritual, Xictic stands atop a platform which is suspended over a circle of platforms. The center platform holds an inanimate stone worker while eight ikaav stand on smaller platforms around the center. What happens next is not really known, but the end result is three lifeless slave corpses. According to this, she has not yet been successful, which I would say is good news. But if we do not stop her, she could easily reinforce the numbers with stone workers tainted by the touch of this legion. I know you have accomplished your goal, but I must ask that you find a way into this ritual and silence Xictic for good. Show this to Nislan. He should be able to decipher the images. I believe this is the key to getting into the ritual chamber. Now, hurry please and return to me with proof of Xictic's death so that I can make a final report on the Qinimi area to Fezbin.'
You get back a slightly altered version of the Writ of the Magi. Head back to Qinimi and give it to Councilman Sislono Nislan.
Councilman Sislono Nislan says 'These glyphs look quite familiar. They are definitely in my language, but it seems as if the one who etched them did so against his will. Where did you get this? Wait, don't tell me. I know. Kreshin must have been successful in finding out what was going on in the Chamber of Souls. These glyphs detail how to animate stone using our geomancy abilities. There are some strange symbols toward the bottom, but for the most part, this is our language. Could he be trying to conduct the [ritual] of my people?'
You say, 'What ritual?'
Councilman Sislono Nislan says 'While animating stone comes easy for us, sometimes we need an extremely powerful stone worker to help with the city. These stone servants were made through a ritual which combined the power of eight geomancers into a ninth. This geomancer would then imbue a stone worker with this power, resulting in a more powerful construct. We stopped doing the ritual when we discovered that it could take away our ability over time. If [she] has somehow figured out a way to absorb this power, then my people could be in more danger than I thought possible.'
You say, 'Who is she?'
Councilman Sislono Nislan says 'We refer to her as the silent one, but the legion calls her Xictic. She is one of their kind who can use magic and she seems to be quite feared by everyone in this area. She comes here sometimes and takes three of us into the building with the glowing dome around it. Along with her are eight magic-using invaders and some of the slavers. When they are finished, only members of the legion leave. None of my people who enter are ever seen again. If what this says is true, you must stop her. If she succeeds, she will be able to control our stone servants at will and cause even more destruction. I beg you to stop her. I will help you in any way if you [promise] to stop her.'
You say, 'I promise to stop her.'
Councilman Sislono Nislan says 'I cannot tell you how relieved this makes me. Now to the issue at hand. While Xictic and those she chooses can roam freely in and out of the magical dome surrounding the chamber, if anyone else tries to enter they are held back. As a councilman, I was granted a device that allows access into the dome and I've managed to keep it away from the prying eyes of the Mata Muram. Using it is not without its consequences, though. As soon as an outsider shows up within the dome, they will know what has occurred and will come searching for the culprit so be certain you are ready to face the challenges ahead before you embark upon this venture. Only eighteen of you will be allowed into the chamber at one time so gather your forces and tell me you are [ready] to face Xictic.'
Gather a raid of 3 full groups (update: 3 people in raid suffices, just 1 needs to be in zone), then say:
You say, 'I am ready to face Xictic.'
If you are not in a raid, you see in red:
You must be in a raid before attempting this event.
If you are in a raid, you see:
Councilman Sislono Nislan pulls out a small stone and closes it in his hand. 'Please be careful. What you are about to see may shock you at first, but don't let yourself be distracted for too long. These beings are merciless and once they have discovered your presence, they will stop at nothing to add your corpse to the others in the area.'
Your raid will be teleported into the enclosed dome in the center of Qinimi to fight another ring event, this one with a 27-minute time limit. You must kill the three ra'tuks within the first 10 minutes or the first sacrifice goes through and you will get slaughtered by the stone golem they created.
There are several waves of mobs:
- 6 mastruqs
- 6 nocs and ukuns
- 6 more nocs and ukuns
- 3 ra'tuks
- Kabeka Kret (archer, 1000 hp AE, high DPS, lots of hps)
- 4 snakes (despawn and respawn in lower numbers at 90%)
- Pixtt Xictic Krvne (boss)
After the 3 ra'tuks are dead:
a ra`tuk decimator's corpse drills a mighty hand into its wounds to hasten the coming of death.
You slash a ra`tuk decimator for 1261 points of damage.
You have slain a ra`tuk decimator!
Your faction standing with Hexxt got worse.
Your faction standing with Nihil got better.
As the last sacrificer falls to the floor, his lifeless eyes lock onto you in a soul-entrancing stare. Even dead, these strange beings look ready to leap forward and try to separate your bones from your skin or your eyes from their sockets.
Xictic shouts, 'What? How can this be? You fools have ruined my ritual and I am so close to finally fulfilling my goal. You shall suffer for this dearly. Meet my elite guardian, Kabeka. He will keep you busy while I finish absorbing the power from my eight magi. I warn you, stopping me this time will not be so easy.'
The chamber begins to glow with magic as the magi continue to funnel their power into Xictic. Unfortunately, that is a concern that will have to be dealt with at a later time as the creature called Kabeka prepares to strike.
Kabeka Kret says 'Xictic wishes you to be destroyed. It will be done.'
Kabeka Kret's corpse says 'Your numbers proved stronger today, but I am one of many who will lay down my life for the legion.'
You have slain Kabeka Kret!
4 Pixt Xictic Krvne spawn permarooted. 3 are fakes, one is real.
If you kill a fake Xictic they all respawn.
Pixtt Xictic Krvne says, 'You fools, did you think it would be that easy? The time you have wasted attacking my illusions has helped me gain even more strength. Now, see if you can find the real one this time.'
If you kill the real one, they all despawn. The real one is not perma-rooted.
Casting Beacon says 'Your foolish decisions have weakened your resolve and given me more power. I shall destroy you once and for all.'
Upon killing him:
The snakelike body of Xictic slowly slumps to the floor, eyes locked in disbelief. As the convulsions of death take control of the lifeless corpse, the area is filled with a familiar laugh. 'You fools! Did you really think I would be dumb enough to fight so many of you at once. I admit your power is indeed formidable, but our army will still crush you and this realm you call home.' Silence follows. Something evil has taken hold of this continent and the threat to Norrath may be much greater than anyone could ever imagine.'
Other items from the raid:
- Band of Bloody Spikes
- Broken Blade of Brooding
- Fervid Hunter's Mask
- Gloves of the Great Earthquake
- Granite Buckler
- Mask of Cracked Stone
- Pauldrons of Judgment
- Pendant of Corrupted Souls
- Wand of Stone Mastery
- Xictic's Twisted Stud
The Finale
Give Xictic's Bloody Robes to Taminoa Bialu.
Taminoa Bialu says 'You have returned bruised, but not broken I see. I am disappointed to hear that he got away, but you are not at fault. We could not foresee how crafty these beings would be. The information you have given us will be invaluable. Fezbin will be pleased. Kreshin told me to give this to you. He believes it may be one of the fragments that will fit into the stone Fezbin gave you. Who knows, if you help me find the rest of our scouts we may yet find more fragments.'
You have successfully completed a section of the Taelosian City.
You receive A Dull Gem Shard, which you may combine with A Socketed White Crystal and Vaifan's Clockwork Gemcutter Tools in Vaifan's Experimental Sealer to craft A Dull Socketed Crystal.
Reward: Gloves of the Great Earthquake
Reward: Shoulder Plates of Discord
Reward: Wand of Stone Mastery
Reward: Dull Socketed Crystal
Reward: Granite Buckler
Reward: Xictic's Twisted Stud
Reward: Band of Bloody Spikes
Reward: Fervid Hunter's Mask
Reward: Mask of Cracked Stone
Reward: Pauldrons of Judgment
Reward: Veil of the Aneuk
Reward: Muddy Ring
Reward: Pendant of Corrupted Souls
Reward: Broken Blade of Brooding
Reward: Gavel of the Adjudicator
Breakdown in Communication #2: Barindu (Normal): Talk to Taminoa Bialu
Taminoa Bialu may be found near Fezbin Fizzles at -35, +60, with whom you must have already completed the preflagging to accomplish this step of the quest.
You say, 'Hail, Taminoa Bialu'
Taminoa Bialu says 'Greetings. You must be one of the adventurers that Fezbin told me about. It is a pleasure to meet such a brave individual. Where are my manners? My name is Taminoa Bialu and I compile all the information from our scouts in the [city] area of Taelosia.'
You say, 'What city?'
Taminoa Bialu says 'Well, it appears the native inhabitants of Taelosia lived in a grand city once. This city is made up of four different areas named in their language. They are [Qinimi], [Riwwi], [Barindu], and [Ferubi]. Based off of early information, we believe each area had a specific purpose. I am still trying to decipher the native language to figure out what the names mean, but going off of visual information I can assume that Qinimi served as their court, Riwwi is where they held games, Barindu was a lush garden, and Ferubi was a central place of worship once. That is about the extent of my information as far as the intended purpose of each area. What they are now used for I can explain in further detail. Which area would you like to hear more about?'
You say, 'What is Barindu?'
Taminoa Bialu says 'This area holds the remains of what was once a place to build stone workers. We can only guess what purpose this part of the city served and all we know now is that it is home to some of the cruelest acts of violence against the nihil. I assigned this area to Talwin, a young wood elf new to the brotherhood. He was a proven scout eager to assist. Initially things were going well, but the information he was sending was not helping much. I think this worried him and resulted in him pushing his luck a little far. Ever since I told him his reports were lacking the vital evidence we needed I have not heard from him. Before Falcin passed on, I asked him if he had found anything out about Talwin and he shook his head. I know Talwin is still alive . . . he has to be . . . and I know that there must be some clues in the area of Barindu somewhere. He was diligent about recording what he found so I would assume that if he has been captured that his writings must be lying around the area somewhere. See if you can find two of his journal entries and bring them back to me. When you return please give what you find to my assistant Opury Foop. She is trying to help me organize my reports a little better.'
You need to find out what happened to Talwin.
Find the Report
Talwin's Journal Pages 1 and 2 drop from random mobs in Barindu. Give these pages to Opury Foop, located near Taminoa Bialu on the ship..
Your Location is -112.19, -43.76, 144.51
You say, 'Hail, Opury Foop'
Opury Foop says 'My brother is an adventurer like you. He left to explore the new continent a couple of days ago. I hope he is okay.'
Upon hand-in:
Opury Foop says 'What's this . . . Oh, you must be one of the adventurers helping us with our scout issue. Taminoa will be excited to see this. Talwin and Tam were really close before Talwin joined the brotherhood, but it is really not my place to give you any more details. I will leave that to him. Now, let me see. According to what Talwin has written here, the head slaver is a being known as Ixvet Pox who spends much of his time in the Stone Worker Yard. Apparently he forces the slaves to use their control over the stone workers to protect him. Sounds like that may be the best place to start looking for more Talwin clues. Wait a second. There are some more notes here on the second page. Seems Talwin was able to build a rapport with the head slave in the area. His name is Proterri and it says here that he was planning to poison the head slaver and try to start a slave revolt. While it seems you could easily go find the head slaver, I would suggest talking to Proterri first and asking him about Talwin. Either way, whatever information you find out regarding Talwin, please return it to Taminoa. I should have finished helping him get things in order by the time you return.'
You gain experience!!
Proteri Amari
You must have warmly faction with the Nihil to have this conversation:
You say, 'Hail, Proteri Amari'
Proteri Amari glances around nervously. 'Leave me be. I can't be seen talking to outsiders.'
You say, 'Who is Talwin?'
In yellow text:
'Yes ... Talwin. He and I were becoming fast friends until Ixvet took him. I am not sure what has happend to him, but if you would be [interested] in helping me I may be able to assist you in return.'
You say, 'I am interested.'
Proteri Amari says 'Good, good. As you may have noticed, the majority of these creatures are brutish types best suited for destruction. They are kept under control solely by strong [leadership].'
You say, 'What leadership?'
Proteri Amari says 'The one who controls this area of the city goes by the name Ixvet Pox. She's as cruel as the rest, but considerably more intelligent which makes her even more dangerous. Fortunately, she's grown complacent and that gives us an [opportunity]. If we can destroy Ixvet, it will throw this area into chaos and we should be able to escape before order is restored.'
You say, 'What opportunity?'
Proteri Amari says 'I've managed to get someone loyal to our cause placed within Ixvet Pox's entourage of personal servants and a skilled herbalist tends to her favorite fruits in the gardens. We will use this connection to poison the tyrant. Go talk with Kunimi Falade. You can find her working on the Hanging Gardens. Give her this ring as proof that you are there with my blessing and she will tell you what she needs.'
You receive a Simple Stone Band.
The Exotic Poison
Kunimi Falade is on the east side of the hanging gardens. You need warmly (possibly high warmly) faction with the Nihil to turn in the ring.
You say, 'Hail, Kunimi Falade'
Kunimi Falade glances around to make sure no one is within earshot then whispers, 'Who are you and what do you want?'
You say, 'Proteri sent me.'
Kunimi Falade looks nervous at the mention of that name and says, 'I'm sorry. I don't know anyone by that name.'
Give Kunimi Falade the Simple Stone Band.
Kunimi Falade takes the ring and studies it for a moment. 'So the time has finally come. Unfortunately, I have had little success. Our traditional poisons have absolutely no effect on these invaders. They don't even seem to notice the poison. But, there is some hope. I believe I can distill a poison that will affect them if I had the right [ingredients].'
You say 'What ingredients?'
Kunimi Falade says 'Creating poisons is distasteful business and I'm afraid the items that go into it are just as distasteful. I need the black bile of a hynid and the yellow bile of a tide feaster from the shores of Natimbi and both a vial of corrosive slime and a mass of insect larva from the sewers beneath us. Once I have these items, I should be able to create an effective poison. Now, you should leave before we're seen.'
You need Black Hynid Bile (from Natimbi), Yellow Tide Feaster Bile (also from Natimbi), Writhing Mass of Insect Larva (from flies and gnats in any of the four the Sewers), and a Vial of Corrosive Slime (from lurker mobs in any of the four Sewers). Give them to Kunimi.
Note: To open Sewers of Nihilia expeditions, visit Gamesh in Barindu.
Kunimi Falade takes the ingredients and gets to work. Within a few minutes, she produces a viscous green liquid. Plucking a bunch of fruit from the nearby plant, she coats the fruit in the poison.
Kunimi Falade says 'That should do it. I can't be positive that this will do more than give Ixvet an upset stomach, but we can hope. Please take this to Proteri Amari.'
Your faction standing with Nihil has been adjusted by 10.
You gain experience!
You receive a Poisoned Fruit. Head back to Proteri Amari.
Poison Ikaav Ixvet Pox
Proteri Amari says 'I knew Kunimi would come through! Our day of escape is almost here. Take this to Abena Taifa. She is the servant who brings Ixvet his meals and is loyal to our cause.'
Your faction standing with Nihil has been adjusted by 10.
You gain experience!
You get a different Poisoned Fruit back (if you turn in the wrong one, you'll need to restart from the beginning). This one goes to Abena Taifa in theory. Alas, she has run into a snag, and you'll have to find help somewhere else.
Abena Taifa says 'Proteri sent word that you would be coming. I have bad news. It seems Ixvet has gotten wind of a plot on his life and has grown paranoid. He has started changing his personal servants on a regular basis and I was replaced by Chiaka Lerato yesterday. I'm afraid that I'm not going to be able to help you anymore. Please, keep the fruit for now'.
Abena hands you back yet another version of Poisoned Fruit. You now need to determine whether Chiaka Lerato will help.
You say, 'Hail, Chiaka Lerato'
Chiaka Lerato ignores your attempts to talk to her.
Hand her the poisoned fruit.
Chiaka Lerato says 'I know of your plot and I have no interest in being a part of it. It's too dangerous and more likely to get us all killed than set us free. I don't want anyone else getting hurt, so I won't tell the guards, but I will have no part in your plans.'
You get another different form of the Poisoned Fruit. Now you have to figure out how to either get Chiaka to help or replace her as Ixvet's servant. Go back to the Abysmal Sea and talk to Hamisi Lerato, a family member of Chiaka's found near the Soulbinder (location -200, 220, 129: same room as the soulbinder - above the bar, by way of the stairs in the bar).
You say, 'Hail, Hamisi Lerato'
Hamisi Lerato looks despondent. 'I recently managed to escape from the city with my mother, but my sister is still stuck in there. She was too frightened to escape with us and now I fear she may be dead.'
You say, 'Chiaka is alive.'
A look of astonishment flashes across Hamisi's face. 'You've seen my sister? Is she ok? Where is she? Wait, there will be time to talk later. For now, you must return to her immediately. Our mother has been worrying herself to death and has grown very sick. I fear she won't last much longer. Please, take this shawl to my sister. It's our mother's. My sister will recognize it and know what it means. May the ocean speed your journey!'
You get a Tattered Shawl. Head back to Chiaka and give it to her.
Chiaka Lerato says 'How did you. . . Never mind. I'd know this shawl anywhere and it can only mean one thing. Mother needs me. I haven't heard from my brother or mother since they escaped and I thought they might be dead. I should have left with them when I had the chance. Fortunately, Hamisi told me of his plans. I should be able to use the same route he did to escape. Here, take this. I won't need it any more.'
You gain experience!!
You get her Serving Tray. Chiaka then starts walking toward the Ferubi zoneline and eventually despawns.
Wait until Ixvet is back up and go to Abena Taifa. Give her the Serving Tray and Poisoned Fruit (from Chiaka).
Abena Taifa says 'Just in time! Ixvet is due for his next meal in a few minutes. With Chiaka out of the way, I'll be able to serve him. I hope this poison isn't noticeable. Here, I've managed to secret this away from the guards up until now and I hate to think about those beasts getting their hands on it. Please hold onto it for me. If this goes well, I won't need it anymore.'
Your faction standing with Nihil has been adjusted by 50.
You gain experience!
You get Abena's Collar of Liberation.
Abena will be killed, because one of the aneuk guards will taste the fruit before it gets to Ixvet.
Abena Taifa says 'Ikaav Ixvet Pox, I humbly present you with your meal.'
Ikaav Ixvet Pox says 'Be gone. I've no interest in your fruits today.'
Aneuk Controller says 'Bring that tray here, girl! I'm famished.'
Aneuk Controller says 'Don't keep that all to yourself. Bring some of that fruit over here too!'
The Aneuk Controllers quickly gorge themselves on the fruit. After a few moments, they both double over and cry out in pain.
Ikaav Ixvet Pox says 'What have you done, slave! Try to poison me? You will pay for your insolence!'
Kill the ikaav and Talwin's Remains, a fallen skeleton in one of the buildings becomes targetable (similar to a chest in the Lost Dungeons of Norrath). The controllers will also join in the fight:
Aneuk Controller raises its scepter and calls out, 'Finally, a chance to practice our tactics. Constructs, destroy their support troops!'
However, being poisoned, they cannot command the constructs:
Aneuk Controller doubles over in pain, losing its concentration as the poison burns through its body.
Break the remains open (attack it) to get Talwin's Final Report.
The Finale
Give the report to Taminoa Bialu.
Taminoa Bialu looks at the final report before bowing his head for a second. 'While I had accepted Talwin's passing as reality, I still hoped you would save him in time. Either way, I thank you for your effort and for delivering this vital piece of information contained in this report. Please take this. I found it wrapped up in the report. Talwin would have wanted you to have it as it appears to be a gem fragment that could fit into the stone Fezbin gave you. Now that you have finished all that was needed for Barindu, there is still more of the city left to explore and I won't be able to complete my report until it is done.'
You have successfully completed a section of the Taelosian City.
You receive A Shiny Gem Shard, which you may combine with A Dull Socketed Crystal and Vaifan's Clockwork Gemcutter Tools in Vaifan's Experimental Sealer to craft a A Shiny Socketed Crystal. Reward: Shiny Socketed Crystal
Reward: Abena's Collar of Liberation
Breakdown in Communication #3: Riwwi (Normal): Talk to Taminoa Bialu
You say, 'Hail, Taminoa Bialu'
Taminoa Bialu says 'Greetings. You must be one of the adventurers that Fezbin told me about. It is a pleasure to meet such a brave individual. Where are my manners? My name is Taminoa Bialu and I compile all the information from our scouts in the [city] area of Taelosia.'
You say, 'What city?'
Taminoa Bialu says 'Well, it appears the native inhabitants of Taelosia lived in a grand city once. This city is made up of four different areas named in their language. They are [Qinimi], [Riwwi], [Barindu], and [Ferubi]. Based off of early information, we believe each area had a specific purpose. I am still trying to decipher the native language to figure out what the names mean, but going off of visual information I can assume that Qinimi served as their court, Riwwi is where they held games, Barindu was a lush garden, and Ferubi was a central place of worship once. That is about the extent of my information as far as the intended purpose of each area. What they are now used for I can explain in further detail. Which area would you like to hear more about?'
You say, 'What is Riwwi?'
Taminoa Bialu says 'Riwwi has to be the most interesting of all of the city areas. You see, this is where the coliseum is located. Now, we are not completely aware of how it was used before this invading army took up residence in the area, but now it is used for the merciless slaughter of the nihil. Early reports from our scout, Reyna, indicate that the slaves in the area would not interact with her until she proved herself. How she was able to do this I am not sure, but I would suggest trying to find something of Reyna's while I go over my Riwwi information. Come back to me when you find something.'
Reyna's Demise
Taminoa Bialu says 'This does not bode well for Reyna's fate. If I had to guess, I would say they took her to the coliseum. Knowing what we know about these strange beings, they would have taken her to the coliseum just so they could entertain themselves by torturing her. You must find a way into the coliseum and save Reyna. I think your best plan of action would be to locate and speak to Turlini and Namosa. They are two slaves Reyna mentioned in her reports. They may not talk to you if you have not proven yourself, but once you do that they should be pretty helpful. They may even know an easy way into the coliseum. Find these two and ask them about Reyna. Return to me when you find out more information about her.'
Gain faction with the Yunjo Resistance
You can also help some of the slaves. This is how Reyna did it. There are some slaves that are hungry and thirsty, located in the first building to the left of the Qinimi zone line. They require some player-made foods and drinks from native Taelosian products.
- Thirsting Yunjo - Needs Taelosian Tea - +5 faction per turn in. ( a drink version of the tea)
- Starved Yunjo - Something with Cragbeast- +2 faction per turn in.
- Emaciated Yunjo - Something with Crab- +2 faction per turn in.
- Famished Yunjo - Something with Tuna- +2 faction per turn in.
- Hungry Yunjo - Something with Hynid- +2 faction per turn in.
Drinks give +5 faction, and food gives either +2 or +5 faction.
Each slave will tell you what it wants. Turn in these for faction gain to the appropriate slave. Slaves accept exactly 8 turn-ins of food or drink, no more than that. On the 8th turn-in the slave despawns and a new one immediately takes its place. The respawn time is 15-20 minutes, and the type of Yunjo that pops is random, either An Enslaved Yunjo, or one of the 5 types listed above.
You need to attain high kindly faction standing with the Yunjo Resistance to talk to the two slaves. The Taelosian Morphemic Staff (grants positive faction to Nihil and Yunjo Resistance) can go a long way toward helping you along here.
Namosa's Family
You say, 'Hail, Namosa Bubundu'
Namosa Bubundu coughs pitifully and looks through you with weak eyes, 'This gazebo was once a place of contemplation, meditation, and reflection, but now it is a place of torture. These slavers shackle us here within feet of the pool of water and refuse us food or drink for days at a time, accompanied by horrible beatings. And now, I have had enough. I am through with this world and can only hope for peace in my passing. Before I pass on I wonder if you could do a [favor] for me?'
You say, 'What favor?'
Namosa Bubundu slips you a scuffed signet ring, 'Yes, yes. Here is a family heirloom that I have been keeping secret from our captors. If you deliver this ring to my kin, I can die in peace knowing it never fell into their hands. There are rumors that some of my family members have escaped the clutches of these monsters and made their way into a city that floats on water. I hope you understand, friend. Go quickly.'
You say, 'Hail, Pandula Bubundu'
Pandula Bubundu says 'What can I do for you? I'm waiting to hear word from the Wayfarer scouts. My niece has been captured by the Muramites and I only wish to discover if she is still alive. I can't take this, not knowing. I would much rather endure a thousand of those beast's whips than be kept in the dark. Please find her for me.'
Pandula Bubundu sobs uncontrollably, tears welling up in her eyes, 'So my little one is still out there. This is wonderful news. I can now die in peace. The Wayfarers have transcribed my final wishes onto this parchment. Please deliver this to Namosa.'
Your faction standing with Yunjo Slave Resistance has been adjusted by +1
Your faction standing with Gladiators of Mata Muram has been adjusted by -1
You gain experience!!
Namosa Bubundu gasps, 'What?! Oh no, this isn't good at all. She isn't supposed to die. I am! Quick, go and see Councilman Tentric in Qinimi and let him know what's happening. He has always helped our family when we were in need. If you bring this token he will know I sent you!'
Your faction standing with Yunjo Slave Resistance has been adjusted by +1
Your faction standing with Gladiators of Mata Muram has been adjusted by -1
You gain experience!!
You say, 'Hail, Councilman Tentric'
Councilman Tentric says 'You haven't come to demand something of me, have you? I've been subjected to enough atrocities already. Please leave this old man in peace.'
Councilman Tentric nods solemnly, 'Hmm . . . I see. So Pandula is contemplating leaving this world. There is no doubt that these are hard times. Our people are strong however, and nothing will truly break our spirit. Please let Pandula know that the gods have not forgotten us. Bring her this holy symbol.'
Your faction standing with Yunjo Slave Resistance has been adjusted by +1
Your faction standing with Gladiators of Mata Muram has been adjusted by -1
You gain experience!!
Pandula Bubundu looks quizzically at the symbol and rubs it in her hands. She smiles as if realizing something, 'Ah, Tentric, you are always right. I can't give up on this world or my family. I'm not sure why I was behaving so selfishly. Take this flower to my niece, she will know what it means.'
Your faction standing with Yunjo Slave Resistance has been adjusted by +1
Your faction standing with Gladiators of Mata Muram has been adjusted by -1
Your faction standing with Yunjo Slave Resistance has been adjusted by 50.
Your faction standing with Gladiators of Mata Muram has been adjusted by -25.
You have received a character flag!
Namosa Bubundu says 'A drakelily? My aunt grew these in her garden. In fact, I helped her plant some of them myself. She always told me they were a sign of hope. Thank you, ______. I'll inform our people of your kindness.'
Your faction standing with Yunjo Slave Resistance has been adjusted by +1
Your faction standing with Gladiators of Mata Muram has been adjusted by -1
You gain experience!!
Namosa touches your shoulder and gazes at you with pleading eyes. 'I hope this isn't presumptuous of me. You've already done so much. Before you go, I need to ask you for another favor. Turlini is under heavy guard in one of the nearby towers. The Muramites think he's up to something and I'm concerned they may torture or kill him. Please have a talk with Turlini when you can.'
Turlini's Revolt
You say, 'Hail, Turlini'
Turlini beams with excitement, 'I recognize you! One of the adventurers we've heard tales about! There are rumors of you destroying the Legion of Mata Muram. Have you come to set us free?'
You say, 'I have come to set you free.'
Turlini says 'Bless you, we're saved! Listen up, friend. I've already formulated a plan to stage a quick and decisive escape, but first we need to get our hands on a complete set of shackle keys. Just a few won't suffice; it must be entire set. If we were to rescue only some of my brethren, those that remain behind would be brutally tortured beyond imagination. Now, I've watched the guards carefully and counted the silvery keys they carry. There are ten in total. Combine the set in this sack and return it to me. I knew you would help!'
- Jagged Silvery Key: A desiccated corpse is located right across the first bridge from Riwwi zone in from Qinimi. Approaching triggers 7 stonemites, and spawns the key at the bottom of the canal.
- Notched Silvery Key: dropped by Night Watchman Fxi in Riwwi
- Serrated Silvery Key: dropped by Officiator Keviazh in Riwwi
- Polished Silvery Key: ground spawn at various places in Riwwi (appears at one place only at a time):
- 50, -490 underwater
- -328, -735 in the fountain
- -460,-280 in a ruined building between Qinimi and Ferubi
- 32, 32, on a crate
- 521, -682 behind a pillar
- -210, 0 outside of Qinimi entrance, near two fallen pillars
- behind the pillar in front of the officiator, to the right
- -240, -165 in small well on top of platform with the 2 named Nihil
- Ridged Silvery Key: Talk to Rorrst in Abysmal Sea, at +30, +90, +100. Saney Jakis stands next to him.
You say, 'Hail, Rorrst'
Rorrst smirks and nods politely your way. The glint of a silvery key hanging from a chain around his neck catches your eye.
You say, 'What is that key?'
Rorrst says 'Oh what, this little thing?' He grasps the key with one hand and holds it forth, displaying it proudly. This be my pride and joy, aye. Stolen right out from under the nose of those blasted Muramites. They be mighty angry at my trespass, I gather.'
Saney Jakis is right next to him.
You say, 'Hail, Saney Jakis'
Saney Jakis says 'Pleasure to meet you, ______! How are you making out? My friend and I traveled from afar in search of adventure and we've certainly found it. This strange land has delivered excitement in spades. Hasn't it, Rorrst?'
You say, 'What is that key?'
Saney Jakis says 'Are you trying to reason with Rorrst?' Saney unsuccessfully attempts to stifle her tinny, high-pitch chortle. 'Now THAT'S a waste of time, and I would know. Personal experience. If you want something from him you'll have to try a different angle: Appeal to his coinpurse. Money talks. Tell him I said so.'
To Rorrst:
You say, 'Saney says money talks.
Rorrst chuckles. 'Money talks? Aye, it does. Keep in mind I still can't give you the original, it means far too much to me. If you're dying to have the key you can make a copy. Say twenty-five thousand gold. It's a nice round number. That should be relatively trivial for someone of your background to obtain.'
For 25,000gp, he'll give you a Impression of a Key. Combine with a Silver Bar in a Jeweler's Kit (you get the mold back on failure). - Scored Silvery Key: Talk to Iniba the Confused in Riwwi (jail cell in the NW room of the Coliseum), and ask "Please". If you have a high begging skill (151+), she'll give it to you.
- Five-Toothed Silvery Key: uncommon drop from the Aneuks in Barindu's temple area
- Elongated Silvery Key: ground spawn at -112,285 in a ruined building in Barindu
- Edgeless Silvery Key: rare drop in Qinimi from various mobs
- Blunt Silvery Key: dropped by various named in Qinimi, including Pixtt Kerxek Vket, Pixtt Krakt Ticov, Pixtt Trext Rexi, and Rav Krixt Tekrik
You have received a character flag!
Turlini fishes a jagged key from the sack and tries it on his manacles. They unlock with a loud snap and slide off his wrists. His expression melts into simultaneous shock and elation. 'YES! We will be freed. Very soon now, these chains will bind my people no longer! And as for you, ______, you will become a legend among my people.'
Turlini can barely contain his excitement. 'This is wonderful news, friend. Freedom is within our grasp! The only problem remaining is the ever-present guards. They are always watching over us. We would need a monumental distraction to buy enough time for me to release everyone. Which is where you come in. One of your kind who goes by the name of Reyna has been taken to the arena and has been tortured daily in front of the Muramite masses. If you were to create enough of a ruckus in the arena trying to free her I think we could make our escape.'
Your faction standing with Yunjo Slave Resistance has been adjusted by +50
Your faction standing with Gladiators of Mata Muram has been adjusted by -25
You gain experience!!
The Great Diversion: Freeing Reyna
You say, 'Hail, an enslaved yunjo'
an enslaved yunjo says 'It's you! The champion everyone has spoken of! Have you come to defy the Muramites?'
You say, 'I have come to defy the Muramites.'
an enslaved yunjo shouts '______ defies you! Do you hear me? ______ defies you and will destroy your kind!'
An officiator shouts, 'We'll see how defiant ______ is after they have been crushed for our amusement. Send in one of our trained hynids!'
an enslaved yunjo says 'Stand fast and prepare for a fight! They're sending a bloodthirsty beast into the arena to kill you as we speak. If you defeat it, place the head in this sack as proof and return it to Turlini. He is the leader of the resistance and may be able to assist you for helping us.'
If you fail an encounter, you must start over from wave 1. If a mob gates, it is considered a failure.
The ten encounters:
--You have looted a Frothing Hynid's Head.--
Turlini gives you an appraising nod, 'Your valiant demonstration in the arena has given us all hope that someone can stand against the Muramites. Please accept this trinket as a token of appreciation from our people.'
You receive Yunjo's Braided Cord.
You say, 'Hail, an enslaved yunjo'
an enslaved yunjo smiles, 'You are very strong. If you wish to challenge the Muramites, hand me the item Turlini gave you and I will gain their attention again.'
Hand in Yunjo's Braided Cord.
an enslaved yunjo shouts '______ defies you! Do you hear me? ______ defies you and they will destroy your kind!'
An officiator sneers, 'Then let's have a demonstration, shall we, ______? How to be slaughtered by a rabid animal in front of a captivated audience.'
--You have looted a Gibbering Hynid's Head.--
Turlini gives you an appraising nod, 'Your valiant demonstration in the arena has given us all hope that someone can stand against the Muramites. Please accept this trinket as a token of appreciation from our people.'
You receive Yunjo's Sea Kelp Cord.
Turlini kicks the shackles from their legs. 'Quick, to the exits!'
Hand in Yunjo's Sea Kelp Cord.
an enslaved yunjo shouts '______ defies you! Do you hear me? ______ defies you and they will destroy your kind!'
An officiator shouts, 'You've proven amusing so far, ______, but how long can you last? Handlers, send in the cragbeast!'
--You have looted a High Hill Cragbeast's Head.--
--You have looted a Handler Bvekh's Head.--
Turlini gives you an appraising nod, 'Your valiant demonstration in the arena has given us all hope that someone can stand against the Muramites. Please accept this trinket as a token of appreciation from our people.'
You receive Yunjo's Woven Twine Cord.
Hand in Yunjo's Woven Twine Cord.
an enslaved yunjo shouts '______ defies you! Do you hear me? ______ defies you and they will destroy your kind!'
An officiator gloats, 'Your little stand is at an end, ______. Prepare to be slaughtered. I will enjoy this thoroughly.'
--You have looted a Pfaaxle's Head.--
Turlini gives you an appraising nod, 'Your valiant demonstration in the arena has given us all hope that someone can stand against the Muramites. Please accept this trinket as a token of appreciation from our people.'
You receive Yunjo's Plaited Hynid-Fur Cord.
Turlini kicks the shackles from their legs. 'Quick, to the exits!'
Hand in Yunjo's Plaited Hynid-Fur Cord.
an enslaved yunjo shouts '______ defies you! Do you hear me? ______ defies you and they will destroy your kind!'
An officiator shouts, 'Enough of this, let ______ deal with one of the stoneservants.'
--You have looted a Manipulated Stoneworker's Head.--
Create a Heavy Satchel (identifies as "One heavy head inside") and hand it in.
Turlini gives you an appraising nod, 'Your valiant demonstration in the arena has given us all hope that someone can stand against the Muramites. Please accept this trinket as a token of appreciation from our people.'
Turlini says 'Yes! We have been released! Head to the marshlands.'
You receive Yunjo's Hynid Fang Cord.
Hand in Yunjo's Hynid Fang Cord.
an enslaved yunjo says 'It's you! The champion everyone has spoken of! Have you come to defy the Muramites?'
You say, 'I have come to defy the Muramites.'
an enslaved yunjo shouts '______ defies you! Do you hear me? ______ defies you and they will destroy your kind!'
An officiator shouts, 'Graargh! Bring in two stoneservants.'
--You have looted a Misguided Stoneworker's Head.--
--You have looted a Controlled Earthmover's Head.--
Create a Heavy Satchel (identifies as "Two heavy heads inside") and hand it in.
Turlini gives you an appraising nod, 'Your valiant demonstration in the arena has given us all hope that someone can stand against the Muramites. Please accept this trinket as a token of appreciation from our people.'
You receive Pressed Leather Yunjo Sash.
Turlini says 'Yes! We have been released! Head to the marshlands.'
Hand in Pressed Leather Yunjo Sash.
an enslaved yunjo shouts '______ defies you! Do you hear me? ______ defies you and they will destroy your kind!'
An officiator shouts, 'This should prove to be very entertaining. How will you manage against controlled stoneservants? I don't think you will manage at all. Farewell, ______.'
--You have looted a Pixtt Master Hviqu's Head.--
--You have looted a Directed Destroyer's Head.--
--You have looted a Dominated Bonecrusher's Head.--
Turlini gives you an appraising nod, 'Your valiant demonstration in the arena has given us all hope that someone can stand against the Muramites. Please accept this trinket as a token of appreciation from our people.'
You receive Spiked Leather Yunjo Sash.
Turlini kicks the shackles from their legs. 'Quick, to the exits!'
Hand in Spiked Leather Yunjo Sash.
an enslaved yunjo shouts '______ defies you! Do you hear me? ______ defies you and they will destroy your kind!'
An officiator laughs, 'Here come the Kyv. It's over now ______'
--You have looted a Qiz's Head.--
--You have looted a Xnoz's Head.--
--You have looted a Dvax's Head.--
Turlini gives you an appraising nod, 'Your valiant demonstration in the arena has given us all hope that someone can stand against the Muramites. Please accept this trinket as a token of appreciation from our people.'
Turlini kicks the shackles from their legs. 'Quick, to the exits!'
You receive Woven Bone Yunjo Sash.
Hand in Woven Bone Yunjo Sash.
an enslaved yunjo shouts '______ defies you! Do you hear me? ______ defies you and they will destroy your kind!'
An officiator roars, 'GAH! Why won't you die?! ______, your time has come to an end. Send in the SLAYER!'
--You have looted a Kizki the Slayer's Head.--
Turlini gives you an appraising nod, 'Your valiant demonstration in the arena has given us all hope that someone can stand against the Muramites. Please accept this trinket as a token of appreciation from our people.'
You receive Silvery Mesh Yunjo Sash.
Hand in Silvery Mesh Yunjo Sash.
an enslaved yunjo shouts '______ defies you! Do you hear me? ______ defies you and will destroy your kind!'
An officiator shouts, 'I tire of toying with you, ______. Men, kill them. Now.'
--You have looted a Hexxt Skazm's Head.--
--You have looted a Hexxt Lixx's Head.--
--You have looted a Hexxt Nheki's Head.--
--You have looted a Pixtt Kirq's Head.--
--You have looted a Pixtt Mik's Head.--
--You have looted a Pixtt Khark's Head.--
You have received a character flag!
Turlini shouts with joy. 'Aha, you've done it! Thanks to your distractions in the coliseum, the Muramite legion is engulfed in utter chaos. We will take this opportunity to escape. You have saved us all. Oh, I almost forgot! Before I go, take this as a final gift from the Yunjo. It holds much strength, just as you do. Unfortunately I have bad news. Something I could not tell you until now. Reyna passed on a few days ago. Her last request was that I give this to someone who had proven his or her worth. You have more than done that. I wish there were more I could do, but we are masters of shaping stone not life.'
You receive Sash of the Yunjo's Champion.
Turlini says 'I can't wait to be reunited with my family! Let's get out of this place.'
After only a few seconds, Turlini runs out of the tower and despawns, along with the other slaves in the zone. Respawn time for Turlini is several hours (for me it was 6.5 hours)
Taminoa Bialu says 'Reyna was a skilled scout who had spent many years honing her abilities. Learning that she died so horribly upsets the stomach, but she died trying to help others. Yes . . . that's what we should focus on. This report you have returned will be a great help to us and this reward should help you as well. It was wrapped in the report and appears to be a gem fragment that may fit into the stone Fezbin gave you. Now to the rest of the city. Hopefully we can prevent our other scouts from suffering the same fate as Reyna.'
You have successfully completed a section of the Taelosian City.
Need all missing dialogues, mob /locs, and faction hits. Reward: Glowing Socketed Crystal
Reward: Sash of the Yunjo's Champion
Breakdown in Communication #4: Ferubi (Normal): Talk to Taminoa Bialu
Taminoa Bialu may be found near Fezbin Fizzles at -35, +60, with whom you must have already completed the preflagging to accomplish this step of the quest.
You say, 'Hail, Taminoa Bialu'
Taminoa Bialu says 'Greetings. You must be one of the adventurers that Fezbin told me about. It is a pleasure to meet such a brave individual. Where are my manners? My name is Taminoa Bialu and I compile all the information from our scouts in the [city] area of Taelosia.'
You say, 'What city?'
Taminoa Bialu says 'Well, it appears the native inhabitants of Taelosia lived in a grand city once. This city is made up of four different areas named in their language. They are [Qinimi], [Riwwi], [Barindu], and [Ferubi]. Based off of early information, we believe each area had a specific purpose. I am still trying to decipher the native language to figure out what the names mean, but going off of visual information I can assume that Qinimi served as their court, Riwwi is where they held games, Barindu was a lush garden, and Ferubi was a central place of worship once. That is about the extent of my information as far as the intended purpose of each area. What they are now used for I can explain in further detail. Which area would you like to hear more about?'
You say, 'What is Ferubi?'
Taminoa Bialu says 'The area called Ferubi was once a Taelosian temple. Now it is a place that reeks of pain and suffering. The invading army has desecrated the temple and the slaves within endure unimaginable torture. Based on the information our scout Smith Rondo sent to me before his disappearance, the invaders use this area to craft weaponry and conduct strange experiments. Smith's ability to sneak in and out of places quickly made him the ideal choice for this job, but like most of our other scouts he eventually got caught trying to reveal a vital piece of information. We have confirmed that he is still alive and I need you to go find him and give him this. It is a special farstone attuned to his aura so only he can use it. Please make haste in your mission, but be careful. You are entering the lion's den and if you are caught, I cringe to think what will happen.'
You receive a Tuned Farstone. You are to attempt to give the stone to Smith Rondo as a means to get him home.
The Corruption of Smith Rondo
Smith Rondo may be found in Ferubi. Give him the farstone.
Smith Rondo says 'While I applaud your effort, I must decline. You see, since I was captured I have been altered by the beings known as ikaav. As a result, my aura has changed, making this farstone useless. I do not know what it is I am becoming, but I will not place the lives of the brotherhood in danger. I have decided to give in to the inevitable and serve these beings. Please tell Taminoa I am sorry, but this is for the best. And please give him this. As I slip deeper and deeper into insanity, I have lost my ability to articulate my thoughts on paper. This is one of my last written reports and I think Taminoa will find it quite interesting.'
You receive a Sealed Report. Head back to Taminoa and give him the report.
Taminoa Bialu says 'Ah. Glad to see you return and report that you found Smith. Let me see, what does it say here . . . oh my, I can't believe this. These beings are truly insane. This is a detailed account of the experiments the Muramites have been conducting on the natives and on Smith. If what is listed here is true, we must find out more about this. It says that this is one of two reports he wrote, so we must assume he still has the other one on him. It also says here that the weapon master has access to the mountain area that leads to a secret way into the temples where they conduct these experiments. Oh, poor Smith. As soon as he figured out what was going on he documented it, hoping that he could somehow get it back to us without them finding out. Hm . . . here at the bottom he gives details about the weapon master. Seems he only enters the Ferubi area to fix the weapons that his four elite guards use. Knowing this, I am sure we can trick him into appearing. You must return to Ferubi and find his elite guards and collect a different weapon from each of them, but remember the weapon has to be damaged. Sounds like this is pretty durable stuff they use, so it may take some time to accomplish this. Either way, once it is done I would suggest giving the pieces to Smith and asking him to help.'
Free Smith Rondo
You have to get four NO DROP weapons parts: Broken Sword Blade from Pxet Elite Blademaster, Jagged Spear Tip from Pxet Elite Spearmaster, Tarnished Knuckles from Pxet Elite Brawler, and Chipped Hammer Head from Pxet Elite Hammermaster.
Gather a raid force and give the four parts to Smith Rondo. This will attract the attention of Weapon Master Vtiink Vzaan himself. Kill him and his apprentices.
The Weapon Master can drop the following loot:
- Aegis of Discordant Matter
- Blade of Ornate Symbols
- Bone Linked Collar
- Dark Hide Belt
- Gleaming Metal Cuffs
- Muramite Plated Bracer
- Soft Scale Cap
- Veil of Forgotten Heroes
After defeating him, his ghost spawns and is up for a very short period, make sure to hail right after Weapon Master's death. Hail the ghost to receive a flag to bypass the first four trials in the Sewers for zone progression. If you have completed the quest up to this point (including previous subquests), you will receive Rondo's Report. Any number of reports may be received, provided the ghost is still up and the people hailing are fully flagged thus far. You can also trigger the raid if no one is currently doing the quest. If you were not in the raid when the Weapon Master was triggered, the ghost will ignore you.
You say, 'Hail, Smith`s Spectral Memory'
You feel a chill surround your body as a voice enters your mind. 'Thank you for releasing me from an eternity of suffering. Now you must help the others on this continent whose fate I fear is much worse than mine. You must seek out Apprentice Udranda in Barindu. She can help you gain access to the temples beyond the mountain passes.'
The Finale
Turn in Rondo's Report to Taminoa Bialu. You have now finished the city scouting. You receive A Green Colored Gem Shard, which may be combined with A Glowing Socketed Crystal and Vaifan's Clockwork Gemcutter Tools in Vaifan's Experimental Sealer to craft one of four versions of A Green Hued Gemstone (melee, hybrid, caster, priest). Reward: Dark Hide Belt
Reward: Veil of Forgotten Heroes
Reward: Bone Linked Collar
Reward: Blade of Ornate Symbols
Reward: Gleaming Metal Cuffs
Reward: Soft Scale Cap
Reward: Aegis of Discordant Matter
Reward: Muramite Plated Bracer
Reward: Green Hued Gemstone
Reward: Green Hued Gemstone
Reward: Green Hued Gemstone
Reward: Green Hued Gemstone
Breakdown in Communication #5: Sewers (Normal): Talk to Vaifan Cogswin
Vaifan Cogswin may be found near Fezbin Fizzles at -35, +60, with whom you must have already completed the preflagging to accomplish this step of the quest.
You say, 'Hail, Vaifan Cogswin'
Vaifan Cogswin says 'Well, hello traveler. You here to help with the scout problem we've been having?'
You say, 'Yes.'
Vaifan Cogswin says 'Good to hear. I have been going out of my skull trying to tinker another one to find the first. Now that you are here, I can stop that and focus on compiling the information I already have. Let me tell you, being in charge of something like this is very taxing on the nerves. I remember being a young gnome and whenever I tinkered something it worked the first time. Ah, how good it felt to put the Cogswin family emblem on my wonderful creations. Nowadays it seems like everything I make has some intermittent flaw or defect. I might have to accept that I am getting old and a little slow, but I still have the wits to invent. I should stop rambling and get to the point. I am in charge of scouting the mountain areas known as [Tipt], [Vxed], and the [sewers] under the city. Which would you like to know about?'
You say, 'What sewers?'
Vaifan Cogswin says 'According to my records here, the sewers are a pretty vile area. Filled with some strange creatures, I hear. So, being the genius that I am, I came up with a plan to use a prototype clockwork scout I built when we were having problems exploring the catacombs in Mistmoore. He appeared to be working fine. I received constant detailed reports on the sewers and mountain areas until one day it stopped. For some time I tried to make contact with the clockwork, but nothing. I started working on a second one to retrieve the first when Falcin stumbled onto the boat. In his struggle to get back to us he had to make his escape through the sewers. While going through there, he found this. This is the reporting module used by the clockwork scout. It does not look like much now, but you should have seen it when Falcin gave it to me. I have repaired most of the damage in an attempt to access the information stored within, but there are four vital components missing. I need you to go to the four sewer areas and find a timing gear, a rusty spring, an oiled cog, and a processing gizmo. When you have them all, place them inside the gearbox and combine them. Once this has been done, the gearbox should give you a report. Return the report to me.'
You receive a Broken Clockwork Output Gearbox, a 4-slot container.
Repair the Gearbox
You now need to go through each of the four sewer zones and collect the parts mentioned. The Timing Gear drops in the Emanating Crematory off Cryxtetl, Diseased Larva, and Slime Devourer. The Oiled Cog drops in the Lair of Trapped Ones off Blistering Larva, Sludge-Eating Fly, and Rigara the Lost. The Rusty Spring drops in the Pool of Sludge off Distraught Slimesnipper, Festering Sewer Gnat, and Xthid the Undying. The Processing Gizmo drops in the Purifying Plant off Grimy Turepta, Kril V`Lak and Ukun Packleader. You will need to kill many mobs in the zone before the named mobs spawn.
Once you have all four parts, combine them in the Broken Clockwork Output Gearbox.
As you fit each piece into place the small device comes to life. Whirring and clicking, it begins to shake in your hand as a mangled piece of paper slides out of an opening on the front. Then, just as quickly as it started the device goes dead.
You have crafted a Repaired Clockwork Output Gearbox, as well as the Mangled Report you were looking for. Give the report to Vaifan for your reward. Hang on to the Gearbox, as it will be used in a later subquest.
Vaifan Cogswin says 'Grrr, I was afraid of this. Seems without the extra modules working together this one won't function completely. Nonetheless at least it is fixed now and with your assistance we should be able to reassemble the scout and place this module back inside. Take this. I found it in the gearbox when I first received it. Seems like it may have some affinity with the stone Fezbin gave to you. Let me know when you are ready to help out some more.'
Flag: You were successful in helping Vaifan complete her report of the sewer areas.
You receive A Muddy Gem Shard, which you may combine with the appropriate version of A Green Hued Gemstone (melee, hybrid, caster, priest) with Vaifan's Clockwork Gemcutter Tools in Vaifan's Experimental Sealer to craft A Muddy Green Gemstone. Reward: Repaired Clockwork Output Gearbox
Reward: Muddy Green Gemstone
Breakdown in Communication #6: Vxed (Normal): Talk to Vaifan Cogswin
Vaifan Cogswin may be found near Fezbin Fizzles at -35, +60, with whom you must have already completed the preflagging to accomplish this step of the quest.
You say, 'Hail, Vaifan Cogswin'
Vaifan Cogswin says 'Well, hello traveller. You here to help with the problems we've been having with the mechanical scout?'
You say, 'Yes.'
Vaifan Cogswin says 'Good to hear. I have been going out of my skull trying to tinker another one to find the first. Now that you are here, I can stop that and focus on compiling the information I already have. Let me tell you, being in charge of something like this is very taxing on the nerves. I remember being a young gnome and whenever I tinkered something it worked the first time. Ah, how good it felt to put the Cogswin family emblem on my wonderful creations. Nowadays it seems like everything I make has some intermittent flaw or defect. I might have to accept that I am getting old and a little slow, but I still have the wits to invent. I should stop rambling and get to the point. I am in charge of scouting the mountain areas known as [Tipt], [Vxed], and the [sewers] under the city. Which would you like to know about?'
You say, 'What is Vxed?'
Vaifan Cogswin says 'We have discovered that this continent holds many dangerous creatures, including the strange beings of the invading army. Many of these beasts can be found in the mountain area called Vxed. After being severely damaged in Tipt, the clockwork scout made its way back to Vxed to perform self maintenance, but I believe this is where it met its final demise. While the chance is slim, I believe you may be able to salvage enough of the parts from the creatures within Vxed to reassemble the frame. What you will need to find is a flickering finkenheimer, a tarnished sprocket, some uncoiled springs, a greased bolt, and some connection rods. When you have them all place, the sprocket, springs, bolt, and rods in the finkenheimer and bring me the result. I must warn you to be careful though. If these things could stop my clockwork, they must be pretty powerful creatures.'
Collect the Parts
The parts are random drops in Vxed. You need a Flickering Finkenheimer (the container), a Tarnished Sprocket, some Uncoiled Springs, a Greased Belt (Vaifan got confused), and some Connection Rods. Once you have the parts, put them all in the Finkenheimer and hit combine. Note that you must have had the quest assigned to you by Vaifan or the combination will result in nothing:
You have trouble fitting the pieces into the frame correctly. Each attempt ruins the frame a bit more until it crumbles into multiple unsalvageable pieces.
If you had the quest assigned to you, you see this instead:
Linking the pieces together the you create an empty clockwork shell. [sic]
You craft a Clockwork Scout Shell.
The Finale
Give the shell to Vaifan.
Vaifan Cogswin says 'I can't believe you did it. Not a bad job if I do say so myself. You may have a future in tinkering my young friend. Now, if you will give me one second to change a few things and rip this part out, adjust this here, add a couple of these, and there you go, a nice new clockwork frame. Now we just need to collect the rest of the pieces to rebuild him. Oh, and before I forget, here is a reward for helping me out. Let me know if you wish to explore any of the other areas by asking me about them.'
Flag: You were successful in helping Vaifan complete her report of the Vxed mountain area.
You receive A Dusty Gem Shard, which you may combine with A Muddy Green Gemstone and Vaifan's Clockwork Gemcutter Tools in Vaifan's Experimental Sealer to craft A Dusty Green Gemstone. You also receive an Inactive Clockwork Scout Module, "for the rest of the pieces to rebuild him." Reward: Inactive Clockwork Scout Module
Reward: Dusty Green Gemstone
Breakdown in Communication #7: Tipt (Normal): Talk to Vaifan Cogswin
Vaifan Cogswin may be found near Fezbin Fizzles at -35, +60, with whom you must have already completed the preflagging to accomplish this step of the quest.
You say, 'Hail, Vaifan Cogswin'
Vaifan Cogswin says 'Well, hello traveler. You here to help with the scout problem we've been having?'
You say, 'Yes.'
Vaifan Cogswin says 'Good to hear. I have been going out of my skull trying to tinker another one to find the first. Now that you are here, I can stop that and focus on compiling the information I already have. Let me tell you, being in charge of something like this is very taxing on the nerves. I remember being a young gnome and whenever I tinkered something it worked the first time. Ah, how good it felt to put the Cogswin family emblem on my wonderful creations. Nowadays it seems like everything I make has some intermittent flaw or defect. I might have to accept that I am getting old and a little slow, but I still have the wits to invent. I should stop rambling and get to the point. I am in charge of scouting the mountain areas known as [Tipt], [Vxed], and the [sewers] under the city. Which would you like to know about?'
You say, 'What is Tipt?'
Vaifan Cogswin says 'The mountainous areas of this continent hold many dangers within them. Tipt in particular is thick with members of the invading army, dangerous creatures, and the angry spirits of nihil refugees. Looking at the information I have, the clockwork scout tried to take a direct path to the other side of Tipt and had some serious problems. Apparently, it had a run in with some cragbeasts, a pack of ghosts, numerous Muramites, and a native riddlemaster. While he made it pretty far, he took significant damage each step of the way. My last report received for this area stated that it was returning to the Vxed area to recover, but had lost multiple power cells in the process. I need you to retrieve these power cells. They are vital to rebuilding the scout and getting that report. There are five different types of cells, each one is called Vaifan's Power Cell -- named after the most ingenious gnome there is, of course. The cells are named from A to E. When you have collected all of them, place them in this power pack, activate it, and return it to me.'
You receive a Depleted Clockwork Power Pack, a 6-slot SMALL container.
Retrieve the Power Cells
The five cells, named Vaifan's Temporary Power Cell A-E, are rare drops from the mobs mentioned in Tipt: A drops from an enraged maternal cragbeast, B drops from undead nihils, C drops from key-dropping mobs, D is handed to you by Rikabi the Riddler if you solve his riddle, E drops from Kyv Heartstriker Jhiru.
NOTE: See this quest entry for all details about the expedition into Tipt, Treacherous Crags.
Once you have all five cells, combine them in the power pack:
Each battery slides neatly into place as the power pack emits a low whine indicating it is powered up and fully operational.
This produces a "Fully Charged Power Pack". Give this to Vaifan.
Vaifan Cogswin says 'Wonderful. While the power cells were slightly damaged I was still able to increase the strength of the power pack for a short amount of time. This should give the scout just enough power to produce a legible copy the report. Thank you for the assistance, take this I scraped it off the side of the power cells. Looks like it might be able to add some power to the stone you recieived from Fezbin. There are still some areas left to explore, so when you are ready ask me about the next area you want to look into.'
You were successful in helping Vaifan complete her report of the Tipt Mountain pass.
You receive A Dirt Covered Gem Shard, which you may combine with A Dusty Green Gemstone and Vaifan's Clockwork Gemcutter Tools in Vaifan's Experimental Sealer to craft one of four versions of A Dirty Green Gemstone (melee, hybrid, caster, priest). You also receive an Extended Life Power Pack, a Power Pack Adapter, and Clockwork Scout Assembly Instructions.
The above is what you see if you have completed some but not all of steps 5-7. If you have completed all three steps, you see the following:
Vaifan Cogswin says 'Now that we have all the functioning pieces, we can reassemble the scout. Take these instructions and this power pack adapter and return to either mountain area to assemble the scout. I would have you do it here, but I fear he may be unstable and . . . well, let's just say I don't want to put the ship in danger. Please return to me with the report once you have it. I am going to prepare my final report so when you return I can take it straight to Fezbin. Good luck to you.'
Now you must reassemble the Extended Life Power Pack, the Power Pack Adapter, and the Repaired Clockwork Output Gearbox in the Inactive Clockwork Scout Module. This combine only works in Vxed or Tipt, as indicated in the Clockwork Scout Assembly Instructions.
With the final piece in place, the clockwork scout's eyes light up as it comes to life.
Clockwork Scout Model XIII /cons indifferent. As instructed:
You say, 'Access code 040703'
Clockwork Scout Model XIII says 'Verifying password and user identity . . .'
Clockwork Scout Model XIII says 'Identity verified as ______. Processing scout report. Please return report to Vaifan.'
You receive an Outer Regions Scouting Report. Only the person who spawned the scout can get the report. The scout despawns after one minute.
Clockwork Scout Model XIII says 'Power cells low. Shutting down to reserve power.'
Give the report to Vaifan.
Vaifan Cogswin says 'Excellent. It is always wonderful when something you invent works out. This was all I needed to finish up my report to Fezbin. Thank you once again. You have been very helpful. Once again I must reward you with this. When you brought the clockwork frame to me this fell out of it. I think it will go with your stone quite well. Try combining the two together and see what happens. I must say goodbye now.'
Yellow text: Your assistance has helped Vaifan and Taminoa greatly, but L'diava is still in need of assistance.
You get as a reward whatever reward you were supposed to get at the final step of parts 5-7 that you completed. Reward: Dirty Green Gemstone
Reward: Dirty Green Gemstone
Reward: Dirty Green Gemstone
Reward: Dirty Green Gemstone
Breakdown in Communication #8: Yxtta (Normal): Talk to L`diava Rexxen
L`diava Rexxen may be found near Fezbin Fizzles at -35, +60, with whom you must have already completed the preflagging to accomplish this step of the quest.
You say, 'Hail, L`diava Rexxen'
L`diava Rexxen says 'Yes, yes. What is it I can do for you? I am a very busy woman and do not have a moment to waste on just anyone. Are you one of the adventurers sent here by Fezbin?'
You say, 'Yes.'
L`diava Rexxen says 'Very good. You are just in time. I am in need of immediate assistance in the temple areas known as [Yxtta] and the [frightful temple], Kod'Taz. While our scouts have been missing for quite some time, I recently received some information that leads me to believe they may still be alive. Which one we help first is up to you. Which area do you wish to investigate?'
You say, 'What is Yxtta?'
L`diava Rexxen says 'Yxtta is one of three smaller temple areas where a group of natives known as the trusik used to worship a god called Trushar. We do not know who this god is, but we believe he is a false god centered around a belief in natural destruction. Xounii Resnen was the scout assigned to this area. She was given this task because of her expertise in shapeshifting. I told her to take the shape of a trusik native and interact with them to find out more information. She managed to fit in quite well. Perhaps too well. Gradually, reports came less frequently until they eventually stopped. While everyone feared she had suffered the same fate as the other scouts, I think she started to believe she was really a trusik and has abandoned her assignment. What I need you to do is go there and find her. Now, be careful, the trusik are not a friendly race of beings and they are even more irritated by the invasion of the Muramite army. When you find Xounii I fear she may attack you. If this happens, I will not fault you for defending yourself, but if it comes to this I want some form of proof as to what happened.'
Xounii's Journal
Xounii's Journal Page 1 drops randomly from the Primal creatures. It seems that one of these is in fact Xounii, so deeply shapeshifted she forgot she wasn't such a beast. Bring it back to L`diava.
Note: For information about getting past the locked door to the Primal Caves, see this quest entry.
L`diava Rexxen says 'Thank you for returning this to me. I wish the circumstances could have been different, but in honor of her memory, we will use this information to prevent the needless death of any other scouts. Now let me see what is written here. Hm. Seems she stumbled onto a secret ritual of some sort in an underground temple, called Uqua. Looks like the Muramites may be trying to reproduce another tear in space. This does not bode well for anyone. We must find out more about this. I must ask that you return to Yxtta and see if you can find any more of Xounii's entries. I cannot tell you where to start looking, but it seems that the best place to look would be in the caves where you found her. Xounii was very diligent about her reports so she would have written much about this. Try to find four more pieces of her journal entries and return them to me.'
The four pages mentioned are Xounii's Journal Page 2 Left Half (dropped by Primal Arachnid and random spiders), Xounii's Journal Page 2 Right Half (dropped by Pixtt Suir Mindrider and random mobs outside primal caves), Xounii's Journal Page 3 Left Half (dropped by Primal Insect and random insects), and Xounii's Journal Page 3 Right Half (dropped by Primal Reptile and random cragbeasts). Return the four pages to L`diava:
L`diava Rexxen tells you, 'You are truly a blessing from the gods. I thank you for risking your life to help the brotherhood and want to offer you this token of our appreciation. It is an item of dormant power locked within. The only way to unlock this power is to combine it with the stone Fezbin gave to you. Now that we have solved the mystery of Yxtta, I need assistance in Kod'Taz. If you are willing to help please ask me about this area.'
You were successful in helping L'Diava complete her report of Yxtta. Fezbin will be pleased, but there are others who need your help.
You receive A Translucent Gem Shard, which you may combine with one of the four versions of A Dirty Green Gemstone and Vaifan's Clockwork Gemcutter Tools in Vaifan's Experimental Sealer to craft A Translucent Green Gemstone. Reward: Translucent Green Gemstone
Breakdown in Communication #9: Kod'Taz (Normal): Talk to L`diava Rexxen
L`diava Rexxen may be found near Fezbin Fizzles at -35, +60, with whom you must have already completed the preflagging to accomplish this step of the quest.
You say, 'Hail, L`diava Rexxen'
L`diava Rexxen says 'Yes, yes. What is it I can do for you? I am a very busy woman and do not have a moment to waste on just anyone. Are you one of the adventurers sent here by Fezbin?'
You say, 'Yes.'
L`diava Rexxen says 'Very good. You are just in time. I am in need of immediate assistance in the temple areas known as [Yxtta] and the [frightful temple], Kod'Taz. While our scouts have been missing for quite some time, I recently received some information that leads me to believe they may still be alive. Which one we help first is up to you. Which area do you wish to investigate?'
You say, 'What frightful temple?'
L`diava Rexxen says 'Kod'Taz is made up of multiple temples that were once used for worship by the trusik natives. Many of them have since been destroyed or made into strongholds for the Muramite army. Due to the sheer size of this area, we sent a scouting force there to investigate. All of them are still alive, save one, named Kitren Lanom. None of the scouts left in the area know what happened to her or her belongings. Last time they remember seeing her was when she entered the Temple of Tri-Fates in an attempt to pass the temple trial. Please go to Kod'Taz and speak to Kevren Nalavat. He should be able to help you access the three trials. You will have to enter each trial and bring me back anything you find of Kitren's from each temple. Even though the scouts there have searched many times for something, I think a fresh set of eyes may help some. Kevren is the only one who knows you are helping me. Please do not let the others know you were sent by me. I have not yet ruled out the possibility of foul play and if they are aware of your affiliation, it may place you in more danger.'
Kitren's Tattered Cloak may be found in A Pile of Bones, the reward chest at the end of the third Ikkinz trial. Give it to L`diava.
L`diava Rexxen says 'Oh, thank you brave adventurer. We are now one step closer to finding out what happened to Kitren. Now, give me one second to look through the cloak here and . . . here it is, Kitren's notebook. There must be some information here that can help us more. While I read through this, I need you to return to Kevren Nalavat. He believes he may have found more clues to Kitren's whereabouts and since you did such a good job with the trials he believes you may be able to help him. Even though you have proven yourself by defeating the trials, he will not give you what I need unless you help him. When you return to him, show him this letter and it will confirm my trust in you. Hurry now. There no time to waste!'
You receive a Sealed Note. Find Kevren Nalavat at 1020, -1040 and give him the note from L`diava.
Kevren Nalavat says 'Seems you have made quite an impression if you are trusted by L`diava. But don't think that this means you do not have to gain my trust. While you survived the three trials I am still in need of assistance, I some [other tasks] completed, when you have finished them please return to me and tell me you have done all I asked and I will give you what you came here for. If you do not wish to start these tasks right now we do have some time to talk a little [more].'
Asking about the "other tasks" leads you to the standard Kod'Taz flag progression. You do need to complete some of that progression to get the Kod'taz reward:
- You've recovered important glyphs from the Temple of the Damned!
- You've successfully translated the glyphs you found in the Temple of the Damned!
- You were able to recover a rare artifact from the Grand Summoner's goons in the Summoning Circle!
- You've returned four relics from the Martyrs Passage!
- You've returned valuable information as to why the Muramites are in the Martyrs Passage!
You say, 'I have done all you asked.'
Kevren Nalavat says 'Indeed you have and your help is greatly appreciated. Take this back to L`diava I believe it has the answers she seeks.'
You receive a Sealed Confession. Take it back to L`diava.
L`diava Rexxen says 'Once again, a job well done. I hear you accomplished the tasks with flying colors. Now let's see what this says. Hm . . . this changes everything. I never suspected something like this, but now that I know, it all makes sense to me. Oh poor Kitren, why didn't you warn me first? Please leave me be. I must take sometime to think. Take this as proof of your accomplishments in Kod'Taz. It possesses a power that you can unlock when you combine it with the stone from Fezbin. Return to me later if you wish to investigate Yxtta.'
Flag: You were successful in helping L`diava complete her report of Kod'Taz. Fezbin will be pleased, but there are others who need your help.
You have succeeded in retrieving all the information the Wayfarers Brotherhood was seeking. Return to Fezbin and tell him you have completed your task so that he can give you your final reward.
You receive A Smoky Gem Shard, which may be combined with A Translucent Green Gemstone and Vaifan's Clockwork Gemcutter Tools in Vaifan's Experimental Sealer to craft one of four versions of a Smokey Green Gemstone (melee, hybrid, caster, priest). Reward: Smokey Green Gemstone
Reward: Smokey Green Gemstone
Reward: Smokey Green Gemstone
Reward: Smokey Green Gemstone
Brewing Collect: Galidnus' Busywork (Normal): Galidnus Corkpopper may be found at -175, +180, +115.
You say, 'Hail, Galidnus Corkpopper'
Galidnus Corkpopper says 'Welcome! Welcome! Hey, I don't suppose you'd like to learn how to brew? Or maybe you already know the trade and you just want to help me out? I've got some busywork to do, and I'd like to get someone else to do it for me. I'd rather spend my time making tea from those wonderful local tea leaves. There's a wild variety that somehow grows in the mountains that I really would like to spend some time working with. Can you help me with my [busywork]?'
You say, 'What busywork?'
Galidnus Corkpopper says 'The local tea can be used for some helpful brews. Of course this means that I have to spend all my time and energy brewing stuff up for the Wayfarers and no time trying new ideas. I really want to investigate this [mountain tea]! It's supposedly growing in harsh terrain, and the properties it displays are definitely magical. So if you are willing to do [some work] for me, I'll reward you with the secret that Yitimis and I have learned about preparing both types of local tea. I would need you to bring me some of the Taelosian Tea that Yitimis can make for you if you bring her Taelosian Tea Leaves.'
You say, 'What mountain tea?'
Galidnus Corkpopper says 'It's amazing that this tea can grow in those mountains. I hear the locals like it a lot and often have it with them. I'd love to have some, and I'll prepare the Taelosian Mountain Tea leaves for you. I'll give you most of the Taelosian Mountain Tea and keep just a bit for myself.'
You say, 'I am willing to do some work for you.'
Galidnus Corkpopper says 'I can definitely use your help. I need some Taelosian Tea for the tasks I want you to do. Give Yitimis some Taelosian Tea Leaves and she can prepare Taelosian Tea for you. If you bring that to me, I can get you doing the busywork. Of course, since I'm asking you to supply the materials, I can reward you sooner than Yitimis will.'
Taelosian Tea Leaves may be foraged or dropped in various Gates of Discord zones. Yitimis Groglenog may be found near Galidnus at -135, +180, +115. Hand in 1 x Taelosian Tea Leaves to receive 2 x Taelosian Tea. Give Galidnus 1 x Taelosian Tea:
Galidnus Corkpopper says 'Let's get you started. Brew us up some Traveler's Tea. Just drop a Small Bundle of Taelosian Tea and a Pinch of Sugar into a brew barrel and combine. The tea it makes is very tasty and very popular with the Wayfarers. Bring the Traveler's Tea to me as soon as you have it.'
You receive 10 x Small Bundle of Taelosian Tea and 10 x Pinch of Sugar. Combine 1 of each in a Brew Barrel.
You have learned the recipe Traveler's Tea!
Traveler's Tea trivials at 31. After doing 10 combines, hand them back to Galidnus unstacked, up to four at a time. After handing them all in, give him another Taelosian Tea to get more ingredients. After handing in around 40 x Traveler's Tea total, the next time you hand in a Traveler's Tea you will see this:
Galidnus Corkpopper says 'Much work to do. Dive right in and brew up some Wayfarer Spiced Tea. Just take a Small Bundle of Taelosian Tea and Wayfarer Spice and combine them in a brew barrel. The result is pretty good! Just bring the tea back to me when you have it ready. Thank you.'
You receive 10 x Small Bundle of Taelosian Tea and 10 x Wayfarer Spice. Combine 1 of each in a Brew Barrel.
You have learned the recipe Wayfarer Spiced Tea!
Wayfarer Spiced Tea trivials at 38. After doing 10 combines, hand them back to Galidnus unstacked, up to four at a time. After handing them all in, give him another Taelosian Tea to get more ingredients. After handing in around 30 x Wayfarer Spiced Tea total, the next time you hand in a Wayfarer Spiced Tea you will see this:
Galidnus Corkpopper says 'You'll have plenty of experience brewing tea before I'm done with you,' Galidnas smiles. 'I need more Bitter Berry Tea. Personally, I can't stand the stuff, but it goes over well with some folks. Just take a Small Bundle of Taelosian Tea and a Bitter Berry and combine them in a brew barrel. Don't worry, you only need one of those berries, they are really bitter! Bring the tea back to me when you're done.'
You receive 10 x Small Bundle of Taelosian Tea and 10 x Bitter Berry. Combine 1 of each in a Brew Barrel.
You have learned the recipe Berry Tea!
Berry Tea (not Bitter Berry Tea as per the dialogue) trivials at 46. After doing 10 combines, hand them back to Galidnus unstacked, up to four at a time. After handing them all in, give him another Taelosian Tea to get more ingredients. After handing in around 40 x Berry Tea total, the next time you hand in a Berry Tea you will see this:
Galidnus Corkpopper says 'Busy work is never done, is it? Well, I need some Rum Tea brewed up. Simple, but wonderful stuff, especially with that new tea. Combine Small Bundle of Taelosian Tea, Wayfarer Spice and an Ounce of Rum in a brew barrel to make this. It's my favorite drink. Bring it right back here to me as soon as you can, please.'
You receive 10 x Small Bundle of Taelosian Tea, 10 x Wayfarer Spice, and 10 x Ounce of Rum. Combine 1 of each in a Brew Barrel.
You have learned the recipe Rum Tea!
Rum Tea trivials at 54. After doing 10 combines, hand them back to Galidnus unstacked, up to four at a time. After handing them all in, give him another Taelosian Tea to get more ingredients. After handing in around 30 x Rum Tea total, the next time you hand in a Rum Tea you will see this:
Galidnus Corkpopper says 'I don't want to work you to death. There are others that can help me. Besides, you've earned your reward. Go talk to lovely Yitimis and she'll give you the secret. Make certain to tell her that you were able to [lend a hand] over here.'
To Yitimis:
You say, 'I was able to lend a hand.'
Yitimis Groglenog says 'You've been just a peach helping out! I don't think I need your help any more, you've already done so much. Let me give you the secret I promised and you go out and enjoy the rest of the day.' Yitimis pulls out several ragged-looking pieces of parchment, most with wine stains that make them almost unreadable. She holds one up for you to look at. It only takes you a minute to grasp what needs to be done to prepare the Taelosian Tea Leaves and the Taelosian Mountain Tea Leaves. In fact, you are certain that if you work at it long enough, you can produce more usable tea with practice.'
This gives you the ability to process Taelosian Tea Leaves and Taelosian Mountain Tea Leaves into Taelosian Tea and Taelosian Mountain Tea respectively. These two types of tea are used in many GoD brewing recipes.
Brewing Freebie: Work for Yitimis (Normal): Yitimis Groglenog is located on the Queen of Thorns in the Abysmal Sea at -135, +180, +115.
You say, 'Hail, Yitimis Groglenog'
Yitimis Groglenog says 'Hail. Brell's blessing on you. Are you, perchance, a brewer or interested in learning the craft? I have a lot of [work] to do here, and I could use some help.'
You say, 'What work?'
Yitimis Groglenog says 'We're very busy just trying to keep up with demand. With all of the new discoveries on Taelosia, we have a lot of visitors, but I'd really like to have some time to look at the native plants. I've been given some samples of the [tea] that grows locally and it has some very unusual properties. I just have not had enough time to investigate. Perhaps you could [lend a hand] with my daily tasks so that I can free up some time to look into this?'
You say, 'What tea?'
Yitimis Groglenog says 'It's aromatic and that's the least of its properties. I have a few dozen interesting ideas I want to try. Unfortunately, the tea requires special preparation before it can be used. I've worked out how to do that and I'd be very pleased if you could bring me some of those Taelosian Tea Leaves. I'll prepare them for you and only keep a small amount for myself. That way we can both try it!'
You say, 'I will lend a hand.'
Yitimis Groglenog says 'Excellent. The mornings are probably the busiest around here. And a Wayfarer's favorite pick-me-up in the morning is called Spicy Sunrise. Just take the Orange Juice and the Wayfarer Spice and combine it in a brew barrel. It will make a tasty drink! Please bring them to me as soon as you can. If you help me out enough, I may be willing to share the secret of preparing Taelosian Teas with you!'
You receive 20 x Orange Juice and 20 x Wayfarer Spice. You also receive a book entitled "Making Sauces." Head to the Brew Barrel (south of Yitimis in the same room, -220, +175, +115) and do the combines. Combine 1 of each ingredient in the brew barrel.
You have learned the recipe Spicy Sunrise!
Spicy Sunrise trivials at 31. After doing each set of 20 combines, hand them back to Yitimis. After handing them all in, say "I will lend a hand" again and she will give you more Spicy Sunrise components until she feels you've made enough (approximately 100).
You say, 'I will lend a hand.'
Yitimis Groglenog says 'Well hello! I can certainly use your help. We need to brew up some coffee. I think we'll make Vanilla Coffee today. Just take the Coffee Beans, the Vanilla Beans and the Flask of Purified Sea Water and combine them in a brew barrel. Please rush back and give me the coffee, we'd like to serve it hot.'
You receive 20 x Coffee Beans, 20 x Vanilla Beans and 20 x Flask of Purified Sea Water. As before, combine 1 of each in a brew barrel.
You have learned the recipe Vanilla Coffee!
Vanilla Coffee trivials at 38. After doing each set of 20 combines, hand them back to Yitimis unstacked, up to four at a time. After handing them all in, say "I will lend a hand" again and she will give you more Vanilla Coffee components until she feels you've made enough (approximately 100).
You say, 'I will lend a hand.'
Yitimis Groglenog says 'Hi! I'm glad you can help. One of the things we have trouble with around here is folks that stay on duty for hour after hour and getting bored. They tend to fall asleep. Well, Galidnus designed a tasty beverage that helps folks stay awake. Though he didn't come up with a very good name for it. He calls it Galidnus' Glad Juice. To make it, just put Orange Juice, Coffee Beans, and Redberry into a brew barrel and combine. Bring them back to me when you've got them ready. Thank you!'
You receive 20 x Orange Juice, 20 x Coffee Beans, and 20 x Redberry. Back to the barrel.
You have learned the recipe Galidnus' Glad Juice!
Galidnus' Glad Juice trivials at 46. After doing each set of 20 combines, hand them back to Yitimis unstacked, up to four at a time. After handing them all in, say "I will lend a hand" again and she will give you more Galidnus' Glad Juice components until she feels you've made enough (approximately 100).
You say, 'I will lend a hand.'
Yitimis Groglenog says 'You sure are helpful! This one is pretty simple, though the ingredients can be expensive enough, I suppose. We need a good stock of Wayfarer Spiced Wine. Just put the Simple Wine and the Wayfarer Spice in a brew barrel and combine them. Bring me the wine and I'll get them into the store room. Thank you for helping me out.'
You receive 20 x Simple Wine and 20 x Wayfarer Spice. You know what to do.
You have learned the recipe Wayfarer Spiced Wine!
Wayfarer Spiced Wine trivials at 54. After doing each set of 20 combines, hand them back to Yitimis unstacked, up to four at a time. After handing them all in, say "I will lend a hand" again and she will give you more Wayfarer Spiced Wine components until she feels you've made enough (approx. 100). When you've turned in enough of those, finally...
You say, 'I will lend a hand.'
Yitimis Groglenog says 'You've been just a peach helping out! I don't think I need your help any more, you've already done so much. Let me give you the secret I promised and you go out and enjoy the rest of the day.' Yitimis pulls out several ragged-looking pieces of parchment, most with wine stains that make them almost unreadable. She holds one up for you to look at. It only takes you a minute to grasp what needs to be done to prepare the Taelosian Tea Leaves and the Taelosian Mountain Tea Leaves. In fact, you are certain that if you work at it long enough, you can produce more usable tea with practice.'
This gives you the ability to process Taelosian Tea Leaves and Taelosian Mountain Tea Leaves into Taelosian Tea and Taelosian Mountain Tea respectively. These two types of tea are used in many GoD brewing recipes.
If your skill is already high enough :
Yitimis Groglenog says 'You've been just a peach helping out! I don't think I need your help any more, you've already done so much. If you have forgotten or want them for posterity, I can give you the [recipes] you used while helping us. Let me give you the secret ...
You say, 'Please give me the recipes.'
Yitimis Groglenog says 'Here you go.'
You have learned the recipe Spicy Sunrise!
You have learned the recipe Vanilla Coffee!
You have learned the recipe Galidnus' Glad Juice!
You have learned the recipe Wayfarer Spiced Wine!
You have learned the recipe Traveler's Tea!
You have learned the recipe Wayfarer Spiced Tea!
You have learned the recipe Berry Tea!
You have learned the recipe Rum Tea!
Chaos Runes (Ancient GoD Spells) (Normal): Reyfin Malakwa may be found on the ship at /waypoint +225, +290, +100.
You say, 'Hail, Reyfin Malakwa'
Reyfin Malakwa stares silently out over the ocean towards the magical wards protecting the ship from the unyielding onslaught of the pounding waves. He jumps back terrorized when he realizes your presence. His visage calms a bit when he senses you mean him no immediate harm. He ponders you timidly for a moment and then leans down and begins drawing something in the sea grime that covers one of the boxes. You study his sketch for a moment and begin to understand that it is a rune of sorts. Three arching lines join in the center to form a sort of Y-shape.
All classes can turn in Chaos Runes to Reyfin Malakwa for a spell or discipline depending upon class. Each class gets one reward. The Chaos Runes is LORE and NO DROP, and has been reported as dropping in Qvic and higher.
Bard - Ancient: Chaos Chant
Beastlord - Ancient: Frozen Chaos
Berserker - Ancient: Cry of Chaos
Cleric - Ancient: Chaos Censure
Druid - Ancient: Chaos Frost
Enchanter - Ancient: Chaos Madness
Magician - Ancient: Chaos Vortex
Monk - Ancient: Phantom Chaos
Necromancer - Ancient: Seduction of Chaos
Paladin - Ancient: Force of Chaos
Ranger - Ancient: Burning Chaos
Rogue - Ancient: Chaos Strike
Shadowknight - Ancient: Bite of Chaos
Shaman - Ancient: Chaotic Pain
Warrior - Ancient: Chaos Cry
Wizard - Ancient: Strike of Chaos
Reyfin Malakwa 's eyes grow wide as you hand him the glowing black rune. He holds the chaos rune in his left hand and begins to speak. Your skin begins to crawl as you recognize the words as the language of the legion. The runes melt into a sticky mass of darkness which seeps out over Reyfin's hands. He tips his head toward your hands and you bring them out in front of you. Without any visible motion from Reyfin, the black mass quivers and slides through the air toward you and settles in your out stretched hands. The goo begins to solidify and your eyes quiver with amazement as the letters begin to form into familiar words on the black stone. Reward: Spell: Ancient: Bite of Chaos
Reward: Spell: Ancient: Burning Chaos
Reward: Spell: Ancient: Chaos Censure
Reward: Spell: Ancient: Chaos Chant
Reward: Spell: Ancient: Chaos Frost
Reward: Spell: Ancient: Chaos Madness
Reward: Spell: Ancient: Chaos Vortex
Reward: Spell: Ancient: Chaotic Pain
Reward: Spell: Ancient: Force of Chaos
Reward: Spell: Ancient: Frozen Chaos
Reward: Spell: Ancient: Seduction of Chaos
Reward: Spell: Ancient: Strike of Chaos
Reward: Tome of Ancient: Chaos Cry
Reward: Tome of Ancient: Chaos Strike
Reward: Tome of Ancient: Phantom Chaos
Reward: Tome of Ancient: Cry of Chaos
Chef Chowderly's Award-Winning Recipes (Normal): Is there a minimum faction/skill level/level required to get this text?
Find Chef Chowderly at location -100, +175, +115, next to Tylida Eraldi, who shows up on /find.
You say, 'Hail, Chef Chowderly'
Chef Chowderly says 'Sorry, friend. I do not mean to be rude, but I am very busy right now cooking a [meal].'
You say, 'What meal?'
Chef Chowderly says 'I must cook for a large portion of the people living here on the ship. Seems they just cannot get enough of my cooking. I am a master at making [tasty tuna dishes] after all.'
You say, 'What tasty tuna dishes?'
Chef Chowderly says 'Are you interested in the culinary arts? If you are, then you must have heard of some of my most famous dishes such as my Seafarer's Tuna-Corn Chowder. You haven't heard of that you say? Hrmph. If you are interested in perhaps learning my award winning recipes, I could use a good assistant. Throgar over there is not much help!' Chef Chowderly gives a cold glance to his assistant Throgar who is standing in a small pile of broken dishes. 'I swear he drops more dishes than he cleans! Anyway, I might have time to teach you some recipes if you [can help] me with something and you have some knowledge of cooking.'
You say, 'I can help you.'
Chef Chowderly says 'First of all I need some more dishes.' Chef Chowderly glances over at Throgar again, who drops a glass on the ground, shattering it into tiny pieces. 'Sigh. I think I will need a lot of dishes. If you can, take this note to my friend Rellix in Rivervale. He owes me a favor and should be able to give you some dishes. Return them to me when you get them.'
You receive a Note to Rellix. Rellix may be found in Rivervale near the /findable Byl Babbinsbort (location -135, -110, -8). Give him the note.
Rellix says 'A note from Chef Chowderly, eh? I haven't heard from him in some time. Hope he is doing well.' Rellix reads the note. 'I do happen to have some spare dishes. Here, take them.'
You gain experience!!
You receive a Case of Dishes. Head back to Chef Chowderly and give him the case.
Chef Chowderly says 'Thanks much. These should last at least a day or so. Take this recipe for my world famous Spicy Tuna Salad Sandwich and see what you can do with it. Once you make one, hand it to me along with the recipe I just gave to you. Now, I don't let just anyone borrow recipes, so please pay attention and do your best.'
You gain experience!!
You receive a Recipe for Spicy Tuna Salad Sandwich, which reads:
Spicy Tuna Salad Sandwich
Combine in an Oven:
One 1 lb. Saltwater Tuna
One Loaf of Bread
Algae Spices
Kelp Garnish
Lettuce
Butter
-Chef Chowderly
Make one (trivial 202) and give it and its recipe scroll to Chef Chowderly.
Chef Chowderly scarfs down the dish you created. 'Nicely done! I can tell it was prepared with great care! Take this recipe for Pan-Seared Orange Tuna. It is a personal favorite of mine. Once you make this dish, hand it to me along with the recipe I just gave to you.' Chef Chowderly returns to his busy pace of cooking.
You gain experience!!
You receive a Recipe for Pan-Seared Orange Tuna, which reads:
Pan-Seared Orange Tuna
Combine in an Oven:
One 2 lb. Saltwater Tuna
Loaf of Bread
Spices
Seaweed Vinegar
Flask of Orange Juice
Cup of Sugar
Non-Stick Frying Pan
-Chef Chowderly
Make one (trivial 215) and give it and its recipe scroll to Chef Chowderly.
Chef Chowderly scarfs down the dish you created. 'This is great. Your dish was flavorful, cooked just right, and I can tell you know your tuna. Take this recipe for Taelosian Tuna Kabobs. Once you make this dish, hand it to me along with the recipe I just gave to you.' Chef Chowderly returns to his busy pace of cooking.
You gain experience!!
You receive a Recipe for Taelosian Tuna Kabobs, which reads:
Talosian [sic] Tuna Kabobs
Combine in an Oven:
One 3 lb. Saltwater Tuna
Skewers
One Spotted Mushroom
One Habanero Pepper
Ground Garlic
-Chef Chowderly
The mushroom you need is "A Spotted Mushroom," dropped in Dawnshroud Peaks. Make one set of kabobs per the recipe (trivial 228) and give it and its recipe scroll to Chef Chowderly.
Chef Chowderly scarfs down the kabobs. 'Quality work! The tuna was cooked just right, the mushrooms were tender, and you added just enough peppers. I am impressed. Keep up the good work. Take this recipe for my Delightful Tuna Cakes. Once you make this dish, hand it to me along with the recipe I just gave to you.' Chef Chowderly returns to his busy pace of cooking.
You gain experience!!
You receive a Recipe for Chowderly's Delightful Tuna Cakes, which reads:
Chowderly's Delightful Tuna Cakes
Combine in an Oven:
Two 1 lb. Saltwater Tuna
Ground Garlic
Three Shissar Eggs
Bread Crumbs
One Water Flask
One Cup of Flour
-Chef Chowderly
Shissar Eggs drop from various shissar in Ssraezsha Temple. Make one batch of cakes (trivial 242) and hand it and its recipe scroll to Chef Chowderly.
Chef Chowderly joyfully eats the cakes. 'This is great! You certainly know how to make this dish. Shissar Eggs are not easy to prepare properly, but you did an excellent job. We might have a master chef in the making here! I think these dishes have been too easy for you. From here on out, the recipes are going to be harder to make. I think you can handle it though. Take this recipe for Taelosian Tuna a la King. Once you make this dish, hand it to me along with the recipe I just gave to you.' Chef Chowderly returns to his busy pace of cooking.
You gain experience!!
You receive a Recipe for Taelosian Tuna A La King, which reads:
Talosian [sic] Tuna A La King
Combine in an Oven
One 4 lb. Saltwater Tuna
One Bottle of Milk
One Cup of Flour
One Phoenix Egg
One Mushroom
Spices
Vegetables
-Chef Chowderly
Phoenix Eggs drop in Doomfire, the Burning Lands and Eryslai, the Kingdom of Wind. The mushroom is A Mushroom, which drops in Dawnshroud Peaks off the shrooms. Make one batch of Taelosian Tuna A La King (trivial 268) and give it and its recipe scroll to Chef Chowderly.
Chef Chowderly joyfully eats the dish you prepared. 'This dish truly was fit for a king. Very nice work. Your training is almost complete. Take this recipe for Tuna Rice Surprise. Once you make this dish, hand it to me along with the recipe I just gave to you,' Chef Chowderly returns to his busy pace of cooking.
You gain experience!!
You receive a Recipe for Tuna Rice Surprise, which reads:
Tuna Rice Suprise [sic]
Combine in an Oven:
One 4 lb. Saltwater Tuna
Rice
Mature Cheese
Butter
Bread Crumbs
Jug of Sauces
Fish Oil
Wok
`-Chef Chowderly
Make one batch (trivial 282) and give it and its recipe scroll to Chef Chowderly.
Chef Chowderly joyfully eats your meal. 'Excellent work, my friend. I guess you want to know what the surprise part of the dish is? Well, there isn't one really. It is always nice to include the word surprise in at least one of your dishes! That is a tip you should never forget! Take this recipe for Spicy Tuna Sunrise Steak. Once you make this dish, hand it to me along with the recipe I just gave to you.' Chef Chowderly returns to his busy pace of cooking.
You gain experience!!
You receive a Recipe for Spicy Tuna Sunrise Steak, which reads:
Spicy Tuna Sunrise Steak
combine in an Oven:
One 4 lb. Saltwater Tuna
Vegetables
One Small Bottle of Soy Sauce
Ground Garlic
One Celestial Essence
Spices
One Webbed Tail Fin
Non-Stick Frying Pan
`-Chef Chowderly
Webbed Tail Fins drop in the Plane of Nightmare off of slarghilugs. Make one batch (trivial 295) and give it and its recipe scroll to Chef Chowderly.
Chef Chowderly quickly engulfs your steak. 'Your dish was fiercely spicy and cooked just right. Very nice work. Your training is now complete. I present to you your rewards -- Chowderly's Grand Bowl and most importantly, a book containing all my great recipes! It has been a pleasure teaching you! I now send you forth into the world, hoping you feel confident with your tuna related cooking skills!'
You gain experience!!
You receive Chowderly's Grand Bowl and Chef Chowderly's Tuna Recipe Compilation, containing all the recipes used in the quest. Reward: Chowderly's Grand Bowl
Reward: Chef Chowderly's Tuna Recipe Compilation
Cleric Abysmal Armor (Normal): Dakkamor Ironspirit may be found at -175, +75, +95.
You say, 'Hail, Dakkamor Ironspirit'
Dakkamor Ironspirit says 'Hail there! Welcome aboard! There is never enough time to care for all the ill in such a place. You wouldn't happen to be a cleric as well would you?'
You say, 'I am a cleric'
Dakkamor Ironspirit says 'Mayhaps we can help each other out. You keep going about being a good helpful cleric, so I have fewer sick folk to tend to, and I will help you out in the equipment department. If you are in need of new equipment such as helm, legplates, chestplate, bracer, vambraces, gloves, or pair of boots let me know.'
You say, 'What pair of boots?'
Dakkamor Ironspirit says 'Bring me back a sheet of infused Muramite metal along with a Muramite Boot Armor and I believe I can rework them into something quite fine for you. If you need help in the infusing process, just talk to Nalasrine.'
You say, 'What bracer?'
Dakkamor Ironspirit says 'A bracer is rather simple to reshape. If you speak to Nalasrine about her findings, she may be able to help you infuse some Muramite metal to strengthen it. One sheet of infused Muramite metal along with a Muramite Bracer Armor should be sufficient for me to rework it for you.'
You say, 'What chestplate?'
Dakkamor Ironspirit says 'Ahh, a chestplate. Who doesn't want a new chestplate? I can craft one for you fairly easily if you do the legwork. Travel into the hostile areas and bring back two sheets of Muramite Metal. Make sure to speak to Nalasrine about infusing it. Bring me those sheets along with a Muramite Chest Armor and a chestplate you shall have.'
You say, 'What gloves?'
Dakkamor Ironspirit says 'In order for me to craft you some gloves, you need to find some more Muramite metal. I am sure Nalasrine can assist you with infusing the metal, which needs to be done before you bring it back to me. Bring me an infused Muramite metal sheet, and a Muramite Glove Armor.'
You say, 'What helm?'
Dakkamor Ironspirit says 'I can craft a Muramite helm into something suitable for you. Nalasrine has managed to form a powerful compound that reinforces some native materials. Bring me a Muramite Helm Armor piece and some Muramite metal that has been infused with Nalarsine's mixture.'
You say, 'What legplates?'
Dakkamor Ironspirit says 'Reshaping a pair of Muramite legplates into a pair that would serve you well should be easy. Bring back a pair of Muramite Greaves and two sheets of Muramite metal. Give only the greaves to me for shaping, once I am done with that you will need to take the metal and greaves to a forge. Don't forget to infuse the metal with the mixture from Nalasrine before you take it to the forge.'
You say, 'What vambraces?'
Dakkamor Ironspirit says 'Vambraces? Hmm, find some Muramite metal and some Muramite Sleeve Armor. Once you have these things talk to Nalasrine about infusing the metal. When it is strong I should be able to craft you some nice vambraces.'
Nalasrine Twinklecoil is located in the next room at -240, -5, +100.
'Hail, Nalasrine Twinklecoil'
Nalasrine Twinklecoil says 'Salutations! It is great to see so many eager travelers out and about. How are you enjoying our little city here? I have been quite busy myself. There are so many interesting things to learn about these strange beings that inhabit Taelosia. Their armor in particular is most interesting. I have developed some intriguing compounds. Let me know if you are interested in such things before I just prattle on!'
You say, 'I am interested.'
Nalasrine Twinklecoil says 'Oh, good. Well let me see. Basically, I have been studying the armor that our explorers have been bringing back from their adventures. While it is a bit strangely shaped, as these creatures that seem to reside here are, I have found that by strengthening some native materials it can be reworked into rather fine armor for the likes of you and me.'
You say, 'What armor?'
Nalasrine Twinklecoil says 'If you are looking into having some armor made, you definitely will need to use my infusions. They are a bit pricey, however they are difficult to make and well frankly, I am the only one who can! Use the plate solvent on plate armor, chain solvent on chain, tanning solution on leather, and silk strengthener on silk. All rather intuitive isn't it? Simply take a look at the different types I have for sale.'
Muramite armor begins dropping in Qvic and above. Bring back the appropriate piece of "Muramite XXX Armor" and turn it in to Dakkamor Ironspirit to get a class-specific, no-stat "Reworked Muramite XXX."
Craft a Muramite Metal Sheet by combining a Meldstone, Water Flask, and Smithy Hammer in a forge. This has a high trivial (282) and a high minimum smithing requirement (in the 240s).
Buy Nalasrine's Superior Plate Solvent from Nalasrine Twinklecoil for around 10,500 pp. Combine the solvent with the Muramite Metal Sheet in a forge (no-fail combine). This results in a NO DROP piece of Infused Muramite Metal.
Combine the Infused Muramite Metal with your piece of Reworked Muramite XXX armor in a forge to receive your quest reward (no-fail combine). Reward: Dakkamor's Bracer of the Divine
Reward: Dakkamor's Gauntlets of the Divine
Reward: Dakkamor's Boots of the Divine
Reward: Dakkamor's Helm of the Divine
Reward: Dakkamor's Vambraces of the Divine
Reward: Dakkamor's Chestplate of the Divine
Reward: Dakkamor's Legplates of the Divine
Cristov's Wine (Normal): Take the Cristov's Red Wine that you get from the Freeport Stout quest and give it to Cristov to get a recipe. Reward: Cristov's Schematics
Discord Skin Samples (Normal): Alexsa Whyte may be found at -125, -40, 145.
You say, 'Hail, Alexsa Whyte.'
Alexsa Whyte says 'Greetings traveler, my name is Alexsa and I am currently looking in to collecting samples from the strange beings that make up the Legion of Mata Muram ranks. Our initial encounters with them revealed that each one is innately resistant to certain types of weapons and weak against others. So, by order of Morden, we must gather skin samples from each race and examine it. Thanks to our tinkering sister, Vaifan, I now have a device which can readily examine samples. However, with news of our scouts missing and our resources being spread so thin, retrieving these samples are impossible for us. Since you have taken the time to listen, I am wondering if you would be willing to help?'
You say, 'Yes.'
Alexsa Whyte says 'Oh wonderful! You don't know how helpful this will be. Take this device. It is what we use to examine samples. When you defeat the Muramite, remove his tongue, place it inside of here and combine it with some distilling salts. Distilling slats can be found along the shores of Natimbi. Once you have combined the ingredients, it will give you a final sample which I will need you to return to me when you get the chance. Each time you hand a sample, I will be able to reveal to you the innate strengths and weeknesses for that race. If you are successful at recovering a sample from every different race that has come through the portal, then I will talk to Morden about giving you a reward.'
You receive Vaifan's Pocket Sampling Device. At this point, anything else said is replied to with:
Alexsa Whyte says 'There is nothing more I can tell you, please take the item you received and get some samples for me.'
The item you're looking for is actually called Distilled Salts, and is a ground spawn on the beaches of Natimbi. Some known locations are:
-660, -545
+1300, -625
+1475, -900
+957, +918 (Northern shore)
-1017, -1519 (Western shore)
+625, -1305 (Eastern Shore)
-909, -1474 (Northern shore)
+533, +665 (Eastern shore)
Map File locations:
P -662.0898, -544.1769, 215.0457, 0, 0, 240, 1, GS:_Salt

P 1298.1725, -627.1100, 208.9470, 0, 0, 240, 1, GS:_Salt

P 1473.3293, 900.2025, 204.2386, 0, 0, 240, 1, GS:_Salt

P -919.0884, -955.6981, 214.2075, 0, 0, 240, 2, GS_Salt

P -1399.7537, -281.1713, 307.6973, 0, 0, 240, 2, GS_Salt
You have to gather tongues from several different types of monsters from the Gates of Discord and combine them in the device with the salts to craft "A XXXX Sample," where "XXXX" is replaced by the type of creature the tongue came from. Handing these samples in to Alexsa gives you information about the strengths and weaknesses of that type of creature.
A Kyv Sample
Alexsa Whyte says 'Ah yes, the kyv. These stealthy beings are quite elusive. The fact that you were able to recover a sample from one of them is quite an accomplishment. Now, let's see . . . it appears that the kyv have no noticeable weapon weaknesses or resistances, but we do know they have the ability to deflect incoming arrows and thrown objects. It would seem that they are also resistant to poison based incantations, and quite weak to magic based spells. You're doing great, but there are more samples left to be found. Please get them to me as soon as you can.'
A Mastruq Sample
Alexsa Whyte says 'Great sample! It looks like this was taken from a being with a thickened hide. This particular being is called a mastruq and seems to be quite resistant to blunt objects, but an arrow or slashing weapon would get through that hide quite easily. Because of their thick hides cold based elemental magic would be quite ineffective while the opposite would hold true for fire magic. You're doing great, but there are more samples left to be found. Please get them to me as soon as you can.'
A Noc Sample
Alexsa Whyte says 'Looks like this came from the body of the race of beings called the noc. While their bony frames make them quite weak against crushing damage, their plated chests protect any major organs, reducing the effectiveness of arrows or slashing weapons. It would appear that their flesh is diseased which makes them resistant to disease based spells but their thin skin means that cold might be quite affective against them. You're doing great, but there are more samples left to be found. Please get them to me as soon as you can.'
A Ratuk Sample
Alexsa Whyte says 'This looks like a sample from the brutish ra'tuk. These large beasts wield their axes adeptly and seem to have no major weaknesses save magical based spells. Because of their strange body makeup magic tends to affect them more then other spell types. You're doing great, but there are more samples left to be found. Please get them to me as soon as you can.'
An Aneuk Sample
Alexsa Whyte says 'These odd-looking floating beings interest me the most. They seem to be quite adept with magic making them strong against magical incantations. You're doing great, but there are more samples left to be found. Please get them to me as soon as you can.'
An Ikaav Sample
Alexsa Whyte says 'These snakelike beings are very deadly. The scales on their lower body are all but impervious to slashing weapons, but a well-placed arrow could do some serious damage. They are masters of magical energy making their defenses against such spells very good. However they do seem to be weak against elemental magic like cold. You're doing great, but there are more samples left to be found. Please get them to me as soon as you can.'
An Ixt Sample
Alexsa Whyte says 'These centaur-like beings are quite bloodthirsty. They appear to be bred for fighting. Their fur covered lower half makes them very resistant to the element of cold but while that fur can protect them from one element it also makes them very vulnerable to fire. You're doing great, but there are more samples left to be found. Please get them to me as soon as you can.'
An Ukun Sample
Alexsa Whyte says 'An excellent find here! It appears that this was retrieved from one of the beings called an ukun. They have frail bodies but their blood is a deadly poison. This would imply that they are probably very resistant to poison. You're doing great, but there are more samples left to be found. Please get them to me as soon as you can.'
Once you've collected the eight samples:
Alexsa Whyte says 'Now that I have all of the basic samples I can add all of my research into this tome and give it to you.'
Alexsa Whyte says 'While we still need samples from both the force commander and his lieutenant, what you have given me so far warrants a reward of some kind. When you have recovered samples from both of the additional races I mentioned I will be able to reward you with something much better.'
At this point you receive Alexsa's Research Notes, a book containing the information given to you thus far.
Zun'muram Sample
Alexsa asks for the Tongue of the Zun'muram, which drops off various Zun`Murams in Ferubi, Txevu, and Tacvi.
Alexsa Whyte says 'A two-headed beast built for destruction. This creature is quite powerful, as I am sure you found out when you met it. While it does not appear to have any resistances or weaknesses, this sample should reveal some more information about its particular race. You're doing great, but there are more samples left to be found. Please get them to me as soon as you can.'
Tunat'Muram Sample
You also need a Tongue of the Tunat'muram, which drops off the boss of Tacvi and all of Discord: Tunat`Muram Cuu Vauax.
Alexsa White says 'This is unbelievable, you retrieved a sample from the army's leader and you still live? You are truly a great adventurer. I must get this sample to our mages quickly. We must do some extended testing as we have not had any information on him till now. You're doing great, but there are more samples to be found. Please get them to me as soon as you can.'
After you have handed in all the samples:
Alexsa Whyte says 'This is unbelievable, you retrieved a sample from the army's leader and you still live? You are truly a great adventurer. I must get this sample to our mages quickly. We must do some extended testing as we have not had any information on him till now. You have collected all the samples we need and I thank you for the assistance. I am indebted to you and with approval given by Morden himself I want you to take this, hopefully it will help you in your future adventures. Good day and good luck.'
You receive an Assistant Researcher's Symbol.
Need missing drop information. Reward: Assistant Researcher's Symbol
Druid Abysmal Armor (Normal): You say, 'Hail, Gaelin Valekeeper'
Gaelin Valekeeper says 'Greetings ______, I am looking for those protectors of the woodland, the most noble of all classes, the [druid]. You wouldn�t happen to be one would you?'
You say, 'I am a druid'
Gaelin Valekeeper says 'Wonderful, it brings me joy to see fellow naturewalkers. For one such as yourself, I may be able to assist. If you are in need of new equipment such as [cap], [leggings], [tunic], [bracer], [sleeves], [gloves], or [sandals] - let me know.'
You say, 'What bracer?'
Gaelin Valekeeper says 'A bracer is rather simple to reshape, if you know what you�re doing. Bring me back Muramite Bracer Armor piece and I will get to work on it. You will also need a section of infused Muramite leather to finish the bracer in a loom. Talk to Nalasrine if you still some help infusing the leather.'
You say, 'What cap?'
Gaelin Valekeeper says 'I should be able to reform Muramite Helm Armor into something quite useful to you. Explore these lands until you find some Muramite leather padding. Talk to Nalasrine about infusing it, then bring piece it together with your new helm from me in a loom.'
You say, 'What gloves?'
Gaelin Valekeeper says 'I can make you a wonderful pair of gloves. Take the time to dig up some Muramite leather and have Nalasrine assist you with infusing it. Bring me Muramite Glove Armor and I can reshape it into something that you can use. Strengthen the gloves by reinforcing them with the infused leather in a loom, and a fine pair shall be yours.'
You say, 'What leggings?'
Gaelin Valekeeper says 'Reforming some Muramite greaves into a pair of leggings that would serve you well should be no great feat. Bring me a pair of Muramite Greaves and I will get to work on that. To finish your leggings you will also need to obtain two pieces of Muramite leather padding. Speak to Nalasrine about infusing it, then place the leather pieces and leggings in a loom to work them together.'
You say, 'What sandals?'
Gaelin Valekeeper says 'Soft, supple boots are my specialty. Bring me back Muramite Boot Armor and I believe I can rework them into something quite fine for you. Once I�ve reworked them, you will need to take a section of infused Muramite leather along with the new boots and reinforce them in a loom. If you need help in the infusing process, just talk to Nalasrine.'
You say, 'What sleeves?'
Gaelin Valekeeper says 'Some new sleeves? Indeed, arm protection is important. Venture into these strange lands and find some Muramite Sleeve Armor. Bring the armor piece to me and I will get to work on refitting it for you. Once you have a piece of Muramite leather padding, talk to Nalasrine about infusing the it. The new sleeve from me can be easily stitched up in a loom with the infused Muramite leather.'
You say, 'What tunic?'
Gaelin Valekeeper says 'A tunic! Of course. Such a thing of beauty! I can craft one for you fairly easily if you do the legwork. Travel into the hostile areas and bring back two sections of Muramite leather and Muramite Chest Armor. Make sure to speak to Nalasrine about infusing the sections of leather. Bring me the chest piece for reworking, then simply weld together the new chest and leather in a loom.'
Nalasrine Twinklecoil is located in the next room.
You say, 'Hail, Nalasrine Twinklecoil'
Nalasrine Twinklecoil says 'Salutations! It is great to see so many eager travelers out and about. How are you enjoying our little city here? I have been quite busy myself. There are so many interesting things to learn about these strange beings that inhabit Taelosia. Their armor in particular is most interesting. I have developed some intriguing compounds. Let me know if you are interested in such things before I just prattle on!'
You say, 'I am interested.'
Nalasrine Twinklecoil says 'Oh, good. Well let me see. Basically, I have been studying the armor that our explorers have been bringing back from their adventures. While it is a bit strangely shaped, as these creatures that seem to reside here are, I have found that by strengthening some native materials it can be reworked into rather fine armor for the likes of you and me.'
You say, 'What armor?'
Nalasrine Twinklecoil says 'If you are looking into having some armor made, you definitely will need to use my infusions. They are a bit pricey, however they are difficult to make and well frankly, I am the only one who can! Use the plate solvent on plate armor, chain solvent on chain, tanning solution on leather, and silk strengthener on silk. All rather intuitive isn't it? Simply take a look at the different types I have for sale.'
Muramite armor begins dropping in Qvic and above. Bring back the appropriate piece of "Muramite XXX Armor" and turn it in to Gaelin Valekeeper to get a class-specific, no-stat "Reworked Muramite XXX."
Craft a Muramite Leather Padding by combining by combining a Meldstone and some Snake Scales in a loom. This has a high trivial (282) and a high minimum smithing requirement (in the 240s).
Buy Nalasrine's Enforcing Tanning Solution from Nalasrine Twinklecoil for around 10,500 pp. Combine the solution with the Muramite Leather Padding in a loom (no-fail combine). This results in a NO DROP piece of Infused Muramite Leather.
Combine the Infused Muramite Leather with your piece of Reworked Muramite XXX armor in a loom to receive your quest reward (no-fail combine). Reward: Gaelin's Tunic of Woodlands
Reward: Gaelin's Woodland Gauntlets
Reward: Gaelin's Woodland Bracer
Reward: Gaelin's Woodland Cap
Reward: Gaelin's Woodland Sandals
Reward: Gaelin's Woodland Sleeves
Reward: Gaelin's Leggings of Woodlands
Druid Epic 2.0: Staff of Everliving Brambles (Normal): If you have the Staff of Living Brambles (druid epic 1.5):
Chapter 1 - The Strange Drawing and Yuisaha
Go to Abysmal Sea and find Reyfin Malakwa at +225, +285, +98.
You say, 'Hail, Reyfin Malakwa'
Reyfin Malakwa stares silently out over the ocean towards the magical wards protecting the ship from the unyielding onslaught of the pounding waves. He jumps back terrorized when he realizes your presence. His visage calms a bit when he senses you mean him no immediate harm. He ponders you timidly for a moment and then leans down and begins drawing something in the sea grime that covers one of the boxes. You study his sketch for a moment and begin to understand that it is a rune of sorts. Three arching lines join in the center to form a sort of Y-shape.
The bedraggled Taelosian refugee looks up at you after drawing the symbol and looks you directly in the eyes for the first time. He seems to draw strength from your presence and you sense that he feels the power of nature that you carry. He smiles weakly at you and then bends down and erases the symbol by smearing around the surrounding grime. He then draws a new symbol. This symbol is much more complicated, it is an arch with rods protruding from either side at the base. The rod to the right splits into four branches, the one on the left ends in a swirl. He looks up at you with a pleading look in his eyes as he hands you a small bag that appears to be made from his own clothing.
You receive a Ragged Cloth Bag. Forage 2 Rune Fragments from Barindu or Ferubi. They are LORE but there are two different versions, which identify as "A part of a runed stone" and "A part of a rune-carved stone."
Next, head to Qinimi. Find "a broken ritesdancer" in the houses to the right of Natimbi zone-in, at -355, -1065. The house should be the one furthest to the right of the first ones. You have to be careful because there's a Noc inside and a few wanderers, so you need to do this while getting hit, or cleverly pacify everything. NOTE: If the aforementioned mob does not respond, there may be "a melancholy architect" that will talk to you.
You say, 'What about the rune fragments?'
If your faction (with what?) is too low:
The worn Taelosian looks up at you discretely, as if looking at you directly would cause physical pain. She shyly hands you a small, worn bag and what appears to be an animal fang. She then holds up six fingers and points at the fang, then points at herself. She then turns quickly away and proceeds to act as if you are not there.
You receive a Threadbare Cloth Bag and an Undamaged Noc Fang. Collect 5 more Undamaged Noc Fang and combine all six in the bag to craft a Closed Cloth Bag. Give the bag to the ritesdancer.
If your faction is good enough or you did the above steps:
The worn Taelosian looks up at you defiantly. She studies you a moment and nods. Whatever judgment she was making about you, you seem to have passed. She reaches into her ragged clothing and pulls out a small hunk of rock and hands it to you. She then quickly returns to work.
You receive a THIRD rune fragment, which identifies as "A part of a rune-carved rock."
Return to Reyfin in the Abysmal Sea. Combine the three rune fragments in the Ragged Cloth Bag to craft a Wrapped Cloth Bag (can someone confirm that both this combine and the previous one result in a Wrapped Cloth Bag? if not, what does the first combine produce?), which you should give to him.
Reyfin Malakwa looks almost delighted, certainly happier than he has been in years. He smiles and raises his arms, both hands tightly clenching the rune fragments you have recovered. A small burst of magical energies pops off his hands. He lowers his arms and holds out to you the rune, reformed. He then speaks a single word to you, 'Yuisaha.'
You receive a Rune of Yuisaha.
Go to Nedaria's Landing and find Historian Finrazel at +1080, +1505.
You say, 'Hail, Historian Finrazel'
Historian Finrazel says 'Well hello there. I hope all is well with you, friend.'
You say, 'What of Yuisaha?'
Historian Finrazel says 'Where did you hear that name? How do you know it?'
Give him your Rune of Yuisaha.
Historian Finrazel says 'Well, this is an amazing find! I didn't think any of his runes survived the invasion.' The historian cleans the rune with a special solution, then hands it back to you. 'Let me tell you what I know of Yuisaha. He was a great rain spirit, perhaps the greatest patron of the Taelosians. He was manifested when the Muramites invaded Talosia so long ago. He was captured by the army and brought back to the Plane of Discord. What happened to Yuisaha then is hard to say, but there is a separate story of a powerful rain spirit that was frozen during a battle and shattered. The story claims that the frozen shards of the spirit were divided among the leaders of the winning army. Where they have gone since then, or if they still exist, nobody can tell. Do you really [plan to find] him?'
You say, 'I plan to find him.'
Historian Finrazel says 'Then you'll need this. I use it to store magical potions, but it might work for holding frozen pieces of a greater rain spirit.' He shrugs. 'I hope so, anyway. I don't exactly see a lot of frozen rain spirits.' He smiles. 'I wish you luck, friend. Rescuing such a being would be a boon for all of Norrath.'
You receive a Thick Leather Bag, a 4-slot MEDIUM container.
Chapter 2 - The Four Shards
The four shards can be done in any order.
1. Head to Nobles Causeway. Look for the Ukun Packleader camp. You can find it by tracking the only Aneuk in zone. Behind this Aneuk is a trench with a canyon. Don't go down, instead make a left north. You will see Bazu Scavenger wandering around. He is snareable and rootable and doesn't summon. Once he's dead loot a Frost Shard.
2. Head to Dranik's Scar. Go near -850, +1075. Tranlinor the Maimed will spawn. He is a noc that quads for 800, summons and has a single rampage. So you need a friend or two for him. Once he's dead loot a Wind Shard.
3. Head to Wall of Slaughter. You need a few groups for this guy and some mezzers. Tell your raid to go to loc +265, +460, on top of the castle. North of Pyrique Redwing. At this point some mobs will pop when you get near. Be sure to indicate to your raid/groups to clear the area first from trash mobs before you pop your named.
The mobs are 2 "a nervous guardian" and the main mob which is "a retired soldier". You will have to kill his two nervous guardians for the main mob to "awaken" and agro. Once they are dead, a retired soldier will become Lightning Lord. He hits for about 1200 max, summons of course, doesn't rampage and he can be shaman slowed. He spawns 4 to 6 unmezzable but slowable-by-shaman adds called "Lightning Loyalists." These adds will give a complete heal to the named and die/disappear after they do it, so either kill them before they sacrifice themselves or just burn the named while he CH's while mezzing/offtanking adds.
Take him down and loot a Rain Shard. A chest may spawn with additional loot.
4. Head to Qinimi. In the West part of the zone, you will find a shrine (-735, -890, 28 -- inside the first building in the southeast all the way to the back). Approach it and three mobs will spawn: Mastruq Commander Gorlakt, Spiritlord Mind and Spiritlord Body. This is a raid fight for sure. You need strong people, probably 3-4 groups of Time/Qvic people, and you need good healers and a good tank.
This fight goes similarly to the WoS one, but with a twist. Spiritlord Body procs Body Warp, Spiritlord Mind procs Mind Warp. Both the Spiritlords hit for 1500, can be shaman slowed and they are tethered/leeched. Once you kill one, Gorlakt will come alive and will inherit the AE of that which you killed first. Gorlakt also hits for about 2800-3000 and rampages.
Your best strategy is this: bring both guardians down to low health, then kill BODY first so Gorlakt takes his lifetap, kill the other fast. Then put your MT defensive on Gorlakt. Heal up, and since the lifetap can be interrupted, you will not have any AE issues. Just concentrate all healing on the tank and dps it. Once completed the event will yield Spirit Shard. A chest can spawn with additional loot.
Once you have all 4 Shards. Put them in your Thick Leather Bag and combine them. The result is Synched Leather Bag.
Take this to Historian Finrazel in Nedaria's Landing.
Historian Finrazel opens the bag and examines the shards with care and awe. He then seals them back into the bag and returns it to you. 'Well, isn't that a sight to behold. I'm grateful to you for letting me see them. It appears that the stories were correct. My guess would be that those shards were given to various Muramite leaders as rewards for some particularly horrible work they had done. I hope you can find a way to make those pieces whole again. I wish I could help you, but you've already exceeded the bounds of my knowledge. I wish you luck finding someone to help you restore the rain spirit shards.'
Chapter 3 - Restoring Yuisaha
Head to Abysmal Sea and give your bag to Reyfin Malakwa.
Reyfin Malakwa makes a motion with his hands, slowly clasping them together until they are locked tightly. He points at you, then at the shards, then makes the motion again.
Find Silanda Leafdew elsewhere on the ship at -315, +200, +114 (top deck) and give her the bag.
Silanda Leafdew says 'Well, this shouldn't be too hard. These pieces want to be rejoined. I suppose all you really need is a good source of reliable cold to help the pieces mend together and a cool place to put them while that happens. Once you have the pieces together you'll need a source constant heat to revive the spirit. The frozen spirit and the heat will need a warm place to sit for a while. You could probably use one good insulated container for both tasks. Here, let me show you what I mean.' Silanda sketches a drawing on a pieces of rough parchment and hands it to you. 'You'll want to have that made out of the clay the Taelosians used to make their stone workers. There is one problem, though. I can sense that all of the energy has been drained from the spirit that resides here. You will need to restore that energy once you have made the shards whole. It seems likely that the energy should be restored while the spirit is being revived.'
You receive an Insulated Container Sketch and your Synched Leather Bag back.
Make a Clump of Refined Ancient Taelosian Clay by handing a Chunk of Broken Ancient Stone Worker to Hiloan O'Yviania in Abysmal Sea (or if you're flagged for the recipe, just put the chunk in a pottery wheel and hit combine). The Chunk can be found from golems in GoD or in the bazaar. Make sure it's the ancient one.
Head to your nearest Kiln and combine the Clump with the Sketch. This combine will yield Insulated Container.
Head to Velketor's Laboratory. Find mobs called Velketor's Experiments and/or Failed Experiments. The Failed ones are near the end of the Icepaw tunnels, while the Velketor Experiment are found past Velketor's room in a dead end that has six total mobs. These two mobs are relatively easy, but hard to find. Once you kill them one will drop a Pulsing Frozen Heart. This is the cold source that Silanda talks about.
Combine your Bag and the Heart in your Insulated Container. This combine will yield Frozen Rain Spirit.
Head to Burning Woods and look for "a crippled wurm." The mob pops when you zone in at around +3000, 0, but will not spawn unless you've already made the Frozen Rain Spirit. The mob is inmune to run speed changes (meaning NOT snareable or rootable) and doesn't summon. Hits for about 450 damage. You can try soloing by outrunning it, or bring a friend. It drops an Everburning Jagged Tree Limb.
Complete the six raid trials in the Muramite Proving Grounds to gain access to the Asylum of Anguish, then defeat one of the bosses there: Warden Hanvar to spawn an Orb of Discordant Energy, the Keldovan the Harrier ring event to spawn Jelvan`s Keepsake, Arch Magus Vangl, or Overlord Mata Muram. Loot a Globe of Discordant Energy.
Finally, combine the Limb, Globe, and Frozen Rain Spirit in the Insulated Container. (This combine can only be made in the Asylum of Anguish and only if you're in the expedition "Anguish, the Fallen Palace.")
Yuisaha shouts 'I am Yuisaha, spirit of rain and storms.' A great thundering voice booms across the land like a thunderstorm breaking. 'You have endured much to free me. I thank you for rescuing and reviving me. Take this, a small portion of my essence. May it aid you, and may none forget the great deed you have done.
You receive Essence of Rainfall and the Insulated Container back. Combine the Essence of Rainfall with your Staff of Living Brambles (epic 1.5) in the Insulated Container to craft your Staff of Everliving Brambles. Reward: Staff of Everliving Brambles
Enchanter Abysmal Armor (Normal): You say, 'Hail, Lelyen Ieamria'
Lelyen Ieamria says 'Hello there High Elf, or are you? I am seeking those like myself that study the deceptive arts -- an [enchanter]. Is this your calling?'
You say, 'I am a enchanter.'
Lelyen Ieamria says 'Delightful. We are too few nowadays. To help a fellow illusionist I may be able to offer my services. If you are in need of new equipment such as [circlet], [pantaloons], [robe], [bracer], [sleeves], [gloves], and [sandals] please let me know.'
You say, 'What bracer?'
Lelyen Ieamria says 'A bracer? Of course! If you speak to Nalasrine about her findings, she may be able to help you infuse some Muramite silk thread to strengthen it. One length of infused Muramite silk thread along with a reworked bracer would suit you just fine. Find a Muramite Bracer Armor piece and return it to me for reworking.'
You say, 'What circlet?'
Lelyen Ieamria says 'I can shape you a beautiful circlet from Muramite Helm Armor. All you need to do is find some Muramite silk thread. A strengthened thread woven over the circlet in a loom shall yield a fine circlet indeed. Talk to Nalasrine about the strengthening process.'
You say, 'What gloves?'
Lelyen Ieamria says 'I can make you some fine delicate gloves. Find some Muramite silk thread. I am sure Nalasrine can assist you with strengthening it. Bring me Muramite Glove Armor and I will shape them for you, once I have finished you can add the final touches yourself in a loom.'
You say, 'What pantaloons?'
Lelyen Ieamria says 'Stitching some Muramite greaves into a pair of pantaloons that would serve you well should be no great feat. Bring me a pair of Muramite Greaves. Once I have done this, you will need to do the final touches yourself. Two lengths of Muramite silk thread infused with Nalasrine's strengthener should be sufficient to finish them up.'
You say, 'What robe?'
Lelyen Ieamria says 'A grand robe shall be yours if you bring me a Muramite Chest Armor piece. I can reshape it easily, and the finishing touches may be applied by your hand. Strengthen two lengths of Muramite silk thread with Nalasrine's special mixture and some quick work with a loom should do the trick.'
You say, 'What sandals?'
Lelyen Ieamria says 'Bring me back Muramite Boot Armor and I believe I can rework them into some nice sandals. To thread them together you will need some strengthened Muramite silk thread. If you need help in the strengthening process, just talk to Nalasrine.'
You say, 'What sleeves?'
Lelyen Ieamria says 'Sleeves do seem to wear so quickly, don't they? Bring me Muramite Sleeve Armor. I will do the alterations for you, then all you will need to do is find some Muramite silk thread. Nalasrine can help you strengthen it and you will have the makings of some nice sleeves.'
Nalasrine Twinklecoil is located in the next room.
You say, 'Hail, Nalasrine Twinklecoil'
Nalasrine Twinklecoil says 'Salutations! It is great to see so many eager travelers out and about. How are you enjoying our little city here? I have been quite busy myself. There are so many interesting things to learn about these strange beings that inhabit Taelosia. Their armor in particular is most interesting. I have developed some intriguing compounds. Let me know if you are interested in such things before I just prattle on!'
You say, 'I am interested.'
Nalasrine Twinklecoil says 'Oh, good. Well let me see. Basically, I have been studying the armor that our explorers have been bringing back from their adventures. While it is a bit strangely shaped, as these creatures that seem to reside here are, I have found that by strengthening some native materials it can be reworked into rather fine armor for the likes of you and me.'
You say, 'What armor?'
Nalasrine Twinklecoil says 'If you are looking into having some armor made, you definitely will need to use my infusions. They are a bit pricey, however they are difficult to make and well frankly, I am the only one who can! Use the plate solvent on plate armor, chain solvent on chain, tanning solution on leather, and silk strengthener on silk. All rather intuitive isn't it? Simply take a look at the different types I have for sale.'
Muramite armor begins dropping in Qvic and above. Bring back the appropriate piece of "Muramite XXX Armor" and turn it in to Lelyen Ieamria to get a class-specific, no-stat "Reworked Muramite XXX."
Craft a Muramite Silk Thread by combining a Meldstone and a Spider Silk in a loom. This has a high trivial (282) and a high minimum tailoring requirement (i268).
Buy Nalasrine's Perfected Silk Strengthener from Nalasrine Twinklecoil for around 10,500 pp. Combine the strengthener with the Muramite Silk Thread in a loom (no-fail combine). This results in a NO DROP piece of Infused Muramite Thread.
Combine the Infused Muramite Thread with your piece of Reworked Muramite XXX armor in a loom to receive your quest reward (no-fail combine). Reward: Lelyen's Gloves of Entrancement
Reward: Lelyen's Bracer of Entrancement
Reward: Lelyen's Circlet of Entrancement
Reward: Lelyen's Sandals of Entrancement
Reward: Lelyen's Sleeves of Entrancement
Reward: Lelyen's Pantaloons of Entrancement
Reward: Lelyen's Robe of Entrancement
Fletching Freebie: Imildu's Tasks (Normal): You say, 'Hail, Imildu Woodstreak'
Imildu Woodstreak says, 'Welcome ________, Tunare smiles upon us all. I don't want to impose, I know that we are all very busy, but if you have the time and inclination, I could use your help finishing some [tasks] that have been overwhelming me.'
You say, 'What tasks?'
Imildu Woodstreak says, 'As you may know, many of our scouts have been lost. That has not kept us from trying to explore, but to do so we need supplies. We also must keep those that stay behind stocked with weapons to use in our defense. This has kept me in here working on those supplies and has prevented me from getting our to see the new lands. A dwarf brought me back some strange stones from Taelosia and it's made me want to go out and explore with all my heart. The stone has a magical properties too. If treated properly, it can be used much like flint to make some of the sharpest arrowheads I've ever come across. If you could [aid] me with some of the simple tasks, I might be able to do more work with the [Taelosian Stone].'
You say, 'Taelosian stone?'
Imildu Woodstreak says, 'Truly unusual material. I suspect that there has been some long-term unnatural stress on it. If handled one way, it can be ground to power relitively easily, but with some clever manipulation it can be sheared to make very fine edges. It also seems to hold some magical potential, though. I just haven't had time to explore that possibility. If you come across a Chunk of Taelosian Rock, please bring to me. I'll treat it for you at the cost of keeping a small portion of the treated stone for myself.'
You say, 'I will aid you.'
Imildu Woodstreak nods to you. 'You are as welcome here as a shade tree in the Desert of Ro, friend. I and others have created the components needed to make arrows for the Wayfarers. I would be grateful if you could do the final assembly for me. Just take a Wayfarer Arrowhead, a Wayfarer Shaft, and a Wayfarer Fletching and combine them in your fletching kit. There are many chores that need to be completed. If you assist me with them I might be willing to share with you the secret for treating the Chunks of Taelosian Rock to create the useful Taelosian Stones. When you have those arrows finished, please bring them right back to me and I will make certain that they get to those that need them.'
If you fail some of the combines, all you have to do is hand in the ones you completed, then destroy the remaining supplies, hail him again and say aid to get the next batch.
You receive 20 x Wayfarer Arrowhead, 20 x Wayfarer Shaft, 20 x Wayfarer Fletching. Combine one of each in a fletching kit. You also receive the book The Beauty of a Simple Stone.
You have learned the recipe Wayfarer Arrow!
Wayfarer Arrow trivials at 31. After making them all, hand them to him unstacked, up to four at a time. Keep going back and saying "I will aid you" and he will give you more to craft until he is satisfied (need to hand in approximately 100), then he will move on to another recipe.
Imildu Woodstreak says 'Hail, Traveler. Thank you for taking the time to help me. I have several bow staves and stings that need to be assembled. A simple enough task, but time consuming. All you need to do is place the Wayfarer Bow Staff and the Wayfarer Bow String into your fletching kit and combine them. These bows will be needed soon, so please bring them directly to me when you have them assembled.'
You receive 20 x Wayfarer Bow Staff and 20 x Wayfarer Bow String. As before, combine one of each in a fletching kit.
You have learned the recipe Wayfarer Bow!
Wayfarer Bow trivials at 38. After making them all, hand them to him unstacked, up to four at a time. Keep going back and saying "I will aid you" and he will give you more to craft until he is satisfied (need to hand in approximately 100), then he will move on to another recipe.
Imildu Woodstreak says 'Like warm fire on a chill northern eve, you are welcome. We have run low on bow staves. New wood has been hard to find, but we have several staves that van be repaired with some careful work. Place a Scavenged Bow Staff and a Wayfarer Honing Stone into your fletching kit and combine them. The stones are not the best quality, and will be worthless by the time you fix a single staff, but stone is not difficult to find. When you have repaired the staves, bring them to me so I can get someone to assemble them into bows for use.'
You receive 20 x Scavenged Bow Staff and 20 x Wayfarer Honing Stone. As before, combine one of each in a fletching kit.
You have learned the recipe Wayfarer Bow Staff!
Wayfarer Bow Staff trivials at 46. After making them all, hand them to him unstacked, up to four at a time. Keep going back and saying "I will aid you" and he will give you more to craft until he is satisfied (need to hand in approximately 100), then he will move on to another recipe.
Imildu Woodstreak smiles at you. 'You are the stars on a clear night. I am grateful to you for your assistance. We have several ill-prepared or damaged arrowheads that we would like to repair and put into service. All resources must be watched carefully. Please take a Salvaged Arrowhead and a Wayfarer Honing Stone and combine them in your fletching kit. Some of these are badly damaged, but I think you have the skill to repair them. Bring them to me when you are done.'
You receive 20 x Salvaged Arrowhead and 20 x Wayfarer Honing Stone. As before, combine one of each in a fletching kit.
You have learned the recipe Wayfarer Arrowhead!
Wayfarer Arrowhead trivials at 54. After making them all, hand them to him unstacked, up to four at a time. Keep going back and saying "I will aid you" and he will give you more to craft until he is satisfied (need to hand in approximately 100, you can hand in stacks of 20 at a time).
Imildu Woodstreak beams a bright smile at you, one that softens his usually dour face dramatically. 'May Tunare bless you, friend. I can no longer keep you here. Certainly you too wish to get back out under the sun and see the new land. Your help has allowed me much freedom, and for that I thank you. If you have forgotten or want them for posterity, I can give you the [recipes] you used while helping us. Look at this compound. Using it when you work with the Chunks of Taelosian Rock and the Chunks of Discordian Rock will allow you to work them into the shapes you desire.' The smell of the liquid leads you to understand what he has given you. You will be able to incorporate that material into all of your fletching kits and work with this new stone easily. In fact, you believe that in time you can improve on the compound and get better results.
You may now place a Chunk of Taelosian Rock or Chunk of Discordian Rock in a fletching kit and "refine" it (and learn the resulting recipes).
Also, in addition to the refining ability, he teaches:
You have learned the recipe Wayfarer Arrow!
You have learned the recipe Wayfarer Bow!
You have learned the recipe Wayfarer Bow Staff!
You have learned the recipe Wayfarer Arrowhead!
You have learned the recipe Simple Taelosian Honing Stone!
You have learned the recipe Simple Taelosian Arrowhead!
You have learned the recipe Simple Jagged Taelosian Arrowhead!
You have learned the recipe Simple Veined Taelosian Arrowhead!
Freeport Stout for Tillgar (Normal): Tillgar may be found at -155, +80.
You say, 'Hail, Tillgar'
Tillgar grumbles. 'Sorry if'n I seem a bit cranky today. Bein' 'ere without me [favorite drink] is causin' me a bit o' trouble.'
You say, 'What favorite drink?'
Tillgar says 'Why Freeport Stout of course! I don't be knowin' why I like it so much. Just do. There be none in this city though. If you could bring me four Freeport Stouts, I think I could part with some coin for ye.'
Freeport Stout may be bought from Jaleel Hoglomp near the docks in East Freeport, at +165, -785. Hand in four.
Tillgar says 'Blessed be ye!' Tillgar immediately starts to swig down the stout. 'Take this for yer trouble. I don't much care fer wine.'
You gain experience!!
You receive 1 gold from Tillgar.
You receive Cristov's Red Wine. Reward: Cristov's Red Wine
Gates of Discord Progression #7: Access to Txevu (Normal): This part of Gates of Discord progression follows your having accessed Qvic.
Note: If you're Level 65+, you have access to Txevu by default. Presented here is the official access quest.
Splinter of the High Temple
By now, you should have a "Sliver of the High Temple" (Ikkinz Raid #4) and a "Fragment of the High Temple" (Uqua raid). Now, you're in need of a "Splinter of the High Temple".
This item is rewarded from the Inktu'ta, the Unmasked Chapel raid expedition (see the link for details). Just hail the Sentinel that spawns at the raid's end, and you'll receive the item.
This raid is given out by Aganetti the Keeper in the Trusik caves of Qvic.
Cipher of Txevu
Find Brevik Kalaner (click for map image), a High Elf found on the topside of the ship in the Abysmal Sea at /loc 700, -230. Hail him.
He requires the following items:
- Sliver of the High Temple (looted in Ikkinz Raid #4)
- Fragment of the High Temple (obtained from the Specter of Barxt after Uqua completion)
- Splinter of the High Temple (obtained from An Ancient Sentinel after Inktu'ta completion)
If you don't have any of these items when you hail him, you see:
Brevik Kalaner says 'Greetings. I'd love to chat but I must get back to my studies. I've been learning as much as I can about geomancy and its uses. Good day.'
If you have one or two of the three items when you hail him, you see:
Brevik Kalaner says 'Hello. I see you've been busy. I've heard of your exploits from the scouts in the mountains and it seems you're close to uncovering the mystery of Txevu. Return to me when you have more information.'
If you hand him only one of the items, you see:
Brevik Kalaner says 'You've found a sliver from the high temple deep within the mountains! I'm impressed. Do you have anything else or do you [need this back]?'
You say, 'I need this back!'
Brevik Kalaner says 'Here is your sliver from the high temple.'
Brevik Kalaner says 'Please keep it safe until you can recover whatever else goes along with it.'
If you have all three items in your inventory, you see:
Brevik Kalaner says 'I've been expecting you. You have all three pieces to complete the mystery of Txevu. Give them to me and I will use what geomantic knowledge I have to form them into a totem of stone that will carry the trusik essence.'
Give him the three pieces of the High Temple:
Brevik Kalaner takes the three stone pieces from you and wraps them in a soft hide covered with glyphs. He mutters some strange words and the stones begin to glow and undulate beneath the hide. You see a wind of souls swirl around you and become absorbed in the stone. 'The essence of the trusik has been imbued into this stone. With one touch of this totem, the guardian of Txevu will recognize the spirit of its masters and let you pass.'
You receive the "Cipher of Txevu", which is the key to Txevu, Lair of the Elite.
Moving On
You can now move onto the next part of Gates of Discord progression: Keying in Txevu & Requesting the Tacvi raid.
Reward: Cipher of Txevu
Germand's Problem (Normal): Germand Reton is located on one of the lower decks at 135, 112, 99.
You say, 'Hail, Germand Reton'
Germand Reton says 'Hello. Not much time to talk. We have a big [problem] on our hands.'
You say, 'What problem?'
Germand Reton says 'Before the magical Buoys that produce the protective dome over the city were in place, a large sea creature damaged the bottom of the ship. The problem is we need some wood to repair it. There appears to be no wood on this new continent however. If you could perhaps [find some wood] and bring it to me I could find some sort of reward for you.'
You say, 'I will find some wood.'
Germand Reton says 'Very good. Please travel to the Jaggedpine Forest and find Ervonis Leaflow. He supplied us with a lot of the wood during the construction of the Queen of Thorns. Once you find him give him this note.'
You receive a Note to Ervonis. You can find Ervonis Leaflow at -480, -630, -40 in Jaggedpine Forest. Hand in the note. He doesn't respond to hail.
Ervonis Leaflow says 'Germand needs some more lumber? Well I would be happy to chop some for you, but unfortunately I [lost] my axe. It was my favorite axe so I will not be chopping any more wood until I get it back.'
You gain experience!!
You say, 'Lost?'
Ervonis Leaflow says 'I was washing its fine blade down by the river when those darned potameids attacked me. I ran but left my axe behind out of pure fear. If you could [find] it, I would be grateful and won't even charge you for some wood.'
You say. 'I will find it.'
Ervonis Leaflow says 'Great. I would start by checking near the river. Be careful though, those potameids are dangerous!'
You'll find the axe at -60, -2620, -50, before the queen's room in the tunnels where the potameids live, just under a potameid spawn. The axe looks like a wind-worn axe laying on the ground. Take the Axe back to Ervonis Leaflow.
Ervonis Leaflow says 'I cannot tell you how thankful I am. Just a moment and I will get you some wood.' Ervonis chops some wood for you and ties it into a neat bundle. 'It is a bit heavy, but I think you can handle it. Thanks again!'
You gain experience!!
Receive a Bundle of Wood. Take this back to Germand.
Germand Reton says 'You found some wood! This will really help us with fixing the ship. Take this for your trouble. An enchanter friend of mine makes these little trinkets. Their magic doesn't last long, but it might help you out. You have my thanks and the thanks of the entire Wayfarers Brotherhood.'
You gain experience!! Reward: Wood Friend Bauble
GoD Freebie Pottery: Help Malkidiv (Normal): Malkidiv U`Ycionuz is located on the ship at -245, +210.
You say, 'Hail, Malkidiv U`Ycionuz'
Malkidiv U`Ycionuz says 'Hello. Thanks for stopping by. Are you, by chance, interested in helping me with some of the more [menial tasks] I have to get done around here?'
You say, 'What menial tasks?'
Malkidiv U`Ycionuz says 'Well, I am responsible for keeping the ship stocked with plates, pots and other simple supplies, but with all the research I'm working on and my experiments with the amazing local [clay], I just font have time to keep up. Wayfarers are notoriously hard on dinnerware. Can you [help] me out? And if you have any spare clumps of refined ancient clay, please speak with Hiloan, she needs help making some of the more complicated items used on the ship.'
You say, 'I will help.'
Malkidiv U`Ycionuz says 'Great! We've discovered that this new clay makes wonderfully durable plates. Of course, there's no point in making durable plates, that's just a challenge to these people to try and break them. With this clay we can make thinner plates that are just as strong and take up less room. Here, take these bits of broken plates and this bonding agent and re-fire the plates. Bring them back to me as soon as you can. I'm grateful for the help. If you can keep helping me out, I might be willing to share with you our secret method of refining the stone worker clay.'
You receive 20 x Broken Wayfarer Plate and 20 x Bonding Agent. Combine 1 of each item in a kiln.
You have learned the recipe Wayfarer Plate!
Wayfarer Plate trivials at 31. A kiln is located on the ship at -330 +233. After making them all, hand them to him unstacked, up to four at a time. Keep going back and saying "I will help." and he will give you more until he is satisfied (need to hand in approximately 100).
Malkidiv U`Ycionuz says 'Excellent, you're obviously too talented to be wasted fixing plates. We could use a lot of pots. Our cooks are just as clumsy as out patrons. Take these pot molds and blocks of clay and fire them in a kiln. I can use a lot of these things, we use them for storage, cooking, breaking over heads All the usual stuff. We don't need quality here, just quantity. Bring them back to me quickly or we'll run out soon.'
You receive 20 x Small Block of Scrap Clay and 20 x Wayfarer Pot Mold. Combine 1 of each item in the kiln.
You have learned the recipe Wayfarer Pot!
Wayfarer Pot trivials at 38. After making them all, hand them to him unstacked, up to four at a time. Keep going back and saying "I will help." and he will give you more until he is satisfied (need to hand in approximately 100).
Malkidiv U`Ycionuz says 'Wonderful! You are certainly good at working with a kiln, and you've been a great help to me. I have a somewhat more complicated task to be done, if you have the time. We go through mugs here faster than an ogre goes through chocolate. Take this clay and these flasks of water and turn them on a pottery wheel until you have something that resembles a mug. Handles would be helpful, but not necessary. Then take the unfired mug and these Wayfarers seals and carefully fire them in the kiln. Don't worry, those seals are stamped onto tough sea serpent skin, they won't burn. Bring me the mugs when you're done.'
You receive 20 x Small Block of Scrap Clay, 20 x Flask of Abysmal Sea Water, 20 x Wayfarer Mug Seal. Combine 1 Block of Scrap Clay and 1 Flask of Abysmal Sea Water in a pottery wheel.
You have learned the recipe Unfired Wayfarer Mug!
Combine 1 Unfired Wayfarer Mug and 1 Wayfarer Mug Seal in a kiln.
You have learned the recipe Wayfarer Mug!
Unfired Wayfarer Mug trivials at 46. Firing the Wayfarer Mug is trivial at 15. The pottery wheel is in the same room as Malkidiv at -258 +195. After making them all, hand them to him unstacked, up to four at a time. Destroy any remaining Wayfarer Mug Seals as you will not get another set of components with them. Keep going back and saying "I will help." and he will give you more until he is satisfied (need to hand in approximately 100).
Malkidiv U`Ycionuz says 'Fantastic! You have been of great service to the Wayfarers Brotherhood. If you can help me with my next task, I'd be willing to give out one of the Wayfarers trade secrets. This task will require more effort and skill than those I've been asking you to do. Some of our scouts use ceramic shafts for our arrows. These require some skill to make properly and have to be made well. I just can't trust anyone to make them. Take this clay, these flasks of water and this special dye and use the pottery wheel to form them into unfired shafts. Then, take these molds and fire the shafts. The dye is important, as each of the scouts likes to have their own colors on the shafts. Something about competing over who kills the most enemies or something like that.'
You receive 20 x Small Block of Scrap Clay, 20 x Flask of Abysmal Sea Water, 20 x Wayfarer Dye and 20 x Wayfarer Arrow Shaft Mold. Combine 1 Small Block of Scrap Clay, 1 Flask of Abysmal Sea Water and 1 Wayfarer Dye in the pottery wheel.
You have learned the recipe Unfired Wayfarer Arrow Shaft!
Combine 1 Unfired Wayfarer Arrow Shaft and 1 Wayfarer Arrow Shaft Mold in the kiln.
You have learned the recipe Wayfarer Arrow Shaft!
Unfired Wayfarer Arrow Shaft trivials at 54. Firing the Wayfarer Arrow Shaft is trivial at 15. After making them all, you can hand them to him in stacks of 20. Destroy any remaining Wayfarer Arrow Shaft Molds as you will not get another set of components with them. Keep going back and saying "I will help." and he will give you more until he is satisfied (need to hand in approximately 100).
Malkidiv U`Ycionuz says, 'You've been a great help already. I'd feel very guilty asking you to help out any further. There are others that can do that work for us. If you have forgotten or want them for posterity, I can give you the [recipes] you used while helping us. For all of your efforts, I'd be honored to teach you the secret of refining chunks of broken stone worker into refined Taelosian clay and chunks of broken ancient stone worker into refined ancient Taelosian clay.' Malkidiv pulls a small text from his coat and leans forward to show you a few of the pages. What he shows you seems amazingly simple once you've seen it. You think that with practice you might be able to get better results than Malkidiv gives to those that he refines clay for. Just place a single chunk of broken Taelosian stone worker onto a pottery wheel and you will receive clump of refined Taelosian clay.'
All the recipes learned:
You have learned the recipe Wayfarer Plate!
You have learned the recipe Wayfarer Pot!
You have learned the recipe Unfired Wayfarer Mug!
You have learned the recipe Wayfarer Mug!
You have learned the recipe Unfired Wayfarer Arrow Shaft!
You have learned the recipe Wayfarer Arrow Shaft!
You have learned the recipe Wayfarer Augment Receptacle!
You have learned the recipe Wayfarer Crucible!
You have learned the recipe Unfired Wayfarer Watering Can!
You have learned the recipe Wayfarer Watering Can!
You have learned the recipe Unfired Wayfarer Vial!
You have learned the recipe Wayfarer Vial!
GoD Freebie Tailoring: Tonlyei's Chores (Normal): Tonlyei Lyhin is a female Erudite at +45, +145, +115.
You say, 'Hail, Tonlyei Lyhin'
Tonlyei Lyhin says 'Greetings, ______. I hope this day finds you well. For us, as for many aboard, things are hectic. There are many people in need of new clothing or armor among the Wayfarers, and it is our pleasure to provide them. There are other tasks that we would like to attend to. I have received several samples of skin from the Muramites, and I believe that it can be used in many interesting applications. I would like to work with it if only I had [time].'
You say, 'Time?'
Tonlyei Lyhin says 'Time is precious for me. I wonder, would you be able to aid me by tackling some of my [chores] while I spend some time working with the [Muramite etched scales]?'
You say, 'I will tackle your chores.'
Tonlyei Lyhin says 'Very well then. I appreciate your assistance. I have long suspected that certain Wayfarers have been selling their clothing for drink and that is why they need replacements so frequently. Regardless of the reason, there are several simple items that I need to keep in abundant supply. If you can find the time to help us keep up with those supplies, I would be willing to teach you the method we have discovered for making useful leather out of the scales of those Muramites. There will be a lot of work for you as I won't be handing out this secret easily, but if you think the reward is worth the effort, then let's begin by having you make some simple belts for us. These are not complicated, nor are they meant to last, as there seems to be no point in making durable items for these scallywags. Just take a yard of this cloth and a pattern and place them into your sewing kit and combine them. Please return the belts to me as quickly as you can.'
You receive 20 x Yard of Rough Cloth and 20 x Simple Belt Pattern. Combine 1 of each in your Sewing Kit.
You have learned the recipe Simple Belt!
Simple Belt trivials at 31. After doing 20 combines, hand them back to Tonlyei unstacked, up to four at a time. After handing them all in, say "I will tackle your chores again" and she will give you more Simple Belt components. Repeat the process until she feels you've made enough (approximately 100).
You say, 'I will tackle your chores.'
Tonlyei Lyhin smiles and nods approvingly 'Welcome back. Again, I thank you for your efforts. I suppose it wouldn't shock you to know that my fellow Wayfarers use up a large number of socks every day. Many of them refuse to wear shoes as they traipse about the ship. Others just lose them. I suspect that some of the less reputable folks have been using them to filter tea! So, I have resorted to making a large volume of, well, lesser quality socks to give out to those that seem to require replacements more often than others. I would be grateful if you could create a good number of pairs for me to bolster my supplies. These are easy to make. Just take a yard of this cloth and a pattern and combine them in your sewing kit. Bring the socks to me when you are done. Thank you.'
You receive 20 x Yard of Rough Cloth and 20 x Simple Sock Pattern. Combine 1 of each in your Sewing Kit.
You have learned the recipe Simple Socks!
Simple Socks trivials at 38. After doing 20 combines, hand them back to Tonlyei unstacked, up to four at a time. After handing them all in, say "I will tackle your chores again" and she will give you more Simple Socks components. Repeat the process until she feels you've made enough (approximately 100).
You say, 'I will tackle your chores.'
Tonlyei Lyhin says 'Greetings to you, ______. It appears that our supply of pants has run low again. These are just simple cloth pants meant to be worn around the ship, not to protect anyone from harsh weather or sword cuts. This fabric starts off rough, but when washed it actually becomes rather soft. Sure, it's not silk, and you won't catch me wearing it, but for most that venture about this ship it is more than adequate for their needs. Just take a yard of cloth and a pattern and combine them in your sewing kit. Please bring the pants to me when you are done so that I can get a pair onto one of the halflings, as he is wont to run about without any.'
You receive 20 x Yard of Rough Cloth and 20 x Simple Pants Pattern. Combine 1 of each in your Sewing Kit.
You have learned the recipe Simple Pants!
Simple Pants trivials at 46. After doing 20 combines, hand them back to Tonlyei unstacked, up to four at a time. After handing them all in, say "I will tackle your chores again" and she will give you more Simple Pants components. Repeat the process until she feels you've made enough (approximately 100).
You say, 'I will tackle your chores.'
Tonlyei Lyhin says 'Wonderful! I must say your enthusiasm has brightened my day. I like to keep a good supply of shirts available for those that need replacements and for use by those that wear heavy armor as undershirts. These do not need to be of the best quality, but they need to be well made. I think you can produce a more than adequate shirt. Take a yard of cloth and a shirt pattern and combine them in your sewing kit. When you have the finished shirts, bring them to me.'
You receive 20 x Yard of Rough Cloth and 20 x Simple Shirt Pattern. Combine 1 of each in your Sewing Kit.
You have learned the recipe Simple Shirt!
Simple Shirt trivials at 54. After doing 20 combines, hand them back to Tonlyei unstacked, up to four at a time. After handing them all in, say "I will tackle your chores again" and she will give you more Simple Shirt components. Repeat the process until she feels you've made enough (approximately 100).
You say, 'I will tackle your chores.'
Tonlyei Lyhin smiles and clasps your hand for a moment. 'You have been of such great assistance to us that I can no longer ask you to spend your days working for us. I thank you. Please, allow me to show you the secret to preparing Muramite etched scales. This method will work on the younger and aged scales.' Tonlyei opens her sewing kit and shows you the contents. The kit is old, the tools you see there have been handed down by generations in her family. She points to a clearly marked bottle of liquid, a common substance that you might not have thought to use when working with this material. She explains that if you use it liberally when working with the Muramite scales it will reduce the brittleness that tends to develop over time, and makes it possible to work with them. You know that you can use this method, and you even suspect that you will be able to improve on it if you work with the scales for a while. Tonlyei bows slightly to you 'May Prexus guard the waters of your life, ______.'
GoD Freebie Tinkering: Help Skelontorim (Normal): You can get up to skill level 54 via this quest, provided you are a gnome and meet the level requirements.
You say, 'Hail, Skelontorim Orrthemech'
Skelontorim Orrthemech says 'Hail, ____! I can't believe that we've come this far! I've never been much of a traveler, but I'm glad I took these Wayfarers up on their offer to join, even though that means I have to travel on this leaky wooden contraption. I've been teaching these mechanically ignorant folks something about how things should be done. I have to say, they've taken to it well. When they find something useful they use it. So now we're swamped with requests. I could sure use a good [gnome] to lend a hand here.'
You say, 'I am a gnome.'
Skelontorim Orrthemech says ''Well, with all the items I need to make, I haven't any time to delve into the properties of this [new matter] that they've brought me. If I could just find someone to [lend a hand] around here . . .' Skelontorim peers at you, then around you, seemingly searching about for someone with hands to lend him.
You say, 'What new matter?'
Skelontorim Orrthemech says 'Ah! Fascinating stuff. Blacker than night, it is. Heavy, too. I've taken to calling it dark matter, though Tial is of a mind to call it Tialonium.' Skelontorim chuckles. 'In any case, it's surprisingly fragile and must be handled carefully. It seems as though it reacts to contact very poorly. It has to be tempered and refined before it is of any use. But with the proper tuning, as I call it, dark matter is an extremely powerful energy source. Unfortunately, it's also unstable. I'm very sure that I can put it to better use eventually. If you find any raw dark matter, bring it to me and I'll treat it for you. I'll keep a little for my research, but I'll give you most of it back.'
You say, 'I will lend a hand.'
Skelontorim Orrthemech says 'Great! I'm almost ashamed to ask you to do such a menial task, but we are in desperate need of springs. Nothing fancy, just small, tight springs of the sort that many gnomes learn to make before they are out of their cradle. Just take this wire and you should have new springs for me in no time. Bring them right to me.' Skelontorim pauses, then speaks again. 'I don't imagine you should go unrewarded for your efforts. If you help me enough, I can teach you the secret for treating dark matter. That's a pretty important secret, so you'll have to do a lot of work, but I think it's well worth it!'
You have learned the recipe Simple Spring!
You say, 'I will lend a hand.'
Skelontorim Orrthemech says 'Aha! Just in time. I've got some work to do and I need, well, I need a lot of pulleys. You probably shouldn't ask what I need them for, it's a rather long story involving a cat and a wedding ring. Let's just say that I need some pulleys. These should be simple, you'll only need one of each of the items I've given you. Your toolbox, while in need of some repair, should be more than good enough to do the work.'
You have learned the recipe Simple Pulley!
Simple Pulley trivials at 38. After doing each set of 20 combines, hand them back to Skelontorim unstacked, up to four at a time. After handing them all in, say "I will lend a hand" again and he will give you more Simple Pulley components until he feels you've made enough (approximately 100).
You say, 'I will lend a hand.'
Skelontorim Orrthemech says 'Hello. I've got just the thing. As you may have noticed, we live mostly off of fish here. I noticed that our fishermen are using simple, boring lures. I'd like to get together a stock of my personal lures for them, but I just don't have time. If you could make some simple animated lures, I can at least upgrade their tools and improve their production. Not as well as using my special lures, but with all this work, what can we do? I apologize for the quality of the parts, I have to take what I can find here and even if that's used wine corks, then that's what I have to use. Bring the lures to me when you have them finished.'
You have learned the recipe Simple Animated Lure!
Simple Animated Lure trivials at 46. After doing each set of 20 combines, hand them back to Skelontorim unstacked, up to four at a time. After handing them all in, say "I will lend a hand" again and he will give you more Simple Animated Lure components until he feels you've made enough (approximately 100).
You say, 'I will lend a hand.'
Skelontorim Orrthemech smiles widely, 'Fantastic! I am trying to provide some more useful tools for our scouts, namely bows. If you could crank out some simple bow cams for me, I'd be grateful. I like to send folks into battle with the best gear, and those plain wooden bows don't have the punch that they should. With a few simple additions and can give them some serious kick! So hurry back to me with those cams.'
You have learned the recipe Simple Bow Cam!
Simple Bow Cam trivials at 54. After doing each set of 20 combines, hand them back to Skelontorim. After handing them all in, say "I will lend a hand" again and he will give you more Simple Bow Cam components until he feels you've made enough (approximately 100). Finally:
Skelontorim Orrthemech smiles and claps you on the back. 'I think you've done enough. You look like one of those adventuring gnomes and I hate to keep you working for me. You should be out there defeating our enemies! Only you can bring the proper tools to the fight. If you have forgotten or just want them for posterity, I can give you the [recipes] you used while helping us. Before you go, let me explain to you what you need to know about the dark matter so you can treat it yourself.' Skelontorim whispers into your ear. This is distracting, but you are able to concentrate well enough to understand the process he is explaining. 'That should work well enough with the infused dark matter too. Now run off and save the world, but don't be a stranger!' As you step away from the master tinkerer, you are certain that you can treat both forms of the raw dark matter in your toolkit. In fact you're certain that if you work with the material long enough, you will be able to get better results and lose less of the material in the process.
If you say recipes to Skelontorim Orthemech, you will learn these 4 recipes and also Tialechaety's 4 recipes as well.
GoD Jewelcraft Collect: Help Rilwind (Normal): This quest will require six Raw Crimson Nihilites, found uncommonly off pretty much any mob within the Gates of Discord. Your Jewelcraft skill will be raised to 54 by doing the 140 combines associated with this quest.
You say, 'Hail, Rilwind Sitnai'
Rilwind Sitnai says 'Greetings. We are busy here, and I have little time for pleasantries. I can sell you supplies, if you have need. I can even help you fix up that old Jeweler's [Kit] of yours. Or perhaps you are here to [assist] me with my work?'
You say, 'I am here to assist you.'
Rilwind Sitnai says 'I haven't the time to keep up with the needs of the Wayfarers, I have more urgent matters to attend to. We have discovered a rare form of a relatively worthless mineral. Some trauma seems to have affected the local ulexite, striating it, which has given it the unusual property of image transference, as well as imbuing it with some sort of magical properties. I can only imagine the sort of magical and geologic upheaval that would be required to make these changes in ulexite! I certainly would have been a dramatic experience. Study of this material is my primary concern. I also have a duty to the Wayfarers Brotherhood. If you could attend to some of my tasks, I would be grateful. If you can relieve me of enough of these [tasks], I can continue my study of the [Shimmering Nihilite].'
You say, 'recipes'
You have learned the recipe Simple Clasp!
You have learned the recipe Simple Copper Ring!
You have learned the recipe Simple Brass Armband!
You have learned the recipe Simple Silver Chain!
You have learned the recipe Simple Pale Nihilite Pendant!
You have learned the recipe Simple Pale Nihilite Ring!
You have learned the recipe Simple Pale Nihilite Earring!
You have learned the recipe Wayfarer Signet Ring!
Glirina Morningbloom says, 'Here you go.'
You say, 'What Shimmering Nihilite?'
Rilwind Sitnai says 'Nihilite appears to have two forms. The Pale Nihilite is relatively common. Shimmering Nihilite is infused with crystals that make the usual milky color of the stone glimmer with specks of light. It is truly beautiful, but hard to find. It seems to be concentrated in the interior of Taelosia. If you can find Raw Shimmering Nihilite, I can prepare it for you. In exchange, I will keep a small amount of it for my own work.'
Disregard the spew about shimmering nihilite. What you need to do is go to Glirina Morningbloom, another jewelcraft merchant found in the same room as Rilwind. Upon handing her a Raw Crimson Nihilite (formerly Raw Pale Nihilite), you'll receive two Crimson Nihilites.
Glirina Morningbloom says 'I am glad that I could assist you. If you discover more Raw Crimson Nihilite, please bring it to me.'
Give one Crimson Nihilite to Rilwind, and he'll give you some materials to combine (10 combines) as well as a book: "Weapon Adornments."
Rilwind Sitnai says 'Good. We are in need of some simple pendants made from Pale Nihilite, both for sale and for some of our research. Just take this Small Pale Nihilite and Thin Silver Chain and combine them in your Jeweler's Kit. Give me the pendants and I will be grateful.'
You'll receive 10 Thin Silver Chains and 10 Small Pale Nihilites. Combine these one at a time in any jeweler's kit to produce 10 Simple Pale Nihilite Pendants. Hand these pendants unstacked to Rilwind.
Rilwind Sitnai says 'Well done. I still have [tasks] for you.'
You say, 'What tasks?'
Rilwind Sitnai says 'There is much that needs to be done. I have several simple items that need to be made from the Pale Nihilite that Glirina can prepare for you. If you bring me some, I can set you to work on creating items from them. This will give you practice working with Nihilite and will give me more time to work on my research. Because I am asking you to provide the material for this work, I will be able to reward you more quickly than Glirina can. Just hand me the Pale Nihilite when you are ready to begin.'
Hand him another Pale Nihilite for 10 more combine materials. Keep repeating this process and combining the materials. After 140 combines (Simple Pale Nihilite Pendants, Rings, Earrings and Silver Rings), and after handing him another Pale Nihilite:
Rilwind Sitnai smiles at you. 'Thank you for your assistance. You have done enough to earn my gratitude. Speak with Glirina and she will show you the secret of preparing both Pale and Shimmering Nihilite. Be certain to mention to her all of the [work] you have done for us.'
To Glirina Morningbloom
You say, 'What work?'
Glirina Morningbloom smiles broadly at you. 'You have been of great assistance to me. It would be improper for me to ask more of you. I will find others to do these tasks. I have learned much doing research while you have been helping me. Let me show you the method I have discovered for preparing the Nihilite.' She works swiftly, but you understand what she is doing as she carefully prepared the soft stone. 'Here is some of the special polish that we have devised for use with the Nihilite. What I have shown you will work for both the Pale and Shimmering Nihilite and you should be able to get useful stones from Raw Crimson and Raw Shimmering Nihilite.' You know you can reproduce the polish she has given you. You are certain that you can improve on the method she has shown you, given enough practice with the Nihilite.
You can now combine Raw Crimson Nihilite and Raw Shimmering Nihilite to create the material needed for Gates Jewelcraft items.
GoD Refine Raw GoD Materials (Normal): For each of the seven general and three class- or race-specific tradeskills, there are NPCs on the ship in the Abysmal Sea who can convert raw GoD tradeskill components to refined materials. Note that players can do this themselves if they complete one of the tradeskill-specific quests to unlock the recipes, but the NPCs always yield 2, while player-made versions will yield 1-3 depending on the player's experience at making the recipe. Some of the refined materials have no known use other than in the "Collect" version of the tradeskill quests themselves, while some are also used extensively for GoD tradeskills.
The list of tradeskills, NPCs, raw materials and resultant materials, in that order, are as follows:
- Alchemy: Lita Hegeway, Sample of Taelosian Sludge, Sample of Filtered Taelosian Sludge
- Alchemy: Jorlan Hegeway, Sample of Highland Sludge, Sample of Filtered Highland Sludge
- Baking: Ordin Wheasly, Taelosian Wheat, Taelosian Wheat Flour
- Baking: Tylida Eraldi, Taelosian Mountain Wheat, Taelosian Mountain Wheat Flour
- Brewing: Yitimis Groglenog, Taelosian Tea Leaves, Taelosian Tea
- Brewing: Galidnus Corkpopper, Taelosian Mountain Tea Leaves, Taelosian Mountain Tea
- Fletching: Imildu Woodstreak, Chunk of Taelosian Rock, Taelosian Stone
- Fletching: Bansama Nysawi, Chunk of Discordian Rock, Discord Stone
- Jewelcraft: Glirina Morningbloom,
Raw Pale Nihilite,Pale Nihilite(note: the Raw Pale Nihilite is no longer dropped, but the turn-in should work if you still happen to have some in your possession) - Jewelcraft: Rilwind Sitnai, Raw Shimmering Nihilite, Shimmering Nihilite
- Jewelcraft: Neysia Morningbloom, Raw Crimson Nihilite, Crimson Nihilite, Raw Shimmering Nihilite, Shimmering Nihilite
- Poisonmaking: Uiyaniv Tu`Vrozix, Muramite Blood, Muramite Blood Distillate
- Poisonmaking: Viliani I`Xvoyt, Muramite Bile Sack, Muramite Bile
- Pottery: Malkidiv U`Ycionuz, Chunk of Broken Taelosian Stone Worker, Clump of Refined Taelosian Clay
- Pottery: Hiloan O`Yviania, Chunk of Broken Ancient Stone Worker, Clump of Refined Ancient Taelosian Clay
- Smithing: Snokin Breaksteel, Aligned Ore, Bar of Aligned Steel
- Smithing: Esunta, Shimmering Aligned Ore, Bar of Shimmering Steel
- Tailoring: Tonlyei Lyhin, Muramite Etched Scales, Preserved Muramite Etched Scales
- Tailoring: Garald Samer, Aged Muramite Etched Scales, Preserved Aged Muramite Etched Scales
- Tinkering: Skelontorim Orrthemech, Raw Dark Matter, Dark Matter
- Tinkering: Tialechaety Orrthemech, Raw Infused Dark Matter, Infused Dark Matter
Reward: Pale Nihilite
Reward: Taelosian Stone
Reward: Taelosian Wheat Flour
Reward: Muramite Blood Distillate
Reward: Bar of Shimmering Steel
Reward: Discord Stone
Reward: Clump of Refined Ancient Taelosian Clay
Reward: Clump of Refined Taelosian Clay
Reward: Preserved Aged Muramite Etched Scales
Reward: Taelosian Tea
Reward: Taelosian Mountain Tea
Reward: Taelosian Mountain Wheat Flour
Reward: Preserved Muramite Etched Scales
Reward: Sample of Filtered Taelosian Sludge
Reward: Sample of Filtered Highland Sludge
Reward: Muramite Bile
Reward: Infused Dark Matter
Reward: Dark Matter
Reward: Crimson Nihilite
Reward: Shimmering Nihilite
GoD Smithing Collect: Esunta's Tasks (Normal): Esunta may be found on the top deck of the ship in the Abysmal Sea at +140, +260.
You say, 'Hail, Esunta'
Esunta says 'We is workin all day and night to make tings for da Wayfarers. Can you help us wit all dis [work]? We wants time to play wit da new ore.'
You say, 'What work?'
Esunta says 'We been getting da new ore an I wants to take it to da forge. Near da mountains dere is ore dat shines. It's da same aligned ore dat is found everywhere, but gots augment bits in it, and dat makes it shine. I wants time ta work wit it. Dere is too much work to do here, and you look like you can do some of it. If you can do dese [tasks] for me, den I can work wit da [shimmering ore].'
You say, 'What tasks?'
Esunta says 'Lot of work to do here. You help us out, work hard like real ogre, and I show you da secret of making steel from da ore. I needs to make stuff out of da aligned steel, so you needs to bring me some. Find da aligned ore and have Snokin make da steel. Den, bring to me and I will give you work. I reward you sooner dan Snokin if you help me. Jus bring da aligned steel to me when you ready to work.'
You say, 'What shimmering ore?'
Esunta says 'Da ore is pretty. Da bits of da augment stuff makes da stuff more magical. It only found in da mountains. Dey say dat's because some magic ting happen up dere long time ago. Dem magic types will do stuff wit da ore, for sure. I figured out how to smelt it, wit help from Snokin. If you bring da shimmering ore to me, I will give you da shimmering steel.'
Aligned Ore may be looted in various Gates of Discord zones. Snokin Breaksteel stands near Esunta. Give him one Aligned Ore to receive 2 x Bar of Aligned Steel. Give one of these to Esunta.
Esunta says 'Good, you is ready to work. We need skewers. Da more we make, da more we gets to eat! Da new steel makes skewers dat last long time an don't make food taste bad. So you take dis stuff and forge skewers. Bring dem to me when you done.'
You receive 10 x Scrap of Aligned Steel and 10 x Simple Skewer Mold. Combine 1 of each in a forge.
You have learned the recipe Simple Aligned Steel Skewer!
Simple Aligned Steel Skewer trivials at 31. After doing 10 combines, hand them back to Esunta unstacked, up to four at a time. After handing them all in, give her another Bar of Aligned Steel to get more ingredients. After handing in around 40 Simple Aligned Steel Skewers total, the next time you hand in a Bar of Aligned Steel you see this:
Esunta says 'Dere is much work for you. We use steel spikes for lots of tings here, and dey asks me to make some with da new steel. It easy job, so maybe you do it. Just take da metal and da mold to da forge and make da spikes. Bring dem to me when you is done.'
You receive 10 x Scrap of Aligned Steel and 10 x Simple Spike Mold. Combine 1 of each in a forge.
You have learned the recipe Simple Aligned Steel Spike!
Simple Aligned Steel Spike trivials at 38. After doing 10 combines, hand them back to Esunta unstacked, up to four at a time. After handing them all in, give her another Bar of Aligned Steel to get more ingredients. After handing in around 40 Simple Aligned Steel Spikes total, the next time you hand in a Bar of Aligned Steel you see this:
Esunta says 'Lots more work for you to do. Da iron files dat we use don't last long. For da special work dey asks me to make dem files from da new steel. So now you is going to make files from da new steel. Take dis stuff to da forge an make da files. Bring dem to me when you gets dem done.'
You receive 10 x Hardened Aligned Steel Bits, 10 x Scrap of Aligned Steel, and 10 x Simple File Mold. Combine 1 of each in a forge.
You have learned the recipe Simple Aligned Steel File!
Simple Aligned Steel File trivials at 46. After doing 10 combines, hand them back to Esunta unstacked, up to four at a time. After handing them all in, give her another Bar of Aligned Steel to get more ingredients. After handing in around 40 Simple Aligned Steel Files total, the next time you hand in a Bar of Aligned Steel you see this:
Esunta says 'You good helper. Dis time we need needles. Da peoples dat sews stuff likes da needles made wit da new metal, an my fingers is too big for making needles good. You take this stuff to da forge an make needles for us. Bring dem to me when you is done.'
You receive 10 x Scrap of Aligned Steel and 10 x Simple Needle Mold. Combine 1 of each in a forge.
You have learned the recipe Simple Aligned Steel Needle!
Simple Aligned Steel Needle trivials at 54. After doing 10 combines, hand them back to Esunta unstacked, up to four at a time. After handing them all in, give her another Bar of Aligned Steel to get more ingredients. After handing in around 40 Simple Aligned Steel Files total, the next time you hand in a Bar of Aligned Steel you see this:
Esunta says 'You do enough already. No do more. Go talk to Snokin, he will tell secret for making aligned ore into steel. Tell Snokin dat you do much [silly work] for me and he will show you secret.'
To Snokin Breaksteel:
You say, 'What silly work?'
Snokin Breaksteel says 'No more work now. Snokin happy wit what you do already. Snokin show you secret now. You not tell anyone!' Snokin looks around furtively, as if everyone on the ship doesn't hear everything he says. He hands you a piece of paper with some very precise writing on it. You can only guess that he did not write it. You look it over and you understand the methods for smelting the aligned ore and the shimmering aligned ore. It's not a complicated process, but you would have needed information that only that Wayfarers have to uncover it. Now all you need to do is place the ore into a forge and you will be able to make the steel. However, you are certain that you can improve the process if you work with the ore long enough. Snokin takes the paper back and pulls out a ledger. You see him carefully note your name on the ledger with clear and concise penmanship that matches that on the paper you just read.
You can now refine Aligned Ore into a Bar of Aligned Steel and Shimmering Aligned Ore into a Bar of Shimmering Steel.
Helmet Eclipsing Liquidation Machine (H.E.L.M.) (Normal): You say, 'Hail, Marius Alyonn'
Marius Alyonn looks at ______ and begins to speak.
Marius Alyonn says 'Come to exchange your [helm] or you just like looking at gnomes?'
You say, 'What helm?'
Marius Alyonn says 'Yes that's what I said. I have been working with the dwarves to create a device that can alter the view of your headgear. This advanced gnomish technology, that's right gnomish technology, will remove the shroud that makes your helm invisible to the naked eye. It can also replace the shroud if you decide you don't like it being shown. Amazing isn't it? And it was all my design! The only drawback to this device, appropriately named the Helmet Eclipsing Liquidation Machine or H.E.L.M. for short, is that it is only compatible with certain [headgear].'
You say, 'What headgear?'
Marius Alyonn says 'Well, so far I have only been successful with the latest class quest helms but I am hoping to expand soon. For now though if you have any of these and wish to try my machine out, then hand it over and let the show begin.'
Marius Alyonn pulls a small item out of his pocket places it on the floor and stands back as it starts to unfold, revealing what looks to be a modified forge. Placing the helm inside the forge, Marius pulls a small lever on the side, removes the helm from within, and hands it to you. 'There you go! Let me know what you think. If you don't like it, you can always come back, but it will cost you. This type of technology does not come cheap you know.'
You receive a different version of your helmet, one without visible graphics when you wear it. Often the new version loses an important stat as well, so be warned: you pay a price for your vanity. If you have the new version in your possession:
You say, 'Hail, Marius Alyonn'
Marius Alyonn looks at ______ and begins to speak.
Marius Alyonn says 'Ah, so I see you have returned. Do you wish to change your headgear back? Or are you here to alter another? Either way, I am going to have to charge you a small [fee] this time. I am planning to sell this invention in Norrath and beyond, but I need to save a little more money first.'
You say, 'What fee?'
Marius Alyonn says 'Hmm . . . let me see . . . the cost of materials, having to perform maintenance after the process is done, opening the item and closing it again, plus a small labor charge. I think a diamond sounds fair, what do you say [yes] or [no]?'
You say, 'Yes.'
Marius Alyonn says 'Good, then please hand the gem and I will give you my latest version of the H.E.L.M. device that you can use at your leisure. But before you give me the diamond remember that this device is only compatible with the latest class quest helms.'
You receive a Disposable H.E.L.M. Device. Put your GoD armor helmet without graphics into it, then combine.
You have fashioned the items together to create something new! Reward: Gaelin's Woodland Cap
Reward: Pressl's Cap of Balance
Reward: Trimdet's Helm of Chivalry
Reward: Jennu's Circlet of Creation
Reward: Kanleku's Helm of Spirits
Reward: Dakkamor's Helm of the Divine
Reward: Nunkin's Circlet of Pure Elements
Reward: Nolaen's Lifereaper Circlet
Reward: Luvwen's Helm of Melody
Reward: Nodnol's Helm of the Scoundrel
Reward: Nadien's Helm of the Archer
Reward: Rayin's Helm of Abhorrence
Reward: Lelyen's Circlet of Entrancement
Reward: Harlad's Helm of Fury
Reward: Vadd's Helm of Elite Combat
Reward: Kizash's Savage Heart Cap
Jewelcraft Freebie: Help Glirina (Normal): Glirina Morningbloom is located on the ship at -145, +230, +100.
ou say, 'Hail, Glirina Morningbloom'
Glirina Morningbloom says, 'Greetings. You are looking well.' Glirina gives you a critical glance, 'I wonder, are you skilled in jewel crafting? Or perhaps you are interested in learning our craft? I have an opportunity for one who fits either of these categories. I have need of help and by helping me you will learn something of what I know, if you are [interested] in such things.''
You say, 'interested'
Glirina Morningbloom says, 'There are always many simple but time-consuming jobs to do aboard the Queen of Thorns. I have more important research to attend to. I have been given samples of a new gem and I must turn my attention to discovering its properties. I have already discovered a method for cutting and preparing this [Crimson nihilite], as we've named it, so that it can be used in the creation of some beautiful work. Amber and Indigo Nihilite work equally well. We named it after a faction of the natives, though I'm not certain how these nihil differ from the others. I haven't time for the local politics. I have far too much work to do for that. Are you interested in learning something about crafting jewelry while helping me complete my [work]?'
You say, 'work'
Glirina Morningbloom gives you a slight smile 'I am pleased. I have work for you even now. As you may have noticed, members of the Wayfarers Brotherhood are often rough and careless. Despite my repeated insistence that they take more care with the things I make for them, they still return to me with many items in need of repair. The most common items they break are the simple clasps that hold various items together. I would be grateful if you could make many such clasps for me. Simply place this Thin Steel Wire into your Jeweler's Kit and combine it. It is a rather simple task, though the fine wire requires a delicate touch. Bring the clasps back to me when you are done. I have many such tasks that you can help me with. If you prove to be helpful enough, perhaps I will teach you how to prepare raw nihilite for use in your future jewelcrafting.'
You say, 'Crimson nihilite'
Glirina Morningbloom says, 'This nihilite is an unusual gemstone. In its natural state it is opaque and a milky color, generally not too attractive. When prepared properly, it retains its opacity but gains a unique property. When you place it upon another object, the nihilite transfers the image of that object to the front face of the stone! For example,' Glirina takes a small piece of cloudy-looking stone and shows you all sides. It appears the same milky color on all sides, though two sides are smooth while the others remain rough. She places a flat side onto the Wayfarers Brotherhood emblem on her cloak. The portion of the emblem covered by the nihilite is visible on the surface of the stone, as if the stone were suddenly transparent like glass, but only between those two surfaces. 'The stone is rather soft, so it is both easy and delicate to work with. We have discovered the method for preparing nihilite. If you can bring some nihilite, Neysia will prepare it for you, keeping a small amount of it for our use.''
You receive 20 x Thin Steel Wire. Combine 1 in a Jeweler's Kit.
You have learned the recipe Simple Clasp!
Simple Clasp trivials at 31. After making them all, hand them to her unstacked, up to four at a time. Keep going back and saying "What work?" and she will give you more until she is satisfied (need to hand in approximately 100).
Glirina Morningbloom says 'My thanks to you, ______. We have need of some simple items for trade, both here and in other lands. It's a way to keep ourselves involved in the markets all over Norrath. I would appreciate it if you would create some simple copper rings for me to help round out our inventory. Just place the Small Sheet of Copper and a Blob of Metal Polish in your Jeweler's Kit and combine them. Bring the rings to me when you are done.'
This time you receive 20 x Small Sheet of Copper and 20 x Blob of Metal Polish. Combine 1 of each in a Jeweler's Kit.
You have learned the recipe Simple Copper Ring!
Simple Copper Ring trivials at 38. After making them all, hand them to her unstacked, up to four at a time. Keep going back and saying "What work?" and she will give you more until she is satisfied (need to hand in approximately 100).
Glirina Morningbloom says 'I appreciate your assistance. I have a task for you that should be a little more challenging. We sell a fair amount of simple jewelry all around Norrath. Right now we are in need of simple brass armbands. They seem to have become popular, and we'd like to take advantage of this trend while it lasts. Just take the Small Sheet of Brass and a Blob of Metal Polish and combine them in your Jeweler's Kit. Please bring the armbands back to me as soon as you can.'
This time you receive 20 x Small Sheet of Brass and 20 x Blob of Metal Polish. Combine 1 of each in a Jeweler's Kit.
You have learned the recipe Simple Brass Armband!
Simple Brass Armband trivials at 46. After making them all, hand them to her unstacked, up to four at a time. Keep going back and saying "What work?" and she will give you more until she is satisfied (need to hand in approximately 100).
Glirina Morningbloom says 'I am appreciative of your assistance. This task is a bit more complicated. We use a lot of silver chain in our work here, and it is always better and cheaper to make our own. If you could take the Thin Silver Wire and a Blob of Metal Polish and combine them in your Jeweler's Kit, I am certain you can create beautiful silver chain. Please return the chains to me when you are done, we have need of them.'
This time you receive 20 x Thin Silver Wire and 20 x Blob of Metal Polish. Combine 1 of each in a Jeweler's Kit.
You have learned the recipe Simple Silver Chain!
Simple Silver Chain trivials at 54. After making them all, hand them to her unstacked, up to four at a time. Keep going back and saying "What work?" and she will give you more until she is satisfied (need to hand in approximately 100).
Glirina Morningbloom smiles broadly at you. 'You have been of great assistance to me. It would be improper for me to ask more of you. I will find others to do these tasks. I have learned much doing research while you have been helping me. Let me show you the method I have discovered for preparing the Nihilite.' She works swiftly, but you understand what she is doing as she carefully prepared the soft stone. 'Here is some of the special polish that we have devised for use with the Nihilite. What I have shown you will work for both the Pale and Shimmering Nihilite, and you should be able to get useful stones from Raw Pale and Raw Shimmering Nihilite.' You know you can reproduce the polish she has given you. You are certain that you can improve on the method she has shown you, given enough practice with the Nihilite.
Kutin's Key (Normal): Kutin's Key is a no-drop key acquired by fishing in The Abysmal Sea from the Queen of Thorns.
Take the key to Kutin Pyskar, located in the main hall behind and to the right of Morden Rasp. His location is -56.59, -46.197.
Upon handing in the key:
Kutin Pyskar says, 'You found my key! Where was it? Now how did it get there? No matter, you have returned it.'
Kutin opens the chest with the key you just found for him. 'Take this. I found it while adventurin' somewhere. It isn't much, but take it as a reward for findin' my key.'
You gain experience!
Reward was Potion of Transformation (Troll Illusion). Reward: Potion of Transformation
Magician Abysmal Armor (Normal): You say, 'Hail, Jennu Mennea'
Jennu Mennea says 'Hello there! Are you a friend of the elementalkin? Great master of the elements? Conjurer extraordinaire? [Magician]? If so you are just what I have been looking for!'
You say, 'I am a Magician.'
Jennu Mennea says 'Delightful! We are too few nowadays. The few I have met thus far seem intent on burning themselves out too quickly. We are delicate! In any case, to help a fellow magician I may be able to offer my services. If you are in need of new equipment such as [circlet], [pantaloons], [robe], [bracer], [sleeves], [gloves], and [sandals] please let me know.'
You say, 'What bracer?'
Jennu Mennea says 'If you speak to Nalasrine about her findings, she may be able to help you infuse some Muramite silk thread to strengthen it. One length of infused Muramite silk thread along with a reworked bracer would suit you just fine. Find Muramite Bracer Armor piece and return it to me for reworking.'
You say, 'What circlet?'
Jennu Mennea says 'I can shape you a beautiful circlet from Muramite Helm Armor. All you need to do is find some Muramite silk thread. A strengthened thread woven over the circlet in a loom shall yield a fine circlet indeed. Talk to Nalasrine about the strengthening process.'
You say, 'What gloves?'
Jennu Mennea says 'I can make you some gloves that won't burn through no matter how hard you try. Find some Muramite silk thread, I am sure Nalasrine can assist you with strengthening it. Bring me Muramite Glove Armor and I will shape them for you, once I have finished you can add the final touches yourself in a loom.'
You say, 'What pantaloons?'
Jennu Mennea says 'Stitching some Muramite greaves into a pair of pantaloons that would serve you well should be no great feat. Bring me a pair of Muramite Greaves. Once I have done this, you will need to do the final touches yourself. Two lengths of Muramite silk thread infused with Nalasrine's strengthener should be sufficient to finish them up.'
You say, 'What robe?'
Jennu Mennea says 'A grand robe shall be yours if you bring me a Muramite Chest Armor piece. I can reshape it easily, and the finishing touches may be applied by your hand. Strengthen two lengths of Muramite silk thread with Nalasrine's special mixture and some quick work with a loom should do the trick.'
You say, 'What sandals?'
Jennu Mennea says 'Bring me back Muramite Boot Armor and I believe I can rework them into some nice sandals. To thread them together you will need some strengthened Muramite silk thread. If you need help in the strengthening process, just talk to Nalasrine.'
You say, 'What sleeves?'
Jennu Mennea says 'I am always singing the cuffs of my sleeves, too. Bring me Muramite Sleeve Armor. I will do the alterations for you, then all you will need to do is find some Muramite silk thread. Nalasrine can help you strengthen it, and you will have the makings of some nice sleeves.'
Nalasrine Twinklecoil is located in the next room.
You say, 'Hail, Nalasrine Twinklecoil'
Nalasrine Twinklecoil says 'Salutations! It is great to see so many eager travelers out and about. How are you enjoying our little city here? I have been quite busy myself. There are so many interesting things to learn about these strange beings that inhabit Taelosia. Their armor in particular is most interesting. I have developed some intriguing compounds. Let me know if you are interested in such things before I just prattle on!'
You say, 'I am interested.'
Nalasrine Twinklecoil says 'Oh, good. Well let me see. Basically, I have been studying the armor that our explorers have been bringing back from their adventures. While it is a bit strangely shaped, as these creatures that seem to reside here are, I have found that by strengthening some native materials it can be reworked into rather fine armor for the likes of you and me.'
You say, 'What armor?'
Nalasrine Twinklecoil says 'If you are looking into having some armor made, you definitely will need to use my infusions. They are a bit pricey, however they are difficult to make and well frankly, I am the only one who can! Use the plate solvent on plate armor, chain solvent on chain, tanning solution on leather, and silk strengthener on silk. All rather intuitive isn't it? Simply take a look at the different types I have for sale.'
Muramite armor begins dropping in Qvic and above. Bring back the appropriate piece of "Muramite XXX Armor" and turn it in to Jennu Mennea to get a class-specific, no-stat "Reworked Muramite XXX."
Craft a Muramite Silk Thread by combining a Meldstone and a Spider Silk in a loom. This has a high trivial (282) and a high minimum tailoring requirement (in the 240s).
Buy Nalasrine's Perfected Silk Strengthener from Nalasrine Twinklecoil for around 10,500 pp. Combine the strengthener with the Muramite Silk Thread in a loom (no-fail combine). This results in a NO DROP piece of Infused Muramite Thread.
Combine the Infused Muramite Thread with your piece of Reworked Muramite XXX armor in a loom to receive your quest reward (no-fail combine). Reward: Jennu's Gloves of Creation
Reward: Jennu's Bracer of Creation
Reward: Jennu's Circlet of Creation
Reward: Jennu's Sandals of Creation
Reward: Jennu's Sleeves of Creation
Reward: Jennu's Robe of Creation
Reward: Jennu's Pantaloons of Creation
Meat for Allabar (Normal): You can find Allabar Yuti at -50, +80, +140.
You say, 'Hail, Allabar Yuti'
Allabar Yuti sighs. 'Oh, I am sorry. I do not mean to be rude. It is just that I miss the mainland. Being so far away from home is making me homesick. I hate to ask this, but think you could [help] me with something?'
You say, 'I can help you.'
Allabar Yuti says 'When I used to adventure, I acquired quit a habit of eating storm giant steaks. I dearly miss them. Think you could return four storm giant meats to me? I will happily give you some sort of reward if you can do so.'
Hand in 4 unstacked storm giant meats.
Allabar Yuti says 'Thank you very much. This will make me feel much better.'
Monk Abysmal Armor (Normal): You say, 'Hail, Sakar Pressl'
Sakar Pressl says 'Greetings ______, I am looking for those calm and worldly people known as [monks]. You wouldn't happen to be one would you?'
You say, 'I am a monk.'
Sakar Pressl says 'Very nice, it does always please me to see a fellow monk. For one such as yourself, I may be able to assist. If you are in need of new equipment such as [cap], [leggings], [tunic], [bracer], [sleeves], [gloves], or [sandals] - let me know.'
You say, 'What bracer?'
Sakar Pressl says 'Indeed, I can craft you a bracer. Bring me back Muramite Bracer Armor piece and I will get to work on it. You will also need a section of infused Muramite leather to finish the bracer in a loom. Talk to Nalasrine if you still some help infusing the leather.'
You say, 'What cap?'
Sakar Pressl says 'I should be able to reform Muramite Helm Armor into something quite useful to you. Explore these lands until you find some Muramite leather padding. Talk to Nalasrine about infusing it, then bring piece it together with your new helm from me in a loom.'
You say, 'What gloves?'
Sakar Pressl says 'I can make some fine gloves for you. Take the time to dig up some Muramite leather and have Nalasrine assist you with infusing it. Bring me Muramite Glove Armor and I can reshape it into something that you can use. Strengthen the gloves by reinforcing them with the infused leather in a loom, and a fine pair shall be yours.'
You say, 'What leggings?'
Sakar Pressl says 'I believe I can reform some Muramite greaves into a pair of leggings that would fit you. Bring me a pair of Muramite Greaves and I will get to work on that. To finish your leggings you will also have to obtain two pieces of Muramite leather padding. Speak to Nalasrine about infusing it, then place the leather pieces and leggings in a loom to work them together.'
You say, 'What sandals?'
Sakar Pressl says 'Bring me back Muramite Boot Armor and I believe I can rework them into something quite fine for you. Once I've reworked them, you will need to take a section of infused Muramite leather along with the new boots and reinforce them in a loom. If you need help in the infusing process, just talk to Nalasrine.'
You say, 'What sleeves?'
Sakar Pressl says 'Sleeves are quite simple. Venture into these strange lands and find some Muramite Sleeve Armor. Bring the armor piece to me and I will work on refitting it for you. Once you have a piece of Muramite leather padding, talk to Nalasrine about infusing the it. The new sleeve from me can be easily stitched up in a loom with the infused Muramite leather.'
You say, 'What tunic?'
Sakar Pressl says 'I can form you a nice light tunic that will not hinder you in battle. Travel into the hostile areas and bring back two sections of Muramite leather and Muramite Chest Armor. Make sure to speak to Nalasrine about infusing the sections of leather. Bring me the chest piece for reworking, then simply weld together the new chest and leather in a loom.'
Nalasrine Twinklecoil is located in the next room.
You say, 'Hail, Nalasrine Twinklecoil'
Nalasrine Twinklecoil says 'Salutations! It is great to see so many eager travelers out and about. How are you enjoying our little city here? I have been quite busy myself. There are so many interesting things to learn about these strange beings that inhabit Taelosia. Their armor in particular is most interesting. I have developed some intriguing compounds. Let me know if you are interested in such things before I just prattle on!'
You say, 'I am interested.'
Nalasrine Twinklecoil says 'Oh, good. Well let me see. Basically, I have been studying the armor that our explorers have been bringing back from their adventures. While it is a bit strangely shaped, as these creatures that seem to reside here are, I have found that by strengthening some native materials it can be reworked into rather fine armor for the likes of you and me.'
You say, 'What armor?'
Nalasrine Twinklecoil says 'If you are looking into having some armor made, you definitely will need to use my infusions. They are a bit pricey, however they are difficult to make and well frankly, I am the only one who can! Use the plate solvent on plate armor, chain solvent on chain, tanning solution on leather, and silk strengthener on silk. All rather intuitive isn't it? Simply take a look at the different types I have for sale.'
Muramite armor begins dropping in Qvic and above. Bring back the appropriate piece of "Muramite XXX Armor" and turn it in to Sakar Pressl to get a class-specific, no-stat "Reworked Muramite XXX."
Craft a Muramite Leather Padding by combining by combining a Meldstone and some Snake Scales in a loom. This has a high trivial (282) and a high minimum smithing requirement (in the 240s).
Buy Nalasrine's Enforcing Tanning Solution from Nalasrine Twinklecoil for around 10,500 pp. Combine the solution with the Muramite Leather Padding in a loom (no-fail combine). This results in a NO DROP piece of Infused Muramite Leather.
Combine the Infused Muramite Leather with your piece of Reworked Muramite XXX armor in a loom to receive your quest reward (no-fail combine). Reward: Pressl's Robe of Balance
Reward: Pressl's Sleeves of Balance
Reward: Pressl's Bracer of Balance
Reward: Pressl's Cap of Balance
Reward: Pressl's Gloves of Balance
Reward: Pressl's Sandals of Balance
Reward: Pressl's Leggings of Balance
Naea's Necklace (Normal): You say, 'Hail, Naea Fobbins'
Naea Fobbins says 'Why hello there. Just arrived? My name is Naea Fobbins. My husband and I recently joined the Wayfarers Brotherhood. When we heard that they were sailing for lands unknown we just had to go. Truth be told, I do miss home though. I had quite a lucrative business in Rivervale making [necklaces].'
You say, 'What necklaces?'
Naea Fobbins says 'I made all kinds! Some were magical in nature and some just beautiful to look at. That reminds me. My husband recently brought some shells from the shores of Natimbi. They were quite wonderful and I was able to make a nice necklace from them. If you could bring me some shells from Natimbi, I can try to make you one as well. I have nothing else to do at the moment. Are you [interested]?'
You say, 'I am interested.'
Naea Fobbins says 'Okay, great! I will need three Broken Shore shells, and one set of Reef Crustacean Glands to make a necklace for you. The glands are needed because they secrete a kind of sealant to protect the delicate shells. You should be able to find all the items in Natimbi. Hand them to me once you find them.'
Broken Shore Shells are foraged in Natimbi. Reef Crustacean Glands drop from A Reef Crustacean. Give the items to Naea.
Naea Fobbins says 'Oh, you have returned. And you brought all the items I asked for! As promised I will make you a necklace.' Naea begins to carefully thread the shells and adds the secretion from the gland. 'This should do nicely. Here you go! It was a pleasure making it for you. Take care!'
You gain experience!! Reward: Broken Shore Shell Necklace
Necromancer Abysmal Armor (Normal): Nolaen Tav`Inxya may be found at -160, +70, +98.
Nolaen Tav`Inxya says 'Do you command the dead? Do you practice the necromantic arts? Are you a [necromancer]? Speak up!'
You say, 'I am a necromancer'
Nolaen Tav`Inxya says 'Good. Sometimes it is difficult to contact each other, is it not? I too am a necromancer. If you are in need of new equipment such as [circlet], [pantaloons], [robe], [bracer], [sleeves], [gloves], and [sandals] please let me know.'
You say, 'What bracer?'
Nolaen Tav`Inxya says 'I will craft you a bracer if you bring me the materials. Speak to Nalasrine about her findings, she may be able to help you infuse some Muramite silk thread to strengthen it. One length of infused Muramite silk thread along with a reworked bracer would suit you just fine. Find Muramite Bracer Armor piece and return it to me for reworking.'
You say, 'What circlet?'
Nolaen Tav`Inxya says 'I can shape you a powerful circlet from from Muramite Helm Armor. All you need to do is find some Muramite silk thread. A strengthened thread woven over the circlet in a loom shall yield a fine circlet indeed. Talk to Nalasrine about the strengthening process.'
You say, 'What gloves?'
Nolaen Tav`Inxya says 'Find some Muramite silk thread, I am sure Nalasrine can assist you with stregnthening it. Bring me Muramite Glove Armor and I will shape them for you, once I have finished you can add the final touches yourself in a loom.'
You say, 'What pantaloons?'
Nolaen Tav`Inxya says 'Warping some Muramite greaves into a pair of pantaloons that would serve you well is menial. Bring me a pair of Muramite Greaves. Once I have done this, you will need to do the final touches yourself. Two lengths of Muramite silk thread infused with Nalasrine's strengthener should be sufficient to finish them up.'
You say, 'What robe?'
Nolaen Tav`Inxya says 'A useful robe shall be yours if you bring me Muramite Chest Armor piece. I can reshape it easily, and the finishing touches may be applied by your hand. Strengthen two lengths of Muramite silk thread with Nalasrine's special mixture and some quick work with a loom should do the trick.'
You say, 'What sandals?'
Nolaen Tav`Inxya says 'Bring me back Muramite Boot Armor and I believe I can rework them into some nice sandals. To thread them together you will need some strengthened Muramite silk thread. If you need help in the strengthening process, just talk to Nalasrine.'
You say, 'What sleeves?'
Nolaen Tav`Inxya says 'Bring me Muramite Sleeve Armor. I will do the alterations for you, then all you will need to do is find some Muramite silk thread. Nalasrine can help you strengthen it, and you will have the makings of some nice sleeves.'
Nalasrine Twinklecoil is located in the next room.
You say, 'Hail, Nalasrine Twinklecoil'
Nalasrine Twinklecoil says 'Salutations! It is great to see so many eager travelers out and about. How are you enjoying our little city here? I have been quite busy myself. There are so many interesting things to learn about these strange beings that inhabit Taelosia. Their armor in particular is most interesting. I have developed some intriguing compounds. Let me know if you are interested in such things before I just prattle on!'
You say, 'I am interested.'
Nalasrine Twinklecoil says 'Oh, good. Well let me see. Basically, I have been studying the armor that our explorers have been bringing back from their adventures. While it is a bit strangely shaped, as these creatures that seem to reside here are, I have found that by strengthening some native materials it can be reworked into rather fine armor for the likes of you and me.'
You say, 'What armor?'
Nalasrine Twinklecoil says 'If you are looking into having some armor made, you definitely will need to use my infusions. They are a bit pricey, however they are difficult to make and well frankly, I am the only one who can! Use the plate solvent on plate armor, chain solvent on chain, tanning solution on leather, and silk strengthener on silk. All rather intuitive isn't it? Simply take a look at the different types I have for sale.'
Muramite armor begins dropping in Qvic and above. Bring back the appropriate piece of "Muramite XXX Armor" and turn it in to Nolaen Tav`Inxya to get a class-specific, no-stat "Reworked Muramite XXX."
Craft a Muramite Silk Thread by combining a Meldstone and a Spider Silk in a loom. This has a high trivial (282) and a high minimum tailoring requirement (in the 240s).
Buy Nalasrine's Perfected Silk Strengthener from Nalasrine Twinklecoil for around 10,500 pp. Combine the strengthener with the Muramite Silk Thread in a loom (no-fail combine). This results in a NO DROP piece of Infused Muramite Thread.
Combine the Infused Muramite Thread with your piece of Reworked Muramite XXX armor in a loom to receive your quest reward (no-fail combine). Reward: Nolaen's Lifereaper Bracer
Reward: Nolaen's Lifereaper Circlet
Reward: Nolaen's Lifereaper Gloves
Reward: Nolaen's Lifereaper Sandals
Reward: Nolaen's Lifereaper Sleeves
Reward: Nolaen's Lifereaper Robe
Reward: Nolaen's Lifereaper Pantaloons
Nioti's Predicament (Normal): Nioti may be found at +95, +75, +100 in the Abysmal Sea.
You say, 'Hail, Nioti'
Nioti says 'Yes, what is it? I am a bit occupied right now with quite the [predicament]. I swear things keep getting worse and worse around here.'
You say, 'What predicament?'
Nioti says 'Well simply put, we are overwhelmed with repairs. While we made it safely to the shores of the new continent, we suffered some damage to the ship. To make matters worse, we are running out of supplies to complete the needed repairs and I don't have time to return to the mainland to find more. I sure could use some [assistance]. I knew we should have never come here.'
You say, 'What assistance?'
Nioti says 'Well I cannot really believe someone would want to help me, but if you really could help, that would be great. I would need you to find four Branches of Sylvan Oak and return them to me. If you do this for me, I will find some way to reward you for your efforts.'
You can forage the Branches of Sylvan Oak in the Eastern Wastes or the Wakening Land, or simply go to The Bazaar and buy them for a few platinum. Give four unstacked branches to Nioti.
Nioti says 'I don't think you would return. I appreciate your assistance. I hate to do this, but before I can convince my foreman to give you a reward, I am going to need to ask you to help me again. According to another adventurer that passed through here the other day, there is a golem graveyard of sorts in a temple somewhere on this continent. If you could find this place and gather one clay golem part that would help us greatly with repairs. Why do we need these golem parts you ask? I have no idea. Grumby, our foreman said we needed them for some sort of repairs. Oh yeah, take this badge. It identifies you as part of the ship's maintenance crew. Just hand the badge to me when you hand in the golem parts.'
You gain experience!!
You receive a Worker's Badge (identifies as Worker's Badge Number One). The Clay Golem Parts are a ground spawn in Barindu at +600, -585, in a room with Ikaav Ixvet Pox who sees through Shroud of Stealth. Hand in the parts and first Worker's Badge to Nioti:
Nioti says,'Thanks. I hope that wasn't too much trouble. Seems we need more help. Grumby just informed me that some parts on the bridge have already been damaged by rust. That doesnt sound good at all. We will need your help to get some sort of anti rust agent. What? Hey, dont get mad at me. I am sorry I keep asking for help, but I am just following Grumby's orders. There is a gnomish tinker in Ak'anon named Gilipus that might have something to help us. Go there and hand him this note along with your badge so he knows you are working for Grumby. I promise to reward you for your time when you are done helping us. Take your badge back and give it to me again when you hand in the anti-rusting agent.'
You receive a Note to Gilipus and another Worker's Badge (identifies as Worker's Badge Number Two).
Head to Ak'Anon and find Gilipus at +1385, -867 in the room next to the Ak'Anon Bank.
You say, 'Hail, Gilipus'
Gilipus says 'I had a wrench around here somewhere...'
Give him the Note to Gilipus and the Worker's Badge.
Gilipus says 'Yes, what is it? Just a moment, I cannot read without my glasses.'
Gilipus rummages through his numerous pockets looking for his reading glasses. 'Oh this is most embarrassing. Seems I have lost my reading glasses. Oh wait, I know where they are. They are on this bench here.' Just as Gilipus reaches for his glasses, a small mechanical rat snatches them and hurriedly scuttles away. 'Oh drat. This isn't good at all. That defective cleaner just took my reading glasses! Think you could go get them? What defective cleaner you ask? I don't know for certain. I couldn't make out the serial number. If you can find my glasses, I will read this note you brought me.'
You get the Worker's Badge back, but this time it identifies as Worker's Badge Number Three. Kill a defective cleaner in Ak'Anon until one drops Gilipus's Reading Glasses. Give the Glasses and Badge back to Gilipus.
Gilipus says 'Thank you. That is much better.' Gilipus begins to read the note. 'You need something to remove rust? Yes, I do believe I have just the thing for you. Just bring me some rubbing alcohol and I can make what you need. Now where are my tools?'
You get the Worker's Badge back, but now it identifies as Worker's Badge Number Four.
Rubbing Alcohol may be purchased in Thurgadin from Adia Coldbeard and Karey, or in West Cabilis from a mortician. Give the Badge and the Rubbing Alcohol to Gilipus.
Gilipus says 'Hello what can I do for you? Oh yes, you needed something to remove rust. This rubbing alcohol should help you. Good thing you thought to bring it.' Gilipus begins to mix some different chemicals together in a small vial. 'Here you go. This should work. I think. By the way, have you seen a small notebook? It was green with a picture of a lovely cog on it. . .'
You receive a Vial of Anti-Rusting Agent and your Worker's Badge, which now identifies as Worker's Badge Number Five. Head back to Nioti and give her both pieces.
Nioti says 'What took so long? Grumby has been breathing down my neck all day asking for this stuff. I am glad you were able to acquire it. It seems like everything around here is rusting away in this salty air. Your reward? Yes, yes. I will reward you. However it seems we need more help. Grumby has informed me that we need some ore. Think you could go and get some for us? Bring back three blocks of ore and your Worker's Badge.'
You get the Worker's Badge back again (Worker's Badge Number Six now). Blocks of Ore may be crafted by combining 3 x Large Brick of Ore with 1 x Water Flask in a forge, trivial 27. Turn in the Blocks of Ore with the Badge.
Nioti says 'Not the best quality but this ore should help a lot. Now don't get mad at me, but before we can reward you, Grumby has told me that you will need to go get him some food. He said he wants some Filleted Mammoth. Oh and he also wanted a Jumjum Cake. Bring me those food items along with your worker's badge.'
You get the badge again, Worker's Badge Number Seven.
Filleted Mammoth may be baked by combining Mammoth Meat with a Filleting Knife in an oven or spit, trivial 143.
Jumjum Cake may be baked by combining a Cake Round, Clump of Dough, Frosting, Winter Chocolate, and any of three varieties of Jumjum Stalk in an oven or spit, trivial 166.
Turn in the Filleted Mammoth and the Jumjum Cake with the Badge.
Nioti says 'Looks like your work here is done. Grumby said I can reward you. Here you go. Thanks again and sorry for all the trouble.'
Reward(s):
Worker's Earring of Efficiency Reward: Worker's Earring of Efficiency
Noita's Boots (Normal): Noita Ergarman may be found at +160, -235.
You say, 'Hail, Noita Ergarman'
Noita Ergarman says 'Hello. My name is Noita. I just arrived here a day ago. I have come to hopefully work on creating some [new armor designs].'
You say, 'What new armor designs?'
Noita Ergarman says 'Well I work mainly with cloth and animal hides. I have come here to see if there were any new creations I could make. So far I have found one [creature] whose hide has proved to be very durable.'
You say, 'What creature?'
Noita Ergarman says 'I was exploring the beach earlier today, and saw a creature that had a wolf-like appearance, but it was larger than any wolf I have ever seen. The creature proved to be quite vicious, but I was able to dispatch it. The hides I acquired made a very nice pair of boots, suitable for any adventurer. If you could perhaps bring me one boot pattern and three flawless hides from these creatures, I could attempt to make you a pair of these boots.'
Flawless Hynid Hides drop rarely from Hynid Fleshrippers in Natimbi. Hand in three and a Boot Pattern:
Noita Ergarman says 'Thank you, but I asked for other items as well.'
Noita Ergarman says 'Thank you, but I asked for other items as well.'
Noita Ergarman says 'Thank you, but I asked for other items as well.'
Noita Ergarman says 'Excellent. Hopefully I can make the same boots I did earlier.' Noita takes out her sewing kit and begins to skillfully sew the hides together. It doesn't take her long before you start to see the hides taking the familiar shape of a pair of boots. 'Here you go. These boots might be even better than the ones I made earlier. I hope they serve you well.'
You gain experience!! Reward: Hynid Boots
Orgmar's Haunt (Normal): You say, 'Hail, Yitandi'
Yitandi moans in a sad, wispy voice, 'Death. . . coming for all. . .'
You say, 'Hail, Orgmar'
Orgmar says 'You have got ta help me, lad! That ghost there in the corner won't [leave] me alone! Where ever I go he follows me!'
You say, 'Why won't she leave you alone?'
Orgmar say 'I think I took somethin' o' his and he wants it back. Ya got ta [help] me get rid of this ghost, lad! I taint slept in over a fortnight.'
Yitandi moans pitifully, 'Satchel...Sewers...'
You say, 'I will help.'
Orgmar says 'I went explorin' one day in some sewers in the new land. I came across a rottin' satchel on the ground. Inside were some strange gems. I couldn't resist. I took the satchel back here to me room. A day or two later, this ghost appeared. Scared me out o' me chainmail it did. It kept moanin' about wantin' its satchel back. I didn't know what ta do so I went back to the sewers and chucked it into the water. Thought it might appease it or somethin'. That didn't work though and the darn ghost still comes back. Please find the satchel and bring it back ere. Maybe if I can give the satchel to the ghost, it will make him go away for good!'
A Rotting Satchel is a random drop from mobs in the fourth trial (Pool of Sludge). Retrieve it and give it to Orgmar.
Orgmar says 'Ye done a good deed this day, me friend. Not that I am scared of ghosts or anything. Take this as your reward. I found it on one of me adventures in the new land. I know it be a bit gruesome lookin', but it has some magic power. Now to see if I can get rid o' this ghost. Farewell.'
You gain experience!! Reward: Gouged Out Ukun Eye
Paladin Abysmal Armor (Normal): Trimdet Trueheart may be found at -240, +170.
You say, 'Hail, Trimdet Trueheart'
Trimdet Trueheart says 'Greetings. I am only interested in speaking with those most uplifted of knights known as the [paladin], would you be one?'
You say, 'I am a paladin'
Trimdet Trueheart says 'I have served those such as you my entire life. If you are in need of new equipment such as a [helm], [legplates], [chestplate], [bracer], [vambraces], [gloves], or a pair of [boots] let me know.'
You say, 'What helm?'
Trimdet Trueheart says 'I can craft a Muramite helm into something suitable for you. Nalasrine has managed to form a powerful compound that reinforces some native materials. Bring me a Muramite Helm Armor piece and I can shape it to suit you, then you must take some Muramite metal that has been infused with Nalasrine's mixture and put it together in a forge to form a new helm.'
You say, 'What legplates?'
Trimdet Trueheart says 'Reshaping a pair of Muramite legplates into a pair for a noble one such as you is a pleasure. Bring back a pair of Muramite Greaves and two sheets of Muramite metal. Give only the greaves to me for shaping, once I am done with that you will need to take the metal and the greaves to a forge. Don't forget to infuse the metal with the misxture from Nalasrine before you take it to the forge.'
You say, 'What chestplate?'
Trimdet Trueheart says 'I can easily craft you a chestplate if you bring me back a Muramite Chest Armor. Give that to me and I can make some rough adjustments for you. In order for it to suit you properly however, you will also need to sheets of infused Muramite metal and a forge. Make sure to speak to Nalasrine about infusing the metal.'
You say, 'What bracer?'
Trimdet Trueheart says 'A bracer is rather simple to reshape. If you speak to Nalasrine about her findings, she may be able to help you infuse some Muramite metal to strengthen it. Bring me a Muramite Bracer Armor to work with. One sheet of infused Muramite metal along with the new bracer from me placed in a forge should come out perfectly.'
You say, 'What vambraces?'
Trimdet Trueheart says 'I shall make you some glorious vambraces. Bring to me Muramite Sleeve Armor and I will start shaping it to fit you. Once you have some Muramite metal talk to Nalasrine about infusing it. Then simply take the new vambraces from me and forge them with some of the infused metal.'
You say, 'What gloves?'
Trimdet Trueheart says 'In order for me to craft you some gloves, you will need to find some Muramite metal. I am sure Nalasrine can assist you with infusing the metal, which needs to be done before you forge it. Bring me the Muramite Glove Armor and I will shape some gauntlets for you. Then all you need to do is the final touch with the infused metal and the gauntlets in a forge.'
You say, 'What boots?'
Trimdet Trueheart says 'Bring me back some Muramite Boot Armor and I believe I can rework them into something quite fine for you. You will need a sheet of infused Muramite metal along with the new boots from me in a forge to get a good fit. If you need help with infusing process speak to Nalasrine.'
Nalasrine Twinklecoil is located in the next room.
You say, 'Hail, Nalasrine Twinklecoil'
Nalasrine Twinklecoil says 'Salutations! It is great to see so many eager travelers out and about. How are you enjoying our little city here? I have been quite busy myself. There are so many interesting things to learn about these strange beings that inhabit Taelosia. Their armor in particular is most interesting. I have developed some intriguing compounds. Let me know if you are interested in such things before I just prattle on!'
You say, 'I am interested.'
Nalasrine Twinklecoil says 'Oh, good. Well let me see. Basically, I have been studying the armor that our explorers have been bringing back from their adventures. While it is a bit strangely shaped, as these creatures that seem to reside here are, I have found that by strengthening some native materials it can be reworked into rather fine armor for the likes of you and me.'
You say, 'What armor?'
Nalasrine Twinklecoil says 'If you are looking into having some armor made, you definitely will need to use my infusions. They are a bit pricey, however they are difficult to make and well frankly, I am the only one who can! Use the plate solvent on plate armor, chain solvent on chain, tanning solution on leather, and silk strengthener on silk. All rather intuitive isn't it? Simply take a look at the different types I have for sale.'
Muramite armor begins dropping in Qvic and above. Bring back the appropriate piece of "Muramite XXX Armor" and turn it in to Trimdet Trueheart to get a class-specific, no-stat "Reworked Muramite XXX."
Craft a Muramite Metal Sheet by combining a Meldstone, Water Flask, and Smithy Hammer in a forge. This has a high trivial (282) and a high minimum smithing requirement (in the 240s).
Buy Nalasrine's Superior Plate Solvent from Nalasrine Twinklecoil for around 10,500 pp. Combine the solvent with the Muramite Metal Sheet in a forge (no-fail combine). This results in a NO DROP piece of Infused Muramite Metal.
Combine the Infused Muramite Metal with your piece of Reworked Muramite XXX armor in a forge to receive your quest reward (no-fail combine).
Hand-in dialogues needed. Reward: Trimdet's Boots of Chivalry
Reward: Trimdet's Chestplate of Chivalry
Reward: Trimdet's Bracer of Chivalry
Reward: Trimdet's Gauntlets of Chivalry
Reward: Trimdet's Helm of Chivalry
Reward: Trimdet's Vambraces of Chivalry
Reward: Trimdet's Legplates of Chivalry
Pepe's Got a Brand New Bag (Normal): Find Simmons Duronn at -155, -75, +139, outside the Morden Rasp building around the edge.
You say, 'Hail, Simmons Duronn'
Simmons Duronn says 'I am on the hunt for something, my friend. Think you can [assist] me?'
You say, 'I can assist you.'
Simmons Duronn says 'I have dealt with the natives, selling them some goods. In return they have told me of a way to make an interesting bag to carry goods in, from the Venemous Stonemites that inhabit Vxed, the Crumbling Caverns. If you could [travel there] and bring me back a venom sac from one of those Venemous Stonemites, I would be happy to see if I could make a bag for you.'
You say, 'I will travel there.'
Simmons Duronn says 'I await your return.'
Loot a Venomous Stonemite Poison Sac off A Venomous Stonemite in Vxed and return with it to the ship. Give the sac to Simmons.
Simmons Duronn says 'You found the sac! Now what was it they said to do next? Hmm. I believe they said something about not touching the poison. . . yes now I remember. We shouldn't touch the poison. I believe you should talk to a friend of mine named Rion. He can be found here in the city.' Simmons scribbles something down on a note. 'Take this note and the venom sac to him. He should be able to help you.'
You receive Note to Rion and Venomous Stonemite Poison Sac. Rion is located in the ship past the bank at +170, -90. Give him both items.
Rion says, 'Yes, yes. Hmm, a note from Simmons. Hmm, yes. I do believe I can do it, but my assistant Pepe has wandered off somewhere with all my tools. If you can track [Pepe] down and get my tools back, I think I can help you. Oh and here is your venom sac. Hold on to it for now and if you find my tools, hand them to me along with the venom sac.'
You gain experience!!
You also gain a few platinum.
You say, 'Where is Pepe?'
Rion says, 'I fear I do not know where Pepe is at the moment. He tends to get lost quite a bit. Poor lad is a bit addled. When his mother was on her death bed, I promised her I would look after him though. I don't think he would wander away from the city. At least I hope not. If you find him, ask him to give you my scraping tool. Take this doll too. It is his most prized possession. I am surprised he left it behind.'
You receive a doll named "Lamontt." Pepe often wanders past the bank. Give him his doll.
Pepe says, 'Here tools. Hope boss not get mad.' Pepe begins to hug Lamontt.
You gain experience!!
You receive Scraping Tool. Return to Rion and hand him the Scraping Tool and the Venomous Stonemite Poison Sac.
Rion says 'Very good. I will do my best . . . ' Rion begins to carefully remove the poison from the venom sac. 'Here you go. This should do.'
You gain experience!!
You receive a Prepared Stonemite Sac and Scraping Tool. Return to Simmons Duronn and give him the prepared sac.
Simmons Duronn says 'Okay, let's see. . .' Simmons begins to craft the sac into the shape of a small bag. He then dips it into some sort of liquid. 'This will preserve your new bag and keep its shape. Here you go, I hope it assists you on your adventures.'
You gain experience!! Reward: Treated Stonemite Bag
Poisonmaking Freebie: Help Uiyaniv (Normal): You say, 'Hail, Uiyaniv Tu`Vrozix'
Uiyaniv Tu`Vrozix says 'Hello,' Uiyaniv drawls as he appraises you. 'You may be of use to me. If you are wise enough to handle a few simple tasks, you will free me up to do more important things. Are you [willing] in making yourself useful?'
You say, 'I am willing.'
Uiyaniv Tu`Vrozix nods. 'Good start. Being useful is a good talent to cultivate. I am busy working on some interesting uses for the blood of the creatures they have dubbed Muramites. You can please me by doing some of the bothersome tasks that I have been given so that I can apply my talents to this research. Do you want to make yourself [useful] so that I can study the [Muramite blood]?'
You say, 'What muramite blood?'
Uiyaniv Tu`Vrozix says 'I've never seen one of these Muramites, but I've seen samples of their blood -- though calling it blood somewhat extends the usual meaning of that word. There is little resemblance to our blood and and it certainly interacts with it in a very negative way. It's almost like these creatures are antithetical to us. Maybe that's a little extreme, but their blood carries things in it that are first-class poisons to us. The stuff is a little difficult to work with and will certainly make you break out in a rash if you spill it on yourself. The issue is that the blood spoils easily and must be treated properly. I've figured out how to work with it. If you bring me a sample of Muramite blood, I'll distill it for you into something useful and keep a bit of it for my own use.'
You say, 'How can I be useful?'
Uiyaniv Tu`Vrozix says 'Tolerable. At least you are willing to try to prove yourself. Here is what I propose. I will have you complete many tedious and -- if I can manage it -- painful tasks. The result will mean that I have more free time to work on my own projects. In exchange, if you work hard enough, I will teach you the secret for distillation of the Muramite blood. Don't expect this to happen quickly. Your first task will be to create some simple universal suspension. Just take the simple thickener and a vial of Abysmal Sea water and combine them in you mortar and pestle. Return the suspension to me when you are done.'
You receive 20 x Simple Thickener and 20 x Vial of Abysmal Sea Water. Combine 1 of each in your mortar and pestle.
You have learned the recipe Simple Universal Suspension!
Simple Universal Suspension trivials at 31. After making them all, hand them to him unstacked, up to four at a time. Keep going back and saying "How can I be useful?" and he will give you more to craft until he is satisfied (need to hand in approximately 100), then he will move on to another recipe.
Uiyaniv Tu`Vrozix looks you over with a critical glance, 'I have plenty for you to do. We need some solvent. We use a lot of it around here. Just put one ounce of mild acid and a vial of Abysmal Sea water into you mortar and pestle and mix them. Go do that and leave me to my work. Only come back to give me the solvent.'
You receive 20 x Ounce of Mild Acid and 20 x Vial of Abysmal Sea Water. Combine 1 of each in your mortar and pestle.
You have learned the recipe Simple Solvent!
Simple Solvent trivials at 38. After making them all, hand them to him unstacked, up to four at a time. Keep going back and saying "How can I be useful?" and he will give you more to craft until he is satisfied (need to hand in approximately 100), then he will move on to another recipe.
Uiyaniv Tu`Vrozix says 'You are skilled enough to do something more challenging. We have some need of simple poison, though I cannot tell you exactly why. Just take a vial of simple suspension and one ounce of weak spider venom and combine them in your mortar and pestle. Bring me the resultant poison and you will earn a little more respect.'
You receive 20 x Vial of Simple Suspension and 20 x Ounce of Weak Spider Venom. Combine 1 of each in your mortar and pestle.
You have learned the recipe Simple Contact Poison!
Simple Contact Poison trivials at 46. After making them all, hand them to him unstacked, up to four at a time. Keep going back and saying "How can I be useful?" and he will give you more to craft until he is satisfied (need to hand in approximately 100), then he will move on to another recipe.
Uiyaniv Tu`Vrozix says 'Good. Now, get to work making some injected poison for me. It's not hard to do. Just take a vial of simple solvent and an ounce of weak snake venom and combine them in your mortar and pestle. Bring me the poison when you are done.'
You receive 20 x Vial of Simple Solvent and 20 x Ounce of Weak Snake Venom. Combine 1 of each in your mortar and pestle.
You have learned the recipe Simple Injected Poison!
Simple Injected Poison trivials at 54. After making them all, hand them to him unstacked, up to four at a time. Keep going back and saying "How can I be useful?" and he will give you more to craft until he is satisfied (need to hand in approximately 100), you finally see:
Uiyaniv Tu`Vrozix smiles and nods to you. 'You have proven your worth. You need do no more tasks for us. You have done enough and your skills will be more useful elsewhere. Here is the secret we promised you.' Uiyaniv retrieves a thin piece of paper from his pocket. He tells you that it is a bit of the filter that he uses for distilling Muramite blood. He waves it suddenly under your nose. You can't help but flinch at the stench, which causes him to chuckle. You recognize the smell and are able to figure out exactly what he uses to distill the poison from the blood. Figuring out the process is easy now. You also know that you can teach yourself a more effective process with enough practice. Uiyaniv then continues, 'The same method will work for the material we have been calling Muramite bile, though that probably has less in common with what we know as bile.'
Note that there is currently no use for Muramite Blood Distillate or Muramite Bile.
Ranger Abysmal Armor (Normal): You say, 'Hail, Nadien Goldbrow'
Nadien Goldbrow says 'Hail Wood Elf, I am seeing an archer. A forest stalker of the wilds, one who calls themselves [ranger]. Are you such a person?'
You say, 'I am a ranger.'
Nadien Goldbrow says 'In that case, I am at your service. If you would perform a few simple tasks I will assist you in creating a new set of powerful armor to guard you in battle. I can make you a [helm], [greaves], [chainmail], [bracer], [vambraces], [gloves], and [boots].'
You say, 'What bracer?'
Nadien Goldbrow says 'Bring me a Muramite Bracer Armor section and I can reshape it for you. If you speak to Nalasrine about her findings, she may be able to help you infuse some Muramite chain to strengthen it. One length of infused Muramite chain along with my reworked bracer in a forge should be sufficient.'
You say, 'What chainmail?'
Nadien Goldbrow says 'Merely bring me Muramite Chest Armor. Any final adjustments can be made with two lengths of infused Muramite chain and the new chainmail in a forge. Don't forget - Nalasrine can assist you with the infusion.'
You say, 'What gloves?'
Nadien Goldbrow says 'Bring me some Muramite Glove Armor and I shall craft you some gloves. Don't forget to also find a length of Muramite chain and to talk to Nalasrine about the infusion process. Place the infused chain and the gloves from me in a forge for final adjustments.'
You say, 'What greaves?'
Nadien Goldbrow says 'Simply bring me Muramite Greaves Armor. Two lengths of infused Muramite chain will be necessary to make some final adjustments to the greaves yourself in a forge. Don't forget - Nalasrine can assist you with the infusion.'
You say, 'What helm?'
Nadien Goldbrow says 'In order to craft a helm, I need you to bring me Muramite Helm Armor. I can take this helm and reshape it into something more suitable for you. Once I have done so, take an infused Muramite chain length and in a forge you can make any final adjustments to it yourself. Nalasrine can assist you with the infusing the chain.'
You say, 'What vambraces?'
Nadien Goldbrow says 'Bring me Muramite Sleeve Armor. I will fit them as close as I can, then you must take a length of infused Muramite chain and the sleeves to a forge. Nalasrine carries the infusions for the metal that you will need.'
You say, 'What boots?'
Dialogue needed.
Nalasrine Twinklecoil is located in the next room.
You say, 'Hail, Nalasrine Twinklecoil'
Nalasrine Twinklecoil says 'Salutations! It is great to see so many eager travelers out and about. How are you enjoying our little city here? I have been quite busy myself. There are so many interesting things to learn about these strange beings that inhabit Taelosia. Their armor in particular is most interesting. I have developed some intriguing compounds. Let me know if you are interested in such things before I just prattle on!'
You say, 'I am interested.'
Nalasrine Twinklecoil says 'Oh, good. Well let me see. Basically, I have been studying the armor that our explorers have been bringing back from their adventures. While it is a bit strangely shaped, as these creatures that seem to reside here are, I have found that by strengthening some native materials it can be reworked into rather fine armor for the likes of you and me.'
You say, 'What armor?'
Nalasrine Twinklecoil says 'If you are looking into having some armor made, you definitely will need to use my infusions. They are a bit pricey, however they are difficult to make and well frankly, I am the only one who can! Use the plate solvent on plate armor, chain solvent on chain, tanning solution on leather, and silk strengthener on silk. All rather intuitive isn't it? Simply take a look at the different types I have for sale.'
Muramite armor begins dropping in Qvic and above. Bring back the appropriate piece of "Muramite XXX Armor" and turn it in to Nadien Goldbrow to get a class-specific, no-stat "Reworked Muramite XXX."
Craft a Muramite Chain Link by combining a Meldstone, Water Flask, and File in a forge. This has a high trivial (282) and a high minimum smithing requirement (in the 240s).
Buy Nalasrine's Thick Chain Solvent from Nalasrine Twinklecoil for around 10,500 pp. Combine the solvent with the Muramite Chain Link in a forge (no-fail combine). This results in a NO DROP piece of Infused Muramite Chain.
Combine the Infused Muramite Chain with your piece of Reworked Muramite XXX armor in a forge to receive your quest reward (no-fail combine). Reward: Nadien's Bracer of the Archer
Reward: Nadien's Boots of the Archer
Reward: Nadien's Gauntlets of the Archer
Reward: Nadien's Helm of the Archer
Reward: Nadien's Vambraces of the Archer
Reward: Nadien's Chainmail of the Archer
Reward: Nadien's Greaves of the Archer
Reinforced Jeweler's Kit (Normal): You say, 'Hail, Rilwind Sitnai'
Rilwind Sitnai says 'Greetings. We are busy here, and I have little time for pleasantries. I can sell you supplies, if you have need. I can even help you fix up that old Jeweler's [Kit] of yours. Or perhaps you are here to [assist] me with my work?'
You say, 'What about the kit?'
Rilwind Sitnai says 'Ah, well, we've been working on improving our ability to work with liquid precious metals. To do that, we've had to improve our kits. We've made them a bit larger, and added some reinforcements to help them resist the heat. Neysia can make one for you, just find a turepta shell and two shimmering steel threads and hand them to me along with your Jeweler's Kit and she'll make you a new one.'
Neysia Morningbloom may be found at -140, +210, +98.
You say, 'Hail, Neysia Morningbloom'
Neysia Morningbloom says 'Greetings. I can sell you supplies, if you have need or, I can even help you fix up that old Jeweler's [Kit] of yours. Additionally if you like I can convert the various grades of raw Nihilite for you. I will keep a small amount for our use. I will convert raw amber nihilite, raw crimson nihilite, raw indigo nihilite and raw shimmering nihilite.'
You say, 'What Kit?'
Neysia Morningbloom says 'We've been working on improving our ability to work with liquid precious metals. To do that, we've had to improve our kits. We've made them a bit larger, and added some reinforcements to help them resist the heat. I can make one for you, just find a turepta shell and two shimmering steel threads and hand them to me along with your Jeweler's Kit and I'll make you a new one.'
Turepta Shells are uncommon drops from various tureptas in GoD zones. Shimmering Steel Thread may be purchased elsewhere on the ship from either Garald Samer or Tonlyei Lyhin. The Jeweler's Kit is purchasable from jewelcraft merchants in the same room. Give her the items.
Neysia Morningbloom says 'Good work! Here is your new kit.'
The reward is the Reinforced Jeweler's Kit, used in most GoD jewelcraft recipes. Reward: Reinforced Jeweler's Kit
Rogue Abysmal Armor (Normal): Your Location is -160.02, 170.33, 97.00
You say, 'Hail, Nodnol Oow'
Nodnol Oow says 'I am looking for a [rogue]. A cutthroat, a sneak, a thief! Are you some such nefarious person?'
You say, 'I am a rogue.'
Nodnol Oow grins. 'In that case, I am at your service. If you would perform a few simple tasks I will assist you in creating a new set of powerful armor to guard you in battle. I can make you a [helm], [greaves], [chainmail], [bracer], [vambraces], [gloves], and [boots].'
Other dialogues needed.
You say, 'I want to make a bracer.'
Nodnol Oow says 'Bring me Muramite Bracer Armor section and I can reshape it for you. If you speak to Nalasrine about her findings, she may be able to help you infuse some Muramite chain to strengthen it. One length of infused Muramite chain along with my reworked bracer in a forge should be sufficient.'
Nalasrine Twinklecoil is located in the next room.
You say, 'Hail, Nalasrine Twinklecoil'
Nalasrine Twinklecoil says 'Salutations! It is great to see so many eager travelers out and about. How are you enjoying our little city here? I have been quite busy myself. There are so many interesting things to learn about these strange beings that inhabit Taelosia. Their armor in particular is most interesting. I have developed some intriguing compounds. Let me know if you are interested in such things before I just prattle on!'
You say, 'I am interested.'
Nalasrine Twinklecoil says 'Oh, good. Well let me see. Basically, I have been studying the armor that our explorers have been bringing back from their adventures. While it is a bit strangely shaped, as these creatures that seem to reside here are, I have found that by strengthening some native materials it can be reworked into rather fine armor for the likes of you and me.'
You say, 'What armor?'
Nalasrine Twinklecoil says 'If you are looking into having some armor made, you definitely will need to use my infusions. They are a bit pricey, however they are difficult to make and well frankly, I am the only one who can! Use the plate solvent on plate armor, chain solvent on chain, tanning solution on leather, and silk strengthener on silk. All rather intuitive isn't it? Simply take a look at the different types I have for sale.'
Muramite armor begins dropping in Qvic and above. Bring back the appropriate piece of "Muramite XXX Armor" and turn it in to Nodnol Oow to get a class-specific, no-stat "Reworked Muramite XXX."
Craft a Muramite Chain Link by combining a Meldstone, Water Flask, and File in a forge. This has a high trivial (282) and a high minimum smithing requirement (in the 240s).
Buy Nalasrine's Thick Chain Solvent from Nalasrine Twinklecoil for around 10,500 pp. Combine the solvent with the Muramite Chain Link in a forge (no-fail combine). This results in a NO DROP piece of Infused Muramite Chain.
Combine the Infused Muramite Chain with your piece of Reworked Muramite XXX armor in a forge to receive your quest reward (no-fail combine). Reward: Nodnol's Bracer of the Scoundrel
Reward: Nodnol's Gauntlets of the Scoundrel
Reward: Nodnol's Vambraces of the Scoundrel
Reward: Nodnol's Helm of the Scoundrel
Reward: Nodnol's Boots of the Scoundrel
Reward: Nodnol's Chainmail of the Scoundrel
Reward: Nodnol's Greaves of the Scoundrel
Shadowknight Abysmal Armor (Normal): Rayin Yvain may be found at -175, +175, +100.
You say, 'Hail, Rayin Yvain'
Rayin Yvain says 'I need a dark knight, one who walks in the land of the shadow. Would you be thus, a [shadowknight]?'
You say, 'I am a shadowknight.'
Rayin Yvain says 'I too serve the shadow. If you are in need of new equipment such as [helm], [legplates], [chestplate], [bracer], [vambraces], [gloves], or pair of [boots] let me know.'
You say, 'What boots?'
Rayin Yvain says 'Bring me back Muramite Boot Armor and I believe I can rework them into something quite fine for you. You will need a sheet of infused Muramite metal along with new boots from me in a forge to get a good fit. If you need help in the infusing process, just talk to Nalasrine.'
You say, 'What bracer?'
Rayin Yvain says 'Bring me Muramite Bracer Armor to work with. One sheet of infused Muramite metal along with the new bracer from me placed in a forge should be sufficient for it to fit just right.'
You say, 'What chestplate?'
Dialogue needed.
You say, 'What gloves?'
Rayin Yvain says 'In order for me to craft you some gloves, you need to find some more Muramite metal. I am sure Nalasrine can assist you with infusing the metal, which needs to be done before you forge it. Bring me Muramite Glove Armor and I will shape some gauntlets for you. Then all you need to do is the final touch with the infused metal and gauntlets in a forge.'
You say, 'What helm?'
Rayin Yvain says 'I can craft a Muramite helm into something suitable for you. Nalasrine has managed to form a powerful compound that reinforces some native materials. Bring me Muramite Helm Armor piece and I can shape it to suit you, then you must take some Muramite metal that has been infused with Nalasrine's mixture and put it together in a forge with the new helm.'
You say, 'What legplates?'
Rayin Yvain says 'Bring back a pair of Muramite Greaves and two sheets of Muramite metal. Give only the greaves to me for shaping, once I am done with that you will need to take the metal and greaves to a forge. Don't forget to infuse the metal with the mixture from Nalasrine before you take it to the forge.'
You say, 'What vambraces?'
Rayin Yvain says 'I shall make you some glorious vambraces. Hmm, find some Muramite Sleeve Armor. Bring that to me and I will start shaping it to fit you. Once you have some Muramite metal talk to Nalasrine about infusing it. Then simply take the new vambraces from me and forge them with some of the infused metal.'
Nalasrine Twinklecoil is located in the next room.
You say, 'Hail, Nalasrine Twinklecoil'
Nalasrine Twinklecoil says 'Salutations! It is great to see so many eager travelers out and about. How are you enjoying our little city here? I have been quite busy myself. There are so many interesting things to learn about these strange beings that inhabit Taelosia. Their armor in particular is most interesting. I have developed some intriguing compounds. Let me know if you are interested in such things before I just prattle on!'
You say, 'I am interested.'
Nalasrine Twinklecoil says 'Oh, good. Well let me see. Basically, I have been studying the armor that our explorers have been bringing back from their adventures. While it is a bit strangely shaped, as these creatures that seem to reside here are, I have found that by strengthening some native materials it can be reworked into rather fine armor for the likes of you and me.'
You say, 'What armor?'
Nalasrine Twinklecoil says 'If you are looking into having some armor made, you definitely will need to use my infusions. They are a bit pricey, however they are difficult to make and well frankly, I am the only one who can! Use the plate solvent on plate armor, chain solvent on chain, tanning solution on leather, and silk strengthener on silk. All rather intuitive isn't it? Simply take a look at the different types I have for sale.'
Muramite armor begins dropping in Qvic and above. Bring back the appropriate piece of "Muramite XXX Armor" and turn it in to Rayin Yvain to get a class-specific, no-stat "Reworked Muramite XXX."
Craft a Muramite Metal Sheet by combining a Meldstone, Water Flask, and Smithy Hammer in a forge. This has a high trivial (282) and a high minimum smithing requirement (in the 240s).
Buy Nalasrine's Superior Plate Solvent from Nalasrine Twinklecoil for around 10,500 pp. Combine the solvent with the Muramite Metal Sheet in a forge (no-fail combine). This results in a NO DROP piece of Infused Muramite Metal.
Combine the Infused Muramite Metal with your piece of Reworked Muramite XXX armor in a forge to receive your quest reward (no-fail combine). Reward: Rayin's Bracer of Abhorrence
Reward: Rayin's Boots of Abhorrence
Reward: Rayin's Gauntlets of Abhorrence
Reward: Rayin's Helm of Abhorrence
Reward: Rayin's Vambraces of Abhorrence
Reward: Rayin's Chestplate of Abhorrence
Reward: Rayin's Legplates of Abhorrence
Shaman Abysmal Armor (Normal): Kanlekuu Grabboz may be found at -140, +135.
You say, 'Hail, Kanleku Grabboz'
Kanleku Grabboz says 'I seek those who study the spirit world and potions and tribal magic. I seek a shaman. Are you a [shaman]?'
You say, 'I am a shaman.'
Kanleku Grabboz says 'Wonderful. In that case, I am at your service. If you would perform a few simple tasks I will assist you in creating a new set of powerful armor to guard you in battle. I can make you a [helm], [greaves], [chainmail], [bracer], [vambraces], [gloves], and [boots].'
You say, 'What boots?'
Kanleku Grabboz says 'In order to make you some boots, I need you to bring me a Muramite Boot Armor piece. Then take a length of infused Muramite chain and shape the chain to the boots in a forge. Nalasrine can assist you with the infusion, by the way.'
You say, 'What bracer?'
Kanleku Grabboz says 'Bring me a Muramite Bracer Armor section and I can reshape it for you. If you speak to Nalasrine about her findings, she may be able to help you infuse some Muramite chain to strengthen it. One length of infused Muramite chain along with my reworked bracer in a forge should be sufficient.'
You say, 'What chainmail?'
Kanleku Grabboz says 'Merely bring me Muramite Chest Armor. Any final adjustments can be made with two lengths of infused Muramite chain and the new chainmail in a forge. Don't forget - Nalasrine can assist you with the infusion.'
You say, 'What gloves?'
Kanleku Grabboz says 'Bring me some Muramite Glove Armor and I shall craft you some gloves. Don't forget to also find a length of Muramite chain and to talk to Nalasrine about the infusion process. Place the infused chain and the gloves from me in a forge for final adjustments.'
You say, 'What greaves?'
Kanleku Grabboz says 'Simply bring me Muramite Greaves Armor. Two lengths of infused Muramite chain will be necessary to make some final adjustments to the greaves yourself in a forge. Don't forget - Nalasrine can assist you with the infusion.'
You say, 'What helm?'
Kanleku Grabboz says 'In order to craft a helm, I need you to bring me Muramite Helm Armor. I can take this helm and reshape it into something more suitable for you. Once I have done so, take an infused Muramite chain length and in a forge you can make any final adjustments to it yourself. Nalasrine can assist you with the infusing the chain.'
You say, 'What vambraces?'
Kanleku Grabboz says 'Bring me Muramite Sleeve Armor. I will fit them as close as I can, then you must take a length of infused Muramite chain and the sleeves to a forge. Nalasrine carries the infusions for the metal that you will need.'
Nalasrine Twinklecoil is located in the next room.
You say, 'Hail, Nalasrine Twinklecoil'
Nalasrine Twinklecoil says 'Salutations! It is great to see so many eager travelers out and about. How are you enjoying our little city here? I have been quite busy myself. There are so many interesting things to learn about these strange beings that inhabit Taelosia. Their armor in particular is most interesting. I have developed some intriguing compounds. Let me know if you are interested in such things before I just prattle on!'
You say, 'I am interested.'
Nalasrine Twinklecoil says 'Oh, good. Well let me see. Basically, I have been studying the armor that our explorers have been bringing back from their adventures. While it is a bit strangely shaped, as these creatures that seem to reside here are, I have found that by strengthening some native materials it can be reworked into rather fine armor for the likes of you and me.'
You say, 'What armor?'
Nalasrine Twinklecoil says 'If you are looking into having some armor made, you definitely will need to use my infusions. They are a bit pricey, however they are difficult to make and well frankly, I am the only one who can! Use the plate solvent on plate armor, chain solvent on chain, tanning solution on leather, and silk strengthener on silk. All rather intuitive isn't it? Simply take a look at the different types I have for sale.'
Muramite armor begins dropping in Qvic and above. Bring back the appropriate piece of "Muramite XXX Armor" and turn it in to Kanleku Grabboz to get a class-specific, no-stat "Reworked Muramite XXX."
Craft a Muramite Chain Link by combining a Meldstone, Water Flask, and File in a forge. This has a high trivial (282) and a high minimum smithing requirement (in the 240s).
Buy Nalasrine's Thick Chain Solvent from Nalasrine Twinklecoil for around 10,500 pp. Combine the solvent with the Muramite Chain Link in a forge (no-fail combine). This results in a NO DROP piece of Infused Muramite Chain.
Combine the Infused Muramite Chain with your piece of Reworked Muramite XXX armor in a forge to receive your quest reward (no-fail combine). Reward: Kanleku's Vambraces of Spirits
Reward: Kanleku's Boots of Spirits
Reward: Kanleku's Bracer of Spirits
Reward: Kanleku's Gauntlets of Spirits
Reward: Kanleku's Helm of Spirits
Reward: Kanleku's Chainmail of Spirits
Reward: Kanleku's Greaves of Spirits
Smithing Freebie: Help Snokin (Normal): Snokin Breaksteel is located on the ship at +95, +275.
You say, 'Hail, Snokin Breaksteel'
Snokin Breaksteel says 'Hello, Snokin can help you with da smith stuff. Can you [help] Snokin? Snokin too busy, need more time at forge with new ore, less time doing silly work for Wayfarers.'
You say, 'I can help.'
Snokin Breaksteel smiles broadly. 'You is nice person! Da Wayfarers wants Snokin to make lots of silly things for dem, but Snokin want to make stuff with [new ore], not old steel. Can you do some [silly work] for Snokin?'
You say, 'What new ore?'
Snokin Breaksteel says 'It is strange ore, Snokin never see anything like it. It very easy to work with, if you knows the way. It also make very strong steel. Dey say dat it get dat way when something big, like explosion or something magic, make all da metal line up. So dey call it aligned ore,' Snokin says the words, clearly unsure of what they mean. 'It make great steel! Very strong and make good, sharp edges if you hammer on it right way. Snokin know how to make steel from new ore. If you find any ore, bring to Snokin and Snokin give you new steel.'
You say, 'I can do some silly work.'
Snokin Breaksteel says 'Tank you! If you make stuff for Snokin, Snokin can work more on new ore. You work as hard as Snokin, den Snokin give you good reward. Snokin knows people work good for good reward. Take dis stuff and make studs so Snokin no have to. Just go to forge and put stuff in. One of each is good. When you have da studs, bring to Snokin. When you do enough work, Snokin will show you da secret for makin da new ore into da new steel.'
You receive 20 x Vial of Abysmal Sea Water, 20 x Metal Scraps, 20 x Simple Iron File. Combine 1 of each in the nearby forge. You also receive the book Makin Nice Stuff.
You have learned the recipe Simple Stud!
Simple Stud trivials at 31. After making them all, hand them to him unstacked, up to four at a time. Keep going back and saying "What silly work?" and he will give you more until he is satisfied (need to hand in approximately 100).
Snokin Breaksteel smiles at you, showing very crooked teeth. 'Good! Snokin needs some rings for da Wayfarers. If you could make dem. Snokin be happy. Take dis stuff and go over to da forge and make rings. Bring da rings to Snokin.'
This time he hands you 20 x Simple Iron File, 20 x Simple Ring Mold, and 20 x Metal Scraps. As before, combine 1 of each in a forge.
You have learned the recipe Simple Ring!
Simple Ring trivials at 38. After making them hand them to him unstacked, up to four at a time. Keep going back and saying "What silly work?" and he will give you more until he is satisfied (need to hand in approximately 100).
Snokin Breaksteel says 'Snokin not tink you as bad as dey say. Snokin need chisels and you can make dem. Take dis stuff to da forge, put one of each of dem in and make da chisel. Bring da chisel to Snokin fast, da Wayfarers needs dem.'
This time he hands you 20 x Simple Chisel Mold and 20 x Metal Scraps. Again, combine 1 of each in a forge.
You have learned the recipe Simple Chisel!
Simple Chisel trivials at 46. After making them hand them to him unstacked, up to four at a time. Keep going back and saying "What silly work?" and he will give you more until he is satisfied (need to hand in approximately 100).
Snokin Breaksteel says 'Good! More stuff for you to do for Snokin. Snokin like you. Make files and bring Snokin soon. Take dis stuff and put into forge to make files. Go now, work hard for reward, not stand and look at Snokin.'
This time he hands you 20 x Flask of Abysmal Sea Water, 20 x Simple File Mold, and 20 x Metal Scraps. Again, combine 1 of each in a forge.
You have learned the recipe Simple File!
Simple File trivials at 54. After making them hand them to him unstacked, up to four at a time. Keep going back and saying "What silly work?" and he will give you more until he is satisfied (need to hand in approximately 100).
Snokin Breaksteel says 'No more work now. Snokin happy wit what you do already. Snokin show you secret now. You not tell anyone!' Snokin looks around furtively, as if everyone on the ship doesn't hear everything he says. He hands you a piece of paper with some very precise writing on it. You can only guess that he did not write it. You look it over and you understand the methods for smelting the aligned ore and the shimmering aligned ore. It's not a complicated process, but you would have needed information that only that Wayfarers have to uncover it. Now all you need to do is place the ore into a forge and you will be able to make the steel. However, you are certain that you can improve the process if you work with the ore long enough. Snokin takes the paper back and pulls out a ledger. You see him carefully note your name on the ledger with clear and concise penmanship that matches that on the paper you just read.
You can now make (and learn) the Bar of Aligned Steel and Bar of Shimmering Steel recipes.
Taelosian Geomancy Stones (GoD spells) (Normal): Reyfin Malakwa may be found on the ship at +225, +290, +100.
You say, 'Hail, Reyfin Malakwa'
Reyfin Malakwa stares silently out over the ocean towards the magical wards protecting the ship from the unyielding onslaught of the pounding waves. He jumps back terrorized when he realizes your presence. His visage calms a bit when he senses you mean him no immediate harm. He ponders you timidly for a moment and then leans down and begins drawing something in the sea grime that covers one of the boxes. You study his sketch for a moment and begin to understand that it is a rune of sorts. Three arching lines join in the center to form a sort of Y-shape.
All classes can turn in Taelosian Geomancy Stones to Reyfin Malakwa for a spell or discipline depending upon the class. Taelosian Geomancy Stone Jelki may be turned in by all classes, while Taelosian Geomancy Stone Eril and Taelosian Geomancy Stone Yiktu may only be turned in by spellcasting classes.
Reyfin Malakwa shuffles back from you until familiarity dawns on him. You reach forward and hold the stone out in front of you. He tilts his head slightly and studies the stone for a moment before taking it from your hands.
Reyfin Malakwa holds the symbol up over his head and speaks out over the dark waters. He begins to recite some sort of ritual as the runes begin to drip a sticky-looking fluid down on to his hands and arms. The rune begins to glow, softly at first, but it becomes brighter as Reyfin's voice rises. Suddenly, the symbol sublimates into a hovering mass of glowing vapor. Reyfin turns to you and beckons. You hold out your hand and receive the glowing vapor. Almost immediately the vapor solidifies into a familiar shape. Reyfin bends down and begins drawing in the grime once again. You see a pair of jagged lines crossing in the center.
For Taelosian Geomancy Stone Jelki:
Bards receive the song Echo of the Trusik.
Beastlords receive the spell Trushar's Mending.
Berserkers receive the tome Battle Cry of the Mastruq (also vendor-sold, unlike any other quest rewards here).
Clerics receive the spell Holy Elixir.
Druids receive the spell Sylvan Fire.
Enchanters receive the spell Bliss of the Nihil.
Magicians receive the spell Elemental Siphon.
Monks receive the tome Phantom Shadow.
Necromancers receive the spell Night Stalker.
Paladins receive the spell Wave of Trushar.
Rangers receive the spell Sylvan Burn.
Rogues receive the tome Kyv Strike.
Shadowknights receive the spell Black Shroud.
Shaman receive the spell Breath of Trushar.
Warriors receive the tome Bellow of the Mastruq.
Wizards receive the spell White Fire.
For Taelosian Geomancy Stone Eril:
Bards receive the song Dark Echo.
Beastlords receive the spell Trushar's Frost.
Clerics receive the spell Order.
Druids receive the spell Sylvan Embers.
Enchanters receive the spell Madness of Ikkibi.
Magicians receive the spell Monster Summoning IV.
Necromancers receive the spell Night's Beckon.
Paladins receive the spell Holy Order.
Rangers receive the spell Sylvan Call.
Shadowknights receive the spell Miasmic Spear.
Shaman receive the spell Daluda's Mending.
Wizards receive the spell Telaka.
For Taelosian Geomancy Stone Yiktu:
Bards receive the song War March of the Mastruq.
Beastlords receive the spell Turepta Blood.
Clerics receive the spell Holy Light.
Druids receive the spell Sylvan Infusion.
Enchanters receive the spell Dreary Deeds.
Magicians receive the spell Rock of Taelosia.
Necromancers receive the spell Night Fire.
Paladins receive the spell Light of Order.
Rangers receive the spell Sylvan Light.
Shadowknights receive the spell Mental Horror.
Shaman receive the spell Balance of the Nihil.
Wizards receive the spell Black Ice. Reward: Spell: Trushar's Frost
Reward: Spell: Turepta Blood
Reward: Song: Dark Echo
Reward: Spell: Sylvan Light
Reward: Spell: Holy Light
Reward: Song: War March of the Mastruq
Reward: Song: Echo of the Trusik
Reward: Spell: Night Fire
Reward: Spell: Sylvan Call
Reward: Spell: Sylvan Infusion
Reward: Spell: Breath of Trushar
Reward: Spell: Holy Order
Reward: Spell: Mental Horror
Reward: Spell: Holy Elixir
Reward: Spell: Black Ice
Reward: Spell: White Fire
Reward: Spell: Dreary Deeds
Reward: Spell: Balance of the Nihil
Reward: Spell: Bliss of the Nihil
Reward: Spell: Trushar's Mending
Reward: Spell: Elemental Siphon
Reward: Tome of Bellow of the Mastruq
Reward: Spell: Wave of Trushar
Reward: Spell: Black Shroud
Reward: Spell: Sylvan Fire
Reward: Spell: Night Stalker
Reward: Tome of Phantom Shadow
Reward: Spell: Sylvan Burn
Reward: Spell: Light of Order
Reward: Spell: Daluda's Mending
Reward: Spell: Sylvan Embers
Reward: Tome of Kyv Strike
Reward: Spell: Telaka
Reward: Spell: Rock of Taelosia
Reward: Spell: Monster Summoning IV
Reward: Spell: Night's Beckon
Reward: Spell: Order
Reward: Spell: Madness of Ikkibi
Reward: Spell: Miasmic Spear
Reward: Tome of Battle Cry of the Mastruq
The Fourteen Great Adventurers (Normal): Your Location is -431.30, -226.01, 87.19.
You say, 'Hail, De`van Szostek'
De`van Szostek focuses his attention on ______.
De`van Szostek says 'Well, hello there. Have you come to listen to my tale of sorrow? Please say [yes].'
You say, 'Yes.'
De`van Szostek says 'Find a place to sit, for what I am about to tell you is a tale of fourteen great adventurers who met the full force of the Muramites head on . . . [continue].'
You say, 'Continue.'
De`van Szostek says 'When the brotherhood first arrived here, we sent out scouts to gather information about the area. Those scouts were some of our best and they were executing their task flawlessly until one day the information stopped. All of the brotherhood began to worry. We sent a young scout named Falcin to investigate. Soon after his departure, he returned in bad condition. Falcin died shortly afterward, but not before he detailed the gruesome practices of the Muramite army. This upset many, including a group of fourteen legendary adventurers who had arrived shortly after we hit land . . . [continue].'
You say, 'Continue.'
De`van Szostek says 'Feeling that things were getting out of hand, these fourteen came to me and asked that I help them by telling them everything we had found out about the continent thus far. Seeing the light of determination in their eyes, I decided to reveal confidential information to them. I figured they would just leave things to us once they knew how serious the situation was, but knowledge of how dire things could become just fueled the spirit of honor within all of them. I told them that it would be brought under control by the brotherhood, but they refused to listen. They decided that the only solution was to destroy the leader of this invading force . . . [continue].'
You say, 'Continue.'
De`van Szostek says 'That morning, those of them who chose to save us said goodbye to their friends and family, and the rest -- all good friends of mine -- asked me to honor them. They wanted me to say that I believed they would accomplish what it was they set out to do. I told them I would have a mug of ale waiting for all of them upon their triumphant return, but while I said this aloud, deep inside I knew that this would not turn out well . . . [continue].'
You say, 'Continue.'
De`van Szostek says 'The next morning I gathered all of them together and cast a spell on their leader that would allow me to communicate with him through his mind and see what he saw. So, off they went, leaving behind six of our residents -- Sophia, Verna, Irena, Jenna, Gizzmu, and Aprilia -- to wait for their return. Days passed and nights of unrest became worse and worse as visions of their battles popped into my mind. I saw them fighting through Qinimi and stalking through the sewers. I witnessed their arrival in Yxtta where they begin to have problems making it through. I saw one of them almost fall before the rest rushed to his aid and saved him. Even through all of this, they never once considered turning back . . . [continue].'
You say, 'Continue.'
De`van Szostek says 'A short time went by and my mind was oddly silent. I spent those moments trying to comfort the others as they began to ask me questions. Fearing I would reveal my worry, I reassured them that everything was fine and that our heroes would return shortly. There was more silence and my hopes began to wane. Then, I had another vision. They were still alive and were fighting in an area with a huge crater at its center. This, I surmised, was where some kind of explosion occurred that had caused all of the destruction I'd seen. Our friends fought on through this until they finally went as far as they could go . . . [continue].'
You say, 'Continue.'
De`van Szostek says 'They had finally made it to the entrance of Tacvi, the broken temple of the enslaved trusik. It was inside this temple that the trusik worshipped a false god named Trushar. It was here that the army's leader could be found, this ominous being we knew only as the Zun'Muram. It was here that I would receive my last vision and the link to my friends would disappear. The last thing I saw was all of them bruised and beaten, yet still determined to stop this threat to Norrath. Before entering the lair of the fearsome beast, they all embraced each other. That is where the visions stopped and the [mystery] began.'
You say, 'What mystery?'
De`van Szostek says 'Well, you see. this happened some time ago and as each day passes, me and the others sink deeper into depression. With our hope quickly dying, all we can do now is pray for some sort of closure. While I do not want to fully admit it, I believe our heroes all met their demise and now I just want them to be honored in death. I have taken enough of your time and I appreciate that you listened to me. Telling the story helps me feel better, but now I must go back to wondering what has happened [unless] . . .'
You say, 'Unless what?'
De`van Szostek sends this as a private message:
De`van Szostek says 'You seem quite interested in what I have said here and while I could be wrong, when I look at you I see a glimpse of the same honor-filled spirit I saw in them. I know it may be too much to ask, but we have all been suffering for a long time and . . . well, if you ever find yourself inside Tacvi, and you come across the remains of an adventurer, bring back what you find. For me, I would like to have the writings of Xenaida, Wijdan, Rytan, Kaikachi, Vahlara, Frizznik, Zajeer, and Valtron. As for the rest of them, I would ask that you return the memories to the six they left here on the boat. While this task is not an easy one, I shall handsomely reward anyone who returns all of these things to the proper people.'
Handing De`van Szostek any of the writings by the mentioned people nets you this:
De`van Szostek says 'This tome will serve as a remnant of a great warrior who died protecting our realm from the menace of the Muramites. I thank you, ______, and ask that you bring more if you find them.'
Sophia Florence is a dwarf located at -126.28, 236.84, 115.19, in the building with the baking and brewing merchants.
You say, 'Hail, Sophia Florence'
Sophia Florence focuses her attention on ______.
Sophia Florence wipes away a tear as she turns to face you. Hello ______, sorry if I seem somewhat antisocial but it has been many days since I last saw my father Lyndro and as each hour passes the possibility that he may never return becomes more apparent. While I have not given up hope it gets harder each day not to. If he is never to return to me I wish that I had something to remember him by, something that let me know he died just as brave a man as he has always been.
Give her Lyndro's Writings.
Sophia Florence takes the dusty tome from ______'s hands.
Sophia Florence's eyes open wide as she takes the journal and runs her hands over the front cover. Opening the book to the last page tears begin to roll down her cheeks and land on the parchment. Finishing the last line Sophia looks up to you and says, 'I don't know what to say but thank you. De'van mentioned that he had told someone of my worries and now here you are with the final writings of my father. You are truly a blessing sent by the Gods and I thank you once again, but I must ask that you do the same for the others who are worried about the loved ones that traveled with my father. If you have already helped everyone please tell De'van that your task is complete and he will reward you.'
Verna Abella is a barbarian located at -127.06, 227.74, 115.19, next to Sophia.
You say, 'Hail, Verna Abella'
Verna Abella focuses her attention on ______.
Verna Abella seems to be deep in thought. She ignores you at first but eventually turns towards you with a somber look on her face. 'Forgive me. I am not much of a talker these days since Silius left on his journey with Lyndro and the others. Sitting here everyday wishing that they would return has consumed me to the point that I can do nothing else. If only I had some proof of what has happened to Silius. Anything at all would help me in this time of wonder and worry.'
Give her Silius' Writings.
Verna Abella takes the dusty tome from ______'s hands.
Verna Abella takes the book from your hands instantly recognizing it. 'Does this mean he is . . .' She stops for a second choking back tears as the reality of Silius' passing hits her. 'I thank you for bringing this to me I shall cherish it always. Please help the others who have been suffering like me, bring them the closure you have given to me so that they can get on with their lives. Forgive me but I must be going there is much I must do. If you have already helped everyone please tell De'van that your task is complete and he will reward you.'
Aprilia Marrow is a human located at -115.71, 226.99, 131.19, upstairs in the same building from Sophia and Verna.
You say, 'Hail, Aprilia Marrow'
Aprilia Marrow focuses her attention on ______.
Aprilia Marrow groans softly as she turns to face you. 'Please leave me be. My darling Prathun has yet to return to me and each day weakens my resolve. I know in my heart he is out there somewhere, but with no word since the day he left, I fear that my heart may be wrong. If only I had something that would let me know what has happened to him.'
Give her Prathun's Writings.
Aprilia Marrow takes the dusty tome from ______'s hands.
Aprilia Marrow says 'I thought I would never have to face this reality, but here it is -- the proof I asked for. While these pages detail the adventures of my love, it is you who are the great one. While I shall forever be pained by this, I am in your debt for helping me. Please leave me now and find those others who suffer the continued disappearance of their loved ones. If you have already helped everyone, please tell De'van that your task is complete and he will reward you.'
Jenna Gurell is a gnome located at -170.21, 250.03, 115.19, in the same building and on the same level as Sophia and Verna.
You say, 'Hail, Jenna Gurell'
Jenna Gurell focuses her attention on ______.
Jenna Gurell says 'Please do not disturb me. I am mourning the loss of my dear Rashere. While I do not know if his fate has yet been sealed the empty feeling in my heart tells me so. If only I could see him once more, if only I could read his words again.'
Give her Rashere's Writings.
Jenna Gurell takes the dusty tome from ______'s hands.
Jenna Gurell opens the book and begins to read from the last page aloud. As she reaches the final sentence her voice begins to crack and tears stream down her face. Wiping the tears from her face Jenna looks up at you and says `Thank you but I really must be going. If you have done this wonderful thing for the others who have been suffering with me then return to De`van and tell him your task is complete and he will reward you.' Unable to continue she turns away from you motioning for you to leave.
Gizzmu the Wise is an erudite located at -250.35, 100.07, 117.49, one level down from the Grozmok Stone, to the right (with the magus behind you).
You say, 'Hail, Gizzmu the Wise'
Gizzmu the Wise focuses her attention on ______.
Gizzmu the Wise says 'Forgive me but sometimes I get so distracted when I stare out at the water here. I hate this feeling of worry that has overcome me. Here I am waiting for my son's return and yet something keeps telling me my wait is for naught. He is not coming back that is all I can think, but something keeps me hoping. I am sure you have heard our story, there are several others on this ship who have been awaiting the return of the 14 adventurers who set out to stop the Force Commander, one of them was my son Maddoc. While I am close to giving up, I would at least like to have something of his to remember him by. Something I can keep with me so I know somehow he is still looking out for me.'
Give her Maddoc's Writings.
Gizzmu the Wise takes the dusty tome from ______'s hands.
Gizzmu the Wise takes the bound volume from your hands and weeps. As she flips from page to page the crying becomes more intense until finally she closes the book unable to continue. 'Something told me you would bring an end to my worry. While this is not the happy return I had wished for it will help me move on. May your adventures be plentiful and your spirit forever blessed. If you have already helped everyone, please tell De'van that your task is complete and he will reward you.'
Irena Pereira is a vah shir located at -310.61, -179.49, 99.19, down the left stairs from the Grozmok Stone (with the magus behind you), then down the stairs to the left of Malandra.
You say, 'Hail, Irena Pereira'
Irena Pereira focuses her attention on ______.
Irena Pereira says 'You must be the one De'van spoke to. I'm not looking for any of your help. I know that the mighty Absor will return someday and until I am proven wrong I will continue to wait for him to arrive.'
Give her Absor's Writings.
Irena Pereira takes the dusty tome from ______'s hands.
Irena Pereira stops to look at the tome refusing to believe it is what it seems. As she leafs through each page she starts to get choked up. Slamming the book closed defying her want to shed tears she looks up at you and kneels. 'I thank thee mighty adventurer for helping place the spirit of Absor to rest. If you have already helped everyone please tell De'van that your task is complete and he will reward you.'
You say, 'Hail, De`van Szostek'
De`van Szostek says 'There is nothing more I can tell you. If you accomplish what I ask, then I will reward you. Until then, there is nothing left to say.'
You say, 'My task is complete.'
De`van Szostek says 'I thank you, ______, and as I promised, here is a reward for your efforts. Guard this with your life, for while it may not seem like much, I believe its potential will increase when we discover more about these beings and the realm they came from.'
You receive a Tome of New Beginnings (as of 13 Sep 2004, this is still not usable by berserkers). Reward: Tome of New Beginnings
Warrior Abysmal Armor (Normal): You say, 'Hail, Vadd Rabbok'
Vadd Rabbok says 'I seek a powerful warrior. One who does not shy from battle or duty. Are you such a [warrior]?'
You say, 'I am a warrior.'
Vadd Rabbok says 'The world does not turn without the service of those such as yourself. If you are in need of new equipment such as [helm], [legplates], [chestplate], [bracer], [vambraces], [gloves], or pair of [boots] let me know.'
You say, 'What boots?'
Vadd Rabbok says 'Bring me back Muramite Boot Armor and I believe I can rework them into something quite fine for you. You will need a sheet of infused Muramite metal along with new boots from me in a forge to get a good fit. If you need help in the infusing process, just talk to Nalasrine.'
You say, 'What chestplate?'
Vadd Rabbok says 'Bring back Muramite Chest Armor. Give that to me and I can make some rough adjustments for you. In order for it to suit you properly however, you will also need two sheets of infused Muramite metal and a forge. Make sure to speak to Nalasrine about infusing the metal.'
You say, 'What gloves?'
Vadd Rabbok says 'In order for me to craft you some gloves, you need to find some more Muramite metal. I am sure Nalasrine can assist you with infusing the metal, which needs to be done before you forge it. Bring me Muramite Glove Armor and I will shape some gauntlets for you. Then all you need to do is the final touch with the infused metal and gauntlets in a forge.'
You say, 'What helm?'
Vadd Rabbok says 'I can craft a Muramite helm into something suitable for you. Nalasrine has managed to form a powerful compound that reinforces some native materials. Bring me Muramite Helm Armor piece and I can shape it to suit you, then you must take some Muramite metal that has been infused with Nalasrine's mixture and put it together in a forge with the new helm.'
You say, 'What legplates?'
Vadd Rabbok says 'Bring back a pair of Muramite Greaves and two sheets of Muramite metal. Give only the greaves to me for shaping, once I am done with that you will need to take the metal and greaves to a forge. Don't forget to infuse the metal with the mixture from Nalasrine before you take it to the forge.'
You say, 'What vambraces?'
Vadd Rabbok says 'I shall make you some glorious vambraces. Hmm, find some Muramite Sleeve Armor. Bring that to me and I will start shaping it to fit you. Once you have some Muramite metal talk to Nalasrine about infusing it. Then simply take the new vambraces from me and forge them with some of the infused metal.'
Nalasrine Twinklecoil is located in the next room.
You say, 'Hail, Nalasrine Twinklecoil'
Nalasrine Twinklecoil says 'Salutations! It is great to see so many eager travelers out and about. How are you enjoying our little city here? I have been quite busy myself. There are so many interesting things to learn about these strange beings that inhabit Taelosia. Their armor in particular is most interesting. I have developed some intriguing compounds. Let me know if you are interested in such things before I just prattle on!'
You say, 'I am interested.'
Nalasrine Twinklecoil says 'Oh, good. Well let me see. Basically, I have been studying the armor that our explorers have been bringing back from their adventures. While it is a bit strangely shaped, as these creatures that seem to reside here are, I have found that by strengthening some native materials it can be reworked into rather fine armor for the likes of you and me.'
You say, 'What armor?'
Nalasrine Twinklecoil says 'If you are looking into having some armor made, you definitely will need to use my infusions. They are a bit pricey, however they are difficult to make and well frankly, I am the only one who can! Use the plate solvent on plate armor, chain solvent on chain, tanning solution on leather, and silk strengthener on silk. All rather intuitive isn't it? Simply take a look at the different types I have for sale.'
Muramite armor begins dropping in Qvic and above. Bring back the appropriate piece of "Muramite XXX Armor" and turn it in to Vadd Rabbok to get a class-specific, no-stat "Reworked Muramite XXX."
Craft a Muramite Metal Sheet by combining a Meldstone, Water Flask, and Smithy Hammer in a forge. This has a high trivial (282) and a high minimum smithing requirement (in the 240s).
Buy Nalasrine's Superior Plate Solvent from Nalasrine Twinklecoil for around 10,500 pp. Combine the solvent with the Muramite Metal Sheet in a forge (no-fail combine). This results in a NO DROP piece of Infused Muramite Metal.
Combine the Infused Muramite Metal with your piece of Reworked Muramite XXX armor in a forge to receive your quest reward (no-fail combine). Reward: Vadd's Chestplate of Elite Combat
Reward: Vadd's Bracer of Elite Combat
Reward: Vadd's Boots of Elite Combat
Reward: Vadd's Helm of Elite Combat
Reward: Vadd's Vambraces of Elite Combat
Reward: Vadd's Gauntlets of Elite Combat
Reward: Vadd's Legplates of Elite Combat
Wizard Abysmal Armor (Normal): You say, 'Hail, Nunkin Coggrinder'
Nunkin Coggrinder says 'Hello there! Are you a manipulator of fire, ice, and magic? Are you the most powerful of those that claim to be casters? Are you a [wizard]?'
You say, 'I am a wizard.'
Nunkin Coggrinder says 'This is good. I do love to converse with fellow wizards. In any case, to help a fellow wizard I may be able to offer my services. If you are in need of new equipment such as [circlet], [pantaloons], [robe], [bracer], [sleeves], [gloves], and [sandals] please let me know.'
You say, 'What bracer?'
Nunkin Coggrinder says 'A bracer? Of course! If you speak to Nalasrine about her findings, she may be able to help you infuse some Muramite silk thread to strengthen it. One length of infused Muramite silk thread along with a reworked bracer would suit you just fine. Find a Muramite Bracer Armor piece and return it to me for reworking.'
You say, 'What circlet?'
Nunkin Coggrinder says 'I can shape you a beautiful circlet from Muramite Helm Armor. All you need to do is find some Muramite silk thread. A strengthened thread woven over the circlet in a loom shall yield a fine circlet indeed. Talk to Nalasrine about the strengthening process.'
You say, 'What gloves?'
Nunkin Coggrinder says 'Find some Muramite silk thread, I am sure Nalasrine can assist you with stregnthening it. Bring me Muramite Glove Armor and I will shape them for you, once I have finished you can add the final touches yourself in a loom.'
You say, 'What pantaloons?'
Nunkin Coggrinder says 'Stitching some Muramite greaves into a pair of pantaloons that would serve you well should be no great feat. Bring me a pair of Muramite Greaves. Once I have done this, you will need to do the final touches yourself. Two lengths of Muramite silk thread infused with Nalasrine's strengthener should be sufficient to finish them up.'
You say, 'What robe?'
Nunkin Coggrinder says 'A grand robe shall be yours if you bring me a Muramite Chest Armor piece. I can reshape it easily, and the finishing touches may be applied by your hand. Strengthen two lengths of Muramite silk thread with Nalasrine's special mixture and some quick work with a loom should do the trick.'
You say, 'What sandals?'
Nunkin Coggrinder says 'Bring me back Muramite Boot Armor and I believe I can rework them into some nice sandals. To thread them together you will need some strengthened Muramite silk thread. If you need help in the strengthening process, just talk to Nalasrine.'
You say, 'What sleeves?'
Nunkin Coggrinder says 'Bring me Muramite Sleeve Armor. I will do the alterations for you, then all you will need to do is find some Muramite silk thread. Nalasrine can help you strengthen it, and you will have the makings of some nice sleeves.'
Nalasrine Twinklecoil is located in the next room.
You say, 'Hail, Nalasrine Twinklecoil'
Nalasrine Twinklecoil says 'Salutations! It is great to see so many eager travelers out and about. How are you enjoying our little city here? I have been quite busy myself. There are so many interesting things to learn about these strange beings that inhabit Taelosia. Their armor in particular is most interesting. I have developed some intriguing compounds. Let me know if you are interested in such things before I just prattle on!'
You say, 'I am interested.'
Nalasrine Twinklecoil says 'Oh, good. Well let me see. Basically, I have been studying the armor that our explorers have been bringing back from their adventures. While it is a bit strangely shaped, as these creatures that seem to reside here are, I have found that by strengthening some native materials it can be reworked into rather fine armor for the likes of you and me.'
You say, 'What armor?'
Nalasrine Twinklecoil says 'If you are looking into having some armor made, you definitely will need to use my infusions. They are a bit pricey, however they are difficult to make and well frankly, I am the only one who can! Use the plate solvent on plate armor, chain solvent on chain, tanning solution on leather, and silk strengthener on silk. All rather intuitive isn't it? Simply take a look at the different types I have for sale.'
Muramite armor begins dropping in Qvic and above. Bring back the appropriate piece of "Muramite XXX Armor" and turn it in to Nunkin Coggrinder to get a class-specific, no-stat "Reworked Muramite XXX."
Craft a Muramite Silk Thread by combining a Meldstone and a Spider Silk in a loom. This has a high trivial (282) and a high minimum smithing requirement (in the 240s).
Buy Nalasrine's Perfected Silk Strengthener from Nalasrine Twinklecoil for around 10,500 pp. Combine the strengthener with the Muramite Silk Thread in a loom (no-fail combine). This results in a NO DROP piece of Infused Muramite Thread.
Combine the Infused Muramite Thread with your piece of Reworked Muramite XXX armor in a loom to receive your quest reward (no-fail combine). Reward: Nunkin's Sleeves of Pure Elements
Reward: Nunkin's Bracer of Pure Elements
Reward: Nunkin's Circlet of Pure Elements
Reward: Nunkin's Gloves of Pure Elements
Reward: Nunkin's Sandals of Pure Elements
Reward: Nunkin's Robe of Pure Elements
Reward: Nunkin's Pantaloons of Pure Elements